Skip to content
Stirred Recipes
  • Home
  • Appetizers
  • Desserts
  • Salads
  • Breakfast
  • Dinner
  • Privacy Policy
  • Contact
  • About

Chef Luca

No-Bake Mocha Espresso Energy Balls Easy Recipe

October 11, 2025 by Chef Luca
- 1 cup rolled oats - 1/2 cup almond butter - 1/4 cup honey or maple syrup - 2 tablespoons cocoa powder - 2 tablespoons espresso powder (or instant coffee) - 1/2 cup chopped nuts (e.g., walnuts or almonds) - 1/4 cup mini chocolate chips - 1/4 teaspoon salt - Optional: 1 teaspoon vanilla extract Gathering the right ingredients is key to your no-bake mocha espresso energy balls. I love using rolled oats for a chewy texture. Almond butter brings creaminess and a nutty flavor. You can swap it with any nut butter you prefer. Honey or maple syrup serves as a sweetener. Cocoa powder adds rich chocolate notes, while espresso powder gives that delightful coffee kick. Chopped nuts like walnuts or almonds add crunch and extra nutrients. Mini chocolate chips are a must for sweetness and a fun treat. A pinch of salt balances the flavors. If you want a little extra flavor, add vanilla extract. It makes a big difference! Each ingredient plays a role in taste and texture. You can mix and match some of these for a unique twist. Just keep the base ingredients to ensure they hold together well. 1. In a large mixing bowl, combine the rolled oats, almond butter, honey (or maple syrup), cocoa powder, espresso powder, and salt. 2. Use a spatula or your hands to mix the ingredients until fully combined. 3. If you want, add 1 teaspoon of vanilla extract to boost the flavor. 4. Fold in 1/2 cup of chopped nuts and 1/4 cup of mini chocolate chips. Make sure they spread evenly throughout the mix. 1. Refrigerate the mixture for about 15-20 minutes. Chilling helps the mix hold together better. 2. Once chilled, roll the mixture into small balls, about 1 inch in size. 3. Place the balls on a parchment-lined baking sheet. 4. For fun, roll some in extra cocoa powder or shredded coconut to change the texture. 1. Put the energy balls back in the fridge for 10-15 minutes. This step helps them firm up before you eat them. 2. Store your energy balls in an airtight container in the fridge for up to a week, or freeze them for longer snacks. - Adjust sweetness to taste: You can make these energy balls sweeter by adding more honey or maple syrup. If you prefer less sweetness, reduce the amount. - Ensure even distribution of ingredients: Mix all the ingredients well. This helps each bite taste the same. Use your hands to really get in there if needed. - Not refrigerating long enough: If you skip this step, the energy balls will be too soft. Chill the mixture for at least 15-20 minutes. - Skipping essential ingredients: Missing key parts like cocoa powder or espresso powder can change the flavor. Always check your ingredients list before starting. - Using different nut butters: Try swapping almond butter for peanut or cashew butter. Each nut adds its own unique taste. - Adding spices or flavor extracts: A sprinkle of cinnamon or a dash of vanilla can make the flavors pop. Experiment with what you like to find your perfect mix. {{image_2}} You can easily change the almond butter. Try using peanut butter or cashew butter instead. Each nut butter adds a unique taste and texture. For sweetness, swap honey or maple syrup with agave or coconut sugar. These options let you fit the recipe to your diet. Adding coconut flakes or chopped nuts can boost texture and taste. Coconut gives a tropical vibe. Nuts like walnuts or almonds add crunch. You might also decide to use different types of chocolate. Dark chocolate, milk chocolate, or even white chocolate can give a new flavor twist. Be creative to find what you love! If you want fewer calories, choose lower-calorie substitutes. You can use a sugar-free sweetener if you want to cut sugar. For those with nut allergies, make nut-free versions. Just swap the nut butter with sun butter or soy nut butter. These changes allow everyone to enjoy the energy balls without worry. To keep your No-Bake Mocha Espresso Energy Balls fresh, store them in the refrigerator. Place them in an airtight container to avoid moisture. They will stay good in the fridge for up to one week, making them a perfect grab-and-go snack. For longer shelf life, freezing is a great option. You can keep these energy balls in the freezer for up to three months. When you crave a snack, just take out the number you want. Allow them to thaw in the fridge for a few hours or at room temperature for about 30 minutes. This way, they taste fresh and delicious! Choose an airtight container to store your energy balls. Glass or plastic containers work well. Ensure the lid seals tightly to keep air out. This helps maintain their flavor and texture, so you enjoy every bite. No-Bake Mocha Espresso Energy Balls stay fresh in the fridge for about a week. They taste great chilled. If you want them to last longer, freeze them. In the freezer, they can last for up to three months. Just make sure to use an airtight container. This keeps them from drying out or getting freezer burn. Yes, you can easily make these energy balls vegan. Instead of honey, use maple syrup. This swap ensures your energy balls are still sweet and tasty. Also, check that your chocolate chips are dairy-free. Many brands offer vegan-friendly mini chocolate chips, so you still get that chocolatey goodness. If you don’t have espresso powder, don’t worry. You can use instant coffee instead. Just keep the amount the same for a good coffee flavor. Another choice is strong brewed coffee. Use about two tablespoons of cooled coffee in place of the espresso powder. This way, you still enjoy that rich mocha taste. These no-bake mocha espresso energy balls are simple and fun to make. You mix the dry ingredients, add almond butter and sweetener, then shape them into balls. Remember to refrigerate to get the right texture. Be creative with flavors and customize to suit your taste. These treats are easy to store, too. Keep them in the fridge or freeze for later. With all these tips, you can enjoy a healthy snack anytime. Try them out and share your favorites. You’ll love these tasty energy boosts!

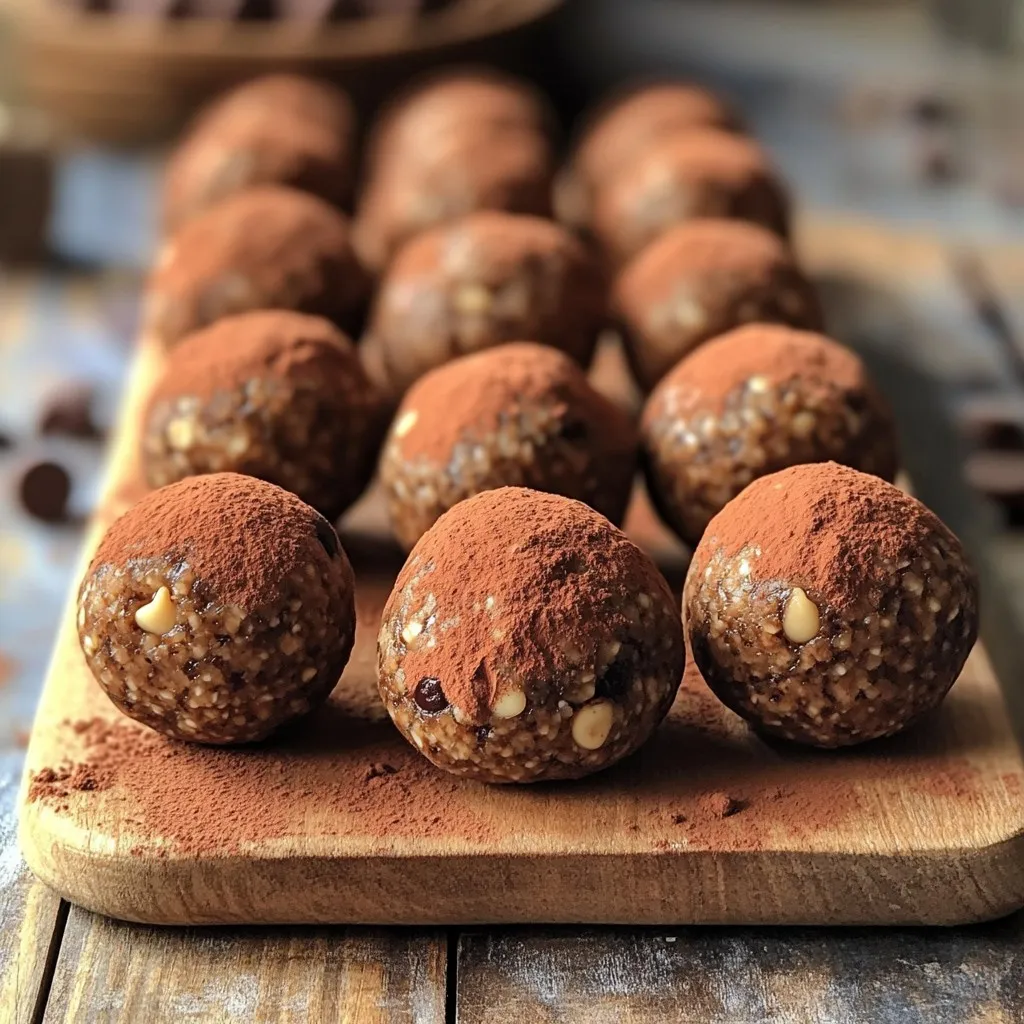
Looking for a quick energy boost without the oven? You’ll love these No-Bake Mocha Espresso Energy Balls! With just a few simple ingredients, you can whip up a tasty treat …

Read more

Categories Desserts

Crispy Sweet and Sour Chicken Better Than Takeout

October 10, 2025 by Chef Luca
- 1 pound boneless, skinless chicken thighs, cut into bite-sized pieces - 1 cup cornstarch - 1/2 cup all-purpose flour - 2 large eggs, beaten - 1 teaspoon salt - 1/2 teaspoon black pepper - Vegetable oil (for frying) - 1 red bell pepper, diced - 1 green bell pepper, diced - 1 cup pineapple chunks (canned or fresh) - 1/4 cup green onions, chopped The chicken thighs provide a juicy base. I prefer them over chicken breasts for flavor. The cornstarch and flour mix gives that crispy crunch. It’s all about texture here. The bell peppers and pineapple add color and sweetness, which makes every bite fun. - 1/2 cup granulated sugar - 1/2 cup apple cider vinegar - 1/2 cup ketchup - 1 tablespoon soy sauce - 1 teaspoon garlic powder - 1 teaspoon ginger powder This sauce brings the dish to life. The sugar balances with the vinegar. Ketchup adds depth and richness. Garlic and ginger give a warm zing that ties everything together. - Chopped green onions - Sesame seeds - Lime wedges These garnishes add a fresh twist. Chopped green onions bring a nice crunch. Sesame seeds add a nutty flavor. A squeeze of lime brightens every bite. These small touches make your dish look and taste gourmet. - In a medium saucepan, combine: - 1/2 cup granulated sugar - 1/2 cup apple cider vinegar - 1/2 cup ketchup - 1 tablespoon soy sauce - 1 teaspoon garlic powder - 1 teaspoon ginger powder - Whisk the ingredients together. - Heat on medium until it simmers. - Cook for 5 minutes then remove from heat. - For extra crispiness, use a double coating. - In a large bowl, mix: - 1 cup cornstarch - 1/2 cup all-purpose flour - 1 teaspoon salt - 1/2 teaspoon black pepper - Dredge each chicken piece in the dry mix. - Dip in 2 beaten eggs, then coat again in the dry mix. - Heat 2 inches of vegetable oil in a deep skillet. - The oil should be medium-high, about 350°F. - Fry the chicken in batches for 5-7 minutes. - They should be golden brown and crispy. - Drain on paper towels after frying. - In a large pan, heat a tablespoon of vegetable oil. - Add diced bell peppers and pineapple chunks. - Stir for 3-4 minutes until tender but still bright. - Pour the sweet and sour sauce over the veggies. - Stir well to mix everything. - Add the crispy chicken and toss until coated. - Cook for 1-2 minutes to warm through. - Garnish with chopped green onions before serving. For a crunchy coating, I use a double coating method. First, I roll each piece of chicken in the dry mix of cornstarch and flour. Then, I dip it in beaten eggs. Finally, I coat it again in the dry mix. This extra layer makes a big difference in crispiness. The oil temperature is key. I heat the vegetable oil to about 350°F. If the oil is too cold, the chicken will soak up oil. If too hot, it will burn. A good fry should take about 5-7 minutes, until golden brown. To get the right taste, I balance sweetness and acidity. I use equal parts sugar and apple cider vinegar in the sauce. This mix gives that classic sweet and sour kick. Feel free to adjust the sugar for more sweetness or vinegar for more tang. Customizing seasonings can elevate the dish. I often add a bit more garlic or ginger powder to the sauce. Taste as you go to find your ideal flavor. For the best meal, I serve the crispy sweet and sour chicken over a bed of steamed rice. The rice soaks up the sauce nicely, making each bite delicious. For visual appeal, I garnish with chopped green onions and sesame seeds. A wedge of lime adds a pop of color and flavor, making the dish look as good as it tastes. {{image_2}} You can switch up the protein in this dish. Shrimp or tofu works great. For shrimp, cook them for about 3-4 minutes until they turn pink. If you choose tofu, use firm tofu. Cut it into cubes and fry until golden. Adjust cooking times based on the protein you use. Feel free to use seasonal veggies! Broccoli, snow peas, and carrots add a nice crunch. For these, cook them for about 3-5 minutes to keep them crisp. Just make sure to slice them thinly. This helps them cook evenly and quickly. If you want a healthier dish, reduce the sugar in the sauce. You can use honey or maple syrup instead. This keeps it sweet but lowers calories. Also, consider baking the chicken instead of frying it. Preheat your oven to 400°F and bake for 20-25 minutes. This method gives you a crispy texture without extra oil. To keep your crispy sweet and sour chicken fresh, follow these steps: - Temperature: Store leftovers in the fridge at 40°F (4°C) or lower. - Container Types: Use airtight containers. Glass or plastic containers work well. To enjoy your dish again without losing its crunch, try these methods: - Oven Method: Preheat your oven to 375°F (190°C). Place chicken on a baking sheet. Heat for about 10-15 minutes. This keeps it crispy. - Air Fryer Method: Set your air fryer to 350°F (175°C). Heat for about 5-7 minutes. This also helps to retain crispiness. If you want to save some for later, freezing is an option: - How to Freeze: Cool the chicken completely. Place it in an airtight container or freezer bag. Remove as much air as possible. - Thawing: To thaw, place it in the fridge overnight. You can also use the microwave on low power. - Impact on Texture: Freezing may soften the chicken's crispiness. Reheat properly to regain some texture. The flavor will still be good! Yes, you can make this dish gluten-free. Use gluten-free cornstarch and a gluten-free flour blend. Check labels for sauces too. Many brands offer gluten-free soy sauce. This way, you keep all the flavor without gluten. To keep chicken crispy, avoid overcrowding the pan when frying. Cook in small batches. After frying, let the chicken rest on paper towels to drain excess oil. Serve right away for the best crunch. If you lack apple cider vinegar, try white vinegar or rice vinegar. Both give a nice tang. White vinegar is sharper, while rice vinegar is milder. Adjust the amount based on your taste preference. Crispy sweet and sour chicken lasts about three days in the fridge. Store it in an airtight container. If you see any signs of mold or off smells, it's best to toss it. This recipe covers all you need for homemade sweet and sour chicken. You learned how to make a tasty sauce, fry the chicken, and stir-fry bell peppers and pineapple. I shared tips for crispiness, ways to customize flavors, and storage methods. Remember, you can swap proteins and veggies to fit your taste. Enjoy creating a meal that excites your taste buds and impresses your family!

Tired of takeout that just doesn’t hit the spot? You’re in for a treat! My crispy sweet and sour chicken recipe packs all the flavor you love, but it’s fresher …

Read more

Categories Dinner

Sheet Pan Lemon Garlic Salmon and Broccolini Delight

October 10, 2025 by Chef Luca
To make this delicious sheet pan lemon garlic salmon and broccolini, you need fresh ingredients. Here’s the list: - 4 salmon fillets (about 6 oz each) - 1 bunch broccolini, trimmed - 3 tablespoons olive oil - 4 cloves garlic, minced - Zest and juice of 2 lemons - 1 teaspoon smoked paprika - Salt and pepper to taste - Fresh parsley, chopped (for garnish) - Lemon wedges (for serving) Each ingredient plays a key role in the flavor and health of the dish. Salmon gives you protein and healthy fats. Broccolini adds a nice crunch and nutrients. Olive oil keeps everything moist. Garlic gives a rich taste that pairs well with lemon. The lemon adds brightness. Smoked paprika gives a gentle warmth. You can adjust salt and pepper to suit your taste. Fresh parsley adds a pop of color. Lemon wedges make the dish extra zesty when served. Using fresh ingredients will elevate your meal. So, make sure to pick the best ones you can find. - Preheating the oven: Start by setting your oven to 400°F (200°C). This temperature helps cook the salmon and broccolini evenly. While the oven heats, prepare your sheet pan. - Preparing the marinade: In a small bowl, mix together 3 tablespoons of olive oil, 4 minced garlic cloves, the zest and juice of 2 lemons, 1 teaspoon of smoked paprika, and salt and pepper. Whisk until well blended. This marinade adds a bright flavor to the salmon. - Arranging salmon and broccolini on the sheet pan: Line your baking sheet with parchment paper. Place the 4 salmon fillets on one side. Brush them well with your lemon garlic marinade. On the other side, add the trimmed broccolini. Drizzle any remaining marinade over the broccolini and toss to coat. - Roasting time and temperature: Slide the sheet pan into your preheated oven. Roast for 15 to 20 minutes. The salmon should flake easily with a fork, and the broccolini should be bright and tender. - Checking for doneness: To ensure your salmon is ready, look for a light pink color. If it flakes easily, it is done. The broccolini should look vibrant and still have a slight crunch. - Garnishing before serving: Once removed from the oven, let it rest for a couple of minutes. Sprinkle fresh chopped parsley over the salmon and broccolini for a pop of color. Serve with lemon wedges for an extra zesty touch. - Ensuring salmon stays moist: To keep your salmon juicy, brush it with the marinade before baking. This adds flavor and moisture. Use a meat thermometer to check for doneness. Salmon is perfect at 145°F (63°C). - Perfectly cooked broccolini: Broccolini should remain bright green and tender. Toss it in the marinade, then roast it alongside the salmon. The heat helps it cook without losing its crunch. - Adjusting marinade flavors to taste: If you love spice, add more smoked paprika or a pinch of cayenne. For tang, add extra lemon juice. Taste the marinade before you apply it. Make it your own! - Serving directly from the sheet pan: For a casual meal, serve right from the pan. It makes cleanup easy and looks inviting. Just place the pan on the table and let everyone serve themselves. - Plating for individual servings: For a more formal touch, plate the salmon and broccolini separately. Use a large spoon to arrange them nicely. This gives each plate a professional look. - Garnishing ideas for visual appeal: Sprinkle fresh parsley on top for a pop of green. Add lemon wedges on the side to brighten the dish. You can even use lemon slices for a colorful touch. {{image_2}} You can switch up the fish in this recipe. Try using trout or even halibut. Both options bring a lovely flavor. For vegetables, don't limit yourself to broccolini. Asparagus or green beans work well too. You can also use bell peppers for a pop of color. Feeling adventurous? Change the marinade a bit. Add honey for sweetness or swap lemon for lime. You can even throw in some herbs like dill or thyme for extra flavor. If you prefer grilling, this dish shines on the grill. Preheat your grill to medium-high heat. Brush the salmon and broccolini with the marinade. Place them on the grill for about 6-8 minutes per side. This gives the salmon a nice char and the broccolini a smoky flavor. You can also try air frying. Preheat the air fryer to 400°F. Place the salmon and broccolini in the basket. Cook for 10-12 minutes until the salmon flakes easily. This method also keeps the veggies crisp and bright. After enjoying your meal, let the leftovers cool down. Place salmon and broccolini in an airtight container. Store it in the fridge. The salmon stays fresh for up to three days. The broccolini keeps well too, but it’s best eaten within two days. To reheat your salmon, preheat the oven to 350°F (175°C). Place the salmon on a baking sheet. Cover it with foil to keep it moist. Heat for about 10 minutes, or until warmed through. For broccolini, you can sauté it in a pan with a little olive oil. This keeps it crisp and flavorful. Enjoy your leftovers! How do I know when salmon is done? Salmon is done when it flakes easily with a fork. The flesh should turn from bright pink to a lighter shade. Use a meat thermometer for accuracy. The ideal temperature is 145°F (63°C). Can I use frozen salmon? Yes, you can use frozen salmon. Just thaw it in the fridge overnight before cooking. This helps maintain texture and flavor. If you’re short on time, you can also run it under cold water. What side dishes pair well with this recipe? This dish goes well with rice or quinoa. You can also serve it with a fresh salad. Roasted potatoes or a side of asparagus can complement the flavors nicely. How can I make the recipe low-carb or keto-friendly? To make this dish low-carb or keto-friendly, skip the rice or quinoa. You can add more non-starchy veggies like zucchini or spinach. Use olive oil and lemon for flavor without adding carbs. This blog post outlined a simple and tasty salmon dish. We covered ingredients like salmon, broccolini, and spices. Next, I shared easy steps to prepare and cook the meal. I provided tips for keeping everything moist and ways to present it nicely. You can also tweak the recipe to fit your taste or try new cooking methods. Remember to store leftovers safely and reheat them to keep the flavor. Enjoy your cooking adventure and make this dish your own!

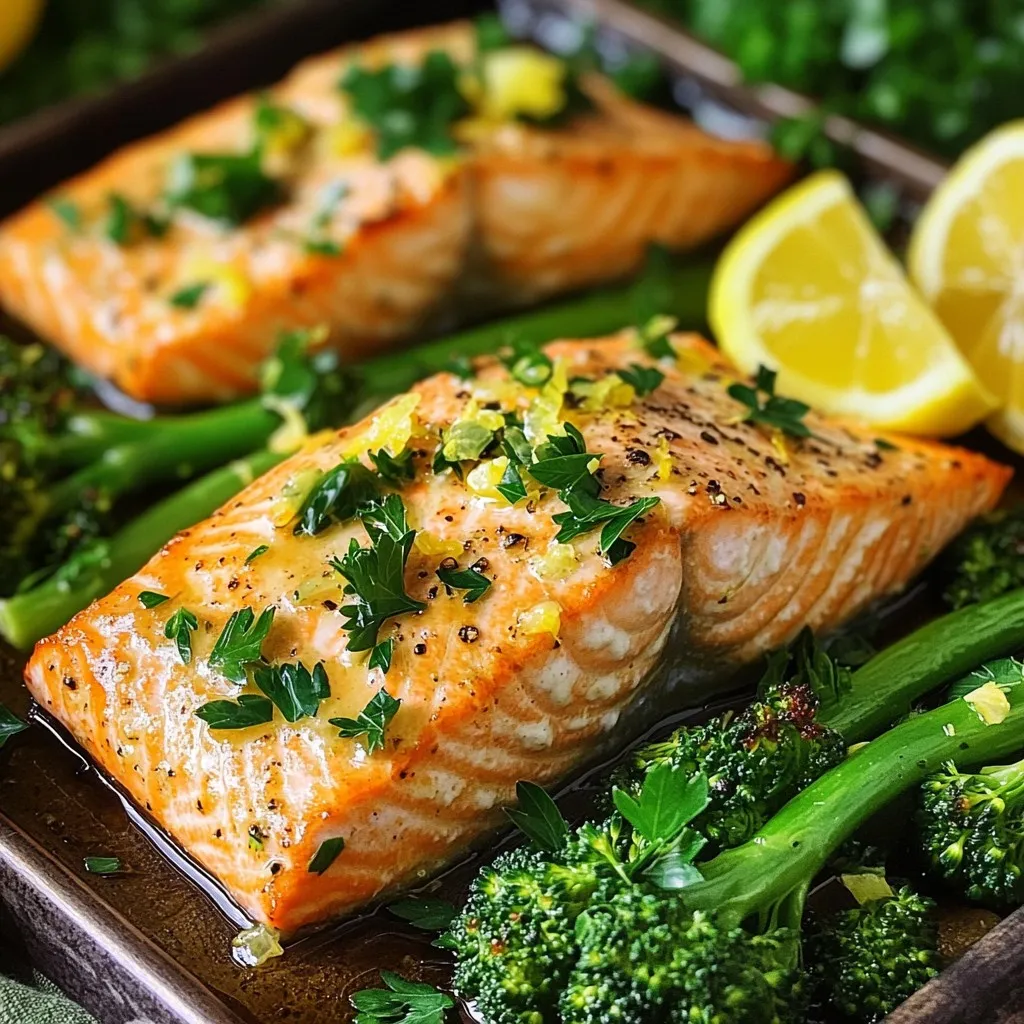
Are you ready for a simple yet delicious meal? My Sheet Pan Lemon Garlic Salmon and Broccolini is the perfect choice! With bright flavors and healthy ingredients, you can make …

Read more

Categories Dinner

Minute Sweet Chili Garlic Tofu Bowls With Bold Flavors

October 10, 2025 by Chef Luca
- 1 block (14 oz) firm tofu - 2 tablespoons cornstarch - 2 tablespoons vegetable oil - 1/4 cup sweet chili sauce - 2 cloves garlic, minced - 1 tablespoon soy sauce - 1 teaspoon sesame oil - 1 cup cooked jasmine rice - 1 cup mixed colorful bell peppers, sliced - 1/2 cup snap peas - Garnishes: sesame seeds, green onions, fresh cilantro leaves To make Minute Sweet Chili Garlic Tofu Bowls, you need simple yet bold ingredients. First, the tofu is the star. I use firm tofu, which holds its shape well. Each block weighs about 14 ounces. Press it to remove excess water, so it absorbs flavors better. Next, cornstarch makes the tofu crispy. It coats the tofu cubes and creates a crunchy outer layer when cooked. For cooking, I choose vegetable oil. It has a high smoke point, perfect for frying. Sweet chili sauce adds a kick of flavor. It’s sweet, spicy, and tangy, making it a great match for the tofu. I also add minced garlic for a savory touch. Soy sauce gives depth to the dish, while sesame oil adds a nutty aroma. For sides, I love jasmine rice. It’s soft and fluffy, perfect as a base. Colorful bell peppers brighten the dish, while snap peas add a crunchy texture. Finally, garnishes like sesame seeds, green onions, and fresh cilantro elevate the dish. These ingredients make each bite exciting and fresh. Start by cutting the pressed tofu into bite-sized cubes. This helps the tofu cook evenly. Next, pat the cubes dry with a paper towel. Drying the tofu helps it become crispy. In a medium bowl, add the tofu cubes and toss them with cornstarch. This coating gives the tofu a nice crunch when cooked. Heat two tablespoons of vegetable oil in a large non-stick skillet over medium-high heat. Once the oil is hot, add the coated tofu cubes to the skillet. Sauté the tofu for about 5 to 7 minutes. You want to cook it until it turns golden and crispy on all sides. Keep an eye on it to avoid burning. Next, reduce the heat to medium. Push the tofu to one side of the skillet. Add two minced garlic cloves to the empty side. Sauté the garlic for about 30 seconds until it becomes fragrant. Then, pour in 1/4 cup of sweet chili sauce, 1 tablespoon of soy sauce, and 1 teaspoon of sesame oil. Stir everything together to coat the tofu evenly. Cook for an additional 2 minutes. Now, add in 1 cup of sliced colorful bell peppers and 1/2 cup of snap peas. Stir-fry the mixture for 2 to 3 minutes. You want the vegetables to be tender yet crisp. To serve, spoon a generous scoop of cooked jasmine rice into serving bowls. This rice will act as a base for the dish. Top the rice with the sweet chili garlic tofu and the sautéed vegetables. For the final touch, sprinkle sesame seeds and sliced green onions on top of each bowl. Add fresh cilantro leaves for an aromatic finish. This not only adds flavor but also makes your bowls look beautiful. Enjoy your meal! To achieve great texture, pressing your tofu is key. First, drain the tofu and wrap it in a clean towel. Place a heavy object on top for about 15-30 minutes. This helps remove excess water, which avoids sogginess in the final dish. To make your tofu crispy, coat it well with cornstarch. This creates a nice crust when sautéed. Use enough oil in your skillet, and don’t overcrowd the pan. Cook in batches if needed to get that perfect golden color! Sweet chili sauce is a star in this dish, but feel free to try different brands. Some are sweeter, while others have a kick. Choose one that matches your taste. You can also swap in various veggies for a personal touch. Try using zucchini, carrots, or broccoli. Each vegetable adds a unique flavor and texture. Mix and match to find your favorite combo! Pre-cooking jasmine rice is a great way to save time. You can make it the night before and store it in the fridge. This way, you only need to reheat it when you assemble your bowls. Using pre-cut vegetables is another fast option. Many grocery stores offer ready-to-cook mixes. This saves chopping time and gets you to your meal quicker. Enjoy your tasty tofu bowls in no time! {{image_2}} You can switch up the protein in this dish. Tempeh is a great choice instead of tofu. It has a nutty flavor and a firm texture. Just cut it into cubes and follow the same cooking steps. For meat lovers, chicken or shrimp works well too. Simply cut chicken into bite-sized pieces or use peeled shrimp. Adjust the cooking time to ensure they are cooked through. Feel free to jazz up the flavors! If you like heat, add sriracha or jalapeños for a spicy kick. Mix in some red pepper flakes for extra warmth. You can also switch to teriyaki or peanut sauce for a different taste. These sauces bring a sweet and savory twist. Experiment with what you have on hand or what you enjoy. To make this dish gluten-free, avoid soy sauce. Instead, use tamari or coconut aminos. These alternatives still give a nice umami flavor. If you want more plant-based flavor, add miso paste or nutritional yeast. These ingredients pack a punch without using animal products. You can also play with herbs and spices for added richness. To keep your Minute Sweet Chili Garlic Tofu Bowls fresh, store leftovers in an airtight container. Place the tofu and veggies in one container and the rice in another. This helps keep everything from getting soggy. Refrigerate the bowls within two hours of cooking. They will stay good for up to three days. You can easily reheat these bowls. For the microwave, place the tofu and veggies in a bowl. Cover it with a microwave-safe lid. Heat for one to two minutes, stirring halfway. For stovetop reheating, use a non-stick skillet over medium heat. Add a splash of water or oil to keep it moist. Stir often until warmed through, which takes about three to five minutes. Preparing your ingredients ahead of time makes meal prep a breeze. You can press and cube the tofu and toss it with cornstarch a day before. Chop your bell peppers and snap peas, and keep them in the fridge. Cook the jasmine rice in advance and store it in a separate container. This way, you can quickly assemble your bowls for lunch or dinner during the week. Enjoy fresh flavors with minimal effort! It takes about 25 minutes to make these bowls. You spend 10 minutes getting ready and 15 minutes cooking. This time includes prepping tofu and veggies. The quick cooking method keeps everything fresh and tasty. Yes, you can make this recipe ahead of time. Cook the tofu and veggies, then store them separately in the fridge. They stay good for about 3 days. When ready to eat, just reheat and serve over rice. If you want to replace tofu, try tempeh or chickpeas. Both options absorb flavors well. You can also use chicken or shrimp if you prefer meat. Adjust cooking times for these proteins to ensure they are fully cooked. Yes, you can make this recipe gluten-free. Use tamari instead of soy sauce. Tamari is a gluten-free soy sauce. Also, check your sweet chili sauce for gluten-free ingredients. This way, everyone can enjoy the dish. You can freeze these tofu bowls, but separately. Freeze the tofu and veggies in airtight containers. They last for about a month. When ready to eat, thaw in the fridge overnight and reheat on the stove or microwave until warm. In this blog post, we explored a delicious sweet chili garlic tofu bowl. We covered the main ingredients, flavors, and sides needed for a tasty meal. We walked through clear steps to prepare and cook the tofu, add flavors, and assemble your bowl. I shared helpful tips to get perfect texture and save time. Remember, cooking is fun and a chance to be creative. Enjoy making this dish your own!

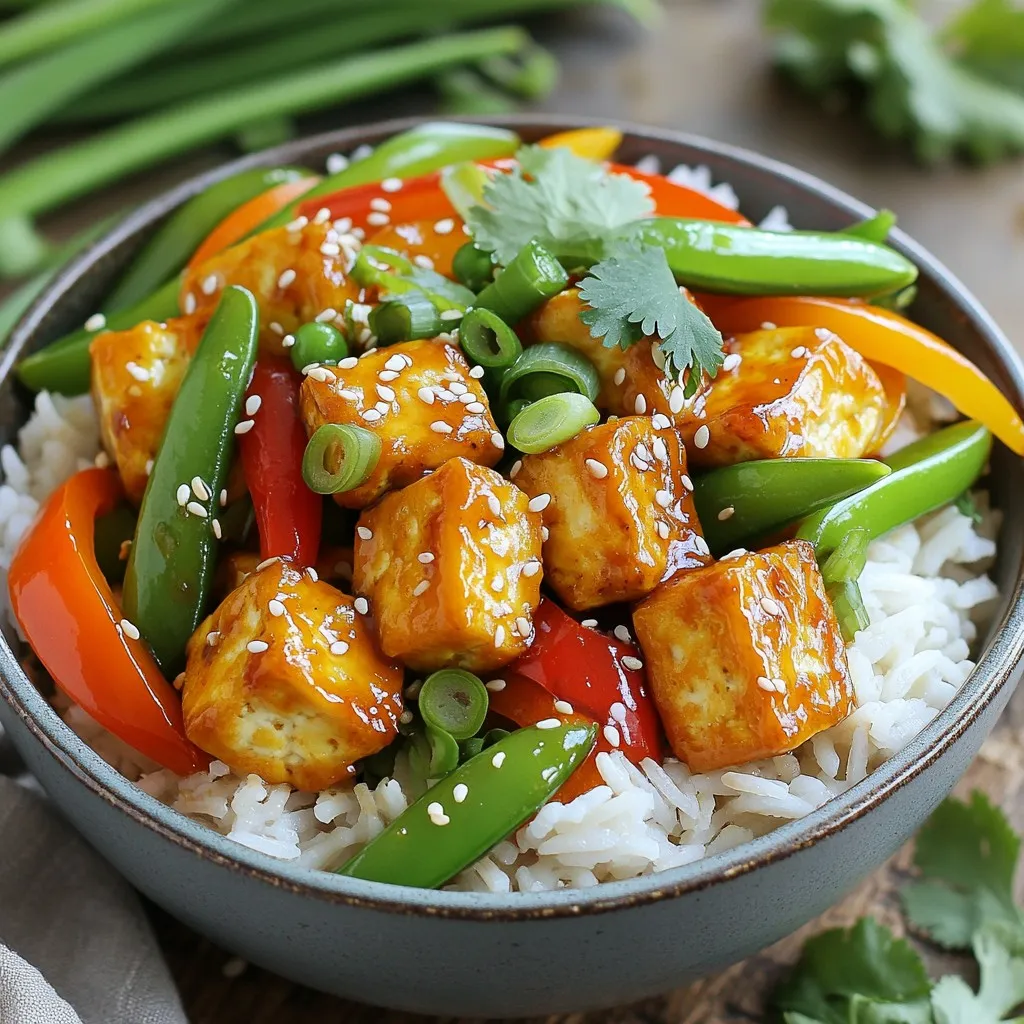
Looking for a quick, tasty meal packed with flavor? My Minute Sweet Chili Garlic Tofu Bowls are here to satisfy your cravings. These bowls feature crispy tofu, fresh veggies, and …

Read more

Categories Dinner

No Bake Pumpkin Spice Energy Truffles Delightful Snack

October 10, 2025 by Chef Luca
To make No Bake Pumpkin Spice Energy Truffles, you will need: - 1 cup rolled oats - ½ cup pumpkin puree - ¼ cup almond butter (or any nut butter) - ¼ cup honey or maple syrup - 2 teaspoons pumpkin pie spice - 1 teaspoon vanilla extract - ½ cup finely chopped nuts (walnuts or pecans) - ¼ cup mini dark chocolate chips (optional) - Pinch of salt - Shredded coconut or crushed nuts for rolling (optional) If you want to change things up, here are some ideas: - Swap almond butter for peanut butter or sunflower seed butter. - Use agave syrup instead of honey or maple syrup. - Replace walnuts or pecans with almonds or hazelnuts. - If you don’t have pumpkin pie spice, mix cinnamon, ginger, and nutmeg. - For a nut-free option, skip the nuts and use seeds instead. These truffles pack a nutritious punch: - Rolled oats provide fiber for good digestion and energy. - Pumpkin puree is rich in vitamins A and C, boosting your immune health. - Almond butter offers healthy fats and protein, keeping you full longer. - Honey or maple syrup gives a natural sweetness with antioxidants. - Chopped nuts add crunch and healthy fats for heart health. - Pumpkin pie spice contains spices like cinnamon, which may help regulate blood sugar. Enjoy creating these delightful snacks that are both tasty and good for you! 1. Start by grabbing a mixing bowl. Add 1 cup of rolled oats. 2. Next, mix in ½ cup of pumpkin puree. This gives your truffles their flavor. 3. Now, add ¼ cup of almond butter. You can use any nut butter you like. 4. Pour in ¼ cup of honey or maple syrup for sweetness. 5. Add 2 teaspoons of pumpkin pie spice. This spice mix brings warmth to the truffles. 6. Include 1 teaspoon of vanilla extract. It adds a nice aroma. 7. Don’t forget a pinch of salt. It balances the sweet flavors. 8. Stir the mixture well until it’s all blended. 9. Fold in ½ cup of finely chopped nuts. Use walnuts or pecans for a crunch. 10. If you want, add ¼ cup of mini dark chocolate chips. They add a nice touch. 11. Now, use your hands to form small balls. Aim for about 1 inch in diameter. 12. Place the truffles on a parchment-lined baking sheet. - Make sure your hands are clean and slightly damp. This keeps the mixture from sticking. - If the mixture feels too dry, add a bit more nut butter. - If it’s too wet, add a few more oats until it firms up. - Roll each ball tightly so they hold their shape. - Once all the truffles are formed, put them in the fridge. - Chill the truffles for about 30 minutes. This helps them firm up nicely. - After chilling, they are ready to serve or store. - You can serve them at room temperature for a softer bite. To get the best texture in your truffles, focus on the oats. Use rolled oats for a chewy bite. If you want a finer texture, pulse them in a blender. This helps blend them into the mix better. The pumpkin puree keeps the truffles moist, while nut butter adds creaminess. As you mix, your goal is a thick, moldable dough. If it feels too dry, add a splash of water or more nut butter. This makes it easier to form balls without crumbling. Watch out for using too much liquid. If you add extra honey or pumpkin puree, the mix can become runny. This makes it hard to form solid truffles. Avoid skipping the refrigeration step. Chilling helps them firm up and hold their shape. Also, don’t forget to mix the ingredients well. Uneven mixing can lead to some truffles tasting bland. Ensure the spices, nuts, and sweetener are evenly distributed for a great flavor in every bite. These truffles are perfect as a quick snack or a post-workout boost. Pair them with a glass of almond milk or a warm cup of chai tea for a cozy treat. You can also serve them on a platter at parties. For an extra touch, sprinkle with cinnamon or drizzle with melted dark chocolate. If you want to share the love, gift these truffles in a cute jar. They make a wonderful homemade gift for friends and family during the holidays. {{image_2}} You can easily change the flavor of your truffles. Try adding a spoon of cocoa powder for a chocolate twist. You can also mix in a dash of cinnamon or nutmeg for a warm flavor boost. If you like a bit of crunch, stir in some sunflower seeds or chia seeds. These small changes can make a big difference! The nut butter you choose can change the taste. Almond butter adds a nice nutty flavor. Peanut butter gives it a classic taste. Sunflower seed butter is great for nut-free diets. For sweeteners, use maple syrup for a richer flavor. Honey works well too. Each option adds its own touch to the truffles. Rolling your truffles can be fun! You can coat them in shredded coconut for a tropical feel. Crushed nuts, like walnuts or pecans, add a nice crunch. You can also try rolling them in cocoa powder for a chocolatey finish. Each option gives your truffles a unique look and taste, making them even more delightful! To keep your truffles fresh, store them in an airtight container. This helps prevent moisture loss and keeps them tasty. You can use a glass jar or a plastic container with a tight lid. Make sure to keep them away from heat and light, as these can change their flavor. These truffles can last up to one week in the fridge. I recommend checking them after a few days to ensure they still taste great. If you notice any changes in texture or smell, it’s best to toss them. If you want to keep them longer, you can freeze the truffles. Place them on a baking sheet, and freeze for about an hour. Then, transfer them to a freezer-safe container. They can stay good for about three months. When you’re ready to eat, take them out and let them thaw in the fridge for a few hours. Enjoy your delicious snack at your own pace! Yes, you can make these truffles gluten-free. Use gluten-free rolled oats. Check the label to ensure they meet your needs. This choice keeps the texture and taste while being safe for those with gluten issues. If you lack pumpkin puree, use sweet potato puree or butternut squash puree. Both options provide a similar creaminess and flavor. You can also blend cooked carrots for a different twist. You can skip the sweetener, but the truffles may taste less sweet. If you want some sweetness, consider using ripe bananas or unsweetened applesauce. These natural options add flavor and moisture without added sugars. Yes, there are allergy-friendly options. Use sunflower seed butter instead of almond butter for nut-free truffles. Replace honey with agave syrup for a vegan option. Always check labels for allergens to stay safe. To make these truffles vegan, use maple syrup instead of honey. Ensure your nut butter is vegan as well. All other ingredients are naturally vegan-friendly, making this treat easy to enjoy for everyone. You now have a complete guide for making No Bake Pumpkin Spice Energy Truffles. We covered the key ingredients, their health benefits, and some tasty substitutions. I shared steps to mix and form the truffles, along with tips for achieving the best texture. We also explored variations and storage tips to keep your truffles fresh. With this knowledge, you can create delicious treats and impress everyone. Enjoy experimenting with flavors and make these truffles your own!

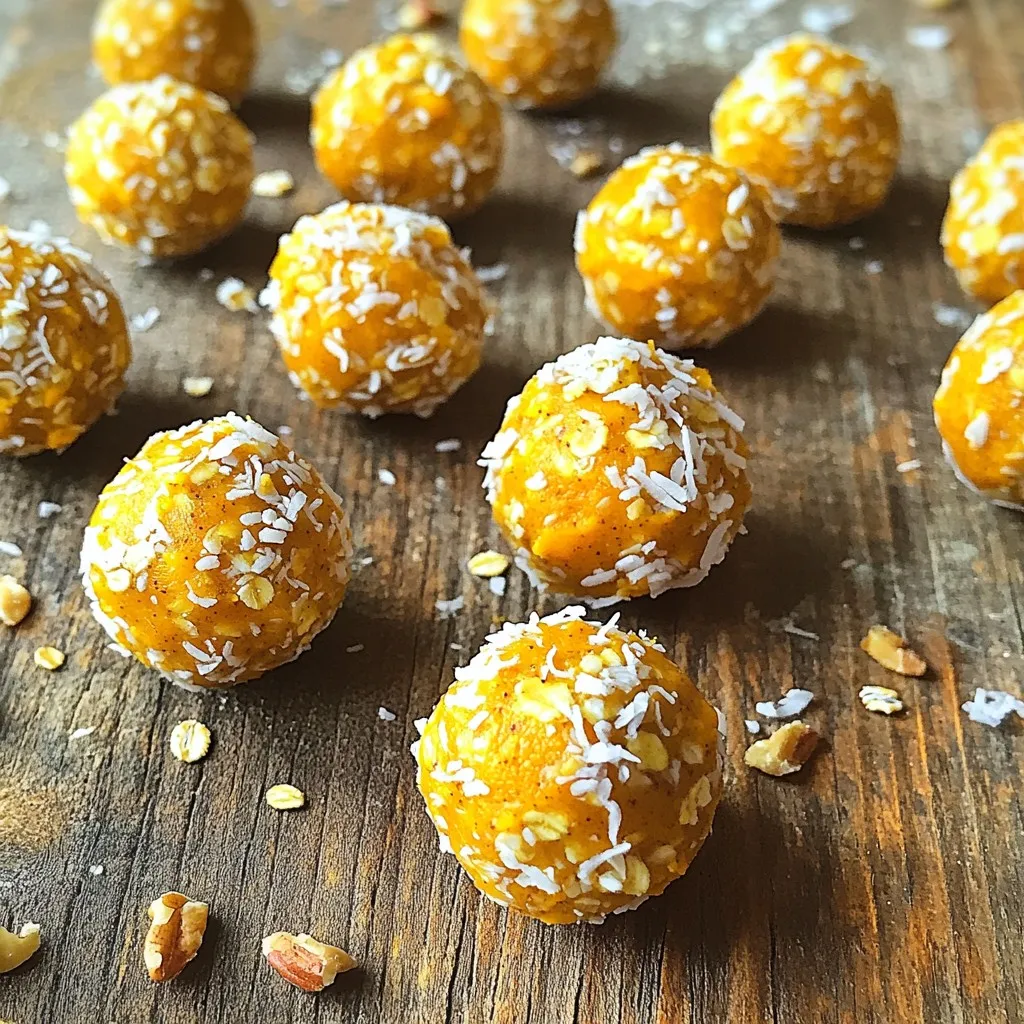
If you crave a tasty treat that’s also good for you, you’re in the right spot! These No Bake Pumpkin Spice Energy Truffles are the perfect snack, filled with flavor …

Read more

Categories Desserts

Bakery Style Brown Sugar Cinnamon Scones Delight

October 10, 2025 by Chef Luca
To make bakery style brown sugar cinnamon scones, gather these ingredients: - 2 cups all-purpose flour - 1/2 cup packed brown sugar - 1 tablespoon baking powder - 1 teaspoon ground cinnamon - 1/2 teaspoon salt - 1/2 cup unsalted butter, chilled and diced - 3/4 cup heavy cream - 1 teaspoon vanilla extract - 1 large egg - 1 tablespoon coarse sugar for topping (optional) These ingredients blend perfectly to create scones that are fluffy and rich. Using fresh ingredients makes a big difference. Fresh flour gives better texture. Brown sugar should be soft and packed tight. Butter must be cold for flaky layers. Heavy cream adds moisture and richness. Always check dates on dairy and baking powder. Fresh items ensure your scones rise well and taste amazing. If you're missing an ingredient, don’t worry! Here are some smart swaps: - Use whole wheat flour for a nuttier taste. - Swap brown sugar for granulated sugar for a lighter flavor. - If you lack heavy cream, use milk mixed with butter. - For a dairy-free version, try coconut cream. These changes can still give you tasty scones that fit your needs. Start by preheating your oven to 400°F (200°C). This step warms up your kitchen and gets the scones baking perfectly. Line a baking sheet with parchment paper. This keeps the scones from sticking. You want them to rise and brown nicely. In a large bowl, mix together the dry ingredients. Combine 2 cups of flour, 1/2 cup of brown sugar, 1 tablespoon of baking powder, 1 teaspoon of cinnamon, and 1/2 teaspoon of salt. This blend gives your scones a nice flavor. Next, add 1/2 cup of chilled, diced butter into the dry mix. Use a pastry cutter or your fingers to blend the butter until you get coarse crumbs. This work makes your scones flaky. In another bowl, whisk together 3/4 cup of heavy cream, 1 teaspoon of vanilla extract, and 1 large egg. Mix until smooth. Pour these wet ingredients into the dry mix and combine gently with a wooden spoon. Be careful not to overmix; the dough should be a bit sticky. Now, turn the dough onto a lightly floured surface. Pat it into a circle about 1 inch thick. Use a knife or a bench scraper to cut the circle into 8 equal wedges. This shaping gives you those perfect scone slices. Transfer the cut scones onto your prepared baking sheet. Brush the tops with a little extra heavy cream. This step helps them brown nicely. If you like, sprinkle coarse sugar on top for a sweet crunch. Finally, bake the scones for 15 to 18 minutes. You want them to be golden brown on top. Once done, let them cool slightly on a wire rack. Enjoy these scones fresh and warm! To make soft and flaky scones, keep your butter cold. Use chilled butter and dice it small. This step helps create that crumbly texture we all love. When mixing, work quickly to avoid warming the dough. Overmixing can lead to tough scones. Just mix until the dough is slightly sticky and holds together. A few mistakes can ruin your scones. First, don’t use warm ingredients. Warm cream or melted butter can change the dough's texture. Second, avoid overworking the dough. The more you mix, the tougher your scones get. Lastly, don’t skip the heavy cream brush. It helps create a beautiful golden color. For that perfect bakery look, pat the dough into a circle of even thickness. Cut the dough into wedges without twisting the knife. This keeps the edges from sealing. Brush the tops with heavy cream and sprinkle coarse sugar for a crunchy top. Bake until golden brown. This adds a nice shine and sweetness. Enjoy your scones warm for the best flavor! {{image_2}} You can change the flavor of your scones with spices. Try nutmeg or ginger for warmth. A pinch of cardamom gives a floral note. Mix and match spices to find your favorite blend. Each spice adds a unique twist to your scone. Fruits and nuts add texture and taste. Chopped apples or pears pair well with cinnamon. Dried cranberries or blueberries can brighten the flavor. For crunch, add walnuts or pecans. Just fold in your mix-ins gently to avoid overworking the dough. Toppings can change the look and taste of your scones. Instead of coarse sugar, try a sprinkle of cinnamon sugar. A simple glaze made from powdered sugar and milk adds sweetness. You can even drizzle chocolate on top for a decadent treat. Each topping brings something new to your scone experience. To keep your Bakery Style Brown Sugar Cinnamon Scones fresh, store them in an airtight container. This helps maintain their softness and flavor. Place parchment paper between layers to prevent sticking. For best taste, enjoy them within two days. If you plan to keep them longer, consider freezing. To reheat your scones, preheat your oven to 350°F (175°C). Place the scones on a baking sheet. Heat for about 5-10 minutes, or until warm. This will help restore their fresh-baked texture. You can also use a microwave. Heat for about 15-20 seconds on a microwave-safe plate. Freezing scones is easy! Allow them to cool completely. Wrap each scone tightly in plastic wrap. Then, place them in a freezer-safe bag or container. They can stay frozen for up to three months. When you're ready to enjoy them, reheat from frozen as mentioned above. Enjoy fresh scones anytime! The best flour for scones is all-purpose flour. It gives scones a nice texture. You want a light and fluffy scone. Other flours may change the texture. Whole wheat flour can make them denser. If you use whole wheat, mix it with all-purpose flour. This blend keeps them light. Yes, you can make scones ahead of time. You can prepare the dough and chill it. Wrap the dough in plastic wrap and refrigerate. This keeps the dough fresh for up to two days. When ready, cut and bake the scones. You can also bake them, cool them, and store in an airtight container. Just reheat before serving for the best taste. You know scones are done when they are golden brown. The tops should look firm but not hard. A toothpick can help check the inside. Insert it into a scone; it should come out clean. If it has dough on it, bake for a few more minutes. Enjoy your warm scones fresh from the oven! In this blog post, we explored how to make scones from start to finish. We discussed the best fresh ingredients and easy swaps. I shared step-by-step instructions and tips for that perfect texture. You learned about fun variations and the best ways to store scones. Making scones can be simple and fun. With practice, you’ll create tasty treats every time. Enjoy baking, and don’t be afraid to add your own twist!

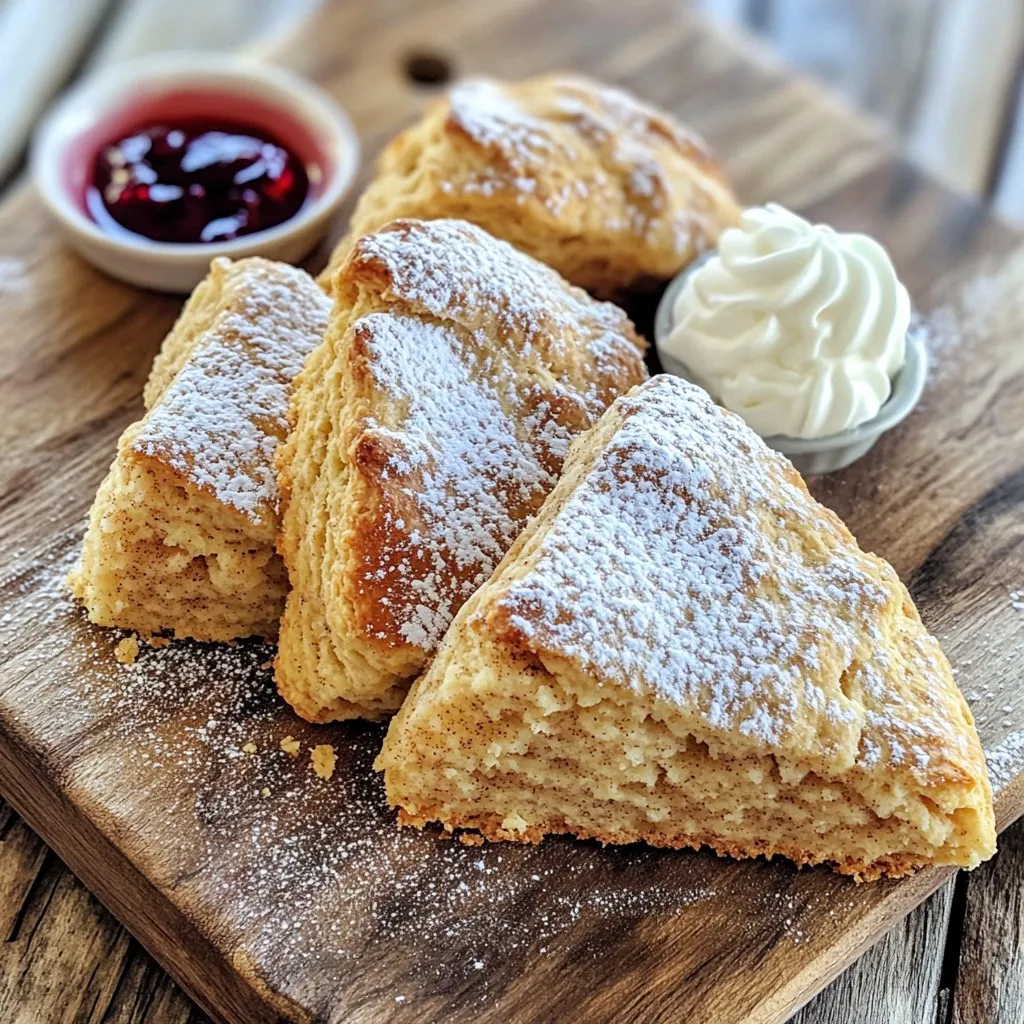
Looking to impress your friends with a tasty treat? Bakery Style Brown Sugar Cinnamon Scones are your answer! These scones blend sweet brown sugar with warm cinnamon for the perfect …

Read more

Categories Desserts

Air Fryer Garlic Herb Breadsticks Simple and Quick Recipe

October 10, 2025 by Chef Luca
To make Air Fryer Garlic Herb Breadsticks, you need the following ingredients: - 1 cup warm water (about 110°F) - 2 teaspoons active dry yeast - 1 tablespoon sugar - 3 cups all-purpose flour - 1 teaspoon salt - 2 tablespoons olive oil - 3 tablespoons butter, melted - 3 cloves garlic, minced - 1 teaspoon dried oregano - 1 teaspoon dried basil - 1/2 teaspoon garlic powder - Fresh parsley, chopped (for garnish) These simple items create a dough that is soft and flavorful. The warm water helps the yeast grow. The sugar feeds the yeast, making the bread rise. All-purpose flour gives the bread its structure. Olive oil adds moisture and flavor, while butter gives a rich finish. Garlic and herbs pack a tasty punch, making each bite delightful. Don't forget the parsley. It adds a pop of color and freshness! Make sure to gather everything before you start. This helps the process go smoothly and keeps you organized. - Combine 1 cup of warm water, 2 teaspoons of active dry yeast, and 1 tablespoon of sugar in a small bowl. - Allow it to sit for about 5 minutes until it becomes frothy. This step wakes up the yeast. - In a large mixing bowl, combine 3 cups of all-purpose flour and 1 teaspoon of salt. - Make a well in the center and add the yeast mixture along with 2 tablespoons of olive oil. - Mix until a dough forms. It should be sticky but not too wet. - Knead the dough on a floured surface for about 5 minutes until it feels smooth and elastic. - Place the dough in a lightly greased bowl. Cover it with a kitchen towel. - Let it rise in a warm place for about 1 hour or until it doubles in size. This helps it get fluffy. - Once risen, punch the dough down gently to remove air. - Roll it out into a rectangle about 1/2 inch thick. - Cut the dough into strips, about 1 inch wide. This is where you shape it into breadsticks. - Preheat the air fryer to 350°F (175°C). This ensures even cooking. - In a small bowl, mix 3 tablespoons of melted butter, 3 cloves of minced garlic, 1 teaspoon of oregano, 1 teaspoon of basil, and 1/2 teaspoon of garlic powder. - Brush this garlic herb butter mixture over each breadstick. - Place the breadsticks in the air fryer basket in a single layer. You may need to do this in batches. - Air fry for 6-8 minutes or until they turn golden brown and are cooked through. - Remove them from the air fryer and brush with any remaining garlic herb butter. Garnish with chopped parsley for a fresh touch. To make great breadsticks, focus on the dough. The right dough needs to be soft but not sticky. It should hold together and bounce back when you poke it. If it feels too dry, add a little water. If it’s too wet, sprinkle in some flour. Kneading is key! Knead the dough for about five minutes. This helps develop gluten. Gluten gives the bread its nice chew. Keep folding and pressing until it feels smooth and elastic. For perfect breadsticks, set your air fryer to 350°F (175°C). This temperature cooks them evenly and gives a nice golden color. Cook the breadsticks for 6 to 8 minutes. Check them at 6 minutes to see if they are golden brown. They should feel firm to the touch. Presentation matters! Serve your breadsticks warm in a nice basket. Line it with a cloth for a cozy feel. Sprinkle some extra herbs on top for color. For dipping, marinara sauce pairs perfectly. You can also use garlic butter or ranch dressing. These dips add flavor and excitement to your meal. {{image_2}} You can change the flavor of your breadsticks easily. Using fresh herbs adds a bright taste. Try fresh basil, thyme, or rosemary instead of dried herbs. You can also mix in cheese for a richer flavor. Parmesan or mozzarella work great. For a bit of heat, add red pepper flakes or garlic powder. These tweaks will give you fun new breadsticks every time! If you need a gluten-free version, use a gluten-free flour blend. Look for one that works in baking. You may need to add more water. Gluten-free dough can be dryer than regular dough. Keep an eye on the consistency. Let the dough rise until it looks puffy. You can still enjoy those tasty breadsticks without gluten! To make the garlic flavor pop, try adding roasted garlic. This gives a sweet, deep taste. You can also infuse your olive oil with garlic before mixing it in. Just heat the oil gently with herbs like thyme or rosemary. Let it cool, then add it to the dough for more flavor. These small changes will make your breadsticks even better! To keep your breadsticks fresh, follow these tips. Store them in an airtight container. Place them in the fridge for up to three days. For longer storage, freeze them. Wrap each breadstick in plastic wrap and place them in a freezer bag. They can last up to three months in the freezer. When you want to eat the leftovers, reheating is easy. For the best results, use the air fryer. Preheat it to 350°F (175°C). Place the breadsticks in the basket and heat for about 3-5 minutes. This keeps them crispy. You can also use an oven. Heat it to 350°F and bake for about 5-7 minutes. When stored properly, breadsticks can last for about three days in the fridge. If frozen, they can be good for up to three months. To tell if they are bad, check for mold or an off smell. If they feel hard or dry, it's time to toss them. Enjoy your garlic herb breadsticks while they are fresh! Yes, you can use fresh yeast. Use about 0.6 ounces of fresh yeast for this recipe. You need to dissolve it in warm water first. Fresh yeast gives a nice rise and flavor. The breadsticks are done when they turn golden brown. You can also tap the bottom. If it sounds hollow, they are ready. Cooking time is around 6-8 minutes in the air fryer. Yes, you can make the dough ahead. After kneading, store it in the fridge for up to 24 hours. Just let it rise at room temperature for about 30 minutes before shaping. To reheat, place the breadsticks back in the air fryer. Heat at 350°F for about 3-4 minutes. This keeps them warm and crispy. Avoid microwaving, as they may become soggy. You can use different flour types, like whole wheat or spelt. Just note that the texture may change. Whole wheat will make them denser. Adjust the liquid amount as needed for different flours. You now know how to make tasty air fryer breadsticks. We covered the key ingredients, from yeast to herbs. I shared step-by-step instructions to make soft, golden breadsticks. You learned tips to perfect your dough and air fryer settings. We also explored fun variations and how to store leftovers. These breadsticks can bring joy to any meal. Don’t hesitate to try making them your own!

If you’re craving warm, buttery breadsticks that are simple to make, you’ve come to the right place! My Air Fryer Garlic Herb Breadsticks are quick to whip up and full …

Read more

Categories Appetizers

Caramel Apple Cheesecake Truffle Cups Sweet Delight

October 10, 2025 by Chef Luca
To make these tasty treats, you need some key items. Here’s what you’ll need: - 1 cup graham cracker crumbs - 1/2 cup unsalted butter, melted - 1 (8 oz) package cream cheese, softened - 1/2 cup powdered sugar - 1 teaspoon vanilla extract - 1 cup diced apples (like Granny Smith or Honeycrisp) - 1/2 teaspoon ground cinnamon - 1/4 cup caramel sauce (store-bought or homemade) - 1/2 cup whipped cream (for topping) - Extra caramel sauce for drizzling - Chopped nuts (like pecans or walnuts) for garnish These ingredients blend to create a delightful mix of flavors. The apples add a fresh crunch. The caramel sauce brings sweetness. Cream cheese gives a rich creaminess that ties everything together. You can dress up your truffle cups with fun toppings. Consider these options: - A sprinkle of cinnamon for warmth - More caramel sauce for extra sweetness - Fresh apple slices for a colorful touch - Shredded coconut for a tropical twist - Mini chocolate chips for a hint of chocolate These toppings make your dessert even more appealing and tasty. Feel free to mix and match based on your taste. If you don’t have a specific ingredient, don’t worry! Here are some easy swaps: - Use almond or graham cracker crumbs for the crust. - Swap cream cheese with Greek yogurt for a lighter option. - Choose maple syrup instead of caramel for a different flavor. - Use any nut butter if you have nut allergies. These substitutions help you get creative. They can also cater to different diets or preferences. Just remember, the goal is to keep that delicious flavor. To start, gather your graham cracker crumbs and melted butter. In a medium bowl, mix them well. Use your hands or a spoon to blend until it looks like wet sand. Now, take mini cupcake liners or silicone molds. Press the crumb mixture into the bottom to form a crust. This step gives the truffles a solid base. Once done, place the molds in the fridge. Let them chill while you prep the filling. Next, grab a large bowl. Add the softened cream cheese. Beat this with a mixer until it's nice and smooth. Slowly add the powdered sugar and vanilla extract. Mix until it’s creamy and well combined. This filling is the heart of your truffle cups. It should taste sweet and rich. In a separate small bowl, take your diced apples. Sprinkle ground cinnamon over them. Toss these together to coat the apples well. Gently fold the apple mixture into the cream cheese mixture. Make sure the apples are evenly mixed in. This adds a fun flavor and texture to your truffles. Now, take the crusts out of the fridge. Spoon the cheesecake apple mixture into each crust. Fill them about three-quarters full. This provides enough space for the caramel. Drizzle caramel sauce over the top of each cup. It adds a sweet touch and looks great. Lastly, put the cups back in the fridge. Let them chill for at least two hours. This helps the flavors meld and the cups to set. To get a smooth cream cheese mixture, start with softened cream cheese. Cold cream cheese is hard to mix. I let it sit at room temperature for about 30 minutes. Then, beat it well until it looks creamy. Add powdered sugar slowly. This helps you avoid lumps. Mixing on low speed first can also help. Once smooth, mix in the vanilla extract. This adds a nice flavor to your base. Setting the truffle cups is key. After filling the cups, chill them for at least two hours. This time allows the mixture to firm up. If you want them firmer, you can chill them longer. Make sure your refrigerator is cold enough. If they are not set, they may fall apart when served. To check, gently press the top. It should feel firm but not hard. Presentation makes these cups extra special. Use mini cupcake liners for a cute look. I like to arrange them on a colorful platter. You can also add fresh apple slices around the cups. It adds color and makes the dish pop. For an extra touch, drizzle more caramel sauce on top. Sprinkle chopped nuts for crunch. These small details make your dessert stand out. {{image_2}} You can switch up the fruit in these cups. Instead of apples, try pears or berries. Each fruit brings a unique taste and texture. For a tropical twist, use diced pineapple or mango. Just make sure to adjust the spices according to the fruit you choose. While graham crackers are classic, you can try other crusts. Use crushed cookies like Oreos for a chocolate base. A nut crust with almonds or pecans adds a rich flavor. If you want to skip the crust, serve the filling in cups for a lighter treat. Add spices to jazz up the flavor. A pinch of nutmeg pairs well with cinnamon. You can also add a splash of almond or maple extract for depth. For a fun twist, mix in a little caramel flavoring to intensify the caramel taste. To keep your leftover truffle cups fresh, store them in an airtight container. Place a layer of parchment paper between the cups to avoid sticking. Refrigerate them for up to four days. This keeps the flavors intact and the texture creamy. You can freeze these truffle cups if you want to save them for later. Wrap each cup in plastic wrap tightly. Then, place them in a freezer-safe bag or container. They can last in the freezer for up to three months. When you want to eat them, thaw them in the fridge overnight. Each ingredient in this recipe has a different shelf life. Here’s a quick breakdown: - Graham cracker crumbs: Last up to six months if sealed well. - Unsalted butter: Stays fresh in the fridge for about one month. - Cream cheese: Good for about two weeks after opening. - Powdered sugar: Can last indefinitely if kept dry. - Diced apples: Best used within three days for freshness. - Caramel sauce: Can be stored for up to a year if unopened. By knowing how to store these truffle cups properly, you can enjoy them longer and reduce waste. Yes, you can make these truffle cups a day in advance. This gives them time to chill and set properly. Just cover them with plastic wrap once they are done. Keep them in the fridge until you’re ready to serve. Serve these truffle cups chilled for the best taste. Add a dollop of whipped cream on top just before serving. Drizzle with extra caramel sauce for a sweet touch. You can also sprinkle chopped nuts for crunch. Arrange them on a nice platter to impress your guests. To make these truffle cups gluten-free, use gluten-free graham cracker crumbs. There are many brands available. Check the label to ensure they are safe. The rest of the ingredients are naturally gluten-free, so you’re all set! You can find pre-made truffle cups at local grocery stores or specialty baking shops. Many online retailers sell them too. Look for mini cupcake liners or silicone molds that suit your needs. You learned how to make delicious Caramel Apple Cheesecake Truffle Cups. We covered key ingredients, step-by-step instructions, and helpful tips. Remember, you can customize these treats with different fruits or crusts for fun variations. Storing leftovers is easy, and you can even freeze them for later. With these insights, you can impress friends and family. Enjoy making and sharing this tasty dessert!

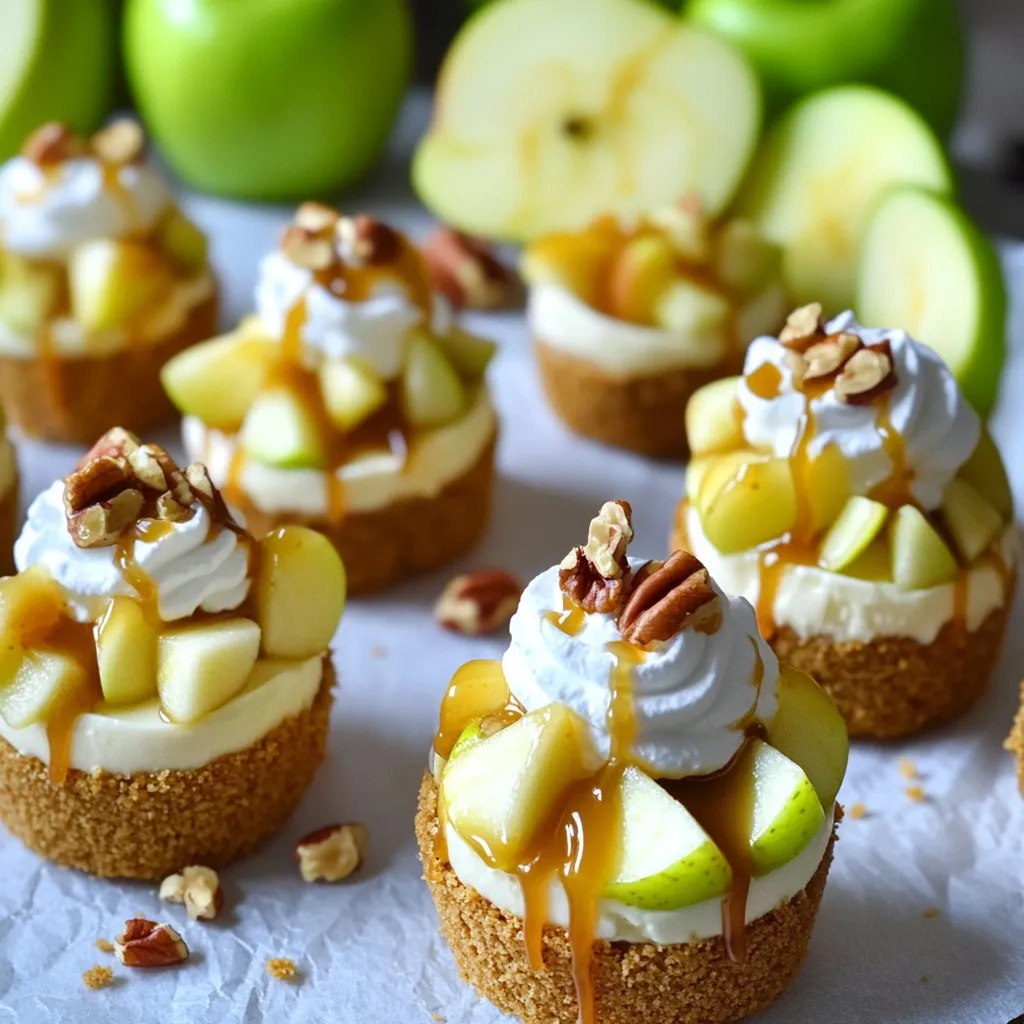
Get ready to indulge in a sweet and creamy treat with my Caramel Apple Cheesecake Truffle Cups! These little delights combine rich cheesecake with crunchy apples and smooth caramel, creating …

Read more

Categories Desserts

One Pot Creamy Pesto Chicken Tortellini Delight

October 10, 2025 by Chef Luca
For the perfect One Pot Creamy Pesto Chicken Tortellini, gather these key ingredients: - 2 cups chicken breast, diced - 1 tablespoon olive oil - 2 cups chicken broth - 1 cup heavy cream - 1 cup pesto sauce - 12 oz cheese tortellini (fresh or frozen) - 1 cup cherry tomatoes, halved - 1 cup spinach, fresh - 1/2 teaspoon garlic powder - Salt and pepper to taste - Grated Parmesan cheese, for garnish - Fresh basil leaves, for garnish These ingredients combine to create a rich and creamy dish that your family will love. You can make this dish your own with these optional ingredients: - Sun-dried tomatoes for a tangy twist - Peas for added sweetness and color - Artichoke hearts for a Mediterranean flair - Zucchini or bell peppers for extra veggies Feel free to mix and match these options to suit your taste and pantry. If you need alternatives, consider these substitutions: - Swap chicken breast for turkey or tofu for a lighter option. - Use vegetable broth instead of chicken broth for a veggie base. - Opt for coconut milk in place of heavy cream for dairy-free cooking. - Replace cheese tortellini with gluten-free pasta if needed. These swaps keep your dish delicious while catering to dietary needs. 1. Dice the chicken breast into small pieces. This helps it cook quickly and evenly. 2. Gather all your ingredients. This makes cooking smooth and fun. 3. Measure out the chicken broth and heavy cream. Having everything ready is key. 1. Heat the olive oil in a large pot over medium heat. 2. Add the diced chicken, salt, pepper, and garlic powder. Cook for 5-6 minutes. The chicken should be white and cooked through. 3. Pour in the chicken broth and bring it to a simmer. This adds flavor to your dish. 4. Add the tortellini. If using fresh, cook for 3-5 minutes. If frozen, cook for 7-9 minutes. Stir it gently to keep it from sticking. 5. Once tender, lower the heat. Stir in the heavy cream and pesto. Mix until smooth and creamy. 6. Gently fold in halved cherry tomatoes and fresh spinach. Let it cook for 2 more minutes. This wilts the spinach and warms everything up. 7. Taste the dish and adjust the seasoning if needed. You can add more salt or pepper. 1. Serve the creamy pesto chicken tortellini hot. 2. Garnish with grated Parmesan cheese and fresh basil leaves. It adds flavor and looks great! 3. Use deep bowls for serving. You can sprinkle extra Parmesan on top. 4. Pair with garlic bread or a light salad for a tasty meal. Enjoy every bite! To cook chicken well, start with even-sized pieces. This helps them cook evenly. Use a medium heat and add olive oil to your pot. Season with salt, pepper, and garlic powder for great flavor. Cook the chicken for about 5-6 minutes. Look for no pink inside to know it’s done. If you want to add more flavor, marinate the chicken for an hour before cooking. When picking tortellini, think about your time and taste. Fresh tortellini cooks fast, taking only 3-5 minutes. It has a soft texture and rich flavor. Frozen tortellini lasts longer but needs 7-9 minutes to cook. If you want quick meals, fresh is best. If you plan ahead, frozen works well. Check the package for cooking times, and don’t forget to stir! Pesto sauce adds a fresh, herby taste to your dish. You can use store-bought or homemade pesto. If using store-bought, choose a high-quality brand for the best flavor. Mix the pesto with cream over low heat. This makes it creamy and rich. Always taste and adjust seasoning as needed. If you like it spicy, add a pinch of red pepper flakes. {{image_2}} You can easily make this dish vegetarian. Skip the chicken and use vegetable broth. Add more veggies like mushrooms or zucchini instead. This gives you a tasty, colorful meal without losing flavor. The pesto sauce pairs well with the cheese tortellini, making it rich and creamy. To make this recipe gluten-free, choose gluten-free tortellini. Many stores offer this option now. You can also check online for brands that fit your needs. The rest of the ingredients are usually gluten-free. Just make sure your broth and pesto are safe too. This way, everyone can enjoy the dish! Feel free to get creative! You can add broccoli, bell peppers, or peas. They cook quickly and add color. For more protein, consider adding chickpeas or diced tofu. Just remember to adjust the cooking time. This keeps your dish balanced and full of nutrition. Enjoy making it your own! To store your One Pot Creamy Pesto Chicken Tortellini, let it cool first. Place it in an airtight container. Make sure to keep it in the fridge. Your dish will stay fresh for up to three days. If you want to freeze it, use a freezer-safe container. This dish can last up to three months in the freezer. When you freeze, leave some space at the top. This allows for expansion as it freezes. To reheat, you can use a pot or microwave. If using a pot, heat it on low. Add a splash of chicken broth or cream to keep it creamy. Stir often to avoid burning. In the microwave, use medium heat and stir halfway through. Enjoy your creamy dish warm! Yes, you can make this dish in advance. Cook it fully, then cool it down. Store it in a container and keep it in the fridge. It tastes great after a day. Just remember to reheat it gently. You can pair this dish with several sides. Garlic bread complements the creamy sauce well. A light salad adds freshness. Roasted vegetables also work nicely. Choose what you enjoy most! This dish lasts about 3 to 4 days in the fridge. Keep it in an airtight container. Check for any signs of spoilage before eating. Enjoy the flavors while they are fresh! This blog post covered key ingredients and steps to make a tasty One Pot Creamy Pesto Chicken Tortellini. We explored essential and optional ingredients, cooking tips, and variations for all diets. I provided storage advice to keep your leftovers fresh. Remember, you can switch ingredients or add veggies to make it your own. I hope these tips help you cook a delicious meal with ease. Happy cooking!

Craving a dinner that is both creamy and satisfying? Look no further than this One Pot Creamy Pesto Chicken Tortellini Delight! In just a few simple steps, you can whip …

Read more

Categories Dinner

Sweet Soy Shrimp Rice Bowls Quick and Tasty Meal

October 9, 2025 by Chef Luca
- 1 pound shrimp, peeled and deveined - 2 cups cooked jasmine rice - 3 tablespoons soy sauce - 2 tablespoons honey - 1 tablespoon sesame oil - 1 teaspoon grated ginger - 1 garlic clove, minced - 1/2 cup snap peas, trimmed - 1/2 red bell pepper, sliced - 2 green onions, chopped - Sesame seeds for garnish - Salt and pepper to taste I love making this sweet soy shrimp rice bowl because it’s quick and easy. The shrimp are the star here, so use fresh ones if you can. The cooked jasmine rice serves as a soft bed for the shrimp. For the sauce, it’s simple. You mix soy sauce, honey, sesame oil, grated ginger, and minced garlic in a bowl. This creates a sweet and savory blend that makes the shrimp shine. Don’t forget the vegetables! Snap peas add a nice crunch, and red bell pepper gives a pop of color. Green onions on top add a fresh touch. Use sesame seeds for garnish. They add a little extra flavor and a nice look to your bowl. Always season with salt and pepper to taste. This dish is not only tasty but also colorful and fun to make. You can have it ready in just 15 minutes, which is great for a busy day. To start, you need to make the sweet soy sauce. In a medium bowl, whisk together these ingredients: - 3 tablespoons soy sauce - 2 tablespoons honey - 1 tablespoon sesame oil - 1 teaspoon grated ginger - 1 garlic clove, minced - Salt and pepper to taste Mix them well until smooth. This sauce will add a sweet and savory flavor to the shrimp. Next, heat a large non-stick skillet over medium-high heat. Add 1 pound of shrimp, peeled and deveined. Cook for 2 to 3 minutes until the shrimp turn pink. Once they are almost done, pour in the sweet soy sauce mixture. Toss the shrimp to coat them evenly. Cook for another 2 minutes until the shrimp are fully cooked and caramelized. In the same skillet, add: - 1/2 cup snap peas, trimmed - 1/2 red bell pepper, sliced Sauté these veggies for 1 to 2 minutes. You want them to be tender but still crisp. This adds color and crunch to your bowls. Now it’s time to put it all together. Serve 2 cups of cooked jasmine rice into bowls. Top each bowl with the sweet soy shrimp and vegetable mixture. For the final touch, garnish with: - 2 green onions, chopped - Sesame seeds for garnish This adds both flavor and a nice look to your meal. Enjoy your quick and tasty sweet soy shrimp rice bowls! To make sweet soy shrimp, timing is key. Cook shrimp for just 2 to 3 minutes on medium-high heat. You want them pink and tender, but not rubbery. Overcooking makes shrimp tough. After they turn pink, add your sauce. Let them cook for 2 more minutes to get that nice glaze. Balancing the sweet soy sauce is simple. If you find it too sweet, add a bit more soy sauce. This adds saltiness. For a sweeter taste, add more honey. Taste as you go! The goal is a nice blend of sweet and salty. Remember, each ingredient affects the final flavor. These rice bowls go well with a side salad or steamed veggies. For drinks, try iced tea or a light beer. They complement the dish nicely. You can also serve fresh fruit for dessert. It adds a refreshing end to your meal. Enjoy your sweet soy shrimp rice bowls! {{image_2}} You can swap shrimp for many other proteins. Chicken works well and cooks fast. Just cut it into bite-sized pieces. Tofu is a great option for a plant-based meal. Use firm tofu for the best texture. Scallops add a touch of luxury and cook quickly too. Just remember to adjust the cooking time based on what you choose. If you want a vegetarian meal, add more veggies! Broccoli is a great choice. It adds color and crunch. You can also try bell peppers, carrots, or snap peas. Just sauté them until they are tender but still crisp. This keeps your meal bright and full of flavor. Feel free to get creative with flavors! You can add sriracha for some heat. A squeeze of lime juice brightens the dish. Try different sauces like teriyaki or chili garlic for a twist. Each change will give your rice bowl a new taste. Enjoy experimenting with what you like best! To store leftover shrimp rice bowls, first let them cool. Place them in an airtight container. Make sure to separate the shrimp and rice if possible. This helps keep their textures fresh. You can keep them in the fridge for up to three days. Label the container with the date for easy tracking. When reheating, the best method is to use a skillet. Heat it on medium until warm. Add a splash of water or broth to prevent sticking. Stir often to keep the shrimp and rice from drying out. You can also use the microwave, but cover the bowl with a damp paper towel. This keeps moisture in and helps the dish heat evenly. Aim for one to two minutes, stirring halfway through. You can freeze shrimp rice bowls for longer storage. For best results, freeze the shrimp and rice separately. Use freezer-safe bags or containers. This helps maintain their textures. Shrimp can stay fresh for up to three months. Rice can last about one month in the freezer. When ready to eat, thaw in the fridge overnight. Reheat as mentioned above for the best taste. Shrimp cook fast. For small shrimp, it takes about 2-3 minutes. For large shrimp, it may take 3-4 minutes. You want them pink and firm. Overcooking makes them tough. Keep an eye on them while cooking. Yes, you can use frozen shrimp. Just make sure to thaw them first. To thaw, place them in cold water for about 15 minutes. If you cook them from frozen, add a few extra minutes to the cooking time. This way, you still get juicy shrimp. Jasmine rice is great for this dish. It has a nice aroma and texture. You can also use basmati rice or brown rice. Just note, cooking times may vary. Always check the package for best results. This recipe can be made gluten-free. Use tamari instead of soy sauce. Tamari is a great alternative that keeps the flavor. Always check labels to make sure it is gluten-free. This way, everyone can enjoy the dish. This blog post covered a simple and tasty shrimp rice bowl. You learned about the main ingredients, including shrimp, jasmine rice, and a sweet soy sauce. We explored step-by-step instructions, tips for best results, and fun variations. In the end, this recipe is flexible and easy. You can swap shrimp for chicken or add more veggies. Enjoy making this dish your own! With a few simple adjustments, you can impress anyone with your cooking skills.

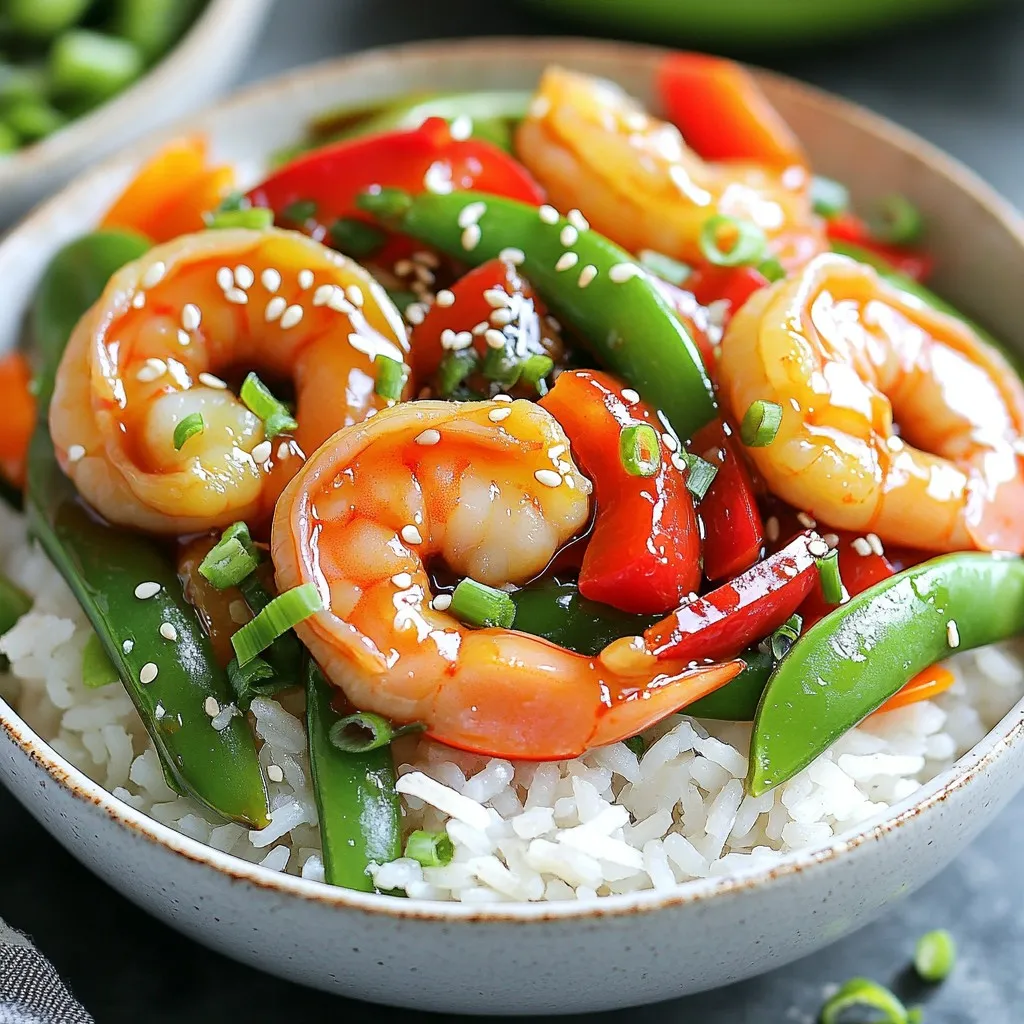
Are you craving a quick and tasty meal? Look no further! My Sweet Soy Shrimp Rice Bowls take just 15 minutes to make, combining juicy shrimp with a sweet and …

Read more

Categories Dinner
Older posts
Newer posts
← Previous Page1 … Page13 Page14 Page15 … Page122 Next →

STIRRED RECIPES

Where every dish begins with a stir! 🍲✨

PAGES

Home About Contact Privacy Policy Terms & Conditions Cookie Policy GDPR Policy Copyright Policy Disclaimer

CATEGORIES

Appetizers Desserts Salads Breakfast Dinner

Contact

  • Pinterest
  • Mail
Copyright © 2026 Stirred Recipes. All rights reserved.