Skip to content
Stirred Recipes
  • Home
  • Appetizers
  • Desserts
  • Salads
  • Breakfast
  • Dinner
  • Privacy Policy
  • Contact
  • About

Chef Luca

Creamy Pepperoncini Chicken Skillet Flavorful Delight

January 5, 2026May 2, 2025 by Chef Luca
- 4 boneless, skinless chicken breasts - 1 tablespoon olive oil - Salt and pepper to taste - 1 cup sliced pepperoncini peppers (jarred) - 1 cup chicken broth - 1 cup heavy cream - 1 tablespoon garlic, minced - 1 teaspoon onion powder - 1 teaspoon Italian seasoning - 1 cup shredded mozzarella cheese - Fresh parsley, chopped for garnish The main ingredients create a perfect mix. The chicken breasts are the star of the dish. They soak up flavors and stay juicy. Pepperoncini adds a tangy kick that shines through. Heavy cream gives the sauce its rich and creamy texture. I recommend using salt and pepper to taste. These will enhance the chicken's natural flavor. Onion powder and Italian seasoning add depth to the dish. Garlic brings a fresh aroma that makes you hungry. For garnishes, sprinkle chopped parsley on top. This adds a fresh touch and color. You can also add extra slices of pepperoncini for more zing. For side dishes, garlic bread pairs well. A fresh green salad adds crunch and balance. These options turn your meal into a feast. {{ingredient_image_1}} First, take your chicken breasts. Season both sides with salt and pepper. This adds great flavor. Next, heat a large skillet over medium heat. Add one tablespoon of olive oil. Once the oil is hot, place the chicken in the skillet. Sear the chicken for about 5-7 minutes on each side. Look for a golden brown color. This step seals in the juices. When cooked, remove the chicken and set it aside. In the same skillet, add minced garlic. Sauté it for about 30 seconds. You want it to smell nice but not burn. Then, pour in one cup of chicken broth. Bring it to a gentle simmer. Be sure to scrape up any browned bits from the bottom. This adds flavor. Now, stir in one cup of heavy cream. Add the sliced pepperoncini, onion powder, and Italian seasoning. Mix everything well. Let this sauce simmer for about 3-4 minutes. You want it to thicken slightly. Return the chicken to the skillet. Spoon the creamy sauce over the top. Now, sprinkle one cup of shredded mozzarella cheese on the chicken. Cover the skillet and let it cook for another 3-4 minutes. The cheese should be melted and bubbly at this point. Finally, garnish with chopped fresh parsley before serving. This adds a nice touch and color. Enjoy your creamy pepperoncini chicken! To cook juicy chicken, start with good seasoning. Use salt and pepper on both sides. This helps the chicken stay moist and tasty. Sear the chicken breasts in hot olive oil. Cook for about 5-7 minutes on each side. Look for a golden brown color. This adds flavor and keeps the juices inside. After searing, always set the chicken aside before making the sauce. This step helps prevent overcooking. For a creamy sauce, use heavy cream as your base. Start with chicken broth in the pan. This adds depth to the flavor. Scrape any brown bits from the pan. These bits add extra taste to your sauce. Stir in the cream and let it simmer. This thickens the sauce just right. If you want it thicker, cook a bit longer. If it’s too thick, add a splash of broth. Always taste as you go for the best results. Serve your creamy pepperoncini chicken directly from the skillet. This makes for a rustic and inviting look. Top with fresh chopped parsley for color and flavor. You can add some extra pepperoncini slices for a kick. Pair the dish with garlic bread or a fresh salad. This balances the richness of the chicken. Enjoy your meal with family or friends for a delightful dining experience! Pro Tips Use Fresh Ingredients: For the best flavor, opt for fresh garlic and high-quality chicken. Fresh ingredients elevate the dish significantly. Adjust Spice Level: If you prefer a spicier dish, add some crushed red pepper flakes or use hotter pepperoncini peppers in the recipe. Thicken the Sauce: For a creamier sauce, let it simmer longer to reduce it further, or whisk in a bit of grated Parmesan cheese for extra richness. Meal Prepping: This dish is perfect for meal prep! Cook a batch and store it in individual containers for an easy weeknight dinner. {{image_2}} You can swap out chicken for other proteins. Try using turkey or pork for a change. Both work well in this dish. If you prefer beef, thinly sliced steak is a great option. Each protein will add a unique flavor. Just adjust the cooking time as needed. Adding vegetables is a fun twist. Bell peppers, zucchini, or spinach mix well with this dish. You can sauté them with garlic before adding the cream. This adds color and nutrition. Use about one cup of veggies for balance. They will cook tender and soak up the sauce. If you like it hot, add more pepperoncini. For a milder taste, reduce the amount. You can also use different peppers. Jalapeños or banana peppers bring heat or sweetness. Adjust based on your spice tolerance. Taste the sauce as you go for the best results. To keep your creamy pepperoncini chicken fresh, store it in an airtight container. Allow the dish to cool to room temperature before sealing it. This helps avoid moisture buildup. You can keep the leftovers in the fridge for up to three days. When you are ready to eat, just take it out and enjoy! Reheat the creamy pepperoncini chicken on the stove for the best taste. Use a medium heat and add a splash of chicken broth to keep it moist. Stir gently until heated through. You can also microwave it for a quick meal. Just cover it loosely and heat for 1-2 minutes. Check for warmth before serving. If you want to save more, freezing is a great option. First, let the chicken cool completely. Then, place it in a freezer-safe container. You can also use freezer bags. Make sure to remove as much air as possible. This helps prevent freezer burn. The dish can stay frozen for up to three months. When you’re ready to eat, thaw it in the fridge overnight and reheat as mentioned earlier. Yes, you can make Creamy Pepperoncini Chicken Skillet ahead of time. Cook the chicken and sauce as usual. Allow it to cool before storing it in the fridge. This dish keeps well for about three days. When you’re ready to eat, reheat the skillet on low heat until warm. You may need to add a splash of chicken broth to keep it creamy. This chicken dish pairs well with several sides. Here are some great options: - Garlic bread - Steamed rice - Mashed potatoes - Fresh green salad These sides enhance the meal's flavor and add variety to your plate. They help soak up the tasty sauce, too. To make this recipe gluten-free, follow these steps: - Use gluten-free chicken broth. - Check the labels on all ingredients for hidden gluten. - Avoid any sauces or mixes that contain wheat. By using these swaps, you can enjoy this creamy delight without worry. You can create a delicious Creamy Pepperoncini Chicken Skillet using fresh ingredients. This dish's key components, helpful tips, and variations make it a fun option. I shared step-by-step instructions to guide you through cooking. You can impress others with your cooking skills and enjoy a tasty meal. Remember to try different proteins and veggies to keep it fresh. Store your leftovers properly to savor them later. Enjoy while exploring this fun recipe, and bring joy to your kitchen!

If you crave a meal that bursts with flavor, you’re in the right place! My Creamy Pepperoncini Chicken Skillet is the perfect weeknight dish. It’s simple, quick, and packed with …

Read more

Categories Dinner

Easy Sweet Potato Casserole Flavorful and Simple Dish

January 12, 2026May 1, 2025 by Chef Luca
For this easy sweet potato casserole, I use simple and tasty ingredients. Here’s what you need: - 4 large sweet potatoes, peeled and cubed - 1/2 cup brown sugar - 1/4 cup maple syrup - 1/2 cup unsalted butter, melted - 1 teaspoon vanilla extract - 1 teaspoon ground cinnamon - 1/2 teaspoon ground nutmeg - 1/4 teaspoon salt - 1 cup mini marshmallows - Optional: 1/2 cup chopped pecans or walnuts Each ingredient adds its own flavor and texture. Sweet potatoes give a creamy base, while brown sugar and maple syrup add sweetness. The butter makes it rich, and vanilla adds depth. Cinnamon and nutmeg bring warmth and spice. Salt balances the sweetness. Finally, mini marshmallows on top give a fun, toasted finish. If you want crunch, add chopped nuts! These ingredients come together for a delightful dish everyone will love. {{ingredient_image_1}} 1. Preheating the oven Start by setting your oven to 350°F (175°C). This step is key to cooking your casserole evenly. 2. Boiling the sweet potatoes Fill a large pot with salted water and bring it to a boil. Once boiling, add 4 large sweet potatoes, peeled and cubed. Cook them for about 15-20 minutes until they are fork-tender. Drain the sweet potatoes and set them aside. 3. Mashing the sweet potatoes In a large mixing bowl, take your drained sweet potatoes and mash them with a fork or potato masher. Aim for a smooth texture, which helps the flavors mix well. 4. Mixing in other ingredients Add 1/2 cup brown sugar, 1/4 cup maple syrup, and 1/2 cup melted unsalted butter to the mashed sweet potatoes. Then, mix in 1 teaspoon vanilla extract, 1 teaspoon ground cinnamon, 1/2 teaspoon ground nutmeg, and 1/4 teaspoon salt. Stir everything until combined and smooth. 1. Transferring the mixture to a baking dish Grease a 9x13 inch baking dish and pour the sweet potato mixture into it. Spread the mixture evenly across the dish. 2. Adding toppings Sprinkle 1 cup of mini marshmallows on top of the sweet potato layer. Make sure to cover the mixture evenly. If you want extra crunch, you can add 1/2 cup chopped pecans or walnuts. 3. Baking time and temperature Place the baking dish in the preheated oven. Bake for 25-30 minutes. Look for the marshmallows to turn golden brown and toasted. When ready, remove the dish from the oven and let it cool slightly before serving. To get fork-tender sweet potatoes, boil them until soft. This usually takes 15 to 20 minutes. You want them to break apart easily when poked with a fork. After boiling, drain them well to remove excess water. When mashing sweet potatoes, use a fork or potato masher. Mash until smooth for a creamy texture. Avoid using a blender, as it can make them gummy. If you like, you can mix in some melted butter while mashing for extra creaminess. You can boost the flavor with extra spices. Try adding a pinch of ginger or allspice for a warm, inviting taste. If you want a richer sweetness, use honey or agave syrup instead of maple syrup. You can also experiment with flavored extracts. A splash of almond extract can add a nice twist. Just be careful not to add too much, as it can overpower the dish. To make your casserole look great, add some garnishes. A light sprinkle of cinnamon on top can add color and flavor. You can also use chopped pecans or walnuts for a crunchy finish. When serving, try a dollop of whipped cream or a scoop of vanilla ice cream. This makes the dish feel special. Always serve it warm to enjoy the best flavors and texture! Pro Tips Choose the Right Sweet Potatoes: Look for firm, smooth-skinned sweet potatoes without any bruises or blemishes for the best flavor and texture. Adjust Sweetness to Taste: Depending on personal preference and the natural sweetness of the sweet potatoes, you can reduce or increase the amount of brown sugar and maple syrup. Make Ahead: This casserole can be prepared in advance. Assemble it and store it in the refrigerator overnight, then bake when ready to serve. Experiment with Toppings: Feel free to mix up the toppings! Try adding crushed graham crackers or coconut flakes along with or instead of the marshmallows for added flavor. {{image_2}} For those who follow a vegan diet, you can make easy swaps. Use coconut oil instead of butter. Replace the eggs with flaxseed meal or applesauce. You can also skip the mini marshmallows or find vegan versions. For gluten-free options, this recipe is already safe. Just make sure your sugar and toppings are gluten-free. If you're looking for alternative sweeteners, try using agave syrup or honey. These can add a different flavor. You can also reduce the amount of brown sugar if you want it less sweet. For topping alternatives, instead of marshmallows, consider using crushed nuts or a sprinkle of oats. Both add a nice crunch. In the South, sweet potato casserole often has a crunchy pecan topping. Mixing in some orange juice or zest can brighten the dish. For an international twist, consider adding spices like cardamom or ginger. Some cultures even add coconut milk for a creamy texture. Each variation brings new flavors to this classic dish. To keep your sweet potato casserole fresh, store it properly. - Refrigeration guidelines: Place leftovers in an airtight container. It can last for about 3 to 5 days in the fridge. Always let it cool down before sealing the container. - Freezing instructions: If you want to save it longer, freeze the casserole. Wrap it tightly in plastic wrap and then in foil. This way, it can last for up to 3 months. Label the package with the date for easy tracking. When you're ready to enjoy leftovers, use these reheating tips. - Best methods for reheating: The oven is the best choice. Preheat it to 350°F (175°C). Place the casserole in a baking dish and cover it with foil. Heat for about 20 to 25 minutes. You can also use the microwave for quick reheating. Just cover it and heat in short intervals until warm. - Keeping the texture intact: To keep the sweet potatoes creamy, avoid overheating. Stir gently if reheating in the microwave. This helps prevent drying out the dish. Sweet potato casserole lasts about three to five days in the fridge. Make sure you store it in an airtight container. This keeps it fresh and tasty. Yes, you can make sweet potato casserole ahead of time. Prepare it a day before and store it in the fridge. Just bake it when you are ready to serve. This saves time on busy days. Absolutely! Fresh sweet potatoes are great for this dish. Peel and cube them, then boil until fork-tender. They will taste fantastic and add a nice texture. You can serve sweet potato casserole with turkey, ham, or roasted chicken. It pairs well with green beans or a fresh salad. These sides balance the sweetness of the casserole. Sweet potato casserole can be healthy, especially if you control the sugar. Sweet potatoes are full of vitamins and fiber. Using less brown sugar and butter can make it even healthier. This blog post covered all you need to make sweet potato casserole. We explored key ingredients, preparation steps, baking tips, and variations. You can adjust the recipe for your diet or region. Don’t forget to store leftovers correctly for the best taste later. Sweet potato casserole is a comforting dish that fits any table. Embrace your creativity and enjoy making this delicious meal with loved ones. You now have all the tools to create a tasty casserole, so get started!

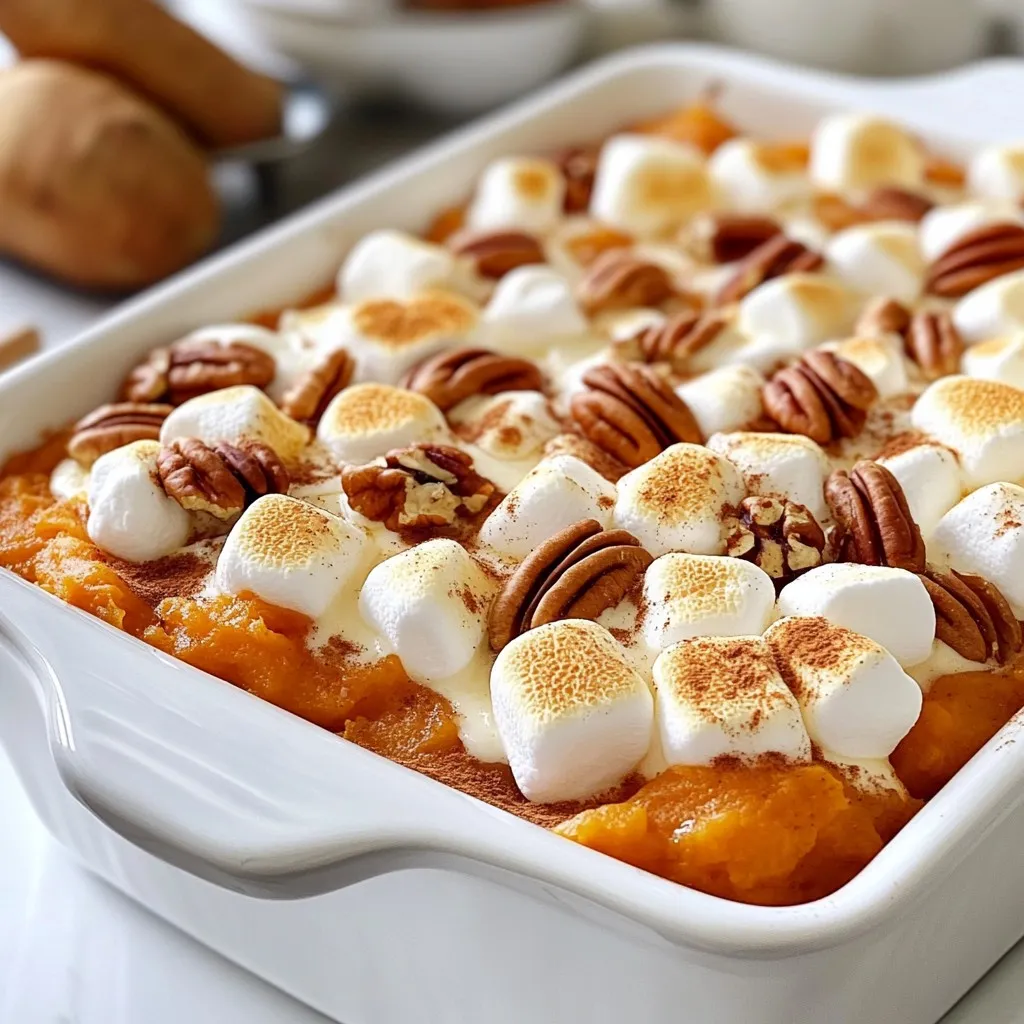
If you’re looking for a simple yet delicious dish that will impress your family, look no further. My Easy Sweet Potato Casserole is packed with flavor and requires minimal effort. …

Read more

Categories Desserts

Chicken Alfredo Flatbread Flavorful and Easy Recipe

January 5, 2026May 1, 2025 by Chef Luca
To make Chicken Alfredo Flatbread, we need a few simple ingredients. Each one adds flavor and texture to our dish. Here’s what you will need: - Large flatbread (store-bought or homemade) - Cooked chicken breast, shredded - Alfredo sauce (store-bought or homemade) - Shredded mozzarella cheese - Grated Parmesan cheese - Fresh baby spinach - Garlic powder - Italian seasoning - Salt and pepper - Fresh basil leaves for garnish Each ingredient plays a key role. The flatbread acts as a base, holding everything together. The cooked chicken gives protein and heartiness. Alfredo sauce adds creaminess and rich flavor. Cheeses like mozzarella and Parmesan melt beautifully, creating a wonderful texture. Fresh spinach adds a touch of color and nutrition. Garlic powder and Italian seasoning boost the flavor. Finally, salt and pepper enhance everything. This mix of ingredients makes the Chicken Alfredo Flatbread both tasty and filling. You can find most of these items at any grocery store. If you want to make it special, try using homemade Alfredo sauce. It’s easy and makes a big difference. {{ingredient_image_1}} First, set your oven to 400°F (200°C). This step is key. A hot oven helps the flatbread cook evenly. Next, place your flatbread on a baking sheet. I like to use parchment paper. It makes cleanup easy. Now, spread the Alfredo sauce on the flatbread. Leave a small border around the edges. Sprinkle garlic powder and Italian seasoning on the sauce. This adds great taste. Then, evenly place the shredded chicken on top. Add the fresh baby spinach next. This gives color and nutrients. Finally, cover everything with mozzarella and Parmesan cheese. Make sure the cheese covers the chicken and spinach well. Season with salt and pepper for extra flavor. Put the flatbread in the oven. Bake it for 12-15 minutes. You want the cheese to melt and bubble. The edges of the flatbread should be crispy. After baking, take it out and let it cool for a minute. Then, slice it up. Don’t forget to garnish with fresh basil leaves! To make the best Alfredo sauce, use high-quality ingredients. Fresh cream and real butter create a rich taste. If you want to make it from scratch, start with butter. Melt it in a pan, then add cream. Stir and let it simmer gently. Add garlic powder and Parmesan cheese for flavor. Mix until the cheese melts, then season with salt and pepper. This sauce pairs perfectly with the flatbread. You can use any flatbread you like, but some are better than others. A large, thin flatbread works best for this recipe. Look for whole wheat or gluten-free options for a healthy twist. Store-bought flatbreads save time, but homemade flatbreads add a personal touch. If you have time, try making your own. It’s simple and fun! If you don't have all the ingredients, don’t worry! You can switch things up. For the chicken, use turkey or even sautéed mushrooms for a vegetarian option. If you don’t have Alfredo sauce, use a creamy ranch dressing instead. Swap mozzarella for cheddar or gouda cheese, which adds a new flavor. Fresh spinach can be replaced with kale or arugula for a different taste. Be creative with what you have! Pro Tips Use Fresh Ingredients: Opt for fresh spinach and high-quality cheeses for a more vibrant flavor and appealing texture. Customize Your Toppings: Feel free to add other toppings like sun-dried tomatoes, mushrooms, or bell peppers for extra flavor and nutrition. Watch the Baking Time: Keep an eye on the flatbread while baking to ensure it doesn't overcook; every oven behaves slightly differently. Let It Rest: Allow the flatbread to cool for a minute after baking to let the cheese set slightly; this makes slicing easier. {{image_2}} To make a vegetarian version, skip the chicken. Use extra veggies instead. You can add roasted bell peppers, mushrooms, or even artichokes. These toppings give your flatbread a great taste. Add a bit more cheese for creaminess. Fresh spinach still works well here. If you love heat, spice up your Chicken Alfredo Flatbread. Add sliced jalapeños or red pepper flakes. You can also use spicy Alfredo sauce. This will give your flatbread a nice kick. The creamy sauce balances the spice, making each bite exciting. Get creative with your toppings! Try adding sun-dried tomatoes or olives. Cooked bacon bits can add a nice crunch too. You can even mix different cheeses like gouda or feta. Each topping brings new flavors. Experimentation makes cooking fun and personal! After you enjoy your Chicken Alfredo Flatbread, store any leftovers in an airtight container. Place it in the fridge. Leftovers will stay fresh for up to three days. If you want to keep it longer, consider freezing it. To reheat your flatbread, use an oven for the best results. Preheat your oven to 350°F (175°C). Place the flatbread on a baking sheet. Heat it for about 10 minutes, or until the cheese melts again. You can also use a microwave if you're in a hurry. Just cover it with a damp paper towel and heat for 1-2 minutes. The oven method keeps it crispier. If you want to freeze your Chicken Alfredo Flatbread, wrap it tightly in plastic wrap. Then, place it in a freezer-safe bag. It can last up to two months in the freezer. When you're ready to eat it, thaw it in the fridge overnight. Reheat it in the oven as described above for the best taste. Yes, you can make Chicken Alfredo Flatbread ahead of time. Prepare the flatbread up to the baking step. Store it in the fridge for up to a day. When you are ready to eat, bake it as directed. This saves time and still tastes great! You can serve many sides with this dish. A fresh salad works well. Garlic bread adds a nice touch. You might also try some grilled veggies. These sides balance the creamy flavors of the flatbread. You can change the recipe to fit your taste. Swap chicken for shrimp or veggies. Use different cheeses like cheddar or Gouda. Add spices, like red pepper flakes, for heat. Fresh herbs like parsley or oregano can brighten the dish too. This blog post covered how to make Chicken Alfredo Flatbread. We discussed the essential ingredients, from large flatbread to fresh basil. I provided easy steps to prepare, layer, and bake your dish. You learned tips for perfecting your Alfredo sauce and different variations you can try, like vegetarian options. Incorporating these ideas, you can create a tasty meal everyone will enjoy. Remember, cooking is all about having fun and being creative.

If you crave a delicious meal that’s quick and easy, try Chicken Alfredo Flatbread! This dish packs creamy flavor and tender chicken on a crispy base. You’ll love how simple …

Read more

Categories Dinner

Millionaire Gnocchi Flavorful and Easy Dinner Recipe

January 5, 2026April 30, 2025 by Chef Luca
To make Millionaire Gnocchi, you need: - 1 lb potato gnocchi (store-bought or homemade) - 2 tablespoons olive oil - 1 cup heavy cream - 1 cup freshly grated Parmesan cheese - 1 tablespoon garlic, minced - 1 teaspoon fresh thyme, chopped (or 1/2 teaspoon dried thyme) - 1 cup spinach, roughly chopped - 1/2 cup sun-dried tomatoes, chopped - 1/4 teaspoon red pepper flakes (optional) - Salt and pepper to taste - Fresh basil leaves, for garnish If you want to switch things up, try these: - Substitute gnocchi with pasta or zucchini noodles for a lighter dish. - Use coconut milk instead of heavy cream for a dairy-free option. - Replace Parmesan with nutritional yeast for a vegan twist. - Spinach can be swapped for kale or arugula for different flavors. - Sun-dried tomatoes can be replaced with roasted peppers for a fresh taste. Choosing the right ingredients makes a big difference. Here are some tips: - Use fresh, high-quality olive oil for the best flavor. - Grate your own Parmesan cheese for a richer taste. Pre-grated cheese lacks flavor. - Select firm and bright spinach. Avoid wilted or yellow leaves. - Choose sun-dried tomatoes packed in oil, as they add more flavor. - Fresh herbs like thyme enhance the dish. Dried herbs work, but fresh is best. By focusing on these quality ingredients, your Millionaire Gnocchi will shine on your table! {{ingredient_image_1}} Start by boiling a large pot of salted water. Once it bubbles, add your gnocchi. Cook until they float to the top, about 2-3 minutes. This shows they are done! Drain the gnocchi and set them aside while you make the sauce. In a big skillet, heat olive oil over medium heat. Add minced garlic and cook for one minute. Watch closely so it doesn’t burn. Next, pour in the heavy cream. Let it simmer gently. Stir in grated Parmesan cheese until it melts. This makes your sauce creamy and rich. Now, add chopped thyme, spinach, and sun-dried tomatoes. If you like heat, toss in red pepper flakes. Mix well until the spinach wilts and everything combines nicely. Gently fold the cooked gnocchi into the sauce. Make sure each piece is coated well. Add salt and pepper to taste. Let it simmer for 2-3 minutes. This helps the gnocchi soak in all those wonderful flavors. When ready, take the skillet off the heat. Serve in shallow bowls and garnish with fresh basil leaves. A sprinkle of extra Parmesan cheese adds a nice touch. Enjoy your delicious Millionaire Gnocchi! To get the best texture for your gnocchi, follow these steps: - Use fresh gnocchi if you can. - Cook it in salted boiling water. - Only boil until it floats, about 2-3 minutes. - Drain gently to avoid breaking them. - Toss with a little olive oil to keep them from sticking. These tips help ensure your gnocchi is soft yet firm, just right for the sauce. You can change the sauce to match your taste. Here are some ideas: - For a spicy kick, add more red pepper flakes. - Swap spinach with kale for a heartier flavor. - Use different herbs like basil or rosemary for a fresh twist. - Substitute Parmesan with feta or goat cheese for a tangy taste. These variations let you personalize the dish and keep it exciting. How you serve the dish makes it even more special. Try these tips: - Use shallow bowls for an elegant look. - Drizzle some sauce on top for extra flair. - Sprinkle more Parmesan cheese to impress your guests. - Garnish with fresh basil leaves for color. These simple steps make your Millionaire Gnocchi look as good as it tastes! Pro Tips Choose Quality Gnocchi: For the best flavor and texture, opt for high-quality store-bought gnocchi or make your own from scratch using fresh potatoes. Enhance Flavor with Fresh Herbs: Fresh herbs like basil or parsley can elevate your dish. Add them at the end of cooking for a burst of freshness. Adjust Creaminess: If you prefer a lighter sauce, substitute half of the heavy cream with chicken or vegetable broth for a delicious, creamy yet lighter version. Make it Vegetarian: Skip the Parmesan cheese or use a vegan alternative to make this dish suitable for a vegetarian or vegan diet. {{image_2}} You can easily make Millionaire Gnocchi vegetarian. Skip the meat and add more veggies. Try mushrooms or zucchini for extra flavor. You can also use cream cheese instead of Parmesan for a different taste. Fresh herbs like basil or parsley can brighten the dish. Want to add protein? Chicken or shrimp works great in this dish. Cook them in the skillet before adding garlic. This adds a nice depth of flavor. You can also use chickpeas for a plant-based option. Just toss them in when you add the spinach. Seasonal ingredients can change the taste. In spring, add asparagus or peas for fresh crunch. In fall, use pumpkin or butternut squash for a cozy feel. During summer, cherry tomatoes or bell peppers can lighten the dish. Always feel free to mix and match based on what you have. After enjoying your Millionaire Gnocchi, store any leftovers in an airtight container. Make sure the gnocchi is cool before sealing. This helps keep the moisture in check. Store it in the fridge for up to three days. For best flavor, try to eat it within two days. When you're ready to enjoy leftovers, reheat them gently. You can use a skillet over low heat. Add a splash of heavy cream or water to help rehydrate the dish. Stir often to avoid sticking. You can also microwave it in 30-second bursts. Stir in between to warm evenly. To freeze, let the cooked gnocchi cool completely. Place them in a single layer on a baking sheet. Once frozen, transfer them to a freezer-safe bag. Remove air to prevent freezer burn. You can freeze them for up to three months. To reheat, cook straight from frozen in a skillet with sauce. Millionaire Gnocchi is a rich and creamy pasta dish. It features soft potato gnocchi, heavy cream, and lots of cheese. The dish combines flavors like garlic, thyme, spinach, and sun-dried tomatoes. This mix gives it a luxurious taste that feels special, perfect for any dinner. Yes, you can use store-bought gnocchi. It saves time and is still tasty. Just cook it according to the package instructions. If you want to try homemade gnocchi, it can add a nice touch. Both options work well in this recipe. To make Millionaire Gnocchi gluten-free, choose gluten-free gnocchi. Many brands offer this option. Check the labels to ensure they fit your needs. The rest of the ingredients are naturally gluten-free, so you can enjoy this dish worry-free. You learned about the key ingredients and how to create delicious millionaire gnocchi. We covered cooking steps, tips for perfect texture, and fun variations. Having options like vegetarian adjustments or protein adds flavor and fun. Storing leftovers correctly keeps your dish fresh for later. Remember, you can make this dish your own while enjoying it with friends and family. Get creative, trust your taste, and enjoy every bite!

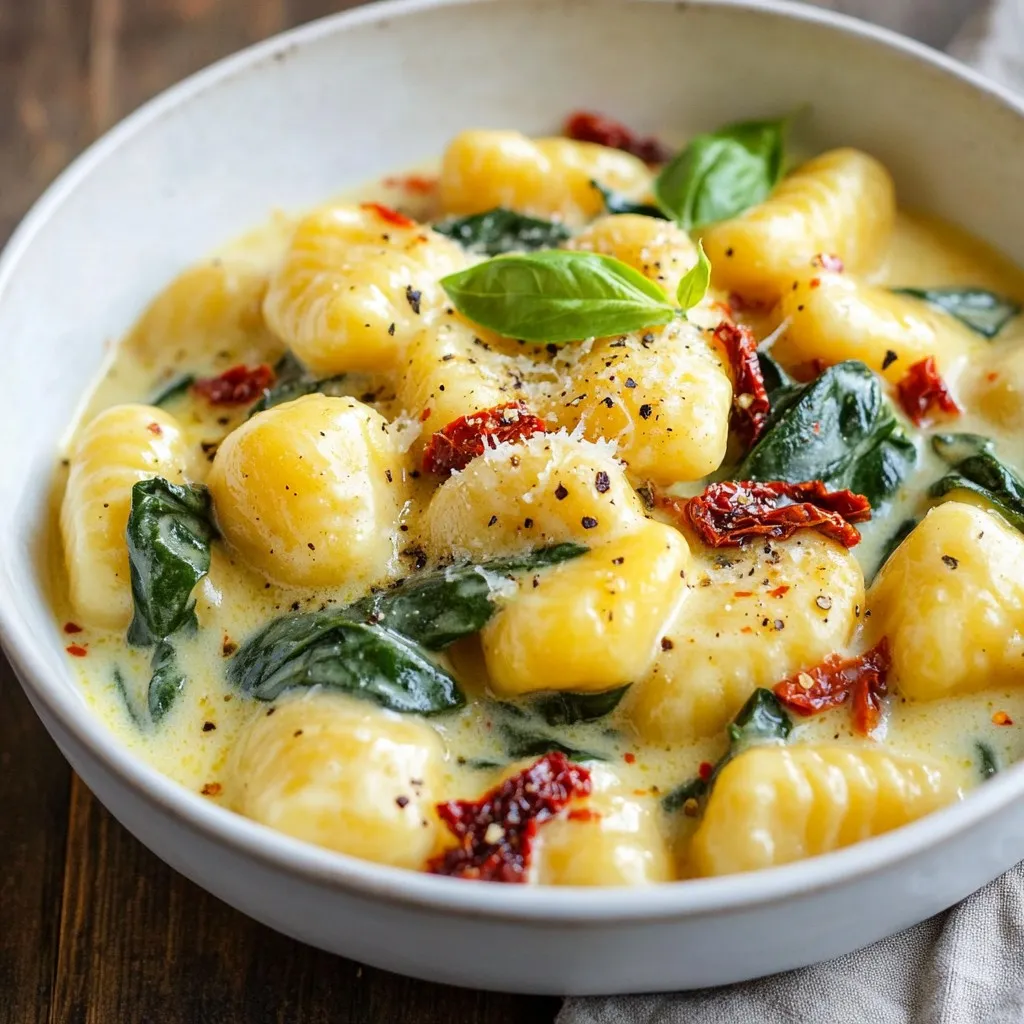
Are you ready to impress your family with a quick and tasty dinner? This Millionaire Gnocchi recipe combines rich flavors with easy steps, making it perfect for busy nights. Knowing …

Read more

Categories Dinner

Minute Garlic Parmesan Chicken Quick and Tasty Meal

January 12, 2026April 20, 2025 by Chef Luca
- 4 boneless, skinless chicken breasts - 4 tablespoons unsalted butter - 4 cloves garlic, minced - 1 teaspoon onion powder - 1 teaspoon Italian seasoning - ½ cup grated Parmesan cheese - Salt and pepper to taste - Fresh parsley, chopped (for garnish) The main star of this dish is the chicken. You want four boneless and skinless breasts. This makes cooking quick and easy. The butter adds richness and flavor. I use four tablespoons of unsalted butter. Garlic is a must for that amazing taste. You need four cloves, minced finely. Next, we have seasonings. Onion powder brings a sweet note. Italian seasoning adds herby goodness. Use one teaspoon of each. Don’t forget salt and pepper to taste. Lastly, Parmesan cheese is key for a cheesy, savory finish. You will need half a cup, grated. For a lovely touch, use fresh parsley as a garnish. It adds color and freshness to the dish. These simple ingredients come together to create a delightful meal. {{ingredient_image_1}} Flattening the Chicken Start by flattening the chicken breasts. Use a meat mallet or a rolling pin. Aim for about half an inch thick. This helps the chicken cook fast and evenly. Seasoning the Chicken Next, season both sides of the chicken. Use salt, pepper, onion powder, and Italian seasoning. Make sure to coat them well. This adds great flavor to the chicken. First Cooking Phase Heat 2 tablespoons of butter in a large skillet over medium-high heat. Once the butter melts, add the seasoned chicken breasts. Cook for about 3-4 minutes on each side. Look for a golden brown color. If you have many pieces, cook them in batches. This will prevent overcrowding. Transferring Cooked Chicken After cooking, transfer the chicken to a plate. Keep it warm while you make the sauce. This way, it stays juicy and tasty. Sautéing the Garlic In the same skillet, add the remaining 2 tablespoons of butter. Then, add the minced garlic. Sauté for about 1-2 minutes. The garlic should be fragrant and slightly golden. Be careful not to burn it. Combining Chicken with Sauce Lower the heat and return the chicken to the skillet. Spoon the garlic butter over the chicken. Right away, sprinkle the grated Parmesan cheese on top. Cover the skillet for 1-2 minutes. This will melt the cheese, making it bubbly and delicious. How to Flatten Chicken Properly To flatten chicken, place it between two sheets of plastic wrap. Use a meat mallet or a rolling pin. Gently pound the chicken until it is about half an inch thick. This step helps the chicken cook evenly and quickly. It also makes the chicken tender and juicy. Ensuring Even Cooking Cook chicken breasts in batches if your skillet is small. This prevents overcrowding, which can cause the chicken to steam instead of sear. Make sure to turn the chicken only once during cooking. This gives you a nice golden crust. Additional Seasonings to Consider Feel free to add a pinch of paprika or crushed red pepper for some heat. You could also use fresh herbs like thyme or rosemary for a fragrant twist. These small changes can elevate the dish and add depth. Substitutions for Parmesan Cheese If you don’t have Parmesan cheese, try Pecorino Romano or Grana Padano. Both offer a similar flavor and can work well in this recipe. You could also use nutritional yeast for a dairy-free option. Avoid Overcrowding the Skillet Cooking too many chicken pieces at once can lead to uneven cooking. Always leave some space in the skillet. This helps steam escape and ensures a crispy exterior. Keeping Chicken Warm Once the chicken is cooked, transfer it to a warm plate. Cover it with foil to keep it warm while you prepare the garlic butter sauce. This way, your chicken stays juicy and hot until serving. Pro Tips Flatten for Even Cooking: Ensure the chicken breasts are evenly flattened to about half an inch thick. This technique promotes uniform cooking and helps the chicken to cook faster. Use Fresh Garlic: For the best flavor, opt for fresh minced garlic instead of garlic powder. Fresh garlic will provide a stronger and more aromatic taste to the dish. Don’t Overcrowd the Pan: Cook the chicken in batches if necessary. Overcrowding can lower the pan's temperature, leading to steaming instead of searing, which prevents that delicious golden-brown crust. Let Cheese Melt Properly: Cover the skillet after adding the Parmesan cheese to allow it to melt evenly. This will ensure a delightful cheesy topping that enhances the dish's flavor. {{image_2}} You can change the cheese to fit your taste. Try mozzarella for a milder flavor. Feta adds a tangy twist that pairs well with garlic. For a sharper taste, consider using aged cheddar. You can also swap the chicken for other proteins. Thinly sliced pork or turkey works great. If you want a meatless option, use firm tofu or tempeh. These swaps keep the dish tasty and fun. If you prefer baking, you can make an oven-baked version. Preheat your oven to 400°F (200°C). After seasoning the chicken, place it in a baking dish. Pour melted butter and garlic over the chicken. Bake for about 20-25 minutes until cooked through. Grilling is another fun option. Marinate the chicken with garlic and spices. Then, grill each piece for about 6-8 minutes per side. This method gives you a nice smoky flavor. Minute Garlic Parmesan Chicken pairs well with many side dishes. Consider serving it with roasted veggies for a healthy touch. Mashed potatoes or rice complement the flavors nicely. For garnishing, fresh parsley adds color and flavor. You can also sprinkle extra Parmesan on top for a cheesy kick. Lemon wedges are a great addition, too, giving a fresh zing. How to Store Leftovers After you enjoy your Minute Garlic Parmesan Chicken, let the leftovers cool. Place them in an airtight container. This helps keep the chicken fresh. You can also cover the dish tightly with plastic wrap. Shelf Life in the Fridge In the fridge, your leftovers stay good for about three days. Make sure to check for any off smells or changes in texture before eating. If it looks or smells funny, it's best to throw it away. Best Practices for Freezing To freeze the chicken, let it cool completely first. Wrap each piece in plastic wrap and then place them in a freezer bag. This keeps the chicken from freezer burn. You can store it for up to three months. Thawing Tips When you're ready to eat frozen chicken, the best way is to thaw it in the fridge overnight. This keeps it safe and tasty. If you're in a hurry, you can use the microwave on the defrost setting, but eat it right away after. Methods for Reheating Chicken You can reheat the chicken in a few ways. The oven works well; place it on a baking sheet and heat at 350°F (175°C) for about 15-20 minutes. You can also use the microwave for quick reheating, but it may dry out the chicken a bit. Ensuring Food Safety Always check that the chicken is hot all the way through. A good rule is to heat it to 165°F (74°C). This keeps you safe from any foodborne illnesses. Enjoy your delicious leftovers safely! It takes about 20 minutes to cook Minute Garlic Parmesan Chicken. The prep time is 10 minutes. Cooking the chicken takes about 10 minutes. You will cook it for 3-4 minutes on each side. This gives you a quick and tasty meal. Yes, you can use frozen chicken breasts. However, you need to thaw them first. Thawing allows the chicken to cook evenly. You can thaw it overnight in the fridge or use the microwave. Once thawed, follow the recipe as usual. Garlic Parmesan Chicken pairs well with many sides. Here are some great options: - Steamed broccoli - Mashed potatoes - Rice pilaf - Garlic bread - Side salad These sides add flavor and balance to your meal. Enjoy experimenting with different combinations! This blog post covers everything you need to know about making Minute Garlic Parmesan Chicken. You learned about the key ingredients, step-by-step cooking instructions, and useful tips. We explored variations to keep your meals fresh and exciting. Proper storage and reheating methods ensure you enjoy every bite later. In conclusion, this dish is simple, tasty, and versatile. You can adapt it to suit your tastes and preferences, making it a favorite in your home. Enjoy cooking this delicious meal!

Looking for a quick and tasty meal? Minute Garlic Parmesan Chicken is the answer! This dish combines juicy chicken, rich garlic, and savory Parmesan in just minutes. Whether you’re a …

Read more

Categories Dinner

One Skillet Salmon Lemon Orzo Flavorful Dish

January 7, 2026April 13, 2025 by Chef Luca
- 2 salmon fillets, skin removed - 1 cup orzo pasta - 4 cups low-sodium vegetable broth - Juice and zest of 1 lemon - 2 cloves garlic, minced - 1 cup cherry tomatoes, halved - 2 cups baby spinach - 3 tablespoons olive oil - Fresh dill or parsley for garnish (optional) This dish shines with fresh and vibrant ingredients. The salmon fillets are the star, bringing rich flavor and healthy fats. Orzo pasta adds a delightful texture and heartiness. Using low-sodium vegetable broth keeps the base light and allows the other flavors to pop. Lemon juice and zest brighten the dish, giving it a zesty kick. Garlic adds depth, making every bite savory. Cherry tomatoes burst with sweetness, balancing the dish beautifully. Fresh baby spinach not only adds color but also boosts nutrition. Olive oil enriches the flavors and keeps everything moist. A sprinkle of dill or parsley at the end makes for a lovely presentation. This ingredient list ensures you create a meal that is not only tasty but also visually appealing. Each component plays a role in making One Skillet Salmon Lemon Orzo a dish you will want to make again and again! {{ingredient_image_1}} First, heat 2 tablespoons of olive oil in a large skillet over medium heat. While the oil warms, season the salmon fillets with salt and pepper. Once the oil is hot, place the salmon in the skillet, skin-side down. Cook for 4-5 minutes on each side until the salmon is cooked through and has a nice golden color. Then, remove the salmon from the skillet and set it aside. In the same skillet, add 1 tablespoon of olive oil and the minced garlic. Cook the garlic for about 1 minute until it smells great. Next, add the orzo pasta to the skillet. Stir the orzo for 1-2 minutes. This toasting method makes the orzo extra tasty. Now, pour in the vegetable broth, lemon juice, and lemon zest. Bring this mix to a gentle simmer. Cook for about 10-12 minutes, stirring often. You want the orzo to be tender and soak up most of the broth. After that, stir in the cherry tomatoes and baby spinach. Cook for 2-3 minutes until the spinach wilts and the tomatoes soften. Finally, flake the cooked salmon into large chunks and gently fold it into the skillet with the orzo and veggies. Adjust the seasoning with more salt and pepper if needed. How to achieve perfect salmon To cook salmon well, use medium heat. Start with skinless fillets. Season with salt and pepper. Heat two tablespoons of olive oil in a skillet. Place salmon in the oil and cook for four to five minutes on each side. Look for a golden color and flaky texture. Remove it when it’s cooked through but still moist. Best way to cook orzo Orzo cooks like rice, but with a twist. First, toast it in olive oil with minced garlic for one to two minutes. This step adds a nice flavor. Then, add broth and lemon juice. Stir it well and let it simmer for ten to twelve minutes. This keeps the orzo soft and full of taste. Adjusting seasoning Taste is key. Always taste your dish before serving. If it needs a boost, add more salt or pepper. A touch of lemon juice can also brighten the flavors. Don’t be afraid to tweak it until it feels just right. Using fresh vs. dried herbs Fresh herbs bring a bright flavor. I recommend using fresh dill or parsley for this dish. If you don’t have fresh herbs, dried ones work too. Just use less, as dried herbs are stronger. Add them at the end of cooking to keep their flavor. Plating ideas Serve this dish in shallow bowls. This gives it a cozy look. Use a spoon to gently place orzo, spinach, and salmon together. It makes it easy to see all the colorful ingredients. Garnishing tips Garnish your dish with fresh herbs. A sprinkle of dill or parsley adds color. Include a lemon wedge on the side for a fresh touch. This not only looks good but also adds more flavor when squeezed over the dish. Pro Tips Fresh Ingredients: Always use fresh salmon and seasonal vegetables for the best flavor and nutrition. Lemon Zest Magic: Don't skip the lemon zest; it adds a vibrant aroma and enhances the overall zestiness of the dish. Toasting Orzo: Toasting the orzo in the skillet for a minute or two before adding liquid brings out a nutty flavor. Perfect Spinach: Add the spinach towards the end of cooking to retain its bright color and nutrients. {{image_2}} - Alternative fish options: You can swap salmon for trout or cod. Both fish cook well and offer great taste. If you prefer something meatier, try chicken breast. - Gluten-free orzo options: If you need a gluten-free dish, try rice or quinoa instead of orzo. These grains absorb flavors nicely and create a hearty meal. - Adding different vegetables: You can mix in bell peppers, zucchini, or asparagus. Each veggie brings its own flavor and color to the dish. - Spices and seasoning alternatives: If you want to change the taste, try adding paprika, oregano, or red pepper flakes. These spices can give your dish a unique twist. - Make-ahead storage: You can prepare the orzo and veggies ahead of time. Store them in an airtight container in the fridge for up to three days. Just add the salmon when you're ready to serve. - Freezing suggestions: If you want to freeze your dish, let it cool first. Place it in a freezer-safe container. It will last up to three months. When ready to eat, thaw it overnight in the fridge and reheat. To store leftovers, let the dish cool down first. Place the salmon lemon orzo in an airtight container. This keeps it fresh and safe. You can store it in the fridge for up to three days. If you want to enjoy it later, eat it within this time frame for the best taste. For freezing, use a freezer-safe container. Make sure to leave some space for the dish to expand. You can freeze the salmon lemon orzo for up to three months. When you’re ready to eat, thaw it in the fridge overnight. Reheat it gently in a skillet over low heat. Add a splash of broth or water to help it warm evenly. Always follow food safety tips. Wash your hands before cooking and after handling raw fish. If the dish smells off or changes color, it may be spoiled. Throw it away if you see any signs of spoilage. Enjoy your meals safely! Yes, you can use frozen salmon. Just make sure to thaw it first. Place the salmon in the fridge overnight. If you are short on time, you can also run it under cold water. When cooking, add a couple of minutes to the cooking time. This way, you still get that nice golden crust. Tips for cooking with frozen fish: - Pat the salmon dry after thawing. This helps it brown better. - Season it well with salt and pepper for flavor. - Cook it on medium heat to ensure it cooks evenly. Orzo is a type of pasta that looks like rice. It’s made from wheat and is very versatile in dishes. You can cook orzo in boiling water, just like other pasta. It usually takes about 8-10 minutes to cook until it’s tender. Explanation and cooking methods: - Use a big pot of salted water for boiling. - Stir the orzo occasionally to prevent sticking. - Drain it and toss it with a bit of olive oil to keep it from clumping. You can tell when salmon is done by looking at its color and texture. It should be opaque and flake easily with a fork. The internal temperature should reach 145°F (63°C). Signs of perfectly cooked salmon: - The flesh turns from bright pink to pale pink. - It should not look raw in the center. - Press it gently; it should feel firm but not hard. This blog post shared a simple recipe for salmon with orzo. I guided you through each ingredient and preparation step. We covered tips for perfect cooking and flavor boosts. You learned about variations and meal prep, too. As you try this dish, remember to experiment with flavors and ingredients. With practice, you'll create a tasty, healthy meal that you love. Enjoy the cooking process and share your tasty results!

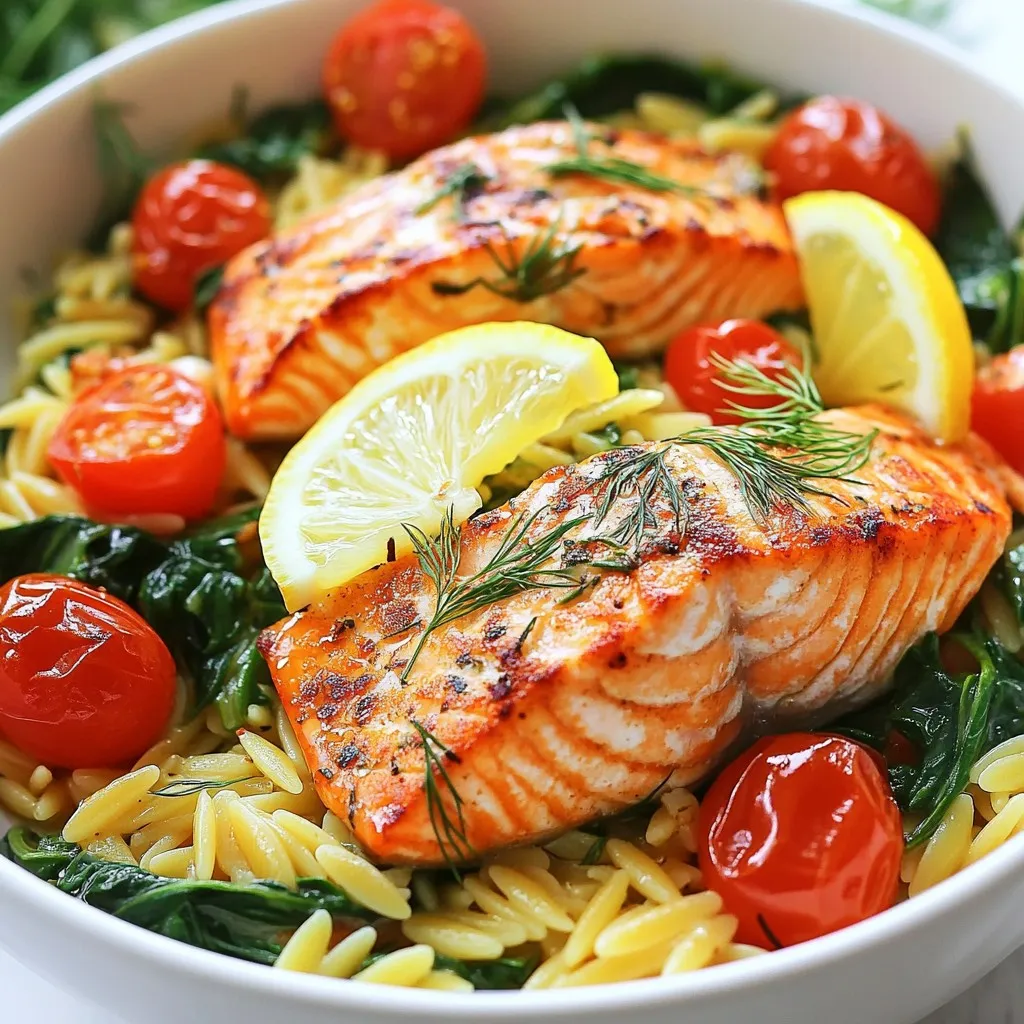
Are you ready to whip up a delicious meal in just one skillet? My One Skillet Salmon Lemon Orzo is a perfect blend of fresh flavors and simple steps. With …

Read more

Categories Dinner

Banana Upside-Down Cake Simple and Tasty Recipe

November 13, 2025April 13, 2025 by Chef Luca
- 3 ripe bananas, sliced - 1/4 cup brown sugar - 1/4 cup unsalted butter - 1 cup all-purpose flour - 1 tsp baking powder - 1/2 tsp baking soda - 1/4 tsp salt - 1/2 cup granulated sugar - 1 large egg - 1/4 cup milk - 1 tsp vanilla extract - 1/2 tsp ground cinnamon - Optional: Whipped cream or vanilla ice cream for serving For this cake, ripe bananas are key. They add natural sweetness and moisture. Look for bananas with brown spots for the best flavor. The brown sugar and butter mixture makes a rich, gooey base. This helps the cake stay moist and gives it a sweet topping when you flip it over. The cake batter is simple yet tasty. It uses all-purpose flour, baking powder, baking soda, and salt for structure. Granulated sugar adds more sweetness. The egg binds the ingredients, while milk and vanilla make it rich. Ground cinnamon adds warmth and depth to the flavor. These ingredients come together to create a delightful dessert. You can enjoy this cake warm or at room temperature. Top it with whipped cream or vanilla ice cream for a special treat! {{ingredient_image_1}} 1. Preheat and Prepare the Cake Pan Set your oven to 350°F (175°C). Grab a 9-inch round cake pan and grease it with cooking spray or butter. This step helps the cake slide out easily later. 2. Make the Topping with Brown Sugar and Butter In a small pot, melt 1/4 cup of unsalted butter and 1/4 cup of brown sugar over low heat. Stir until it bubbles. Pour this mix into your cake pan. Spread it evenly across the bottom. 3. Mixing the Cake Batter In a medium bowl, whisk together 1 cup of all-purpose flour, 1 teaspoon of baking powder, 1/2 teaspoon of baking soda, 1/4 teaspoon of salt, and 1/2 teaspoon of ground cinnamon. In another bowl, beat 1/2 cup of granulated sugar with 1 large egg until light. Mix in 1/4 cup of milk and 1 teaspoon of vanilla extract. Slowly add the dry mix to the wet mix. Stir gently, just until combined. 1. Pouring the Batter Over Bananas Arrange 3 sliced bananas in a circular pattern over the brown sugar mixture in the pan. Then pour the cake batter over the bananas. Spread it out evenly. 2. Baking Time and Temperature Place the cake pan in your preheated oven. Bake for 30 to 35 minutes. You can check if it’s done by inserting a toothpick into the center. If it comes out clean, it’s ready. 3. Cooling and Inverting the Cake Once baked, take the cake out and let it cool in the pan for about 10 minutes. To flip it, place a serving plate over the pan and turn it upside down. Gently lift the pan off. Now, you can see the lovely banana topping. Let it cool completely before slicing. Avoiding Overmixing Mixing the batter is easy, but don’t mix too much. When you combine wet and dry, stop when you see no flour. Overmixing can make the cake tough. A little lumpy batter is okay. It keeps your cake light and fluffy. Ensuring Even Baking For even baking, make sure your oven is at the right temperature. Preheat it to 350°F (175°C). Place the cake pan in the center of the oven. This helps hot air circulate around the cake. Check it at 30 minutes. A toothpick should come out clean when it’s done. Garnishing Ideas To make your cake look great, sprinkle a bit of cinnamon on top. You can also add extra banana slices for color. This small touch makes the cake more appealing. Serving Suggestions with Ice Cream or Whipped Cream Serve your cake warm or at room temperature. Adding a scoop of vanilla ice cream or a dollop of whipped cream makes it special. The cold cream balances the warm cake. Enjoy this treat with family or friends for a happy moment. Pro Tips Use Overripe Bananas: The sweeter and softer the bananas, the better the flavor and texture of your cake. Look for bananas with brown spots for optimal sweetness. Don’t Overmix: When combining the wet and dry ingredients, mix just until incorporated. Overmixing can lead to a tough cake instead of a tender one. Cool Before Inverting: Allow the cake to cool for at least 10 minutes before inverting. This helps the caramelized bananas to set and prevents them from sticking to the pan. Perfect Serving Suggestions: Serve warm with a scoop of vanilla ice cream or a dollop of whipped cream to enhance the flavors and add creaminess. {{image_2}} You can add more flavors to your banana upside-down cake. One great way is by adding nuts or chocolate chips. Chopped walnuts or pecans add a nice crunch. Just fold in about half a cup of nuts before pouring the batter. If you love chocolate, mix in a half cup of chocolate chips for a sweet twist. You can also use other fruits. Pineapple slices work well and give a tropical taste. Try peaches or berries for a fruity mix. Just keep the same baking method and arrange them like the bananas. For gluten-free options, swap all-purpose flour with a gluten-free flour blend. Make sure the blend has a good mix of starches and fibers for the best texture. You might also need to add a bit of xanthan gum to help with the cake’s structure. If you want a vegan version, replace the egg with a flax egg. Mix one tablespoon of ground flaxseed with three tablespoons of water. Let it sit for a few minutes until it thickens. You can also use almond milk or oat milk instead of regular milk. - Best Storage Practices: To store your leftover banana upside-down cake, place it in an airtight container. You can also cover it well with plastic wrap. This keeps the cake moist and fresh. Avoid stacking other items on top of it. - Recommended Duration: The cake stays good for about 3 to 4 days at room temperature. If you want to extend its life, you can refrigerate it. In the fridge, it can last up to a week. - Methods for Keeping the Cake Moist: To reheat, use the microwave. Heat a slice for about 15-20 seconds. This warms it without drying it out. You can also place it in the oven at 350°F (175°C) for about 10 minutes. Cover it with foil to keep it moist. - Serving Leftovers: Serve reheated cake warm. Add a dollop of whipped cream or a scoop of vanilla ice cream on top for a tasty treat. Enjoy it as an easy dessert or snack! Can I use other fruits for the topping? Yes, you can use other fruits! Pineapples and peaches work great. Just slice them thinly. Make sure the fruit is ripe for the best flavor. How do I know when the cake is done baking? To check if the cake is done, use a toothpick. Insert it in the center. If it comes out clean, the cake is ready. If it has wet batter, bake a few more minutes. What can I substitute for eggs in the recipe? You can use applesauce or mashed bananas as an egg substitute. Use 1/4 cup of either for each egg. This keeps the cake moist and tasty. In this blog post, we explored the yummy world of banana upside-down cake. You learned about its main ingredients, how to make it, and tips for perfecting the cake. We also discussed fun variations and how to store and reheat leftovers. This cake is not just delicious; it’s also flexible. Feel free to customize it with your favorite fruits or dietary choices. With this guide, you now have all the tools to bake a tasty treat that will impress everyone! Enjoy making your cake!

Are you ready to elevate your dessert game? This Banana Upside-Down Cake is simple, tasty, and sure to impress! With ripe bananas, a sweet brown sugar topping, and soft cake, …

Read more

Categories Desserts

Beef Taco Pasta Skillet One-Pan Recipe Delight

January 5, 2026April 11, 2025 by Chef Luca
To make this tasty dish, gather these main ingredients: - 1 lb ground beef - 8 oz elbow macaroni - 1 small onion, diced - 2 cloves garlic, minced - 1 packet taco seasoning (or homemade) - 1 can (15 oz) diced tomatoes with green chiles - 2 cups beef broth - 1 cup corn (canned or frozen) - 1 cup shredded cheddar cheese - 2 tablespoons olive oil - Salt and pepper to taste These ingredients blend well. The ground beef gives it depth. The elbow macaroni adds a nice bite. Taco seasoning brings a great flavor. Tomatoes and corn add freshness and texture. To make your dish pop, consider these optional garnishes: - Fresh cilantro, chopped - Sour cream - Sliced jalapeños - Avocado slices These garnishes add color and flavor. They also let each person customize their meal. A dollop of sour cream can cool the spice. Fresh cilantro adds a bright note. Here are some tools you will need: - Large skillet - Wooden spoon or spatula - Measuring cups and spoons - Knife and cutting board Having the right tools makes cooking easier. A large skillet helps cook everything evenly. A good knife is key for chopping onions and garlic. A wooden spoon helps mix without scratching your skillet. {{ingredient_image_1}} 1. Gather all your ingredients. This makes cooking easier and faster. 2. Dice the onion and mince the garlic. Set them aside for later. 3. If you use frozen corn, let it thaw. Canned corn is ready to go. 4. Measure out the beef broth and taco seasoning. This keeps things organized. 1. Heat 2 tablespoons of olive oil in a large skillet over medium heat. 2. Add the diced onion and minced garlic. Sauté for 3-4 minutes until soft. 3. Add 1 pound of ground beef. Break it up with a spoon and cook. 4. Cook until the beef is browned, about 5-7 minutes. Drain any excess fat. 5. Stir in the taco seasoning. Cook for 1-2 minutes to blend flavors well. 6. Pour in one can of diced tomatoes with green chiles and beef broth. 7. Bring the mixture to a simmer. This helps blend all the flavors. 8. Add 8 oz of elbow macaroni. Stir well and cover the skillet. 9. Simmer for 10-12 minutes, stirring occasionally. This cooks the pasta. 10. When the pasta is al dente, mix in 1 cup of corn and 1 cup of shredded cheddar cheese. 11. Stir until the cheese melts and everything is combined. 12. Season with salt and pepper to taste. Adjust as you like. 13. Remove from heat. Garnish with chopped cilantro for a fresh touch. Serve the Beef Taco Pasta Skillet hot. It’s great on its own or with a side salad. You can also top it with more cheese, sour cream, or avocado. Enjoy! To make your Beef Taco Pasta Skillet shine, use quality taco seasoning. You can buy it or make your own. Mixing spices like cumin, chili powder, and paprika gives great flavor. When you sauté the onion and garlic, let them cook until soft. This adds a deep taste to your dish. Don't rush this step. Use fresh diced tomatoes with green chiles for extra zest. The liquid from the tomatoes adds depth. Adding cheese at the end makes everything creamy and rich. Stir it in until it melts for a lovely texture. Start by preparing all your ingredients before cooking. Chop the onion and garlic, measure the broth, and set everything out. This makes cooking smoother. When browning the beef, break it into small pieces for even cooking. If you see too much grease, carefully drain it. Always taste your dish as you go. This helps you adjust the seasoning. Keep an eye on the pasta. Stir it often to prevent sticking. If it seems dry, add a splash of broth. One common mistake is not cooking the pasta long enough. It should be al dente, not mushy. Another mistake is not using enough seasoning. Taste your dish and add salt and pepper as needed. Make sure to stir in the cheese well to avoid clumps. Don’t skip the cilantro at the end. It adds a fresh taste that brightens the dish. Finally, avoid overcrowding the skillet. If it feels too full, cook in batches for better results. Pro Tips Use Lean Ground Beef: Opt for 80/20 lean-to-fat ratio ground beef to keep the dish flavorful without being overly greasy. Homemade Taco Seasoning: For a fresher taste, consider making your own taco seasoning using chili powder, cumin, garlic powder, and paprika. Adjust Pasta Cooking Time: Keep an eye on the pasta as it cooks; you want it al dente to prevent it from becoming mushy when mixed with the sauce. Add Extra Veggies: Enhance nutrition by incorporating bell peppers, zucchini, or spinach into the skillet along with the onions and garlic. {{image_2}} You can swap out ingredients to fit your taste. Instead of ground beef, try ground turkey or chicken. Both options give a lighter flavor. If you want a richer taste, use chorizo. For the cheese, feel free to use Monterey Jack or pepper jack. They melt beautifully and add a nice kick. You can also replace elbow macaroni with penne or rotini. Each pasta shape offers a fun twist to the dish. For a vegetarian version, skip the beef and add black beans or lentils. Both are great protein sources. You can also add more veggies. Chopped bell peppers, zucchini, or mushrooms work well. Use vegetable broth instead of beef broth to keep the flavor rich. This way, you still enjoy a hearty meal without meat. While elbow macaroni shines in this dish, many pasta types fit well. Try fusilli for a fun spiral shape. Shells can hold onto the sauce nicely, too. Even spaghetti can work in a pinch. Just break it into smaller pieces before cooking. Each type brings its unique texture, making the meal exciting every time. To store leftovers, let the beef taco pasta cool down first. Place it in an airtight container. I like to use glass containers, as they keep food fresh. You can keep it in the fridge for up to three days. If you want to keep it longer, consider freezing it. To freeze beef taco pasta, pack it in freezer-safe bags or containers. Make sure to remove as much air as possible. Label the bags with the date. You can freeze it for up to three months. When ready to eat, thaw it in the fridge overnight before reheating. When reheating, you have a few options. You can use the microwave or the stovetop. If using the microwave, heat it in short bursts, stirring in between. For the stovetop, add a splash of beef broth to keep it moist. Heat on low until warm. Enjoy the great flavors again! You can use ground turkey or chicken instead of ground beef. They are leaner options and still give great flavor. For a plant-based choice, try lentils or black beans. Both add protein and texture. When using beans, adjust the cooking time since they are already cooked. Yes, you can make this dish ahead of time. Cook it fully and let it cool down. Once cool, store it in an airtight container. It stays fresh in the fridge for about three days. When ready to eat, reheat it on the stove or in the microwave until hot. To change the spice level, use mild taco seasoning for less heat. You can also add fresh peppers or jalapeños for a kick. For milder flavors, skip the diced tomatoes with chiles. Taste the dish during cooking, and adjust the spices to suit your taste. You’ve learned how to make a tasty Beef Taco Pasta Skillet. I covered the main ingredients, kitchen tools, and detailed steps for prep and cooking. You got tips for flavor and common mistakes to avoid. I also shared fun variations and storage info. This dish is simple and satisfying. Don’t hesitate to try new ingredients or make it your own. Enjoy every bite!

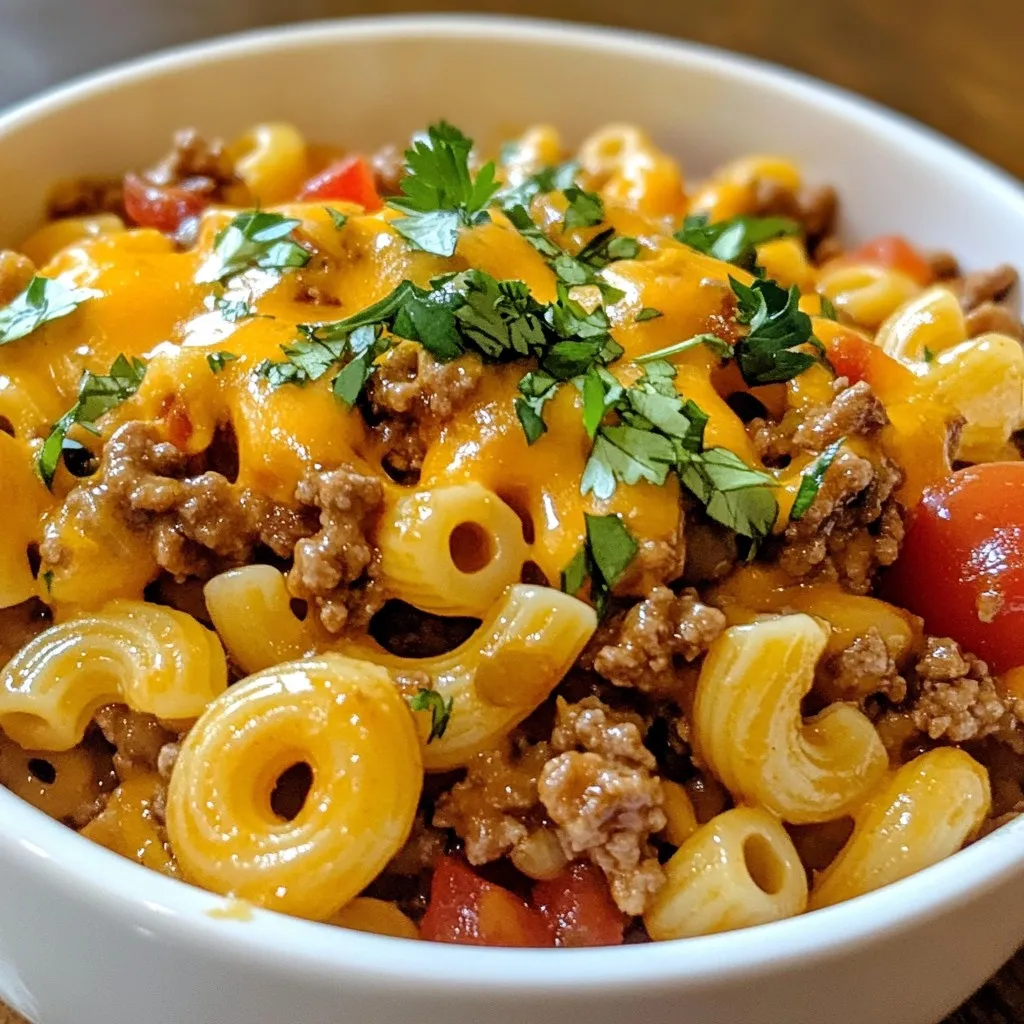
If you’re craving a quick, tasty meal, then this Beef Taco Pasta Skillet is for you! In one pan, you can whip up a hearty dish that’s full of flavor …

Read more

Categories Dinner

Loaded Chili Cheese Fries Delicious and Simple Recipe

January 4, 2026April 11, 2025 by Chef Luca
- 4 large russet potatoes - 1 can (15 oz) chili (meat or vegetarian) - 2 cups shredded cheddar cheese The main ingredients form the heart of your loaded chili cheese fries. The russet potatoes bring a great texture and flavor. Choose a chili that you love, whether it's meat-based or vegetarian. The shredded cheddar cheese adds creaminess and a rich taste. - ½ cup sour cream - 1 jalapeño, thinly sliced - 1/4 small red onion, finely chopped - Fresh cilantro, for garnish Toppings make your fries even better. Sour cream cools the heat from chili. Sliced jalapeño adds spice and crunch. Chopped red onion gives a fresh taste. Fresh cilantro is optional but adds color and flavor. - 1 tablespoon olive oil - Salt and pepper to taste Seasoning is key. Olive oil helps the fries crisp up nicely. Salt and pepper enhance all the flavors. Always taste as you go to find the right balance. {{ingredient_image_1}} 1. First, preheat your oven to 425°F (220°C). This helps the fries cook well. 2. Next, wash and scrub the russet potatoes. Make sure they are clean. 3. Cut the potatoes into fries about 1/4 inch thick. The size helps them cook evenly. 1. In a large bowl, toss the cut fries with olive oil, salt, and pepper. Ensure every fry gets coated well. 2. Spread the fries in a single layer on a baking sheet lined with parchment paper. This keeps them from sticking. 3. Bake the fries for 30-35 minutes. Flip them halfway through. This ensures they get golden and crispy. 1. While the fries bake, heat the chili in a saucepan over medium heat. You want it warm and ready. 2. Once the fries are crispy, take them out of the oven. Sprinkle the shredded cheddar cheese on top. 3. Return the fries to the oven for 5-7 minutes. Wait until the cheese is melted and bubbly. 4. Take the loaded fries out and top them with the heated chili. Make it as generous as you like! 5. Add dollops of sour cream, sliced jalapeños, and chopped red onion. These toppings add great flavor. 6. If you want, garnish with fresh cilantro. Serve the fries right away for the best taste! To get crispy fries, cut the potatoes evenly. Aim for 1/4 inch thick pieces. This helps them cook at the same rate. Soak the cut fries in cold water for at least 30 minutes. This removes excess starch. After soaking, dry them well with a towel. When baking, spread the fries out on the sheet. Keep them in a single layer. This helps them crisp up nicely. Bake at 425°F (220°C) for 30-35 minutes. Flip them halfway through for even baking. Look for a golden color when they are done. Using different types of cheese can change the game. Try pepper jack for a spicy kick. Or use a mix of cheddar and mozzarella for a creamy texture. Each cheese brings its own flavor to the dish. Add toppings to make it your own. Try diced tomatoes, green onions, or even avocado. These extras add freshness and crunch. You can also drizzle with hot sauce for extra heat. Avoid overcooking the fries. Check them frequently in the oven. Overcooked fries can turn soggy and lose their crunch. Don't forget to season the fries well. Under-seasoned fries will taste bland. Use salt and pepper to make them pop. When heating the chili, make sure it’s hot but not boiling. Underheating can make the dish less enjoyable. Aim for a warm, thick chili to top off your fries. Pro Tips Choose the Right Potatoes: For the best texture, use russet potatoes as they crisp up nicely and have a fluffy interior. Season Well: Don’t skimp on the salt and pepper when tossing the fries. Proper seasoning enhances the flavor significantly. Keep an Eye on the Cheese: Watch the fries closely when melting the cheese to prevent burning. You want it perfectly gooey! Customize Your Toppings: Feel free to add other toppings like diced tomatoes or olives for a personalized touch to your loaded fries! {{image_2}} You can make loaded chili cheese fries suit your diet. For a vegan version, use plant-based cheese and chili. This keeps the dish tasty and meat-free. Choose a chili with beans and veggies. Both options remain hearty and satisfying. If you need gluten-free fries, pick fresh potatoes and gluten-free chili. Many canned chilies are gluten-free. Always check the label to be safe. You can enjoy these fries without worry. Want to spice things up? Try international twists! For a Tex-Mex flair, add guacamole and salsa. You can use spicy queso instead of cheddar cheese. This adds more flavor and creaminess. For a Mediterranean touch, use feta cheese and olives. Drizzle some tzatziki sauce on top for extra zest. You can also play with chili styles. Try a spicy beef chili or a hearty white bean chili for different tastes. Loaded chili cheese fries make a great appetizer or a main dish. Serve them in a big bowl for sharing, or on a plate for individual servings. Pair them with drinks like iced tea or a cold beer. They also go well with a side salad or some fresh veggies. This adds balance and freshness to your meal. To store leftovers, let the loaded chili cheese fries cool down. Place them in an airtight container. Make sure to eat them within 3 days for the best taste. When reheating, use an oven or toaster oven. Set it to 350°F (175°C) and heat for about 10 minutes. This makes them crispy again. You can also microwave them, but they may get soggy. You can freeze these fries either before or after baking. If freezing raw, cut the potatoes and toss them with oil and seasoning. Spread them on a baking sheet and freeze until solid. Then, transfer them to a freezer bag. To freeze after baking, let them cool completely. Place them in a freezer-safe container. For the best texture, eat them within 2 months. When ready to bake, cook from frozen at 425°F (220°C) for about 30-35 minutes. In the fridge, the loaded chili cheese fries last about 3 days. To keep them fresh, store them in an airtight container. If you see any mold or a strange smell, it’s time to discard them. Always check your leftovers before eating. If they look or smell off, play it safe and throw them away. You can make simple swaps for healthier options. - Use sweet potatoes instead of russet potatoes. - Choose a lower-fat cheese. - Opt for a low-calorie sour cream or Greek yogurt. - Select a no-bean chili or one with lean meat. These changes can help lower calories without losing flavor. Yes, frozen fries work well! - Look for fries without added seasonings. - Cook them according to package directions. - Spread them out on the baking sheet. This ensures they get crispy and golden. A thick, hearty chili is ideal. - Try a beef or turkey chili for rich flavor. - Vegetarian chili adds a nice touch, too. - Chili with beans gives extra texture. The key is to choose a chili you love. You can easily swap ingredients! - Use a vegetarian or vegan chili. - Replace cheddar cheese with a plant-based cheese. - Swap sour cream for a vegan version or avocado. These changes keep the dish tasty and satisfying. You now have all you need to make delicious Loaded Chili Cheese Fries. We covered the key ingredients, cooking steps, and tips for crispy fries. With so many options and variations, this dish can suit everyone. Don’t forget to store leftovers properly to enjoy later. Whether you want a snack or a meal, these fries are sure to please. Dive in and create your version; it’s simple and fun! Enjoy your tasty creation and share it with others.

Are you ready to indulge in a tasty treat that everyone loves? Loaded Chili Cheese Fries are simple to make and packed with flavor. With just a few ingredients like …

Read more

Categories Appetizers

Korean Pot Roast Flavorful and Tender Recipe Guide

November 11, 2025April 10, 2025 by Chef Luca
For a tasty Korean pot roast, you need: - 3 lbs beef chuck roast - 2 carrots, cut into chunks - 1 onion, quartered - 3 green onions, chopped (plus extra for garnish) The flavors come from these key items: - 1 cup soy sauce - 1/2 cup brown sugar - 1/4 cup sesame oil - 1 cup beef broth - 1 cup water - 1 tablespoon grated ginger - 4 cloves garlic, minced - 2 tablespoons gochugaru (Korean red pepper flakes) - Salt and pepper to taste These seasonings create a rich and deep flavor that makes the beef tender and juicy. To finish your dish, use: - 1 tablespoon sesame seeds - Chopped green onions These garnishes add a nice touch and make the dish look great. Enjoy the burst of flavors with every bite! {{ingredient_image_1}} First, gather your ingredients to make the marinade. In a large bowl, mix these items: - 1 cup soy sauce - 1/2 cup brown sugar - 1/4 cup sesame oil - 1 cup beef broth - 1 cup water - 1 tablespoon grated ginger - 4 cloves garlic, minced - 2 tablespoons gochugaru Whisk everything together until smooth. This marinade gives the beef great flavor. Next, take your beef chuck roast, which should weigh about 3 pounds. Place it in a large resealable bag or dish. Pour the marinade over the roast, ensuring it is fully covered. Seal the bag tightly or cover the dish. Let the beef marinate in the fridge for at least 4 hours. For even better taste, marinate it overnight. When you're ready to cook, take the roast out of the marinade. Pat it dry with a paper towel. This helps the meat brown better. In a large oven-safe pot, heat a tablespoon of oil over medium-high heat. Season the roast with salt and pepper. Sear it on all sides for about 4-5 minutes each. You want a nice brown crust to form. After searing, remove the roast and set it aside. In the same pot, add quartered onions and carrot chunks. Sauté these for about 3-4 minutes until they soften a bit. This step adds great flavor to your dish. Now, return the roast to the pot. Pour the reserved marinade over it and add chopped green onions. Bring the pot to a boil. Cover it with a lid or foil. Transfer the pot to a preheated oven at 300°F (150°C). Cook for about 3-4 hours. The roast should become fork-tender by the end. Once the roast is done, take it out of the oven and let it rest for 10-15 minutes. This resting time helps keep the meat juicy. Slice the roast and serve it with the veggies. Drizzle the sauce over the top. For a pretty finish, sprinkle with sesame seeds and extra green onions. Enjoy your flavorful Korean pot roast! Marinating is key to great flavor. Use a large resealable bag or dish. Pour the marinade over the beef and seal it tightly. Let it sit in the fridge for at least 4 hours. For the best taste, marinate overnight. This allows the meat to soak up all the flavors. Searing the roast adds a nice crust. Heat oil in your pot on medium-high heat. Remove the roast from the marinade and pat it dry. Season it with salt and pepper. Sear each side for about 4-5 minutes. This step creates a flavorful outer layer. To make sure your roast is fork-tender, use a low and slow cooking method. Cook it in the oven at 300°F (150°C) for 3-4 hours. Keep it covered to lock in moisture. Check for tenderness after the time is up. It should easily pull apart with a fork. For a beautiful presentation, slice the pot roast on a platter. Surround it with colorful veggies. Garnish with fresh green onions and sesame seeds. This adds color and texture to your dish. An appealing plate makes the meal even more enjoyable. Pro Tips Marinate Longer for More Flavor: For the best flavor, marinate the beef chuck roast overnight. This allows the spices and sauce to deeply penetrate the meat, resulting in a richer taste. Rest the Meat: After cooking, let the roast rest for 10-15 minutes before slicing. This helps the juices redistribute, ensuring a moist and tender result. Customize the Heat: Adjust the amount of gochugaru based on your heat preference. You can start with less and add more to taste if you prefer a spicier dish. Use Leftover Marinade: Don't discard the marinade after cooking! Reduce it on the stovetop to create a flavorful sauce to drizzle over the sliced roast and vegetables. {{image_2}} You can easily spice up your Korean pot roast. Just add more gochugaru. Start with an extra tablespoon for a nice kick. If you love heat, try two extra tablespoons. The red pepper flakes will give a bold flavor and a warming sensation. This change makes the dish exciting for those who enjoy spicy food. Feel free to add more veggies to your pot roast. You can include mushrooms, bell peppers, or zucchini. These will add color and nutrients to your meal. Just chop them into chunks and add them with the carrots and onions. This way, you'll create a more balanced dish that tastes great. If you want to try a different cut of meat, go for brisket or short ribs. These cuts bring their own rich flavors to the dish. They may take a bit longer to cook, but the result is worth it. Searing these cuts still works well, just like with the chuck roast. Experiment with what you like best! To store leftover Korean pot roast, let it cool down first. Place the roast in an airtight container. Add any leftover vegetables and sauce to the container. Seal it well to keep air out. Store it in the fridge for up to three days. Make sure to label it with the date for easy tracking. If you want to keep it longer, freezing is a great option. Cut the roast into smaller pieces for easier thawing. Wrap each piece tightly in plastic wrap. Then, place the wrapped pieces in a freezer bag. Remove as much air as possible before sealing. You can freeze it for up to three months. When you’re ready to eat, just thaw it overnight in the fridge. Reheating Korean pot roast is simple. You can use the oven, stovetop, or microwave. For the oven, preheat it to 350°F (175°C). Place the roast in an oven-safe dish and cover it with foil. Heat for about 20-30 minutes, or until warmed through. On the stovetop, use a skillet with a bit of broth or water to keep it moist. Heat on low and stir often. If using the microwave, slice the roast and place it in a microwave-safe dish. Cover it and heat in short intervals, stirring in between, until hot. Yes, you can. To make it in a slow cooker, sear the beef first. Then, place it in the slow cooker with the marinade and veggies. Cook on low for 6-8 hours. This will give you a tender roast with rich flavors. You can marinate the beef for at least 4 hours. For the best taste, try marinating it overnight. This allows the flavors to soak in deeply. You can serve Korean Pot Roast with rice or noodles. Steamed veggies also pair well. For a crunchy side, try pickled vegetables. Each adds a nice touch to your meal. Yes, you can use other cuts. Brisket and round roast work well too. Just remember that cooking times may change. Always check for tenderness. Not really. The dish has some heat from gochugaru, but it’s mild. If you like more spice, add extra gochugaru to the marinade. This will give you a bolder flavor. You now have all the key steps to make a delicious Korean pot roast. We discussed the main ingredients, seasonings, and garnishes. I laid out clear instructions for marinating, searing, and cooking. I shared helpful tips for perfecting your dish. Plus, I covered fun variations and storage methods. As you create this meal, remember to enjoy the process. Food brings people together. This dish not only tastes great but also offers warmth and comfort. Happy cooking!

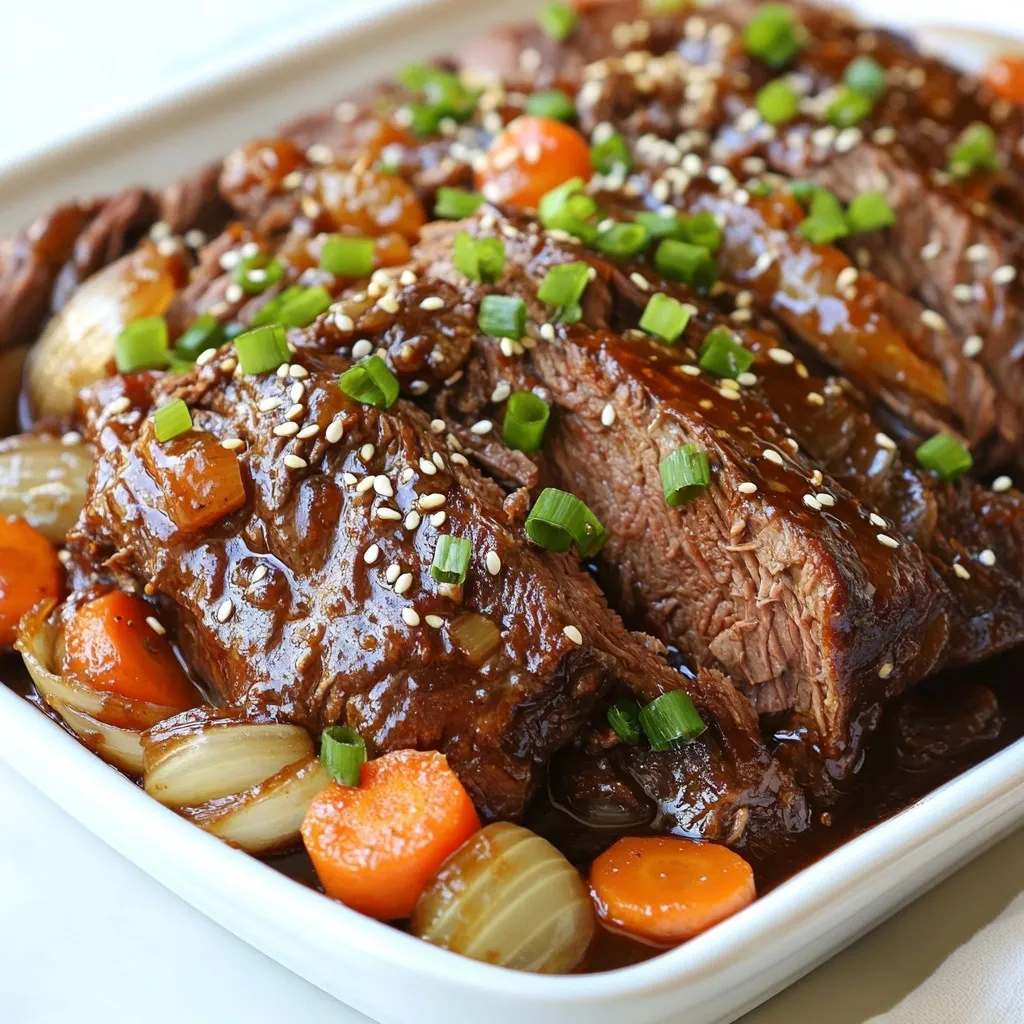
Are you ready to savor the rich flavors of Korean Pot Roast? This tender, juicy dish combines sweet, savory, and spicy notes that will satisfy your taste buds. I’ll guide …

Read more

Categories Dinner
Older posts
Newer posts
← Previous Page1 … Page117 Page118 Page119 … Page122 Next →

STIRRED RECIPES

Where every dish begins with a stir! 🍲✨

PAGES

Home About Contact Privacy Policy Terms & Conditions Cookie Policy GDPR Policy Copyright Policy Disclaimer

CATEGORIES

Appetizers Desserts Salads Breakfast Dinner

Contact

  • Pinterest
  • Mail
Copyright © 2026 Stirred Recipes. All rights reserved.