Skip to content
Stirred Recipes
  • Home
  • Appetizers
  • Desserts
  • Salads
  • Breakfast
  • Dinner
  • Privacy Policy
  • Contact
  • About

Chef Luca

Savory Chicken Pot Pie Pasta Simple and Comforting Dish

January 13, 2026May 21, 2025 by Chef Luca
To make Chicken Pot Pie Pasta, you need these key items: - 8 oz pasta (fusilli or penne) - 2 tablespoons olive oil - 1 onion, diced - 2 carrots, diced - 2 celery stalks, diced - 2 cloves garlic, minced - 2 cups cooked chicken, shredded - 1 cup frozen peas - 3 cups chicken broth - 1 cup heavy cream - 1 teaspoon dried thyme - 1 teaspoon dried rosemary - Salt and pepper to taste - 1 cup shredded cheddar cheese - Fresh parsley for garnish Each ingredient plays a role. The pasta forms the base. The chicken adds protein. The veggies give flavor and crunch. Herbs like thyme and rosemary bring warmth. The heavy cream makes the dish rich and creamy. You can tweak the recipe with these options: - Mushrooms for earthy flavor - Corn for sweetness - A splash of white wine for depth - Different herbs like basil or oregano Feel free to mix in your favorites. This way, you can make the dish your own. Here’s what you need to make this dish: - Large pot for boiling pasta - Large skillet for cooking veggies and chicken - Wooden spoon for stirring - Measuring cups and spoons for accuracy - Knife and cutting board for dicing Having the right tools makes cooking easier and more fun. You will enjoy every step! {{ingredient_image_1}} Start by boiling salted water in a large pot. Add 8 oz of pasta like fusilli or penne. Cook it according to the package instructions. This usually takes about 8-10 minutes. Once it's ready, drain the pasta and set it aside. You want it al dente for the best texture later. In the same pot, heat 2 tablespoons of olive oil over medium heat. Add 1 diced onion, 2 diced carrots, and 2 diced celery stalks. Cook these veggies for about 5 minutes until they soften. Then, stir in 2 minced garlic cloves and cook for one more minute. This will fill your kitchen with a wonderful aroma. Next, add 2 cups of shredded cooked chicken to the pot. Mix it all together. Pour in 3 cups of chicken broth and bring it to a simmer. Now, lower the heat a bit. Stir in 1 cup of heavy cream, 1 teaspoon of dried thyme, and 1 teaspoon of dried rosemary. Add salt and pepper to taste. Let this mix simmer for 5-7 minutes. It should thicken slightly during this time. After that, add your cooked pasta and 1 cup of frozen peas. Stir everything together until well mixed and heated through. Finally, take it off the heat and mix in 1 cup of shredded cheddar cheese. This will make the dish creamy and rich. Top it off with fresh parsley for a burst of color and flavor before serving. I love using fusilli or penne for this dish. They hold the creamy sauce well. Fusilli twists grab every bit of flavor. Penne's shape lets you enjoy the sauce in each bite. You can also try macaroni for a fun twist. Just make sure to cook the pasta until al dente. This way, it won't get mushy when mixed with the sauce. To achieve a creamy sauce, start with heavy cream. It gives richness and smoothness. Add it slowly to the chicken broth while stirring. This helps blend the flavors. Let the sauce simmer gently to thicken. If it’s too thick, add a splash of chicken broth. If it’s too thin, let it simmer longer. The key is patience and gentle heat. Seasoning makes a big difference in this dish. Use dried thyme and rosemary for a warm, earthy taste. A pinch of salt and pepper balances the flavors. Taste as you go, and adjust to your liking. Fresh parsley adds a nice touch at the end. It brings freshness and color to the dish. Don’t skip these steps; they make your meal shine! Pro Tips Cook Pasta Al Dente: Cooking the pasta slightly less than the package directions will ensure it stays firm when mixed with the sauce. Use Rotisserie Chicken: For a quicker meal, opt for store-bought rotisserie chicken to save time on cooking and shredding. Season Wisely: Adjust the salt and pepper after adding the cream, as the cheese will also add saltiness to the dish. Add Fresh Herbs: For a burst of flavor, consider adding fresh thyme or parsley just before serving to enhance the dish's aroma. {{image_2}} You can easily make this dish gluten-free. Just swap regular pasta for gluten-free pasta. Look for pasta made from rice or quinoa. These options cook well and taste great. Follow the same steps in the recipe. The sauce remains rich and creamy. This change makes the dish safe for those with gluten allergies. To make a vegetarian version, leave out the chicken. You can add more veggies instead. Try mushrooms, zucchini, or bell peppers for flavor. Tofu can also work well for protein. Use vegetable broth instead of chicken broth. The creamy sauce and spices still bring comfort to this dish. Cheese adds depth to your Chicken Pot Pie Pasta. While cheddar is a classic choice, you can try others. Mozzarella gives a stretchy, milky taste. Gruyère adds a nutty, rich flavor. For a kick, use pepper jack cheese. Mixing cheeses can create a unique flavor profile. Just remember to melt the cheese well for creaminess. Store your leftover Chicken Pot Pie Pasta in an airtight container. Let it cool first. Place it in the fridge for up to three days. If you want to keep it longer, consider freezing it. To reheat, use a microwave-safe dish. Cover the dish with a lid or a damp paper towel. Heat in the microwave for one to two minutes. Stir halfway through to ensure even heating. You can also reheat on the stove over low heat. Add a splash of chicken broth or cream to keep it creamy. To freeze, let the pasta cool completely first. Portion it into freezer-safe bags. Remove as much air as possible before sealing. It will last in the freezer for up to three months. When ready to eat, thaw in the fridge overnight, then reheat as described above. Yes, you can make Chicken Pot Pie Pasta ahead. Cook the pasta and sauce as usual. Let it cool down before storing it in a container. Keep it in the fridge for up to two days. When you are ready to eat, reheat it on the stove. Add a splash of water or broth to help with the sauce consistency. If you want a lighter option, use half-and-half. You can also use whole milk mixed with a little flour. This mix gives a nice creaminess. For a dairy-free choice, try coconut cream or almond milk. Just note that the flavor may change a bit. To make more servings, simply double or triple the ingredients. Use a larger pot to mix everything. Make sure to keep an eye on the cooking times. You want the pasta to be cooked just right and the sauce thick enough. This way, everyone gets a hearty portion of Chicken Pot Pie Pasta! This chicken pot pie pasta combines comfort with ease. We covered essential and optional ingredients, along with useful equipment to get started. Step-by-step instructions helped you prepare the dish perfectly. Tips on pasta types and sauce consistency boost your cooking skills. Variations let you customize for dietary needs. Finally, we shared storage tips for leftovers and answers to common questions. With these insights, you can create a satisfying meal once or many times! Enjoy your cooking adventure!

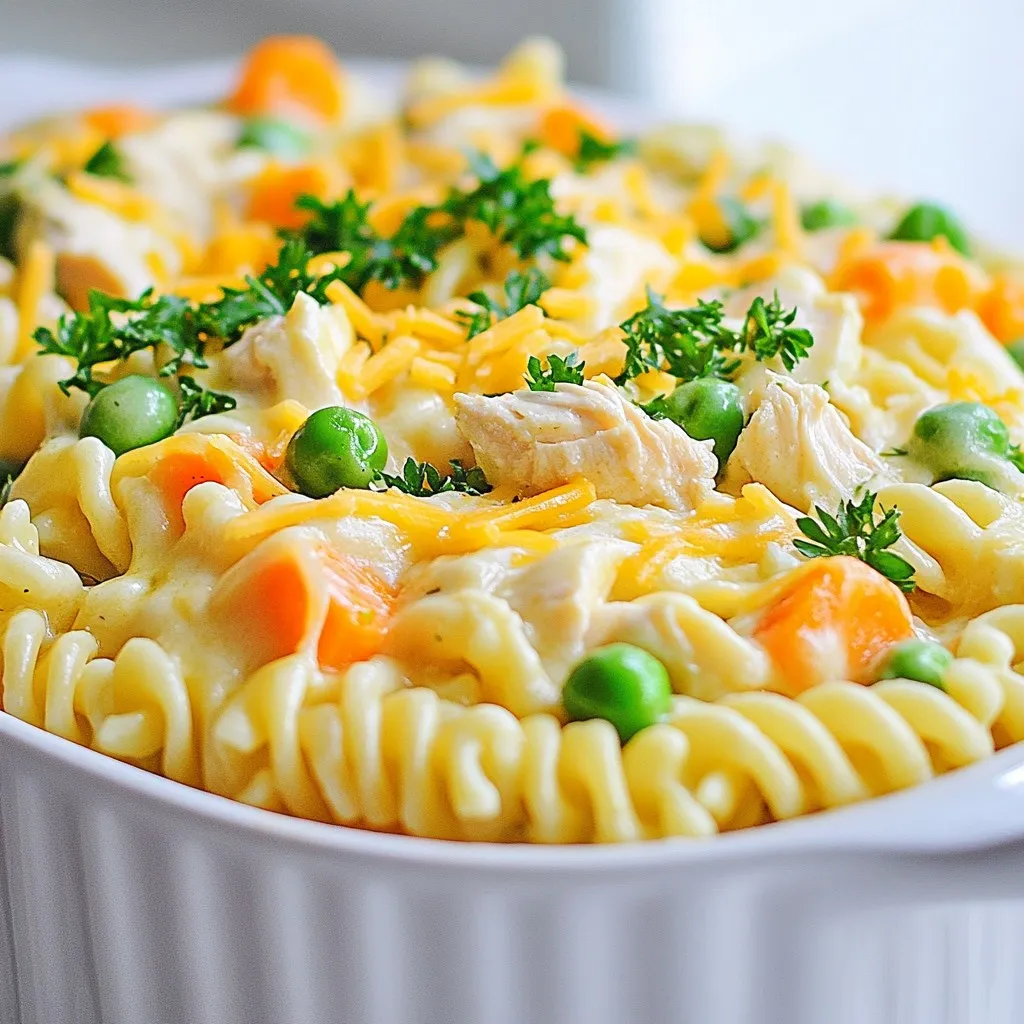
Looking for a simple and warm dish that brings comfort with every bite? I’ve got just the thing: Chicken Pot Pie Pasta! This recipe combines the classic flavors of your …

Read more

Categories Dinner

Creamy Baked Mac & Cheese Delightful Cheesy Dish

January 4, 2026May 18, 2025 by Chef Luca
- 8 oz elbow macaroni - 2 cups sharp cheddar cheese, shredded - 1 cup mozzarella cheese, shredded - 1/2 cup cream cheese, softened - 2 cups whole milk - 1/4 cup unsalted butter - 1/4 cup all-purpose flour - 1 teaspoon garlic powder - 1 teaspoon onion powder - 1/2 teaspoon paprika - Salt and pepper to taste - 1/2 cup breadcrumbs (for topping) - 1 tablespoon fresh parsley, chopped (for garnish) - 9x13 inch baking dish - Large saucepan - Whisk - Cooking pot The ingredients for creamy baked mac and cheese create a rich, cheesy dish you’ll love. The elbow macaroni serves as the perfect base. Sharp cheddar cheese adds a strong flavor. Mozzarella cheese brings creaminess and stretch, while cream cheese ties it all together. You need whole milk to create a smooth sauce. Butter and flour make a roux, which thickens the sauce. The garlic and onion powders give a nice savory taste. Paprika adds a hint of warmth and color. Salt and pepper balance the flavors. For texture, breadcrumbs on top create a crispy finish. Chopped parsley makes for a lovely garnish. Make sure you have a large saucepan for cooking. A whisk helps blend the ingredients smoothly. The 9x13 inch baking dish fits everything perfectly as it bakes. {{ingredient_image_1}} - Cook 8 oz elbow macaroni until al dente. - Drain and set aside. To cook the macaroni, bring a pot of salted water to a boil. Add the macaroni and stir. Follow the package instructions. Al dente means the pasta is firm but cooked. Drain it well to avoid sogginess. - Create a roux with 1/4 cup butter and 1/4 cup flour. - Whisk in 2 cups whole milk and cook until thickened. - Incorporate 1/2 cup cream cheese and spices. In a large saucepan, melt the butter over medium heat. Once melted, add the flour. Stir constantly for 1-2 minutes to make a roux. Slowly pour in the milk while whisking to keep it smooth. Cook this mixture for about 5-7 minutes until it thickens. Lower the heat and add the cream cheese. Stir until smooth. Add 1 teaspoon garlic powder, 1 teaspoon onion powder, 1/2 teaspoon paprika, and salt and pepper to taste for flavor. - Fold in 2 cups shredded cheddar and 1 cup shredded mozzarella. - Mix in the cooked macaroni. - Transfer to a greased 9x13 inch baking dish and top with 1/2 cup breadcrumbs. - Bake until golden and bubbly. Gently fold the cheddar and mozzarella into the cheese sauce until melted. Combine the macaroni with the cheese sauce, stirring well. Pour the mixture into the baking dish. Evenly sprinkle breadcrumbs on top for a nice crunch. Bake in a preheated oven at 350°F (175°C) for 20-25 minutes. Look for a golden brown top and bubbly edges. Enjoy your creamy baked mac and cheese! Using a mix of cheeses makes your mac and cheese extra creamy. I love using sharp cheddar and mozzarella together. Sharp cheddar gives a strong flavor, while mozzarella adds that meltiness we crave. Cream cheese also plays a key role. It brings a smooth texture that ties everything together. For milk, whole milk is best for creaminess. It adds a rich flavor that low-fat milk can't match. If you want a little twist, you can mix in some heavy cream. This will make your dish even richer and creamier. Bake your mac and cheese for 20 to 25 minutes. This gives the top a nice crisp while the inside stays gooey. You want that golden brown look on top. It shows your dish is done and ready. After removing it from the oven, let it cool for 5 to 10 minutes. This step helps the cheese set and makes serving easier. If you cut it too soon, it might be too runny. Pair your baked mac and cheese with a fresh salad. A simple green salad with a light vinaigrette works well. You can also serve it with garlic bread for a filling meal. Garnish your dish with fresh parsley. It adds a pop of color and freshness. For some extra fun, try adding crispy bacon bits or chopped green onions on top. Pro Tips Use Fresh Cheese: Freshly shredded cheese melts better and provides a creamier texture compared to pre-shredded cheese, which often contains anti-caking agents. Breadcrumb Variations: For added flavor, consider mixing herbs or spices into the breadcrumbs, or use panko for an extra crunchy topping. Make Ahead: You can prepare the mac and cheese, assemble it in the baking dish, cover it, and refrigerate it for up to 24 hours before baking. Just add a few extra minutes to the baking time if baking from cold. Experiment with Cheese: Feel free to mix in different types of cheese like Gruyère or fontina for a unique flavor twist. {{image_2}} You can mix different cheeses to make this dish unique. Try gouda or fontina for a twist. These cheeses melt well and add rich flavors. For a vegan option, use cashew cream and nutritional yeast. They give a cheesy taste without dairy. You can boost the flavor by adding proteins. Bacon, chicken, or shrimp work great. Just cook them first, then mix them in. To add nutrition, toss in some veggies like broccoli or spinach. They add color and taste, making the dish even better. Spices can make a big difference in your mac and cheese. Try adding a pinch of cayenne or black pepper for heat. You can also use herbs like thyme or basil for freshness. These simple changes can elevate your dish from good to great! To keep your creamy baked mac & cheese fresh, let it cool first. Once it cools, place it in an airtight container. I recommend using glass or BPA-free plastic containers. These help keep moisture in and prevent drying out. When you want to enjoy leftovers, the best method is the oven. Preheat your oven to 350°F (175°C). Place the mac & cheese in a baking dish. Add a splash of milk to keep it creamy. Cover it with foil to trap steam. Heat for about 20 minutes. If you use the microwave, heat in short bursts. Stir between heating to keep it moist. Yes, you can freeze baked mac & cheese! To freeze, let it cool fully. Then, transfer it into a freezer-safe container. Make sure to label it with the date. To thaw, move it to the fridge overnight. When ready to bake, preheat your oven to 350°F (175°C). Reheat as mentioned above for the best results. This way, you will taste the creamy goodness again! To keep your mac and cheese creamy, use enough cheese and milk. Start with a good amount of sharp cheddar and mozzarella. I suggest using whole milk for a rich flavor. Always stir your cheese sauce well. If it looks thick, add a splash of milk. This helps it stay smooth and creamy. Yes, you can make it ahead! Cook the macaroni and cheese sauce, then mix them together. Pour it into your baking dish and cover it. You can store it in the fridge for up to two days. When ready to bake, just pop it in the oven. Add a few extra minutes to the cooking time if it's cold from the fridge. If you need a pasta swap, try these options: - Fusilli - Penne - Shells These shapes work well and hold cheese nicely. You can even use gluten-free pasta if needed. Each choice gives your dish a fun twist! This blog post covered how to make creamy baked mac and cheese. We discussed the key ingredients, step-by-step instructions, and tips for the perfect dish. I shared ways to customize the recipe with different cheeses and add-ins. You can also learn how to store and reheat leftovers effectively. Baked mac and cheese is a classic comfort food. With the right ingredients and techniques, you can make it your own. Enjoy this dish with family and friends, and feel free to experiment with flavors!

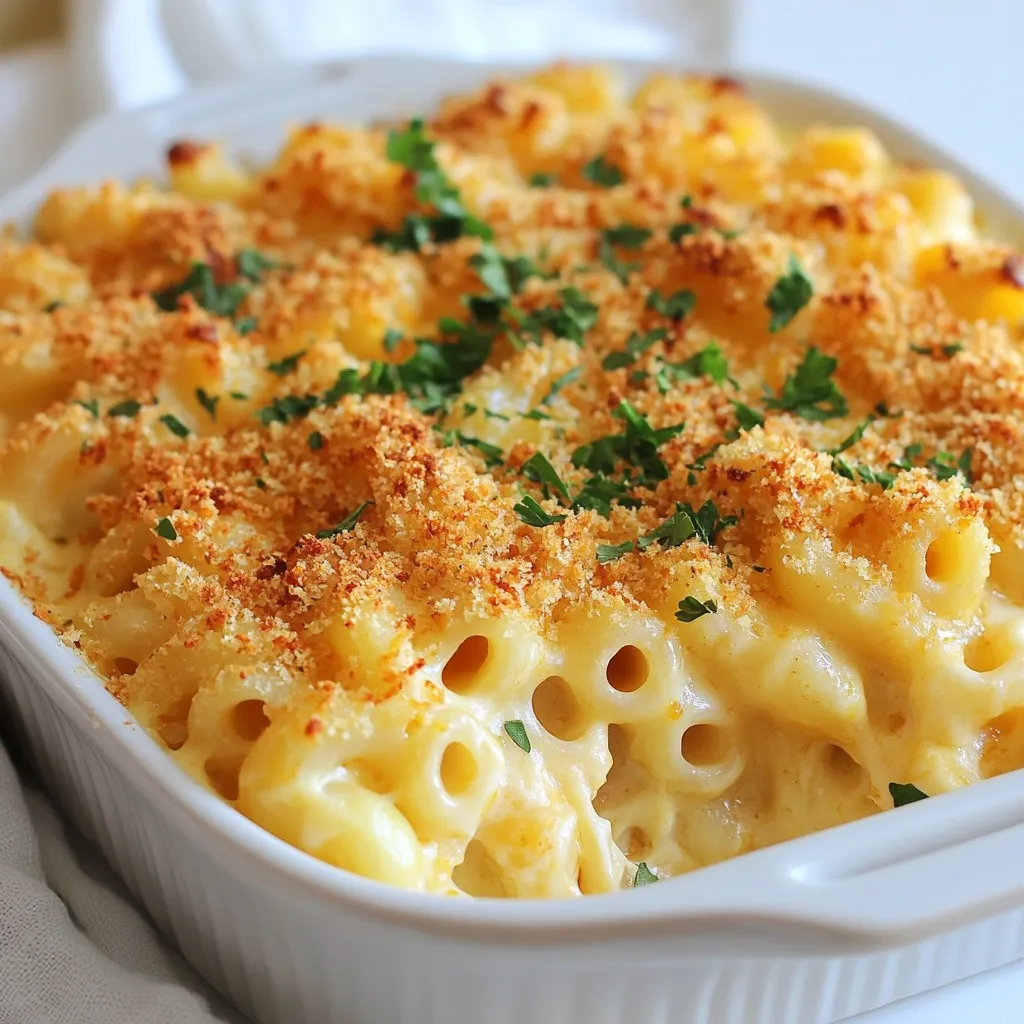
Get ready for the ultimate comfort food: Creamy Baked Mac & Cheese! This delightful cheesy dish will bring joy to your table. With a blend of sharp cheddar, mozzarella, and …

Read more

Categories Dinner

Mini Baked Chicken Tacos Flavorful and Easy Recipe

January 5, 2026May 17, 2025 by Chef Luca
- 1 pound ground chicken - 12 small corn tortillas - 1 cup shredded cheddar cheese - 1 cup shredded lettuce - 1 cup diced tomatoes - ½ cup sour cream The main ingredients for mini baked chicken tacos are simple yet flavorful. The ground chicken serves as the base, and I love its versatility. You can season it to your taste. Corn tortillas are perfect for these mini tacos. They hold the filling well and add a nice crunch. The cheese melts beautifully, adding richness. Fresh lettuce and diced tomatoes provide a crisp contrast to the hearty filling. - 1 tablespoon olive oil - 1 small onion, finely chopped - 2 cloves garlic, minced - 1 teaspoon ground cumin - 1 teaspoon chili powder - Salt and pepper to taste For seasoning, I use olive oil to sauté the onion and garlic. This step builds a strong flavor in the chicken. Ground cumin and chili powder give the filling its warmth. I add salt and pepper to balance the taste. These spices make the chicken delicious and fragrant. You can adjust them based on your own preferences. - Fresh cilantro for garnish I like to finish the tacos with fresh cilantro. It adds a burst of color and flavor. You can also use sour cream for creaminess. Adding some extra vegetables, like avocado or bell peppers, can make them even better. These garnishes enhance the look and taste of your mini tacos. Enjoying them fresh adds to the fun! {{ingredient_image_1}} 1. Sautéing onions and garlic Start by heating olive oil in a large skillet over medium heat. Add finely chopped onion and minced garlic. Sauté until the onion turns translucent, about 3-4 minutes. This step builds a flavorful base for your chicken. 2. Cooking ground chicken with spices Next, add one pound of ground chicken to the skillet. Use a spatula to break it apart. Cook until the chicken is browned and no longer pink, which takes about 5-7 minutes. Stir in one teaspoon of ground cumin, one teaspoon of chili powder, salt, and pepper to taste. Mix well to blend the spices into the chicken evenly. Remove from heat and let it cool slightly. 1. Softening tortillas While the chicken cools, wrap twelve small corn tortillas in a damp paper towel. Microwave them for about 30 seconds. This softens the tortillas, making them easier to shape. 2. Forming tortilla cups Lightly grease a muffin tin to prevent sticking. Take one softened tortilla and place it in a muffin cup. Gently press it down to form a taco shell shape. Repeat this for the remaining tortillas. 1. Filling tortilla cups Spoon the chicken mixture into each tortilla cup. Fill them generously, making sure each cup has enough chicken. Next, sprinkle shredded cheddar cheese on top of the chicken in each cup. 2. Baking until crispy and golden Preheat your oven to 375°F (190°C). Place the muffin tin in the oven and bake for about 15-20 minutes. Keep an eye on them until the tortillas are crispy and the cheese is melted and bubbly. Once done, remove them from the oven and let them cool for a few minutes. Carefully lift the taco cups out from the muffin tin. To enhance the flavor, always season the chicken while cooking. Use ground cumin and chili powder for a tasty kick. Fresh herbs like cilantro can add a burst of freshness at the end. To avoid dryness, do not overcook the chicken. Cook it just until it turns brown and is no longer pink. This keeps the filling juicy and tender. Forming taco cups can be tricky, but it’s easy once you know how. Use a greased muffin tin to hold the tortillas in shape. Don't forget to warm the tortillas in a damp paper towel. This makes them soft and easy to mold. To ensure crispy tortillas, bake them at 375°F for 15-20 minutes. Check to see they are golden and crunchy. For the best side dishes, think fresh and colorful. Serve with a simple salad or some guacamole for a nice contrast. You can get creative with serving. Try adding a spicy salsa or a zesty lime wedge to each plate. This adds fun and flavor for your guests. Pro Tips Use Fresh Ingredients: Fresh vegetables and herbs enhance the flavor of your tacos significantly. Opt for ripe tomatoes and fresh cilantro for the best taste. Customize the Spices: Feel free to adjust the spice levels by adding more chili powder or even a few jalapeños for a kick. Tailor it to your heat preference! Make Ahead: You can prepare the chicken mixture in advance and store it in the fridge. Just assemble and bake the taco cups when you're ready to serve. Experiment with Fillings: Experiment with different proteins like beef or turkey, or make it vegetarian by using black beans or lentils for a delicious twist. {{image_2}} You can easily swap the ground chicken for other proteins. Ground turkey works great and has a similar taste. If you want beef, try using lean ground beef. Both options give your tacos a different flair. For a vegetarian twist, consider using black beans or lentils. These options are hearty and full of flavor. You can also add chopped veggies like bell peppers or zucchini. They add crunch and nutrition. Changing the spices can give your tacos a fresh taste. For a zestier option, use taco seasoning instead of cumin and chili powder. You can also try smoked paprika for a smoky flavor. Experiment with different spice blends to find what you love. Toppings can change everything! Instead of just cheese, add sliced jalapeños for heat. Avocado or guacamole adds creaminess. You can also mix in corn or black olives for extra texture. If you need gluten-free options, use corn tortillas. They are naturally gluten-free and perfect for this recipe. Check labels to ensure your tortillas meet gluten-free standards. For a low-carb alternative, use lettuce wraps instead of tortillas. This swap cuts carbs while still giving you that taco feel. You can also use cauliflower tortillas, which are tasty and healthy. To keep your mini baked chicken tacos fresh, store them properly. You can keep them in the fridge or freezer. - Refrigerator Tips: Place tacos in an airtight container. They last about 3 days. - Freezer Tips: Wrap tacos in plastic wrap, then foil. They can last up to 2 months. For best results, use glass or plastic containers with tight lids. They help keep the tacos moist and tasty. When it’s time to eat leftovers, reheating is key to keeping the texture nice. - Best Methods: The oven is best for even heating. Preheat it to 350°F (175°C) and bake for about 10-15 minutes. This keeps the tortillas crisp. - Microwave Method: You can use a microwave, but it might make the tortillas soft. Heat for 30 seconds, then check if they are warm. Knowing how long tacos last helps you avoid waste. - Fridge Life: In the fridge, they last about 3 days. - Freezer Life: In the freezer, they last up to 2 months. Signs of Spoilage: Check for changes in smell or color. If the tacos look or smell off, it’s best to throw them away. To make mini baked chicken tacos, follow these steps: 1. Preheat your oven to 375°F (190°C). 2. Heat a tablespoon of olive oil in a large skillet over medium heat. 3. Add one small finely chopped onion and two minced garlic cloves. Sauté until the onion looks clear. 4. Add one pound of ground chicken. Cook until it's browned, about 5-7 minutes. 5. Mix in one teaspoon of ground cumin, one teaspoon of chili powder, salt, and pepper. Stir well and remove from heat. 6. Wrap 12 small corn tortillas in a damp paper towel. Microwave them for 30 seconds to soften. 7. Grease a muffin tin. Place each tortilla in a cup, pressing down to form a shell. 8. Fill each shell with the chicken mixture and top with one cup of shredded cheddar cheese. 9. Bake for 15-20 minutes, until the tortillas are crispy and cheese is bubbly. 10. Let cool for a few minutes before lifting them out of the muffin tin. Yes, you can use various types of tortillas. Here are some options: - Flour tortillas: These are softer and great for a different texture. - Whole wheat tortillas: A healthier choice that adds fiber. - Lettuce wraps: Perfect for a low-carb option. - Baked tortilla chips: For a crunchy twist. Each type changes the flavor and crunch, allowing you to customize. Mini baked chicken tacos pair well with many sides and drinks. Here are some ideas: - Side dishes: Serve with Mexican rice, refried beans, or corn salad. - Salads: A fresh cilantro lime salad adds brightness. - Drinks: Enjoy with a cold soda, iced tea, or a fruity mocktail. These options enhance your meal and make it even more enjoyable. In this post, we explored making mini baked chicken tacos, starting with essential ingredients. I shared tips on prepping the chicken filling, forming the tortilla cups, and ensuring everything bakes to a crisp. Techniques for enhancing flavor and keeping the tortillas crispy were also covered. As you create your tacos, feel free to experiment with different proteins and toppings to match your taste. Enjoy these fun bites with your favorite sides. Happy cooking!

Looking for a fun and tasty meal? Mini baked chicken tacos are your answer! They’re easy to make and packed with flavor. In this recipe, I’ll show you how to …

Read more

Categories Dinner

Pumpkin Cookies with Cream Cheese Frosting Delight

November 11, 2025May 15, 2025 by Chef Luca
To make these delightful pumpkin cookies, you need the following items: - 1 cup pumpkin puree - 1/2 cup granulated sugar - 1/2 cup brown sugar, packed - 1/2 cup unsalted butter, softened - 1 large egg - 1 teaspoon vanilla extract - 2 cups all-purpose flour - 1 teaspoon baking soda - 1 teaspoon baking powder - 1 teaspoon ground cinnamon - 1/2 teaspoon ground nutmeg - 1/4 teaspoon ground ginger - 1/4 teaspoon salt - 1 cup cream cheese, softened - 1/4 cup powdered sugar - 1 tablespoon milk You can make some swaps in this recipe. For pumpkin puree, you can use butternut squash puree. If you want a dairy-free option, try using coconut oil instead of butter. For the frosting, you can use a dairy-free cream cheese. You can also swap powdered sugar for a sugar alternative if you prefer. The quality of your ingredients matters. Fresh pumpkin puree gives the best flavor. Use real butter for a rich taste. Good quality spices add warmth and depth. Using high-quality cream cheese makes the frosting creamy and smooth. If you want the best cookies, don’t skimp on these ingredients. {{ingredient_image_1}} Start by preheating your oven to 350°F (175°C). This step is key for even baking. Next, grab a baking sheet and line it with parchment paper. This helps keep the cookies from sticking. In a large mixing bowl, combine 1/2 cup of softened unsalted butter, 1/2 cup of granulated sugar, and 1/2 cup of brown sugar. Use a mixer to beat these together until creamy. Then, add 1 cup of pumpkin puree, 1 large egg, and 1 teaspoon of vanilla extract. Mix until everything is well blended. In a separate bowl, whisk together 2 cups of all-purpose flour, 1 teaspoon of baking soda, 1 teaspoon of baking powder, 1 teaspoon of ground cinnamon, 1/2 teaspoon of ground nutmeg, 1/4 teaspoon of ground ginger, and 1/4 teaspoon of salt. Gradually add this dry mix to your wet ingredients. Mix just until combined, being careful not to overmix. Now, drop tablespoonfuls of the cookie dough onto your prepared baking sheet. Space them about 2 inches apart and flatten them slightly with a spoon. Bake the cookies for 12-15 minutes. The edges should be lightly golden. The centers will look soft but will firm up as they cool. Keep an eye on them to avoid overbaking. While the cookies cool, it's time to make the frosting. In a medium bowl, beat 1 cup of softened cream cheese until smooth. Add 1/4 cup of powdered sugar and 1 tablespoon of milk. Mix until you reach a creamy consistency. Adjust with more milk or powdered sugar if needed. Once the cookies are cool, spread a generous dollop of frosting on each one. For a lovely finish, sprinkle a pinch of cinnamon or pumpkin spice on top. To make soft and chewy pumpkin cookies, you need the right balance of wet and dry ingredients. Use one cup of pumpkin puree. This adds moisture and flavor. Don’t overmix the dough when you combine wet and dry ingredients. Overmixing can make cookies tough. One common mistake is using too much flour. Scoop flour directly from the bag. Then, level it off with a knife. Don’t pack it down into the cup. Another mistake is baking the cookies too long. Check them at 12 minutes. The edges should be golden, and the middle will look soft. Spices make pumpkin cookies extra special. Use ground cinnamon, nutmeg, and ginger. Each spice adds warmth and depth. For a twist, add a pinch of allspice or cloves. You can also sprinkle some cinnamon on top of the frosting for added flavor. Pro Tips Use Fresh Pumpkin Puree: For the best flavor, consider using fresh pumpkin puree instead of canned. Roast a pumpkin and blend until smooth for a rich, natural taste. Chill the Dough: If the dough feels too sticky to handle, chill it in the refrigerator for 30 minutes. This helps the cookies hold their shape while baking. Frosting Variations: Experiment with the frosting by adding flavors like maple syrup or vanilla bean to create a unique twist on the classic cream cheese frosting. Storage Tips: Store cookies in an airtight container at room temperature for up to a week. For longer storage, freeze the unfrosted cookies and frost them when ready to serve. {{image_2}} You can make gluten-free pumpkin cookies easily. Just swap the all-purpose flour with a gluten-free blend. Look for one that works well in baking. This blend should have a mix of flours and starches. Make sure your baking soda and powder are also gluten-free. The taste stays rich and similar to the classic version. To make these cookies vegan, replace the egg with a flax egg. Mix one tablespoon of ground flaxseed with three tablespoons of water. Let it sit for a few minutes until it thickens. Use vegan butter instead of regular butter. For the frosting, use non-dairy cream cheese. This makes a tasty treat for everyone. While cream cheese frosting is a star, you can try other toppings too. For a lighter option, whip up some coconut cream. Just chill a can of coconut milk and whip the solid part. You can also use a simple glaze made of powdered sugar and milk. Add a splash of vanilla or maple for extra flavor. Each option gives a unique twist to your pumpkin cookies. Store your pumpkin cookies in an airtight container. This keeps them fresh. You can stack them with sheets of parchment paper in between. This prevents them from sticking together. Keep the container at room temperature. They will stay soft and tasty this way. To freeze your pumpkin cookies, first cool them completely. Place them in a single layer on a baking sheet. Freeze them for about an hour. Then, transfer them to a freezer bag. Remove as much air as possible. Label the bag with the date. You can freeze them for up to three months. Pumpkin cookies can last about a week at room temperature. If stored well, they stay soft and yummy. For frosting, keep it in the fridge. It lasts about a week too. If you freeze the cookies with frosting, eat them within a month for best flavor. You can use butternut squash puree instead of pumpkin puree. It has a similar taste and texture. Sweet potato puree is another great choice. Both will give your cookies a lovely flavor. Look for a light golden edge on your cookies. The centers might seem soft but will firm up as they cool. A toothpick inserted in the center should come out clean or with a few moist crumbs. Yes, you can make the cream cheese frosting in advance. Store it in an airtight container in the fridge for up to three days. Just stir it again before using to get it smooth. Pumpkin cookies are usually cakey, thanks to the pumpkin puree. They have a soft, moist texture that feels light. If you want a chewier cookie, try using less flour and bake them a bit longer. Absolutely! Adding chocolate chips brings a nice sweetness to the cookies. You can mix in about one cup of chocolate chips into the dough before baking. It adds a fun twist to the flavor. This blog post provided a complete guide on making pumpkin cookies. We discussed important ingredients, key substitutions, and why quality matters. You learned step-by-step instructions for mixing, baking, and frosting. I shared tips to avoid common mistakes for the best texture. We covered fun variations, storage methods, and answered your top FAQs. Now, you have all the tools to create delicious pumpkin cookies. Enjoy baking and sharing them with friends and family!

Get ready to indulge in the rich flavors of fall with my delicious Pumpkin Cookies with Cream Cheese Frosting! These soft, spiced cookies are not just easy to make; they’re …

Read more

Categories Desserts

Taco Stuffed Peppers Flavorful and Easy Dinner Recipe

January 13, 2026May 11, 2025 by Chef Luca
To make delicious taco stuffed peppers, gather these simple ingredients: - 4 large bell peppers (any color) - 1 lb ground turkey or beef - 1 cup cooked rice (white or brown) - 1 can (15 oz) black beans, rinsed and drained - 1 cup corn (fresh, frozen, or canned) - 1 packet taco seasoning (or homemade) - 1 cup salsa - 1 cup shredded cheese (cheddar, Monterey Jack, or your choice) - 2 tablespoons olive oil - Salt and pepper to taste - Fresh cilantro or parsley for garnish These ingredients come together to create a meal that is tasty and filling. The bell peppers add sweetness and crunch. The ground turkey or beef gives protein, while the beans and corn add fiber and flavor. Taco seasoning brings that classic taste we all love. The cheese melts into a creamy topping that makes each bite delightful. You can switch up the cheese to suit your taste. Using fresh herbs like cilantro or parsley makes the dish look nice and adds a fresh flavor. Don't worry if you want to make it your own. You can mix in different veggies or spices. Just be sure to have fun with it! {{ingredient_image_1}} - Preheat your oven to 375°F (190°C). - Take your bell peppers and cut off the tops. Remove the seeds and membranes inside. - Drizzle the outside with olive oil. Sprinkle some salt and pepper for flavor. - Place peppers upright in a baking dish. - In a large skillet, brown 1 pound of ground turkey or beef over medium heat. - Break the meat apart as it cooks for about 5-7 minutes. Drain any extra fat. - Add 1 packet of taco seasoning, 1 cup of cooked rice, 1 can of rinsed black beans, and 1 cup of corn. - Mix well and cook for 3-4 more minutes until hot. - Spoon the meat mixture evenly into each bell pepper. Pack it tightly. - Pour the remaining 1 cup of salsa over the top of each filled pepper. - Cover the baking dish with foil. Bake for 25 minutes. - Remove the foil and sprinkle 1 cup of shredded cheese on top. - Return to the oven and bake uncovered for another 10 minutes, until the cheese is melted. These steps will help you create a delicious and fun meal. Enjoy your tasty taco stuffed peppers! You can make taco stuffed peppers your own. Here are some easy swaps: - Ground meat options: Use ground chicken, pork, or a mix of meats. - Vegetables: Add chopped onions, diced zucchini, or spinach for more nutrition. - Spices: Spice it up with cumin, paprika, or chili powder for extra kick. Choosing the right cheese can change the flavor. Here are some great picks: - Recommended types: Cheddar and Monterey Jack melt well and taste great. - Vegan cheese options: Try almond-based mozzarella or cashew cheese for a dairy-free delight. Meal prep helps save time. Here are some tips: - Preparation: You can stuff the peppers a day ahead. Just cover and refrigerate. - Reheating: Warm them in the oven at 350°F (175°C) for about 15 minutes. Pro Tips Choose Colorful Peppers: Select a variety of bell pepper colors to create a visually appealing dish that is also packed with different nutrients. Customize Your Filling: Feel free to get creative with the filling! Add diced tomatoes, jalapeños, or even some avocado for extra flavor and texture. Make Ahead: Prepare the stuffed peppers in advance and store them in the refrigerator. Bake them just before serving for a quick and easy meal. Experiment with Cheese: Try different types of cheese like pepper jack or feta to enhance the flavor profile of your taco stuffed peppers. {{image_2}} You can make taco stuffed peppers vegetarian easily. Instead of meat, use beans or lentils. Black beans work well for protein and flavor. You can also mix in chickpeas or lentils for a hearty bite. Add more veggies like zucchini or bell pepper chunks in the filling. This keeps it colorful and packed with nutrients. If you want a low-carb option, try cauliflower rice. It mimics cooked rice but has fewer carbs. You can also use zucchini. Spiralize or shred zucchini and mix it in with the filling. Both options keep the dish light and delicious without losing the taco taste. To boost flavor, try adding different sauces or spices. A splash of lime juice brightens up the dish. You can also add chipotle sauce for a smoky kick. Experiment with spices like cumin or paprika. Each twist adds a unique taste to the stuffed peppers. To store leftover taco stuffed peppers, let them cool first. Place them in an airtight container. You can keep them in the fridge for up to three days. If you want to keep them fresh, cover them tightly. This way, they won’t dry out or absorb other smells. Freezing stuffed peppers is easy. First, let them cool completely. Wrap each pepper in plastic wrap. Then, place them in a freezer bag. You can freeze them for up to three months. Just remember to label the bag with the date. This will help you keep track of how long they’ve been in there. When you’re ready to eat your stuffed peppers, there are a few ways to reheat them. You can use the oven, microwave, or stovetop. For the oven, preheat it to 350°F (175°C). Place the peppers in a baking dish and cover them with foil. Bake for about 20 minutes. For the microwave, heat them on high for about 2-3 minutes. If you use the stovetop, place them in a skillet with a lid and heat on low until warm. Enjoy your tasty meal! When picking bell peppers, look for large ones. They should be firm and bright. Avoid any that feel soft or have dark spots. Choose any color you like—red, yellow, or green. They all taste great. Yes, you can prepare taco stuffed peppers ahead of time. Stuff the peppers and cover them. Store them in the fridge for up to 24 hours. When you're ready to cook, just bake them as usual. Your stuffed peppers are done when they are tender. The cheese should be melted and bubbly. You can also check the filling's temperature. It should reach 165°F (74°C) for safety. You can serve taco stuffed peppers with a side salad or rice. Guacamole and sour cream are great toppings too. Chips and salsa make a fun snack on the side. Enjoy! Taco stuffed peppers are tasty, fun, and easy to make. You learned how to prepare the ingredients, cook the filling, and bake them perfectly. I shared tips for customizing and storing these stuffed peppers. Experiment with different meats, cheeses, or veggies to suit your taste. You can create a dish everyone will love. Remember to enjoy the process and make it your own! Happy cooking!

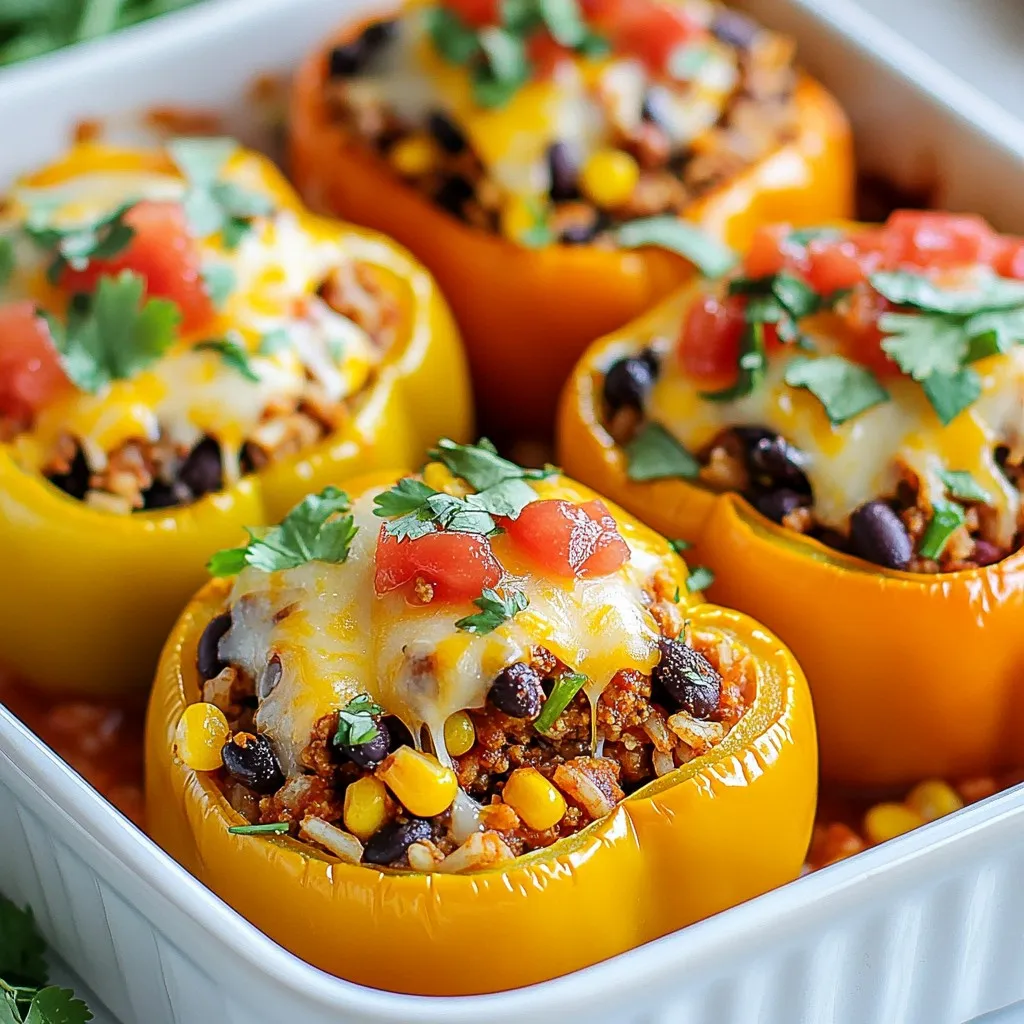
Looking for a fun and easy dinner idea? Taco stuffed peppers are your answer! This vibrant dish combines the flavors of tacos with healthy bell peppers. With simple ingredients and …

Read more

Categories Dinner

Oven Baked Chicken Parmesan Quick and Tasty Recipe

January 13, 2026May 11, 2025 by Chef Luca
- 4 boneless, skinless chicken breasts - 1 cup breadcrumbs (preferably Italian seasoned) - 2 cups marinara sauce (homemade or store-bought) - 2 cups shredded mozzarella cheese - 1 teaspoon garlic powder - 1 teaspoon dried oregano - Fresh basil leaves, for garnish - 2 eggs (for coating) - 1/2 cup grated Parmesan cheese - Salt and pepper, to taste For this recipe, I focus on fresh and simple items. The chicken breasts are the star. They come out juicy and tender. I like using Italian seasoned breadcrumbs. They add a nice flavor. Marinara sauce gives it a rich taste. I often use store-bought sauce, but homemade is great too! The cheese is key. I use shredded mozzarella for that gooey melt. A sprinkle of grated Parmesan on top adds a nice crunch. For seasoning, garlic powder and oregano bring warmth and depth. Fresh basil leaves are perfect for garnish. They smell amazing and add color. This list keeps the dish easy and tasty. It’s great for busy nights or family meals. Each ingredient plays a role in making this chicken Parmesan a hit. {{ingredient_image_1}} First, preheat your oven to 375°F (190°C). This step is key for even cooking. While the oven heats, season your chicken breasts. Use salt, pepper, garlic powder, and dried oregano. Rub the spices on both sides. This adds great flavor. Next, set up your dredging station. In a shallow bowl, place the two beaten eggs. This will help the coating stick. In another bowl, mix breadcrumbs with grated Parmesan cheese. This mixture gives the chicken a tasty crunch. Now, it’s time to coat the chicken. Dip each breast into the egg first. Let the extra egg drip off. Then, coat it well in the breadcrumb mixture. Press the coating on the chicken for even coverage. After that, place the coated chicken in the baking dish. Bake the chicken in the oven for 25-30 minutes. Check that it is cooked through. The coating should be golden brown and crispy. Once baked, take the chicken out of the oven. Spoon marinara sauce evenly over each piece. Then, sprinkle shredded mozzarella cheese on top. This will melt into a gooey layer of goodness. Return the chicken to the oven for another 10-12 minutes. Keep an eye on it. The cheese should be bubbly and golden. After baking, let the chicken rest for a few minutes before serving. This helps keep it juicy. To get a nice, even coating on your chicken, make sure to follow these steps: - Dredging: Dip each chicken breast in the beaten eggs first. Shake off the extra egg before coating it in the breadcrumb mix. This helps the crumbs stick. - Press Down: After coating in breadcrumbs, press down firmly to ensure they stick well. This gives a thicker, crunchy layer. - Spray Oil: Lightly spray the coated chicken with oil before baking. This helps achieve a crispy texture. Want to boost the flavor? Here are some great tips: - Herbs and Spices: Add more herbs like thyme or parsley to the breadcrumbs. You can also mix in some chili flakes for a kick. - Sauce Choice: Homemade marinara sauce tastes fresh and flavorful. It’s easy to make with just tomatoes, garlic, and herbs. Store-bought marinara is fine too, but look for high-quality brands without added sugar. Presentation matters! Here’s how to serve your dish: - Plating: Place the chicken on a large platter. Drizzle extra marinara sauce on top for color. Sprinkle more Parmesan and add fresh basil on top for a gourmet look. - Side Dishes: Pair it with a simple salad or garlic bread. Roasted veggies or pasta also make great sides. Enjoy! Pro Tips Use Panko Breadcrumbs: For an extra crispy coating, consider using panko breadcrumbs instead of regular breadcrumbs. They create a lighter and crunchier texture. Marinara Sauce Options: If you have time, try making your own marinara sauce for a fresher taste! Simple ingredients like tomatoes, garlic, and basil can elevate the dish. Let Chicken Rest: Allow the chicken to rest for a few minutes after baking. This helps the juices redistribute, keeping the chicken moist and flavorful. Cheese Variations: Feel free to mix different cheeses! Adding provolone or fontina cheese can give a unique flavor and creaminess to your chicken parmesan. {{image_2}} For a twist on the classic, you can change the breading. - Panko breadcrumbs add extra crunch. They are light and crisp. - Gluten-free options work great too. Use crushed cornflakes or gluten-free breadcrumbs. These changes keep the dish delicious and cater to different diets. Mix up the toppings to make your chicken parmesan unique. - Different cheese options can surprise your taste buds. Try provolone or gouda for a rich flavor. - Adding vegetables like spinach or bell peppers boosts nutrition. Layer them before the cheese for a colorful dish. These toppings can enhance both flavor and presentation, making your meal more exciting. The sauce can change the whole dish. - White sauce variations like alfredo can offer a creamy twist. It pairs well with the chicken. - Spicy marinara options can kick up the heat. Add red pepper flakes or fresh jalapeños for a fiery touch. Experimenting with sauces keeps every bite fresh and interesting. After you make Oven Baked Chicken Parmesan, let it cool. Place leftovers in an airtight container. Store it in the fridge for up to four days. To reheat, use the oven for best results. Preheat it to 350°F (175°C). Bake for about 20 minutes or until hot. You can freeze cooked chicken Parmesan. Wrap each piece in plastic wrap and then foil. Place them in a freezer bag. This helps prevent freezer burn. Thaw chicken in the fridge overnight before reheating. You can also use the microwave for quicker thawing, but it may change the texture. In the fridge, cooked chicken lasts about four days. If you freeze it, it can last up to three months. Look for signs of spoilage, like a bad smell or slimy texture. Discard any chicken that looks or smells off. Always trust your senses when it comes to food safety. Yes, you can use frozen chicken breasts. Just remember to thaw them first. To thaw, place the chicken in the fridge overnight. If you're short on time, you can also use the microwave. Cook them right after thawing to ensure safety. You can make this recipe healthier by using less cheese. Try using low-fat mozzarella and Parmesan. You can also bake without breading for fewer calories. Add more veggies, like spinach or zucchini, to boost nutrients. You can use several sauces in place of marinara. Try pesto, Alfredo, or even a homemade tomato sauce. If you want a kick, use a spicy marinara or salsa. Each option adds its unique flavor. To check if the chicken is cooked, use a meat thermometer. The internal temperature should reach 165°F (75°C). Also, the juices should run clear when you cut into it. Look for a golden brown coating, which is a good sign too. You now have all you need to make a delicious chicken dish. We covered the main ingredients, step-by-step instructions, and some handy tips and tricks. Remember to experiment with flavors and textures for a twist on the classic recipe. Storing leftovers correctly keeps your meal fresh longer. Don't hesitate to try variations or alternative ingredients to fit your taste. Enjoy every bite and share your culinary success. Let this meal impress your family and friends!

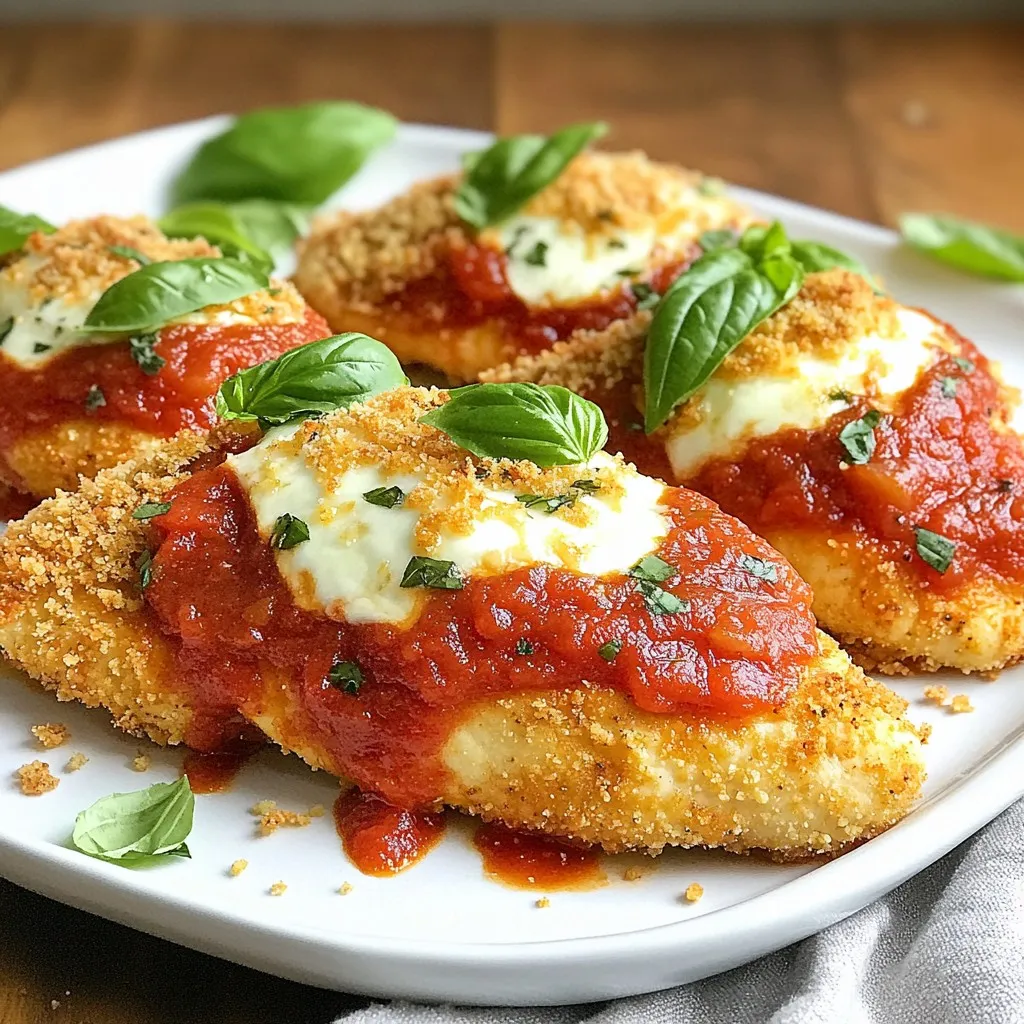
Welcome to my quick and tasty recipe for Oven Baked Chicken Parmesan! If you’re looking for a simple way to prepare a classic dish, you’re in the right place. This …

Read more

Categories Dinner

Air Fryer Chicken Mozzarella Wraps Irresistible Delight

January 7, 2026May 10, 2025 by Chef Luca
- 2 large flour tortillas - 1 cup cooked chicken, shredded - 1 cup fresh mozzarella cheese, shredded The main ingredients set the stage for this dish. Flour tortillas give a soft and chewy base. Shredded cooked chicken adds protein and heartiness. Fresh mozzarella cheese melts beautifully, creating a delightful texture. - 1 teaspoon garlic powder - 1 teaspoon Italian seasoning - 1/4 cup sun-dried tomatoes, chopped Flavor enhancers are key for taste. Garlic powder brings a savory punch. Italian seasoning adds herbs for warmth. Sun-dried tomatoes introduce a sweet and tangy twist that makes each bite special. - 1/2 cup fresh spinach, chopped - Salt and pepper to taste - Olive oil spray Optional add-ins can boost nutrition and flavor. Fresh spinach gives a nice color and adds vitamins. Salt and pepper balance flavors perfectly. A light spray of olive oil helps the wraps crisp up in the air fryer. {{ingredient_image_1}} - First, preheat the air fryer to 375°F (190°C). This step ensures that the wraps cook evenly. - In a large bowl, combine 1 cup of shredded chicken, 1 cup of fresh mozzarella, 1/2 cup of chopped spinach, and 1/4 cup of sun-dried tomatoes. - Add 1 teaspoon of garlic powder, 1 teaspoon of Italian seasoning, and salt and pepper to taste. - Mix all the ingredients well until fully combined. This mix brings great flavor to your wraps. - Place a large flour tortilla flat on a clean surface. - Spoon half of the chicken mixture onto one half of the tortilla. Make sure to leave some space at the edges. - Fold the tortilla over the filling to form a half-moon shape. - Press down gently to seal the edges. Repeat this process for the second tortilla with the remaining filling. - Lightly spray the tops of the wraps with olive oil. This helps them get crispy in the air fryer. - Place the wraps in the air fryer basket in a single layer. Make sure they do not touch each other. - Air fry for 8-10 minutes until they are golden brown and crispy. Flip the wraps halfway through for even cooking. - Once cooked, carefully remove the wraps and let them cool for a minute. Then slice them in half for easy eating. Enjoy these delicious wraps with a side of marinara sauce for dipping! To get the best crispy wraps, always use olive oil spray. This oil helps the wraps brown nicely and adds flavor. Spray the tops of the wraps lightly before cooking. If you have many wraps, cook them in batches. This way, they won’t touch each other. Cooking in batches ensures even crispiness. You can change the taste by using different spices. Try adding chili powder for some heat or cumin for a smoky flavor. You might also want to swap out the fillings. Instead of chicken, use turkey or even tofu for a veggie option. You can also add more veggies like bell peppers or mushrooms to boost nutrition. These wraps pair well with many sides. Serve them with a fresh salad or some crispy sweet potato fries. For dipping, marinara sauce is a favorite choice. You can also try ranch or a spicy aioli for a creamy touch. Enjoy experimenting with different sides and dips! Pro Tips Use Fresh Ingredients: Fresh mozzarella and vibrant spinach will enhance the flavor and texture of your wraps. Adjust Seasoning: Feel free to add more garlic powder or Italian seasoning according to your taste preferences for a more robust flavor. Don't Overcrowd the Air Fryer: For even cooking, place the wraps in a single layer and avoid stacking them in the basket. Experiment with Fillings: Swap out the chicken or add additional vegetables like bell peppers or mushrooms for a unique twist on this recipe. {{image_2}} You can easily swap chicken for turkey or tofu. Turkey offers a leaner protein option, while tofu provides a plant-based choice. Both work well in wraps. For tortillas, try whole wheat or low-carb versions. Whole wheat adds fiber, while low-carb suits those watching carbs. Experiment with different cheeses for new tastes. Try sharp cheddar or creamy gouda. These cheeses melt beautifully. You can also add extra veggies like bell peppers or mushrooms. These veggies add crunch and nutrients, enhancing the wrap's flavor. For a kick, add spicy peppers or sauces. Jalapeños or sriracha can boost the heat. Adjust your seasoning for more spice if you like it hot. A little more garlic powder or chili flakes can make a big difference. These spicy twists keep each bite exciting! To keep your Air Fryer Chicken Mozzarella Wraps fresh, store them in the fridge. Place them in an airtight container. They stay good for up to three days. If you want them to last longer, wrap each one in plastic wrap before putting them in the container. This extra layer helps prevent dryness. The best way to reheat these wraps is in the air fryer. Set it to 375°F (190°C) and cook for about 5 minutes. This gives them a nice crisp again. You can also use a microwave, but the wraps might turn soft. If using a microwave, place a damp paper towel on top to keep moisture. To freeze your wraps, let them cool completely first. Then, wrap each one tightly in plastic wrap. Place the wrapped wraps in a freezer bag. They can stay in the freezer for up to two months. When you're ready to eat, thaw them overnight in the fridge. After that, reheat in the air fryer until hot and crispy. Enjoy your delicious meal anytime! You can use raw chicken, but you need to cook it first. To ensure safety, here are some steps: - Cook the chicken until it reaches 165°F (74°C). - You can grill, bake, or boil the chicken. - Shred the cooked chicken before mixing it with other ingredients. This keeps your wraps safe and tasty. You can serve these wraps with many sides. Here are some great options: - Marinara sauce for dipping - A fresh salad with light dressing - Crispy potato wedges - Steamed veggies like broccoli or carrots These sides add great flavor and balance to your meal. The total time for these wraps is about 20 minutes. Here’s the breakdown: - Prep time: 10 minutes - Cooking time: 8-10 minutes in the air fryer You can adjust the cooking time based on how crispy you like them. Just remember to flip them halfway for even cooking. In this post, we explored how to make Air Fryer Chicken Mozzarella Wraps, starting with key ingredients like flour tortillas, cooked chicken, and mozzarella cheese. We discussed flavor enhancers such as garlic powder and Italian seasoning, plus optional add-ins like fresh spinach. We outlined steps for prepping, assembling, and cooking the wraps, and I shared tips for perfectly crispy results. Feel free to try different variations to suit your taste. These wraps are quick, easy, and perfect for any meal. Enjoy your cooking adventure!

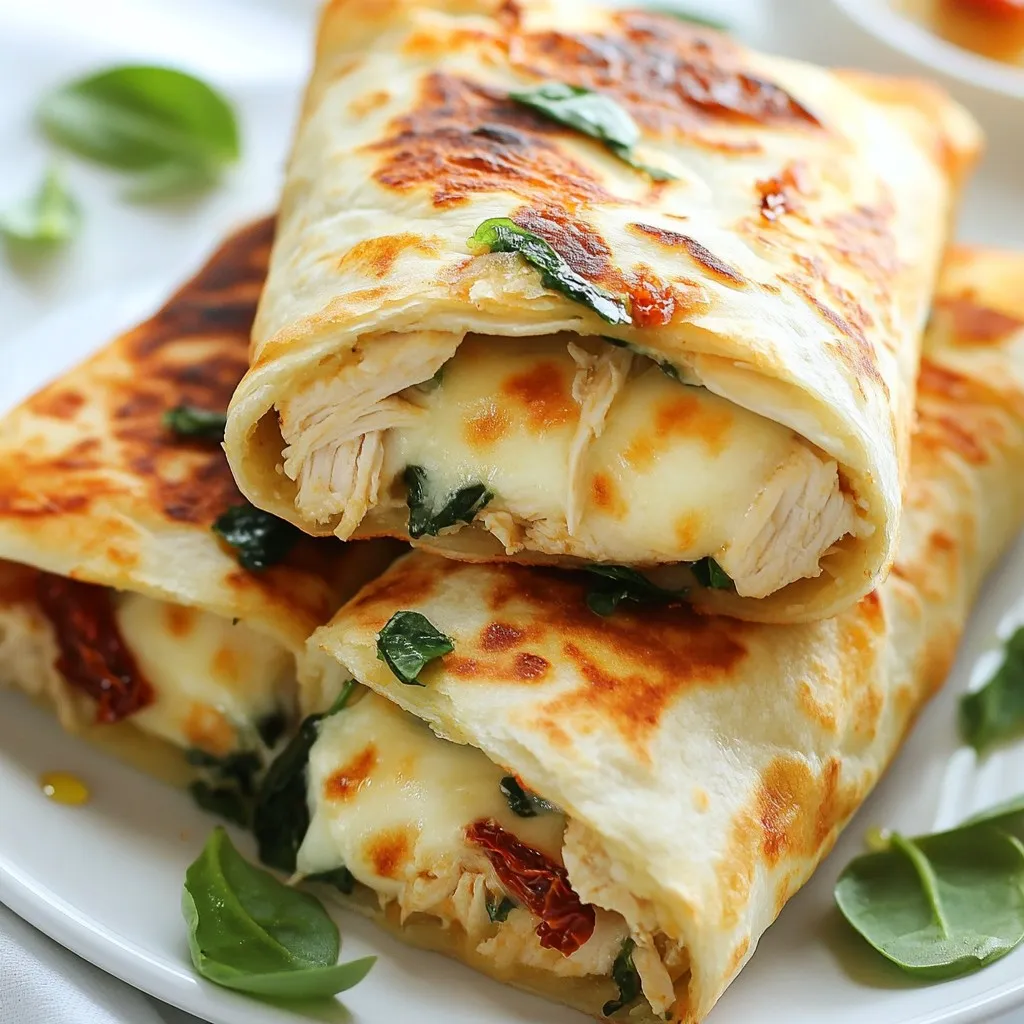
Are you ready to discover a tasty treat? Air fryer chicken mozzarella wraps are easy to make and packed with flavor. Picture warm tortillas filled with tender chicken and creamy …

Read more

Categories Appetizers

Cheesy Garlic Chicken Wraps Tasty and Quick Meal

January 9, 2026May 9, 2025 by Chef Luca
- 2 cups cooked chicken, shredded - 1 cup shredded mozzarella cheese - 1/2 cup cream cheese, softened - 1 clove garlic, minced - 1 tablespoon fresh parsley, chopped (or 1 teaspoon dried) - 4 large tortillas (flour or whole wheat) - 1 cup spinach leaves - 1/4 teaspoon red pepper flakes (optional) - Salt and pepper to taste - Olive oil for brushing You need a few simple tools to make these wraps. Gather: - A medium bowl for mixing - A skillet for cooking - A spatula for flipping - A knife for slicing - A cutting board for prep Choosing fresh ingredients makes a big difference. Here are some tips: - Chicken: Look for cooked chicken that is moist and tender. - Cheese: Choose mozzarella that is fresh, not pre-shredded. - Garlic: Pick firm garlic cloves with no sprouting. - Spinach: Select bright green leaves. Avoid wilted or yellowed ones. - Tortillas: Check for soft and flexible tortillas, not dry or cracked. By following these tips, you ensure your Cheesy Garlic Chicken Wraps taste their best! {{ingredient_image_1}} To start, gather your ingredients. You will need cooked chicken, mozzarella cheese, cream cheese, minced garlic, and parsley. In a medium bowl, combine 2 cups of shredded chicken, 1 cup of mozzarella cheese, and 1/2 cup of softened cream cheese. Add 1 clove of minced garlic and 1 tablespoon of chopped parsley. Mix everything well until it’s smooth. Season the mixture with salt and pepper. If you like heat, add 1/4 teaspoon of red pepper flakes. This cheesy garlic chicken mixture is packed with flavor. Next, lay out a large tortilla flat on a clean surface. Spread a generous amount of the cheesy chicken mixture in the center. Leave about 1 inch of space on the edges. Then, add a small handful of fresh spinach leaves on top of the mixture. This adds a nice crunch and color. Now, fold the sides of the tortilla inward. Roll it up tightly from the bottom to the top. Repeat this with the rest of the tortillas and filling. You will have a stack of tasty wraps ready to cook. Now it’s time to cook your wraps. Preheat a skillet over medium heat. Brush the outside of each wrap lightly with olive oil. Place the wraps seam-side down in the skillet. Cook them for 3 to 4 minutes on each side. You want them to be golden brown and the cheese melted. Once cooked, remove the wraps from the skillet. Let them cool slightly before slicing them in half diagonally. Enjoy your delicious Cheesy Garlic Chicken Wraps! To get a nice, golden wrap, heat your skillet well. Use medium heat to avoid burning. Brush the outside of the wraps with olive oil. This helps them crisp up nicely. Cook the wraps seam-side down first. This keeps the filling inside. Flip them carefully after 3 to 4 minutes. You want them golden, not dark brown. Add some spice for more kick. Try using red pepper flakes in the mixture. You can also mix in some diced jalapeños for heat. Fresh herbs like cilantro or basil can boost taste too. A squeeze of fresh lime juice adds brightness. You can even use a sprinkle of your favorite seasoning blend for an extra layer of flavor. Don’t overfill your wraps. Too much filling makes them hard to roll. Use just enough so you can fold them without spilling. Also, avoid cooking at too high a heat. This can burn the outside while leaving the inside cold. Finally, let them cool for a minute after cooking. This helps the cheese set and makes slicing easier. Pro Tips Use Leftover Chicken: This recipe is perfect for utilizing leftover roasted or rotisserie chicken, adding flavor and saving time. Customize Your Cheese: Feel free to mix and match different cheeses like cheddar or pepper jack for a unique flavor twist. Make It Veggie-Friendly: Substitute the chicken with grilled veggies or a plant-based protein for a delicious vegetarian option. Serving Suggestions: Serve with a side of marinara or ranch dipping sauce for an extra flavor boost! {{image_2}} You can switch up the protein in your wraps. Try using cooked turkey or ham instead of chicken. Both of these meats add a nice flavor. If you want a vegetarian option, use black beans or chickpeas. They bring protein and fiber to the meal. You can also use tofu for a plant-based choice. Just make sure to season it well. Adding vegetables boosts the flavor and nutrition. You can try bell peppers, onions, or mushrooms. These veggies add crunch and color. Zucchini or grated carrots work well too. For a fresh touch, add some diced tomatoes or avocados. They make the wraps taste even better. Spinach is already a great choice, but you can mix in kale or arugula too. While mozzarella is a classic choice, you can explore other cheeses. Cheddar adds a sharp flavor. Pepper jack gives a spicy kick. If you want something creamier, try cream cheese or goat cheese. You can also mix in feta for a tangy taste. Use whatever cheese you love most. This way, your wraps can be unique and tasty every time. To keep your Cheesy Garlic Chicken Wraps fresh, store them in an airtight container. This helps lock in flavor and moisture. If you have leftover wraps, let them cool down first. Once cooled, place them in the container and refrigerate. They can stay good for about three days. Before eating, check for any signs of spoilage to stay safe. If you want to save these wraps for later, freezing works great. First, wrap each one tightly in plastic wrap or foil. This prevents freezer burn. Next, place the wrapped wraps in a freezer-safe bag or container. Label it with the date. You can freeze them for up to three months. When you're ready to eat, thaw them in the fridge overnight. To reheat your wraps, use a skillet for the best results. Heat it over medium heat. Place the wrap seam-side down in the skillet. Cook for about 3-4 minutes on each side until warm. Check that the cheese is melted and everything is hot. You can also use a microwave, but this may make the wrap soft instead of crispy. If you want a crispy wrap, the skillet is the way to go! You can make Cheesy Garlic Chicken Wraps healthier by using whole wheat tortillas. Whole wheat adds more fiber and nutrients. Swap cream cheese for Greek yogurt for less fat and more protein. You can also add more fresh veggies, like bell peppers or cucumbers, to boost nutrients. Reducing cheese or using a low-fat version can help too. Finally, use grilled chicken instead of fried for a leaner option. Yes, you can make these wraps ahead of time. Prepare the cheesy chicken mixture and store it in the fridge for up to 2 days. Assemble the wraps just before cooking for the best taste. If you want to store assembled wraps, wrap them tightly in plastic. Keep them in the fridge for up to 1 day. Just remember to cook them thoroughly before serving. Cheesy Garlic Chicken Wraps pair well with many sides. A fresh salad adds a nice crunch and color. You can serve them with baked sweet potato fries for a tasty contrast. Try adding some salsa or guacamole for extra flavor. A side of roasted veggies also complements the wraps nicely. Feel free to mix and match to find your favorite combinations! In this post, we covered how to make Cheesy Garlic Chicken Wraps from start to finish. We discussed the ingredients, necessary tools, and tips for fresh selections. You learned important steps for preparation, assembly, and cooking. Additionally, we explored ways to make the wraps golden, enhance their flavor, and avoid common mistakes. You can also experiment with different proteins, veggies, and cheeses. With proper storage and reheating tips, you can enjoy these wraps later. Dive into your kitchen and enjoy this tasty meal!

Looking for a tasty and quick meal? You’ve come to the right place! Cheesy garlic chicken wraps are simple to make and full of flavor. In this post, I’ll share …

Read more

Categories Dinner

Garlic Bread Grilled Cheese Savory Flavor Delight

January 13, 2026May 5, 2025 by Chef Luca
- 4 slices of artisanal garlic bread (store-bought or homemade) - 2 cups shredded mozzarella cheese - 1 cup sharp cheddar cheese, shredded - 2 tablespoons unsalted butter, softened - 2 cloves garlic, minced - 1 tablespoon fresh parsley, chopped - Salt and pepper to taste - Skillet or frying pan - Mixing bowl - Spatula Gathering the right ingredients is key to making a great garlic bread grilled cheese. You need four slices of artisanal garlic bread. You can buy it or make it at home. The bread gives a strong flavor base. Next, you need two cups of shredded mozzarella cheese. This cheese melts well and pulls nicely. One cup of sharp cheddar cheese adds a lovely tang. You will need two tablespoons of unsalted butter. Softened butter mixes well with garlic. Speaking of garlic, you will use two cloves, minced. Garlic adds a robust flavor. A tablespoon of fresh parsley brings freshness to your dish. Finally, salt and pepper add depth. Don't forget to taste as you go! For tools, grab a skillet or frying pan for cooking. You also need a mixing bowl for the garlic butter. A spatula helps flip the sandwich easily. With these ingredients and tools, you're ready to create a savory delight. Enjoy the process and have fun with it! {{ingredient_image_1}} To start, grab a small bowl. You will mix the butter, minced garlic, chopped parsley, salt, and pepper. Make sure to blend them well. This garlic butter adds so much flavor. Next, take two slices of garlic bread. Spread half of the garlic butter mixture on one side of each slice. On the unbuttered side of one slice, layer one cup of shredded mozzarella cheese and half a cup of sharp cheddar cheese. This mix gives a great taste. Top with the second slice of garlic bread, buttered side up. Now, you have formed a delicious sandwich. Now, heat a skillet over medium heat. Once hot, add the sandwich to the pan. Cook for about 3-4 minutes on each side. You want the bread to be deeply golden and the cheese to melt. Remove the sandwich from the skillet, and slice it diagonally. Repeat this process with the other slices of garlic bread and cheese. Enjoy your tasty garlic bread grilled cheese! To boost flavor, try adding more spices. Red pepper flakes add heat. Italian herbs give depth. You can mix in some chopped sun-dried tomatoes too. Use a blend of cheeses for best taste. Mozzarella melts well, while sharp cheddar adds a rich flavor. You might also try gouda or fontina for a twist. Set your heat to medium for grilling. This helps the cheese melt without burning the bread. If the bread browns too fast, lower the heat. Flip the sandwich carefully to avoid mess. Use a spatula to press down gently. This helps the cheese melt evenly. Serve your grilled cheese on a rustic wooden board. This adds charm to your meal. Garnish with fresh parsley for color. A small bowl of marinara sauce makes a great dip. You can also serve a simple salad on the side. This adds freshness to the plate. Pro Tips Use Quality Bread: Opt for high-quality artisanal garlic bread for the best flavor and texture. Cheese Variations: Feel free to mix different cheeses like gouda or pepper jack for a unique twist. Low and Slow Cooking: Cook on medium-low heat to ensure the cheese melts perfectly without burning the bread. Extra Crunch: For an added crunch, sprinkle some Parmesan cheese on the outside of the bread before grilling. {{image_2}} What are the best substitutes for mozzarella and cheddar? You can try gouda or provolone. They melt well and add a rich taste. For a sharper flavor, use gruyere or fontina. Each brings a unique twist to your grilled cheese. Using flavored cheeses for different experiences? Consider using pepper jack for a spicy kick. You can also use herb-infused cheese for a fresh taste. These options make your sandwich stand out and keep it interesting. What are other types of bread to explore? Sourdough and ciabatta are great choices. Sourdough adds a tangy flavor, while ciabatta gives a nice crunch. Both types elevate your garlic bread grilled cheese. How do I make homemade garlic bread? To make homemade garlic bread, mix softened butter, minced garlic, and fresh parsley. Spread this mix on slices of your favorite bread. Bake until golden, then use it for your grilled cheese. What are some gluten-free options? Use gluten-free bread instead of regular bread. Many brands offer tasty options that work well in this recipe. Check labels to ensure they fit your diet. What about vegan alternatives? For a vegan version, use vegan butter and plant-based cheese. Brands like Daiya or Violife offer good choices. They melt well and taste great in your sandwich. To store your garlic bread grilled cheese, let it cool first. Place the slices in an airtight container. This keeps them fresh for up to three days in the fridge. Make sure to separate layers with parchment paper to avoid sticking. When it's time to eat, reheating is key. Use a skillet over low heat. This warms the sandwich evenly without burning the bread. Cook each side for about two to three minutes. You can also use an oven; wrap the sandwich in foil and bake at 350°F for about 10 minutes. If you want to freeze assembled sandwiches, wrap each one tightly in plastic wrap. Then, place them in a freezer-safe bag. They can last up to three months in the freezer. When you're ready to enjoy, take the sandwich out and let it thaw in the fridge overnight. After thawing, reheat it in a skillet or oven as mentioned before. This way, you get that melty cheese and crispy bread again! You can serve many sides with garlic bread grilled cheese. Here are some tasty options: - Soup: Tomato soup is a classic choice. It pairs well with the cheesy goodness. - Salad: A fresh green salad adds crunch and balance. Try a Caesar or garden salad. - Dips: Marinara sauce or pesto makes a great dip. They add extra flavor. - Pickles: Crunchy pickles bring a nice contrast to the creamy sandwich. Yes, you can easily make garlic bread grilled cheese vegan. Here are some ideas: - Vegan Butter: Use a plant-based butter instead of regular butter. - Vegan Cheese: Choose a vegan cheese that melts well. Look for options labeled as mozzarella or cheddar. - Garlic: You can still add minced garlic for flavor. It’s vegan-friendly! Cooking garlic bread grilled cheese is quick and easy. Here's the breakdown: - Prep Time: It takes about 10 minutes to prepare the ingredients. - Cooking Time: Grill each sandwich for about 3-4 minutes on each side. - Total Time: You can make this dish in about 20 minutes. It’s perfect for a quick meal! This blog post covers how to make a delicious garlic bread grilled cheese. You need simple ingredients like garlic bread, mozzarella, and cheddar. I shared step-by-step instructions, tips for the best flavor, and variations to inspire your own twist. As you experiment, feel free to use different breads or cheeses. Enjoy making this quick meal, and share it with family or friends. It's fun to create your own tasty version!

Get ready for a twist on your classic grilled cheese! In this post, I’ll show you how to make Garlic Bread Grilled Cheese, a savory delight you won’t forget. Imagine …

Read more

Categories Appetizers

Breakfast Enchiladas Flavorful and Easy Recipe Guide

November 14, 2025May 3, 2025 by Chef Luca
- 6 large corn tortillas - 4 large eggs - 1 cup black beans, rinsed and drained - 1 cup shredded cheddar cheese - 1 cup diced bell peppers (mix of colors) - 1 small onion, finely chopped - 1 teaspoon ground cumin - 1 teaspoon smoked paprika - 1 cup salsa (your choice of spiciness) - 2 tablespoons olive oil - Salt and pepper to taste - Fresh cilantro, chopped for garnish - Avocado slices for serving (optional) Choose fresh corn tortillas for the best texture. They should be soft and pliable. Pick ripe bell peppers to add sweetness and color. For beans, canned black beans work well. Make sure to rinse them to reduce sodium. Use good-quality eggs for creamy texture and flavor. If you don't have corn tortillas, use flour tortillas. They also work great. For cheese, try Monterey Jack or pepper jack for a kick. You can swap black beans for pinto beans or refried beans. If you want no eggs, use tofu for a vegan option. {{ingredient_image_1}} Start by preheating your oven to 375°F (190°C). This step is important. It ensures your enchiladas bake evenly and the cheese melts perfectly. While you prepare the filling, the oven will get hot. In a large skillet, heat two tablespoons of olive oil over medium heat. Add one finely chopped onion and one cup of diced bell peppers. Cook them until they soften, which takes about five minutes. Next, push the veggies to one side of the skillet. Crack four large eggs into the empty side. Scramble them until they are just set. Then, mix in one cup of rinsed black beans, one teaspoon of ground cumin, one teaspoon of smoked paprika, salt, and pepper. Stir everything until heated through, and then remove it from heat. Warm six large corn tortillas in the microwave for about 30 seconds. This makes them easier to roll. On each tortilla, add a generous scoop of the egg and bean mixture. Sprinkle a little cheddar cheese on top. Roll each tortilla tightly and place them seam-side down in a greased baking dish. Once all the enchiladas are in the dish, pour one cup of your favorite salsa evenly over them. Then, sprinkle the remaining cheddar cheese on top. Place the baking dish in the preheated oven. Bake for 20 to 25 minutes. Look for bubbly, melted cheese. After baking, take the dish out of the oven. Let it cool for a few minutes. Garnish your enchiladas with fresh chopped cilantro. You can also serve them with avocado slices on the side for extra flavor and creaminess. Enjoy your meal! To make great scrambled eggs, use fresh eggs. Crack four large eggs into a bowl. Whisk them gently with a fork. Add a pinch of salt and pepper to taste. Heat a non-stick skillet over medium heat. Add a little olive oil to coat the pan. Pour in the eggs and let them sit for a few seconds. Stir slowly with a spatula for soft, fluffy eggs. Remove them from heat when they are just set. This keeps them creamy and tasty. Spices can transform your breakfast enchiladas. Use ground cumin and smoked paprika for a warm, smoky taste. Just one teaspoon of each is enough. Mix them into the egg and bean filling. You can also try adding a pinch of chili powder for extra heat. Fresh herbs like cilantro can brighten the dish. Sprinkle them on top before serving. Making enchiladas ahead is easy. Prepare the filling and assemble the enchiladas. Place them in a baking dish. Cover with plastic wrap and refrigerate for up to 24 hours. When ready to cook, just remove the wrap. Pour salsa and cheese on top, then bake. You can enjoy delicious enchiladas any day! Pro Tips Use Fresh Ingredients: Fresh vegetables and herbs enhance the flavor of your enchiladas, making them more vibrant and delicious. Customize Your Heat: Adjust the spiciness of your salsa to suit your taste; try a mild salsa for kids or a hot one for a spicy kick. Make Ahead: You can prepare the filling a day in advance and store it in the fridge to save time in the morning. Experiment with Cheeses: Try using different types of cheese like pepper jack or queso fresco for a unique twist on flavor. {{image_2}} You can make breakfast enchiladas vegetarian by skipping the eggs and meat. Use more beans instead. Add ingredients like spinach, mushrooms, or zucchini. These veggies add flavor and texture. You can also swap cheese for a plant-based option. This keeps it tasty and friendly for all diets. For protein, you can use cooked chicken or sausage. Shred leftover chicken and mix it in. You can also use cooked ground sausage for a hearty bite. If you want a simple option, diced ham works too. Just remember to cook your protein first. This keeps the flavors balanced and rich. To adjust the spice level, choose mild or hot salsa. If you like more heat, add jalapeños or chili powder to your filling. For a milder taste, use sweet bell peppers. You can also top with sour cream or Greek yogurt to cool it down. This way, everyone can enjoy their meal just the way they like it. After enjoying your breakfast enchiladas, you may have some left. To store them, place the enchiladas in an airtight container. Make sure they cool down first. This keeps them fresh for up to three days in the fridge. If you want to keep them longer, freezing is a great option. For freezing, wrap each enchilada tightly in plastic wrap. Then, place them in a freezer-safe bag or container. Label the bag with the date. They can stay in the freezer for up to three months. When ready to eat, you can defrost them in the fridge overnight. To reheat, you have a few options. You can use the microwave for quick results. Place the enchiladas on a plate and cover them with a damp paper towel. Heat them for about 1-2 minutes. For a crispier texture, use the oven. Preheat it to 350°F (175°C) and bake for 15-20 minutes. This method melts the cheese and warms the filling nicely. Enjoy your delicious breakfast enchiladas again! Yes, you can use flour tortillas. Flour tortillas are softer and easier to roll. They do change the flavor and texture a bit. Corn tortillas are more traditional for enchiladas. If you like a chewy texture, stick with corn. If you prefer soft, use flour. You can serve many sides with breakfast enchiladas. Consider fresh fruit for a sweet touch. A simple green salad adds crunch. You might enjoy some crispy hash browns for texture. Salsa and guacamole also pair well. Choose toppings based on your taste. Breakfast enchiladas stay fresh for about 3-4 days in the fridge. Store them in an airtight container. This keeps them from drying out. If they last longer than that, they may spoil. Always check for any off smells or colors before eating. Yes, you can make enchiladas without eggs. Use a mix of beans, cheese, and veggies instead. Spinach or mushrooms make great additions. You can also add tofu for protein. This keeps the dish flavorful and satisfying without eggs. In this post, we explored the key ingredients for perfect enchiladas. We covered selection tips, substitutes, and step-by-step instructions, from preheating the oven to garnishing. We shared useful tips for making eggs, enhancing flavors, and prepping ahead. Variations included vegetarian options, different proteins, and spice levels. Lastly, we provided storage and reheating advice. Making enchiladas can be fun and easy. Use these tips to create delicious meals. Enjoy your cooking!

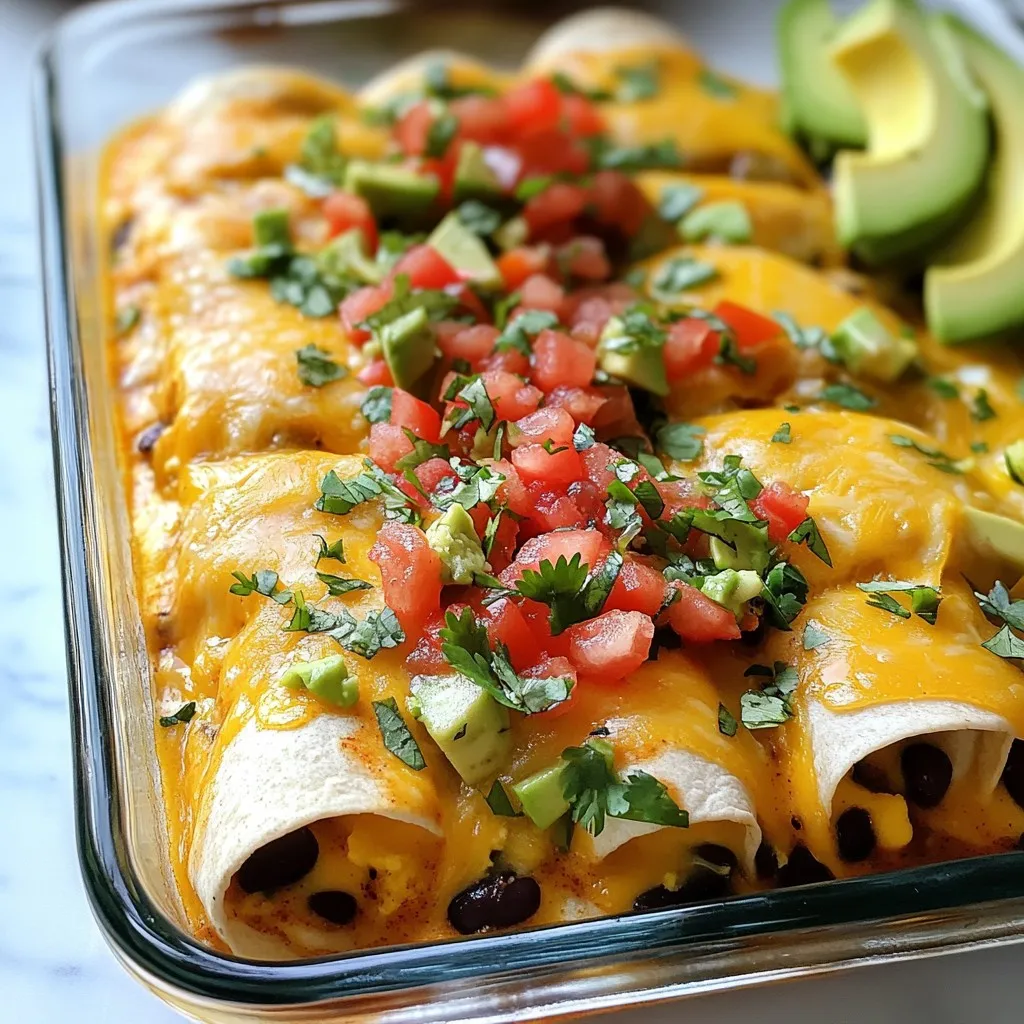
Are you ready to spice up your mornings? This Breakfast Enchiladas guide will transform your breakfast routine into a fiesta of flavors! With simple ingredients and easy steps, you’ll create …

Read more

Categories Breakfast
Older posts
Newer posts
← Previous Page1 … Page116 Page117 Page118 … Page122 Next →

STIRRED RECIPES

Where every dish begins with a stir! 🍲✨

PAGES

Home About Contact Privacy Policy Terms & Conditions Cookie Policy GDPR Policy Copyright Policy Disclaimer

CATEGORIES

Appetizers Desserts Salads Breakfast Dinner

Contact

  • Pinterest
  • Mail
Copyright © 2026 Stirred Recipes. All rights reserved.