Skip to content
Stirred Recipes
  • Home
  • Appetizers
  • Desserts
  • Salads
  • Breakfast
  • Dinner
  • Privacy Policy
  • Contact
  • About

Chef Luca

Air Fryer Parmesan Crusted Chicken Crispy Delight

May 29, 2025 by Chef Luca
- 2 boneless, skinless chicken breasts - 1 cup grated Parmesan cheese - 1 cup breadcrumbs (preferably panko for extra crunch) - 2 teaspoons garlic powder - 1 teaspoon Italian seasoning - 1/2 teaspoon paprika - Salt and pepper to taste - 2 large eggs - 1 tablespoon olive oil - Fresh parsley, chopped (for garnish) Gather these ingredients before you start cooking. Fresh chicken and quality cheese make a big difference. The panko breadcrumbs add a crisp layer that makes this dish special. Garlic powder and Italian seasoning bring great flavor. Using salt and pepper to taste helps you control the seasoning. The eggs and olive oil help the coating stick well to the chicken. Don’t forget the parsley to add a fresh touch at the end. For the full recipe, check the step-by-step guide later. Each ingredient plays a key role in creating that crispy delight you crave. - Preheat air fryer to 400°F (200°C). - In a shallow bowl, mix grated Parmesan cheese, breadcrumbs, garlic powder, Italian seasoning, paprika, salt, and pepper. - In another bowl, beat the eggs and add olive oil. Whisk until well combined. - Pat dry the chicken breasts with paper towels. This helps the coating stick. - Dip each chicken breast in the egg mixture, letting excess drip off. - Coat the chicken in the Parmesan mixture. Make sure each piece is fully covered. - Place the coated chicken breasts in the air fryer basket. Arrange them in a single layer. - Cook for 12-15 minutes. The chicken should turn golden brown and reach an internal temperature of 165°F (75°C). - After cooking, remove the chicken and let it rest for a few minutes. - Garnish with fresh parsley before serving. Enjoy this crispy delight! For the complete instructions, check the Full Recipe. To get that perfect crispy crust, use panko breadcrumbs. They are lighter and crunchier than regular breadcrumbs. This helps create a nice texture on the chicken. If your chicken breasts are thick, adjust the cooking time. Thicker pieces need more time to cook through. Aim for about 15 minutes for thicker pieces. You can add fun mix-ins to the Parmesan crust. Try adding a bit of lemon zest for brightness or red pepper flakes for heat. Adjust the spice levels to your taste. If you like it spicy, add more paprika or some cayenne pepper. This will make your chicken pop with flavor! Serve your chicken with fresh veggies or a side salad. A light pasta dish or rice also pairs well. For a beautiful presentation, slice the chicken and arrange it on a plate. Sprinkle fresh parsley on top for color. This makes the dish look great and adds a fresh taste. Check out the Full Recipe for more ideas! {{image_2}} You can switch out Parmesan cheese if you want. Try using pecorino Romano for a sharper taste. Another option is to use nutritional yeast for a vegan choice. This gives a cheesy flavor without dairy. You can also change the breadcrumbs. Use crushed cornflakes for a gluten-free crunch. You can mix up the seasonings too. Instead of Italian seasoning, try Cajun spices for a spicy kick. Or use lemon zest for a fresh twist. You can also add herbs like thyme or rosemary for extra flavor. Air frying gives you crispy chicken, but you can also bake it. To bake, preheat your oven to 400°F (200°C). Place the chicken on a baking sheet lined with parchment. Bake for 20-25 minutes until golden brown. Grilling is another tasty option. Brush the chicken with olive oil and grill over medium heat. Cook for about 6-7 minutes on each side. This adds a smoky flavor that’s hard to beat. If you need a gluten-free option, use gluten-free breadcrumbs. You can also use almond flour for a low-carb choice. This keeps the dish light but still tasty. For low-carb variations, skip the breadcrumbs altogether. Coat the chicken with crushed nuts or seeds instead. This adds crunch without the carbs. Enjoy these options to fit your diet and taste! After you make Air Fryer Parmesan Crusted Chicken, store the leftovers in an airtight container. This keeps them fresh. You can refrigerate them for up to 3 days. If you see any signs of spoilage, toss them out. To reheat your chicken, use the air fryer for the best results. Set it to 350°F (175°C) and heat for about 5-7 minutes. This keeps the chicken crispy. Avoid using the microwave, as it can make the chicken soggy. Yes, you can freeze cooked chicken! Wrap each piece in plastic wrap, then place it in a freezer bag. This helps prevent freezer burn. You can freeze it for up to 3 months. When ready to eat, thaw in the fridge overnight before reheating. How long does it take to cook chicken in an air fryer? It takes about 12 to 15 minutes. The chicken should be golden brown. Use a meat thermometer to check for 165°F inside. Can I use frozen chicken breasts? Yes, but you must increase the cooking time. Frozen chicken usually takes 5 to 10 more minutes. Ensure it cooks thoroughly. Why is my chicken not crispy? Your chicken may not be dry enough before coating. Pat it dry well with paper towels. Also, ensure you use enough breadcrumbs for crunch. Can I double the recipe? Yes, you can double it. Just make sure your air fryer has enough space for both pieces. You may need to cook in batches. How to adjust for larger servings? To serve more, multiply the ingredients. You may need to cook in groups. Each batch will need the same time and care. Do I need to preheat my air fryer? Yes, preheating helps cook the chicken evenly. Set it to 400°F before you start coating the chicken. What is the best temperature for cooking chicken? The best temperature for chicken is 400°F. This heat crisps the outside while keeping the inside juicy. This blog post covered a simple way to make crispy air-fried chicken. You learned about key ingredients, step-by-step instructions, and useful tips. Explore variations and storage info to keep leftovers fresh. By mastering this recipe, you can impress anyone at your table. The air fryer makes cooking easy and fun. Try it out and enjoy your crispy chicken meal!

Are you ready to transform your dinner game? This Air Fryer Parmesan Crusted Chicken is a crispy delight that will impress everyone at the table. With just a few simple …

Read more

Categories Dinner

Low Carb Italian Grinder Salad Fresh and Flavorful Mix

May 29, 2025 by Chef Luca
When making a Low Carb Italian Grinder Salad, fresh ingredients shine. Here’s what you need: - 2 cups romaine lettuce, chopped - 1 cup cherry tomatoes, halved - ½ cup cucumber, diced - ½ cup bell pepper, diced - ½ cup red onion, thinly sliced - 1 cup salami, sliced into strips - 1 cup provolone cheese, cubed - ½ cup pepperoncini, sliced - ¼ cup olives, pitted and sliced - ¼ cup olive oil - 2 tablespoons red wine vinegar - 1 tablespoon Italian seasoning - Salt and pepper to taste Each ingredient brings its own flavor and texture. The romaine lettuce serves as a crisp base. Cherry tomatoes add sweetness, while cucumbers and bell peppers offer crunch. Salami and provolone cheese provide protein and richness. Pepperoncini and olives give a nice briny kick. The dressing is simple yet flavorful. Olive oil and red wine vinegar blend with Italian seasoning, salt, and pepper. This mix ties all the ingredients together. For the full recipe, check out the details in the guide. Enjoy making this fresh and vibrant salad! Start your salad by washing all the fresh vegetables. Rinse the romaine lettuce under cold water. Then, chop it into bite-sized pieces. Next, take your cherry tomatoes and cut them in half. You want the flavors to spread out nicely. Now, dice the cucumber and bell pepper into small pieces. Finally, slice the red onion thinly. This mix adds flavor and crunch. In a large mixing bowl, combine the chopped romaine, halved cherry tomatoes, diced cucumber, and bell pepper. This colorful base makes your salad pop! Next, add the salami strips for a savory kick. Toss in the cubed provolone cheese for creaminess. Then, add sliced pepperoncini and olives for a tangy touch. Mix everything together gently so each bite is packed with flavor. In a small bowl, whisk together olive oil, red wine vinegar, and Italian seasoning. This dressing ties the salad together. Add salt and pepper to taste. Once it's well mixed, pour the dressing over the salad. Toss everything together until the salad is fully coated in that tasty dressing. Let it sit for about 10-15 minutes. This allows the flavors to meld, creating a delicious mix. For the full recipe, check the details above. You can make this salad your own. Try adding different proteins. Chicken or turkey work great. You can also swap out cheese. Adding nuts can give your salad extra crunch. Pecans or walnuts are perfect choices. Experiment with flavors that you love. To save time, prepare your ingredients ahead. Chop veggies and store them in the fridge. This way, you can quickly assemble your salad later. When storing dressing, keep it separate. This helps prevent sogginess. Pour it on just before you eat. Choose the freshest vegetables and herbs. Look for bright colors and firm textures. For herbs, smell them to check their flavor. Store any leftover salad in an airtight container. This keeps it fresh for a couple of days. Enjoy your Low Carb Italian Grinder Salad fresh and tasty! {{image_2}} For a keto-friendly version of the Low Carb Italian Grinder Salad, swap regular salami for turkey or chicken. These proteins keep the carb count low while adding flavor. You can also change provolone cheese to mozzarella or feta for a different taste. Consider adding more leafy greens like spinach or kale. These greens are low in carbs and boost nutrition. Fresh herbs like basil or parsley can enhance the flavor. A touch of garlic powder or red pepper flakes can add a nice kick. To complement your salad, serve it with grilled chicken or fish. These proteins pair well and keep the meal balanced. You can also offer a side of roasted vegetables for added nutrition. When plating, use large, colorful bowls to showcase the salad. Garnish with extra olives and a sprinkle of Italian seasoning. A slice of lemon on the side adds a fresh touch and visual appeal. For more ideas, check the Full Recipe. To keep your Low Carb Italian Grinder Salad fresh, store it in an airtight container. This helps to prevent moisture loss and keeps the salad crisp. Place the salad in the fridge right after serving. It will last for about 3 days. If you have dressing mixed in, the salad may get soggy. To avoid this, store the dressing separately. I recommend enjoying this salad cold. The crunchy veggies taste best chilled. If you decide to heat it, be aware that the lettuce will wilt. The flavors may blend more, but you will lose the crispness. A quick warm-up in the microwave for 10-15 seconds can work. Just remember, cold is where the salad shines! For the complete experience, check out the Full Recipe. This salad is low carb because it uses fresh vegetables and meats. The main ingredients, like romaine lettuce and cucumbers, are low in carbs. Salami and provolone cheese add flavor without many carbs. - Romaine lettuce - Cherry tomatoes - Cucumber - Bell pepper - Salami - Provolone cheese - Pepperoncini - Olives These ingredients keep the carb count low while still tasting delicious. You avoid high-carb items like bread or pasta. Yes, you can use many different vegetables. Feel free to swap out veggies based on your taste. Some great options include: - Spinach instead of romaine - Zucchini instead of cucumbers - Radishes for crunch These swaps still keep the salad fresh and tasty. You can add more colors and flavors, too. Yes, you can easily make this salad vegan. To do this, simply replace the meat and cheese. Here are some great options: - Use chickpeas or tofu instead of salami. - Swap provolone with vegan cheese. These changes keep the salad full of flavor and plant-based. You can still enjoy the tasty dressing with olive oil and vinegar. This blog post covered how to create a fresh, tasty salad. We discussed key ingredients, step-by-step prep, and tips for customizing it. You can even make low-carb and vegan versions. Proper storage keeps your salad fresh for longer, too. A good salad fits many needs and can be fun to make. Enjoy playing with flavors and ingredients to make it your own!

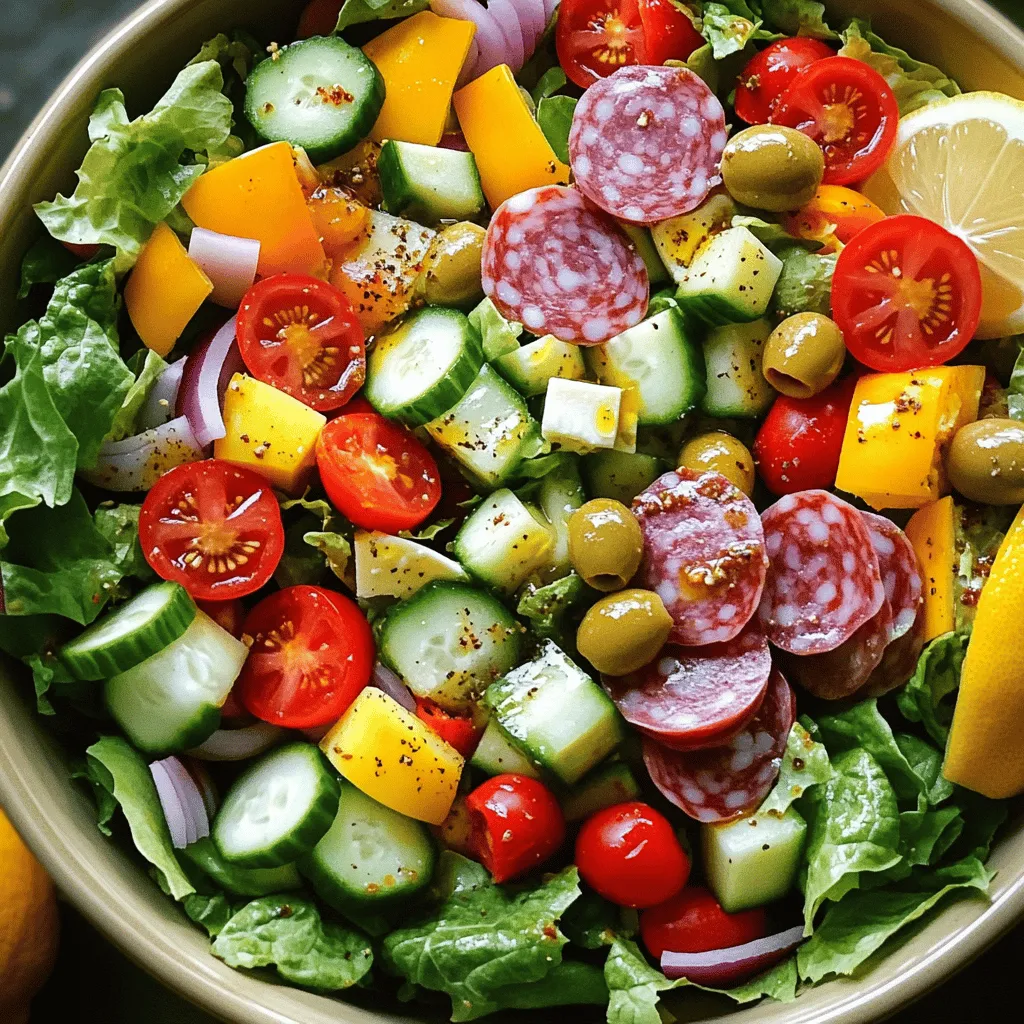
Are you craving a fresh and satisfying meal without the carbs? Look no further! This Low Carb Italian Grinder Salad packs a punch with crisp romaine, savory salami, and tangy …

Read more

Categories Salads

Crispy Honey Garlic Salmon Bites Savory and Simple Snack

May 29, 2025 by Chef Luca
- 1 lb salmon fillet, skinless and cut into bite-sized cubes - Marinade components: - 1/4 cup honey - 3 tablespoons soy sauce - 2 cloves garlic, minced - 1 tablespoon ginger, grated - Coating ingredients: - 1 tablespoon cornstarch - 1/2 cup breadcrumbs (panko preferred) - Green onions, chopped - Sesame seeds - Salt and pepper to taste - 1 tablespoon sesame oil (for cooking) When I make these crispy honey garlic salmon bites, I start with fresh salmon. The skinless fillet cuts easily into perfect cubes. The marinade is where the magic begins. I mix honey, soy sauce, garlic, and ginger in a bowl. This mix adds a sweet and savory flavor that really makes the salmon shine. I let the salmon cubes soak in this mixture for at least 15 minutes. This helps them absorb all those tasty flavors. For a crunchy coating, I use cornstarch and panko breadcrumbs. Panko gives a nice extra crunch. After coating the salmon, I heat sesame oil in a skillet. The oil should be hot enough to sizzle when I add the salmon. I cook the salmon bites for about 2-3 minutes on each side until they turn golden brown. The key is to only flip them once to keep them crispy. For garnish, I sprinkle some chopped green onions and sesame seeds on top. These add a lovely pop of color and flavor. You can find the full recipe at the end of this article for step-by-step instructions and tips. First, grab a large bowl. Whisk together the honey, soy sauce, minced garlic, grated ginger, salt, and pepper. This will create a tasty marinade. Then, add the salmon cubes to this mix. Toss gently until each piece is coated. Let the salmon marinate for at least 15 minutes. This step helps the salmon soak up all those great flavors. Next, you need to coat the salmon. In a separate bowl, combine the cornstarch and breadcrumbs. Mix them well for an even coating. Now, take each salmon piece from the marinade. Dredge it in the cornstarch and breadcrumb mixture. Make sure each piece is fully coated. This will give your salmon bites a nice crunch when cooked. Now, it's time to cook! Heat sesame oil in a non-stick skillet over medium-high heat. Once the oil is hot, add the salmon bites in a single layer. Cook them for about 2-3 minutes on one side until they turn golden brown. Then, flip them over and cook for another 2-3 minutes. You want them crispy and cooked through. After cooking, place them on a paper towel-lined plate to absorb any extra oil. If you have leftover marinade, you can drizzle it over the salmon bites for extra flavor. You can find the full recipe to guide you through the process. To get that crunchy bite, I always use panko breadcrumbs. They add a great crunch. Make sure the oil is hot before you add the salmon. This helps it fry right and not stick. Want to spice it up? Add chili flakes for a nice kick. You can also try different dipping sauces. Sweet, spicy, or tangy, the choice is yours! For a lovely meal, serve the salmon bites with steamed vegetables or a fresh salad. To make your platter pop, arrange the bites neatly. Garnish with chopped green onions and sesame seeds. It looks great and tastes amazing! {{image_2}} You can swap out salmon for chicken or tofu. Chicken provides a heartier bite, while tofu offers a plant-based option. If you choose chicken, cook it longer to ensure it reaches 165°F. Tofu will need less time. Aim for a golden crust on all choices for the best taste. Want to shake things up? Add citrus zest from lemons or limes. This gives a fresh twist to the dish. You can also try other marinades, like teriyaki or garlic butter. These new flavors can brighten your meal and keep everyone guessing. You don’t have to stick to pan-searing. Baking or air-frying are healthier options. They require less oil and still give a nice crunch. If you prefer, pan-searing adds a richer flavor and a different texture. Each method can make your dish unique. You can store any leftover salmon bites in an airtight container. They will stay fresh for up to 3 days. Make sure to let them cool before sealing. This helps keep them from getting soggy and losing that crispy texture. For reheating, use your oven. Set it to 350°F (175°C) and warm the salmon bites for about 10 minutes. This method helps keep them crispy. Avoid using a microwave, as it can make them soggy and chewy. If you want to save salmon bites for later, freezing is a good option. First, let them cool completely. Then, place them in a single layer on a baking sheet. Freeze for about an hour, then transfer them to a freezer bag. This keeps them from sticking together. You can store them in the freezer for up to 3 months. To cook, just thaw in the fridge overnight and reheat in the oven. To know if salmon is cooked, look for flakiness. Use a fork to test it. The fish should break apart easily. The inside should reach 145°F. If you don’t have a thermometer, just check for that flaky texture. Cook it for about 2-3 minutes on each side. If it is golden brown outside, you are on the right track. Yes, you can prepare this recipe ahead of time. You can marinate the salmon cubes for up to 30 minutes. Just keep them in the fridge until you are ready to cook. This helps the salmon soak up all those tasty flavors. If you want, you can coat the salmon bites in cornstarch and breadcrumbs earlier. But cook them fresh for the best crunch. Crispy Honey Garlic Salmon Bites taste great with many sides. Consider serving them with steamed rice or a fresh salad. Rice soaks up the sauce nicely, while salad adds a crisp texture. You can also try roasted vegetables for a healthy touch. Pair flavors that complement the sweet and savory notes of the salmon. You can find the full recipe for Crispy Honey Garlic Salmon Bites in the section above. It includes all the steps and details you need to make this snack. Enjoy cooking! In this blog post, I covered how to make delicious crispy honey garlic salmon bites. I shared the ingredients you'll need, including easy marinade and coating options. The cooking steps were simple and effective for great flavor and texture. Remember, you can switch proteins or add spice to make it yours. Enjoy experimenting with different sides and sauces to elevate your meal. With these strategies, you can impress anyone at your table. Dive in, and savor your tasty creation!

Craving a quick, tasty snack? Let me introduce you to Crispy Honey Garlic Salmon Bites! With just a few simple ingredients, you can create a dish that’s both savory and …

Read more

Categories Appetizers

Air Fryer Baked Potatoes Crispy and Delicious Treat

May 29, 2025 by Chef Luca
- 4 medium russet potatoes - 2 tablespoons olive oil - 1 teaspoon sea salt - 1/2 teaspoon black pepper - 1 teaspoon garlic powder - 1 teaspoon paprika (smoked or regular) - Optional toppings: sour cream, chives, shredded cheese, crispy bacon bits (omit if avoiding pork) When I make air fryer baked potatoes, I love using medium russet potatoes. They have a great texture and flavor. The olive oil adds crispiness to the skin. Season with sea salt, black pepper, garlic powder, and paprika for a tasty touch. You can use smoked paprika for a fun twist. Don't forget the optional toppings! Sour cream and chives brighten up the dish. Shredded cheese and crispy bacon bits make it even better. You can mix and match to suit your taste. I enjoy trying new combinations every time! You can find the Full Recipe with all the details you need. Enjoy cooking! Start by washing and scrubbing the potatoes. This step removes dirt and debris. After washing, pat them dry with a paper towel. Next, use a fork to prick each potato several times. This helps steam escape while cooking. In a small bowl, mix together the olive oil, sea salt, black pepper, garlic powder, and paprika. This seasoning mix adds great flavor. Rub the mixture over each potato. Ensure they are evenly coated for the best taste. Now, preheat your air fryer to 400°F (200°C). It usually takes about 5 minutes to get hot enough. Preheating helps the potatoes cook evenly. Place the potatoes in the air fryer basket. Make sure to space them out evenly. This allows hot air to circulate around each potato. Air fry the potatoes at 400°F for 35-40 minutes. Halfway through, turn them for even cooking. Check doneness by inserting a fork. If it pierces easily, they are ready. Once cooked, remove the potatoes from the air fryer. Let them cool for a couple of minutes. Then, slice them open and fluff the insides with a fork. Add your favorite toppings like sour cream, chives, or cheese. Enjoy your crispy air fryer baked potatoes! For the full recipe, refer to the earlier section. To get crispy skins on your air fryer baked potatoes, start by pricking them. Use a fork to poke holes all over. This lets steam escape. If you skip this step, the potatoes may burst. Next, oil and seasoning matter. I use olive oil to coat the skins. It helps them get nice and crispy. For seasoning, I mix sea salt, black pepper, garlic powder, and paprika. This adds flavor and enhances that crispy texture. For toppings, the options are endless. I love sour cream and chives for a classic taste. Shredded cheese and crispy bacon bits also make a great combo. If you want something lighter, try Greek yogurt instead of sour cream. For a fun presentation, serve the baked potatoes on a rustic wooden board. You can also place them on individual plates. Don’t forget to add a dollop of sour cream on top. It adds color and makes the dish pop! You can find the full recipe above for more details. {{image_2}} You can turn your baked potatoes into loaded delights. Here’s how. Ingredients for loaded versions: - 4 medium russet potatoes - 1 cup shredded cheese - 1/2 cup sour cream - 1/2 cup chopped chives - 1/2 cup crispy bacon bits (omit for a pork-free option) To make loaded baked potatoes, start with the basic air fryer baked potato. Once they are cooked and fluffy, slice them open. Then, add your toppings. You can sprinkle cheese, dollop sour cream, and top with chives or bacon bits. Mix and match your favorites to create your perfect dish. For a healthier twist, you can use different potatoes. Sweet potatoes are a great choice. They add a nice sweetness and are packed with nutrients. Low-calorie seasoning options: - Use herbs like rosemary and thyme. - Try lemon juice for a fresh taste. - Swap olive oil for cooking spray to cut calories. These options keep your meal tasty while being mindful of health. Have fun experimenting with different potatoes and seasonings. You can store leftover baked potatoes in the fridge. Let them cool first. Wrap each potato in foil or place them in an airtight container. This keeps them fresh for up to four days. When you’re ready to eat, simply reheat them. The best way to reheat is in the air fryer. Set it to 350°F (175°C) and heat for about 10-15 minutes. This will help restore the crispy skin. Yes, you can freeze baked potatoes, but they may lose some texture. To freeze, let them cool completely. Wrap each potato tightly in plastic wrap, then in foil. This helps prevent freezer burn. Store them in a freezer bag for up to three months. When you want to eat them, thaw the potatoes overnight in the fridge. Reheat them in the air fryer at 350°F for 15-20 minutes. This helps regain some of the crispiness. For the best taste, try to eat them fresh whenever you can. The best temperature for air frying potatoes is 400°F (200°C). This high heat helps the skins get crispy while keeping the insides soft. This temperature works well for most medium russet potatoes, giving you the perfect baked potato. Cook baked potatoes in an air fryer for 35 to 40 minutes. This time allows the potatoes to cook fully and become tender. I recommend turning them halfway through for even cooking. You can check doneness by poking them with a fork. Yes, you can make air fryer baked potatoes without oil. The potatoes will still cook well, but the skins may not be as crispy. For a healthier option, just scrub the potatoes clean and prick them with a fork. Season them as you like. Avoid these common mistakes: - Not pricking the potatoes: This can cause them to burst. - Overcrowding the basket: This leads to uneven cooking. - Skipping the oil: This helps with crispiness. - Not checking doneness: Always test before serving. By following these tips, you will enjoy perfect air fryer baked potatoes every time. For more details, check the Full Recipe. In this post, I covered how to make tasty baked potatoes in an air fryer. We looked at ingredients, preparation steps, and the cooking process. I shared tips for getting crispy skins and suggested delicious toppings. You can also try variations for loaded or healthy options. Don't forget how to store any leftovers properly. Baked potatoes are simple, fun, and a great meal choice. Now, it's your turn to enjoy them!

Looking for the perfect side dish? Air fryer baked potatoes are crispy, fluffy, and delicious! With just a few simple ingredients, you can turn ordinary russet potatoes into a mouthwatering …

Read more

Categories Dinner

Blueberry Peach Feta Salad Fresh and Flavorful Delight

May 29, 2025 by Chef Luca
- 2 cups fresh baby spinach - 1 peach, sliced - 1 cup fresh blueberries The key to this salad's freshness lies in the produce. Start with baby spinach. It adds a soft, leafy base. Next, slice a ripe peach. The juicy sweetness of peaches enhances the flavor. Add a cup of fresh blueberries. Their slight tartness balances the sweetness of the peach. - 1/2 cup crumbled feta cheese - 1/4 cup chopped walnuts (toasted) The feta cheese brings creaminess to the salad. It adds a salty kick that pairs well with the fruit. Toasted walnuts add crunch. Their nutty flavor complements the sweetness of the fruits. - 2 tablespoons honey - 1 tablespoon balsamic vinegar - 1 tablespoon olive oil - Salt and pepper to taste The dressing ties everything together. Use honey for sweetness. Balsamic vinegar adds tang. Olive oil brings richness. Don't forget salt and pepper! They enhance all the flavors. For the full recipe, refer to the Blueberry Peach Feta Salad section above. To start, gather your fresh ingredients. In a large salad bowl, combine: - 2 cups fresh baby spinach - 1 peach, sliced - 1 cup fresh blueberries Mix these vibrant ingredients with care. The spinach gives a nice, crunchy base. The peaches add sweetness, while the blueberries bring a burst of flavor. Next, sprinkle on the feta cheese and walnuts. Use: - 1/2 cup crumbled feta cheese - 1/4 cup chopped walnuts (toasted) The feta adds creaminess, and the walnuts give a nice crunch. This combo makes your salad special and tasty. Now it’s time to make the dressing. In a small bowl, whisk together: - 2 tablespoons honey - 1 tablespoon balsamic vinegar - 1 tablespoon olive oil - Salt and pepper to taste Whisk until the mixture is smooth. This dressing ties everything together with its sweet and tangy flavor. Taste the dressing and adjust it to your liking. If you want it sweeter, add more honey. If you like it tangy, drizzle in more vinegar. Now, drizzle the dressing over your salad. Gently toss the salad to make sure the dressing coats all the ingredients. Make sure to present your salad nicely. Place it in a large bowl or individual plates. Add a few extra blueberries and walnuts on top for a beautiful finish. Enjoy your fresh, flavorful Blueberry Peach Feta Salad! For more details, check the Full Recipe. Choosing Ripe Peaches Look for peaches that feel soft but not mushy. The skin should be smooth and fragrant. A ripe peach will have a sweet scent. If you find hard peaches, let them ripen at room temperature for a few days. Freshness of Spinach and Berries Always pick fresh baby spinach and berries. Spinach leaves should be vibrant and crisp. Check berries for any signs of mold or squishy spots. Fresh berries should be firm and bright in color. Serving Suggestions and Plates Use a wide, shallow bowl to show off the salad’s colors. A white plate makes the salad pop. You can also serve it on a rustic wooden board for a casual look. This adds charm and style to your table. Garnishing for Visual Appeal Add a sprinkle of extra feta and walnuts on top. Toss in some fresh mint leaves for a splash of green. A drizzle of honey can add shine and make the dish look even more appetizing. Customizing the Dressing You can tweak the dressing to fit your taste. If you want it sweeter, add more honey. For a tangy kick, increase the balsamic vinegar. Mix and match until you find your perfect balance. Substituting Ingredients Feel free to swap ingredients based on what you have. Try arugula instead of spinach for a peppery flavor. You can use goat cheese instead of feta for a creamier texture. This salad is flexible and fun to make! For the full recipe, check out the Blueberry Peach Feta Salad details! {{image_2}} Adding Seasonal Fruits You can change this salad with fresh fruits. In summer, try adding strawberries or raspberries. In fall, consider apples or pears. These fruits add a fun twist and keep things fresh. Incorporating Other Greens While baby spinach is great, you can also use arugula or kale. These greens add a different flavor. They also bring health benefits. Mixing greens can make your salad more exciting. Making it Vegan To make this salad vegan, skip the feta cheese. You can use a plant-based cheese instead. A creamy cashew cheese works well. You can also add avocado for creaminess and flavor. Gluten-Free Options This salad is gluten-free as is. Just double-check your feta cheese and dressings. Some brands may add gluten. Always read labels to be safe. Adding Herbs (like Mint or Basil) Fresh herbs can make your salad pop. Mint gives a bright touch, while basil adds depth. Just sprinkle some on top before serving. It’s a simple way to boost flavor. Incorporating Other Cheeses If you like different cheeses, try goat cheese or blue cheese. These will alter the taste and texture. Experimenting with cheese can lead to new favorites. You can find your perfect match with just a small change. For the full recipe, refer to the Blueberry Peach Feta Salad. - Storing Leftovers: After enjoying your Blueberry Peach Feta Salad, store leftovers in a sealed container. This keeps the salad fresh and tasty. If you have leftover dressing, keep it separate to avoid soggy greens. - Keeping Ingredients Fresh: To keep ingredients fresh, always wash and dry your spinach and fruits before storing. Keep peaches at room temperature until ripe, then store them in the fridge. This helps maintain their sweetness. - Prepping Ingredients Ahead: Wash and slice your peaches and berries in advance. Store them in airtight containers. You can also crumble the feta and toast the walnuts for easy use later. - Assembling the Salad For Later: If you want to prepare the salad ahead of time, layer the spinach, peaches, and blueberries in a container. Keep the feta and walnuts on top to prevent them from getting soggy. Add dressing right before serving. - How Long it Lasts in the Fridge: Your salad stays fresh in the fridge for up to three days. After that, the flavors may change, and the greens can wilt. - Signs of Spoilage: Check for slimy greens or off smells. If the salad looks brown or mushy, it's time to toss it. Always trust your senses when it comes to freshness. Yes, you can make this salad ahead of time. To keep it fresh, follow these best practices. - Prepare the salad base without dressing. - Store the salad in an airtight container. - Keep the feta cheese and walnuts separate until serving. - Add the dressing just before you eat. This method keeps everything crisp and tasty. If you don't have feta, there are great alternatives. - Goat cheese offers a similar tangy flavor. - Ricotta cheese provides a creamy texture. - Cotija cheese gives a crumbly style. Each option adds its own unique taste to the salad. Absolutely! This salad is perfect for summer parties. - It is light and refreshing. - The colors are bright and inviting. - It pairs well with grilled meats and seafood. Your guests will love the mix of flavors. To turn this salad into a full meal, add protein. - Grilled chicken or shrimp works well. - Chickpeas or black beans add plant-based protein. - Quinoa or farro offers a hearty touch. These additions make the salad filling and satisfying. This blog post detailed how to make a fresh salad with vibrant ingredients. We started with fresh produce like spinach, peaches, and blueberries. Then, we added feta cheese and walnuts for crunch. The dressing, made of honey, balsamic vinegar, and olive oil, tied it all together. You can personalize this salad with different fruits or dressings. Remember to store leftovers properly for the best taste. With simple steps and smart tips, you can enjoy a delicious, healthy salad anytime.

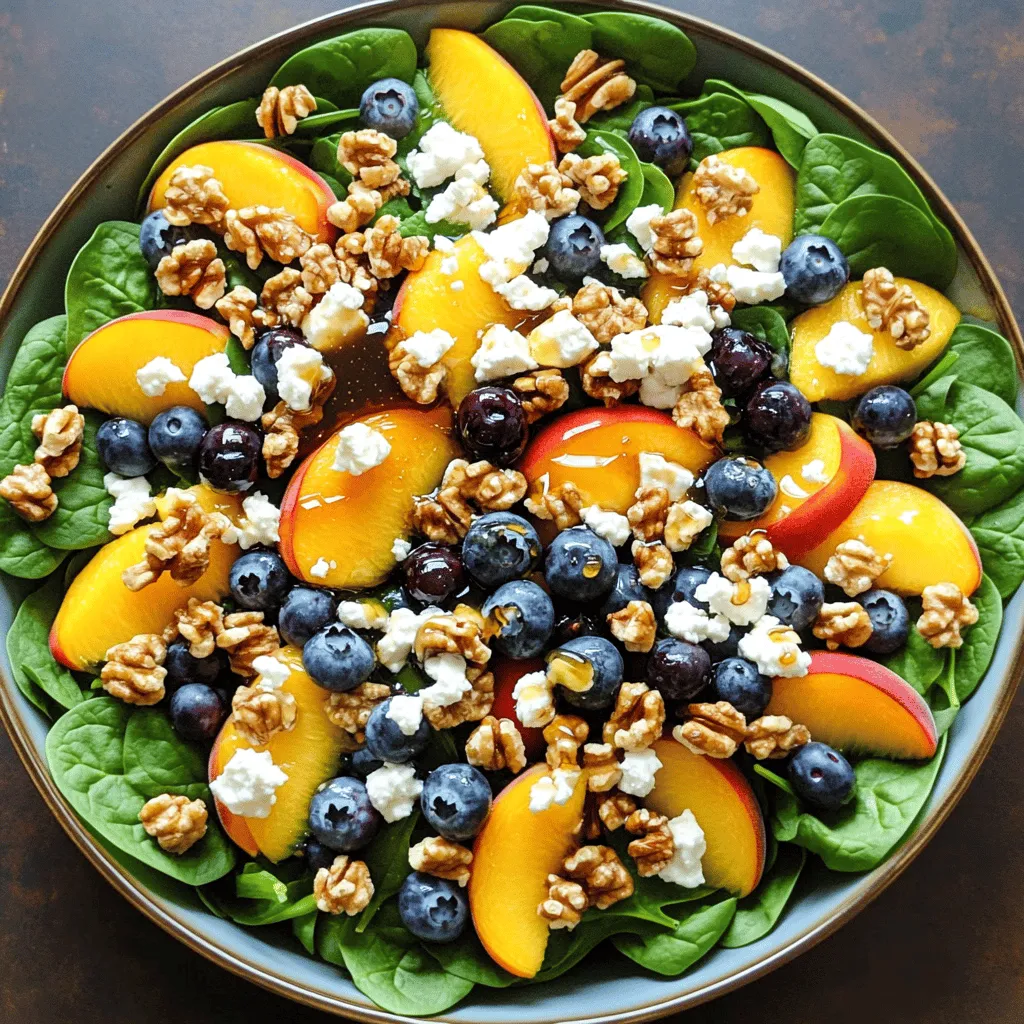
Summer is here, and what better way to celebrate than with a refreshing Blueberry Peach Feta Salad? Bursting with vibrant colors and flavors, this salad combines sweet peaches, juicy blueberries, …

Read more

Categories Salads

Cajun Garlic Butter Steak Bites Easy Flavorful Dish

May 29, 2025 by Chef Luca
- 1 pound sirloin steak - 2 tablespoons Cajun seasoning - 4 tablespoons unsalted butter - 4 cloves garlic - Fresh parsley - Salt and pepper - Lemon juice The main ingredients for this dish are simple yet flavorful. Sirloin steak adds a nice richness. Cajun seasoning brings warmth and spice. Butter gives a creamy texture, while garlic adds depth. Fresh parsley brightens the dish and adds color. - Olive oil - Variations in seasoning You can add olive oil for extra richness. Feel free to experiment with different seasonings. Maybe try a bit of smoked paprika or red pepper flakes for added heat. Mixing up the spices makes the dish more personal and fun! To start, you need to season the steak cubes. Use Cajun seasoning, salt, and pepper. Make sure to cover all sides well. This step adds great flavor. When cutting steak into bite-sized pieces, focus on uniformity. Aim for 1-inch cubes. This size ensures even cooking. Use a sharp knife for clean cuts. Next, sear the steak bites. Heat a skillet on medium-high. Add 1 tablespoon of butter until it melts. Place the seasoned steak cubes in the skillet. Avoid overcrowding the pan. Cook for 2-3 minutes on each side. Look for a nice crust. Medium-rare is a great target. Now, make the garlic butter sauce. After removing the steak, keep the skillet. Lower the heat to medium and add the rest of the butter. Let it melt. Add minced garlic. Sauté for about 30 seconds until it smells nice. Be careful not to burn the garlic. Combine the steak bites with garlic butter. Return them to the skillet. Toss them well in the sauce. Squeeze in lemon juice and add chopped parsley. Stir to coat everything evenly. For perfect doneness, taste a piece. If you like it more cooked, leave it in the skillet for an extra minute. Enjoy your flavorful Cajun Garlic Butter Steak Bites! You can find the Full Recipe for more details. To get a great crust on your Cajun Garlic Butter Steak Bites, follow these steps: - Use high heat: Start with a hot skillet. This helps sear the steak. - Don’t overcrowd: Cook in batches if needed. Give each bite space to brown. - Pat dry: Use a paper towel to dry the steak cubes before seasoning. This helps them brown better. To avoid overcooking the steak, keep these tips in mind: - Use a timer: Cook for 2-3 minutes per side for medium-rare. - Check doneness: Use a meat thermometer. Aim for 130°F for medium-rare. - Let it rest: After cooking, let the steak sit for a few minutes. This keeps the juices inside. You can add more spice and adjust seasoning in these ways: - Extra Cajun seasoning: If you like heat, sprinkle in a bit more. - Garlic powder: Add a dash to enhance the garlic flavor. - Fresh herbs: Try thyme or oregano for a twist. For side dishes that complement the flavors, consider: - Garlic bread: It pairs well with the rich garlic butter. - Roasted vegetables: Carrots or asparagus add color and taste. - Rice or mashed potatoes: These soak up the delicious butter sauce. For the full recipe, check the [Full Recipe]. {{image_2}} You can switch up the cut of steak you use. Sirloin works great, but other cuts like ribeye or tenderloin can add more flavor. Each cut has its own taste and texture, so try different ones to find your favorite. You can also mix up the seasonings. If you want a milder dish, use less Cajun seasoning. You can add herbs like thyme or rosemary for a fresh twist. For a spicy kick, try adding cayenne pepper or crushed red pepper flakes. This gives you a chance to create a flavor that suits your taste. If you're looking for gluten-free options, this dish is already a winner. Cajun seasoning is often gluten-free, but check the label to be sure. You can enjoy this dish without worry! For those who need a dairy-free option, swap the butter for olive oil or a dairy-free butter. The garlic and lemon will still give you a rich flavor, keeping the dish tasty and satisfying. You won’t miss the butter at all! You can find the Full Recipe above to get started on your Cajun Garlic Butter Steak Bites. To store your Cajun Garlic Butter Steak Bites, let them cool first. Place them in an airtight container. Make sure to seal it tightly. This keeps the steak fresh and flavorful. You can keep them in the fridge for up to three days. After that, the taste starts to fade a bit. If you want to enjoy them later, consider freezing them. To reheat steak bites, the skillet is best. Heat it on medium-low. Add a small bit of butter or oil. This helps keep the moisture in. Stir gently until they are warm. If you prefer the microwave, use it on a low setting. Heat for short bursts, checking often. This way, they stay juicy and tasty. Avoid high heat, as it can dry them out. With these tips, you keep the flavor and texture just right. You can find the full recipe for these delicious bites above. Enjoy! What is Cajun seasoning and how can I make it at home? Cajun seasoning is a mix of bold spices. It often includes paprika, cayenne, garlic powder, and onion powder. You can make it at home by mixing: - 1 tablespoon paprika - 1 teaspoon cayenne pepper - 1 teaspoon garlic powder - 1 teaspoon onion powder - 1 teaspoon thyme - 1 teaspoon oregano - Salt and black pepper to taste This blend brings warmth and flavor to your dishes. Can I use chicken or shrimp instead of steak? Yes, you can use chicken or shrimp. Both options will absorb the Cajun flavor well. Just adjust cooking time: cook chicken until it reaches 165°F and shrimp until they turn pink. How can I tell if steak bites are cooked properly? Check the color and firmness of the steak. For medium-rare, aim for an internal temperature of 130°F to 135°F. Use a meat thermometer for accuracy. If you press the steak, it should feel soft but springy. What sides pair well with Cajun Garlic Butter Steak Bites? These steak bites go great with sides like: - Rice or quinoa - Roasted vegetables - Mashed potatoes - A fresh salad Each side adds balance to the rich flavor of the steak. Can I prepare the ingredients in advance? Yes, you can prepare ingredients ahead of time. Cut the steak cubes and store them in the fridge. Mix the Cajun seasoning and store it in a jar. This saves time on busy days. How to meal prep Cajun Garlic Butter Steak Bites for weekly dining? Cook a larger batch and store it in airtight containers. Keep the steak bites in the fridge for up to three days. Reheat them in a skillet to retain flavor. This makes for quick and tasty meals throughout the week. You've learned how to make Cajun Garlic Butter Steak Bites. We covered the main and optional ingredients, and I provided easy step-by-step instructions. I shared tips to avoid overcooking and enhance flavor. You can also customize the dish with various ingredients. Remember to store leftovers properly for best taste. Enjoy your cooking adventure and feel confident creating this tasty meal. Each bite will bring great flavor, and you can always adjust it to make it your own.

If you’re looking for a simple yet scrumptious dish, Cajun Garlic Butter Steak Bites are your answer! This easy recipe combines tender sirloin steak with rich garlic butter and bold …

Read more

Categories Dinner

Carrot Apple Salad Fresh and Healthy Side Dish

May 29, 2025 by Chef Luca
To make a tasty Carrot Apple Salad, you need fresh ingredients. Here’s what you will use: - 2 large carrots, grated - 1 large apple, cored and diced (choose a sweet variety like Honeycrisp or Fuji) - 1/2 cup raisins or dried cranberries - 1/4 cup walnuts, chopped - 1/4 cup Greek yogurt (or dairy-free alternative) - 1 tablespoon honey or maple syrup - 1 tablespoon lemon juice - 1 teaspoon cinnamon - Salt to taste Each ingredient adds its unique flavor and texture. The carrots provide crunch, and the apple adds sweetness. The raisins or cranberries bring in a chewy element, while walnuts add a nutty taste. If you don’t have an ingredient, don’t worry! Here are some easy swaps: - Carrots: You can use zucchini or beets instead. - Apples: Any sweet apple works. Try pears for a different taste. - Raisins: Use chopped dates or dried figs. - Walnuts: Pecans or almonds are great substitutes. - Greek Yogurt: Swap it for sour cream or a dairy-free yogurt. - Honey: Agave syrup or maple syrup works well too. These swaps keep your salad fresh and fun! Choosing seasonal produce is key for great flavor. Seasonal fruits and veggies taste better and are often cheaper. When you pick local, fresh ingredients, you support farmers and your community. In spring, you might find crisp apples and vibrant carrots. In summer, try peaches or cherries for a sweet twist. Fall brings in rich squash and apples, while winter has hearty root veggies. By using seasonal produce, you ensure your Carrot Apple Salad is not just healthy but also bursting with flavor. Enjoy experimenting with different ingredients throughout the year! How to Properly Grate Carrots Grating carrots is simple. First, wash them well. Peel off the skin for a cleaner taste. Use a box grater or a food processor. Grate the carrots into thin strands. Aim for long, even pieces. This will help them mix well with the apples. Best Practices for Dicing Apples Choose a sweet apple like Honeycrisp or Fuji. Start by washing the apple. Cut it in half from top to bottom. Remove the core and seeds. Lay each half flat and slice it into thin wedges. Turn the wedges and dice them into small cubes. This size will blend nicely with the carrots. In a large bowl, combine the grated carrots and diced apples. Add in the raisins or dried cranberries, and the chopped walnuts. These ingredients add sweetness and crunch. In another bowl, mix Greek yogurt, honey or maple syrup, lemon juice, cinnamon, and salt. Stir until it is smooth and creamy. Pour this dressing over the carrot and apple mixture. Toss gently until everything is well-coated. Let the salad sit for about 10 minutes. This waiting time helps the flavors blend. The sweetness from the apples will mix with the tang from the lemon juice. The yogurt adds creaminess, making every bite delicious. Enjoy your Crunchy Carrot Apple Delight! You can find the complete recipe [Full Recipe]. You can boost the taste of your carrot apple salad easily. Try adding fresh herbs like mint or parsley. These herbs add a refreshing kick. You can also toss in some diced celery for extra crunch. If you like spice, a pinch of cayenne pepper can wake up the flavors. Feel free to swap walnuts for pecans or almonds for a nutty twist. For a zesty touch, add more lemon juice. Experiment and find what you love best. To keep your salad fresh, store it in an airtight container. This helps prevent moisture loss. If you make it ahead, add the dressing just before serving. This keeps the carrots and apples crisp. If you have leftovers, eat them within 2 days for the best taste. You can also place a paper towel in the container to absorb excess moisture. This simple trick keeps everything crunchy and fresh. You can easily modify this salad for dietary needs. To make it vegan, swap Greek yogurt for a plant-based yogurt. Use maple syrup instead of honey for sweetness. If you're gluten-free, check that your yogurt and sweeteners are certified gluten-free. For those watching sugar, use less honey or a sugar substitute. This salad is versatile and can fit many diets while still being delicious. {{image_2}} You can add fresh herbs to your carrot apple salad. Mint and parsley are great choices. They bring a burst of flavor. Just chop a few leaves and mix them in. Mint adds a cool taste, while parsley gives a fresh touch. This makes the salad even more delightful. If you want more protein, try adding chicken or tofu. Grilled chicken adds a savory taste. It pairs well with the sweet apple. For a plant-based option, use tofu. Cube it and toss it in. Both options make the salad heartier and more filling. Try different dressings to change things up. A lemon vinaigrette can brighten the salad. Mix olive oil, lemon juice, and a pinch of salt. Another tasty option is a honey mustard dressing. Combine honey, mustard, and a splash of vinegar. Both dressings enhance the flavors in your carrot apple salad. Check the Full Recipe for more ideas! To keep your carrot apple salad fresh, store it in an airtight container. Make sure to seal the lid tightly. This helps keep moisture out and flavors in. Place the container in the fridge as soon as you finish your meal. If you made the salad ahead of time, the same rules apply. Keep it chilled until you are ready to serve. When stored properly, your carrot apple salad can last for about three days in the fridge. After that, the carrots and apples may start to lose their crunch. The yogurt dressing may also become watery. If you notice any strange smells or colors, it’s best to toss it out. If you have leftovers, don’t let them go to waste! You can add them to a wrap or sandwich for extra crunch. Mix the salad with cooked grains like quinoa for a hearty meal. You can also use it as a topping for grilled chicken or fish. This way, you can enjoy the flavors in new and exciting ways. For the full recipe, check out the Crunchy Carrot Apple Delight. Yes, you can make this salad ahead of time. It tastes great when chilled. However, wait to mix the dressing until just before serving. This keeps the carrots and apples crisp. If you mix it early, the salad may get soggy. To make this salad vegan, swap Greek yogurt for a vegan yogurt. Use maple syrup instead of honey. This will keep the salad creamy and sweet without using any animal products. The flavor will still shine through! Carrots and apples are both very healthy. Carrots are packed with vitamin A, which helps your eyes. Apples are full of fiber, which is good for digestion. Together, they boost your immune system. This salad is a tasty way to get your nutrients! Yes, this salad is naturally gluten-free! All the ingredients in this recipe are safe for a gluten-free diet. Just ensure that any added ingredients, like nuts or dried fruits, are also gluten-free. Enjoy your crunchy carrot apple delight without worry! In this blog post, we explored the power of fresh ingredients and how they enhance your salad. We discussed simple preparation steps to help you get the most out of carrots and apples. I shared tips on keeping your salad fresh and customizing it for diet needs. You learned about creative variations, including herbs and dressings, plus storage tips for leftovers. Using fresh, seasonal produce makes salads more tasty and healthy. Enjoy exploring these ideas and making your own delicious salads!

Looking for a simple, fresh side dish? Let me introduce you to the Carrot Apple Salad. It’s bright, crunchy, and packed with flavor! In this post, I’ll show you how …

Read more

Categories Salads

Easy Egg Roll in a Bowl Quick and Flavorful Recipe

May 29, 2025 by Chef Luca
- 1 lb ground turkey or chicken - 4 cups coleslaw mix (cabbage and carrots) - 2 green onions, chopped - 3 cloves garlic, minced - 1 tablespoon fresh ginger, grated The main ingredients of this dish are simple and tasty. Ground turkey or chicken gives it protein. I love using coleslaw mix because it adds crunch and color. Garlic and ginger bring bold flavor. - 3 tablespoons soy sauce (or tamari for gluten-free) - 1 tablespoon sesame oil - 1 tablespoon rice vinegar - 1 teaspoon sriracha or to taste The seasonings and sauces add depth to your egg roll in a bowl. Soy sauce gives umami flavor, while sesame oil adds a nutty touch. Rice vinegar balances the dish with acidity. Adjust sriracha for heat based on your taste. - Sesame seeds - Additional green onions Toppings can make your dish pop! I like adding sesame seeds for a nice crunch. Chopped green onions add freshness and color to the finished meal. You can find the Full Recipe to guide you through making this delicious dish. - Sauté meat and aromatics: Start by heating 1 tablespoon of sesame oil in a large skillet. Use medium-high heat. Add 1 pound of ground turkey or chicken. Cook it until it turns brown, breaking it apart with a spoon. This takes about 5 to 7 minutes. Once the meat is browned, stir in 3 minced garlic cloves and 1 tablespoon of grated ginger. Cook for another minute until you smell the aroma. - Add coleslaw mix: Next, add 4 cups of coleslaw mix to the skillet. This mix has cabbage and carrots. Stir well to combine the meat with the veggies. Cook until the cabbage wilts, which takes about 3 to 4 minutes. - Incorporate sauces and seasonings: After the cabbage wilts, pour in 3 tablespoons of soy sauce, 1 tablespoon of rice vinegar, and 1 teaspoon of sriracha. This adds a nice flavor kick. Mix everything thoroughly. Don't forget to add salt and pepper to taste. - Final cooking to meld flavors: Let the mixture cook for another 2 to 3 minutes. This helps all the flavors blend together nicely. Once done, remove it from heat and stir in 2 chopped green onions for freshness. - Presentation tips for a visually appealing dish: Serve your egg roll in a bowl in colorful bowls. Top it with a sprinkle of sesame seeds and more green onions. This makes the dish look nice and inviting. - Serving in bowls: The dish is best served warm in bowls. This makes it easy for everyone to enjoy. You can also provide extra toppings on the side for added fun. If you want the full recipe, check out the details above! - Alternative proteins: You can use ground beef or pork instead of turkey or chicken. If you want a plant-based option, try crumbled tofu or tempeh. Both work well with the other ingredients. - Gluten-free options: Use tamari instead of soy sauce. Make sure your rice vinegar is gluten-free too. You can also check the coleslaw mix for any hidden gluten. - Adding spices: For extra flavor, add garlic powder or onion powder. You can also include five-spice powder for a nice twist. This can elevate the dish beyond the basic flavors. - Adjusting heat level: If you like it spicy, add more sriracha or even some crushed red pepper flakes. For a milder taste, reduce the sriracha or skip it altogether. - Using a wok versus skillet: A wok can heat up quickly and cook food evenly. This makes it ideal for stir-frying. If you use a skillet, just keep the heat a bit higher to achieve similar results. - Adjusting cooking times: Cooking in a wok may cut your time by a few minutes. Always stir frequently, no matter which pan you use, to keep everything from burning. These small tweaks can make a big difference in your Easy Egg Roll in a Bowl. For the full recipe, check out the section above! {{image_2}} You can easily make this dish vegetarian or vegan. Simply substitute the ground turkey or chicken with tofu or plant-based meat. Firm tofu works best. Just press it to remove excess water, then crumble it into the skillet. This adds a nice texture. Cook it until golden brown, about 5-7 minutes. You can also use lentils or chickpeas for protein. Both add a hearty feel while keeping the dish light. To give your egg roll in a bowl an Asian twist, add more veggies. Bell peppers and mushrooms blend well with the coleslaw mix. They add crunch and flavor. You might also want to incorporate traditional Asian spices. Five-spice powder or a touch of hoisin sauce can elevate the taste. A sprinkle of sesame seeds enhances the look and flavor, too. Feeling adventurous? Try a Mexican egg roll in a bowl. Use ground beef or black beans. Swap soy sauce for taco seasoning. Add corn, black olives, and diced tomatoes for extra zest. For a Mediterranean vibe, consider using ground lamb or chickpeas. Mix in Kalamata olives and feta cheese. This gives a fresh and unique flavor profile that is sure to impress. For a full recipe, check out the Egg Roll in a Bowl Delight. To keep your egg roll in a bowl fresh, store leftovers promptly. Use a clean, airtight container. Glass or plastic containers work well. You can refrigerate the dish for up to three days. Label the container with the date to keep track. When reheating, aim for the best taste and texture. The microwave is quick but may not keep the crispness. I suggest using a skillet. Heat it on medium until warm. Stir occasionally to heat evenly. This method helps maintain the crunch of the coleslaw mix. For long-term storage, freeze your egg roll in a bowl. Let it cool completely first. Place it in a freezer-safe container or a heavy-duty freezer bag. It can last up to three months in the freezer. When ready to eat, thaw it overnight in the fridge. Reheat it in a skillet as mentioned earlier. This helps it taste fresh and delicious. You can easily change this recipe to fit your taste. Here are some ideas: - Protein swaps: Use ground beef, pork, or tofu for a different flavor. - Vegetable add-ins: Try bell peppers, zucchini, or mushrooms for extra crunch. - Spices: Add red pepper flakes or five-spice powder for more heat. - Herbs: Fresh cilantro or basil can brighten up the dish. These options let you create a meal that suits your palate. Yes, you can prep this dish in advance. Here are some tips: - Cook the meat: You can brown the meat a day before. Store it in the fridge. - Chop vegetables: Prepare the coleslaw mix and aromatics ahead. Keep them in airtight containers. - Storage: Keep everything separate until you're ready to cook. Mixing keeps the veggies fresh. This way, you can enjoy a quick meal any night of the week. Making this recipe gluten-free is simple. Here are some suggestions: - Soy sauce: Use tamari instead of regular soy sauce. Tamari is gluten-free. - Rice vinegar: Most rice vinegars are gluten-free, but check labels. - Sriracha: Ensure your sriracha is gluten-free as some brands may contain gluten. With these swaps, you can enjoy a tasty egg roll in a bowl without gluten! This recipe blends ground turkey, coleslaw, and tasty sauces for a delightful dish. You can customize the flavors and try different toppings. Remember to follow the cooking steps for the best results. With various options for substitutions and meal prep, this dish fits many tastes. Enjoy your cooking and feel free to get creative. It’s simple, fun, and perfect for sharing!

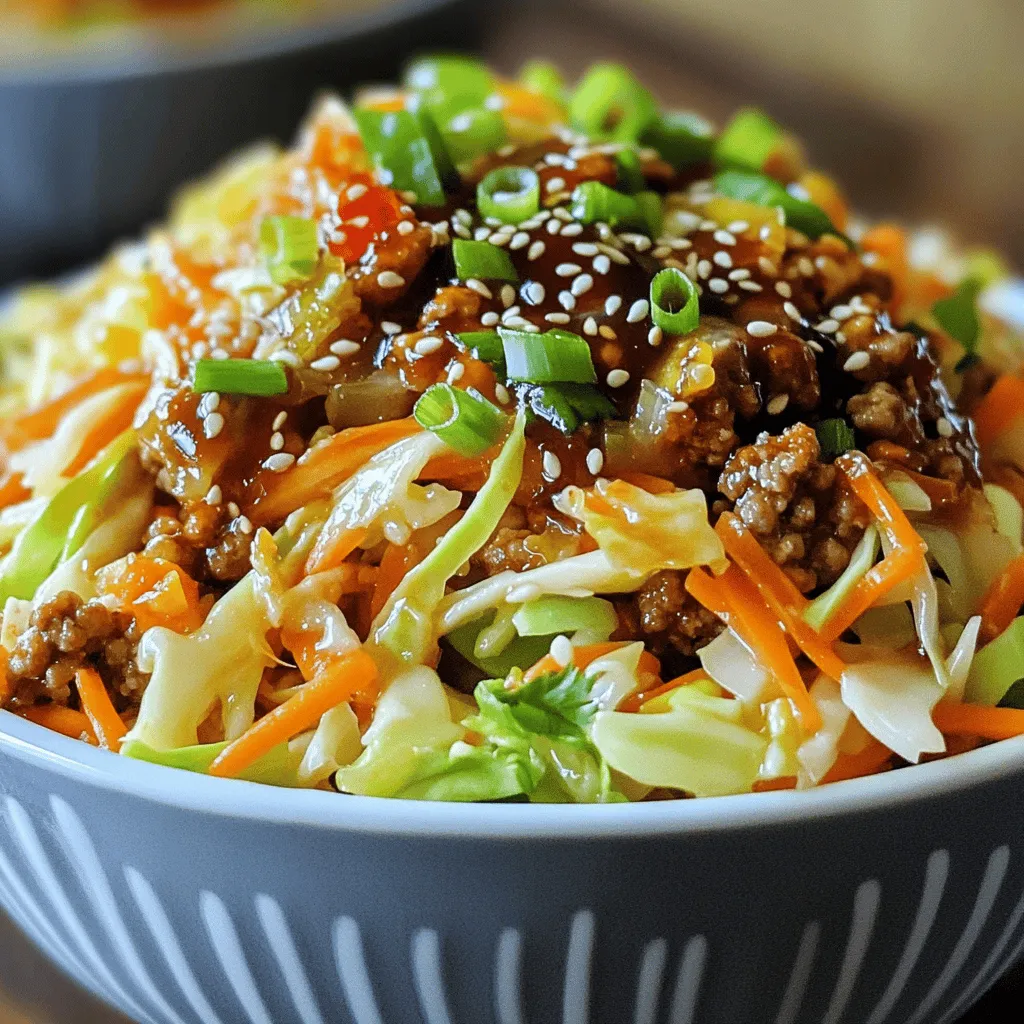
Looking for a quick dinner that packs a flavor punch? Try my Easy Egg Roll in a Bowl recipe! It combines ground turkey, coleslaw, and tasty sauces for a dish …

Read more

Categories Dinner

Juicy Air Fryer Chicken Breasts Easy Dinner Delight

May 29, 2025 by Chef Luca
To make juicy air fryer chicken breasts, gather these simple ingredients: - 4 boneless, skinless chicken breasts - 2 tablespoons olive oil - 1 teaspoon garlic powder - 1 teaspoon onion powder - 1 teaspoon paprika - 1 teaspoon dried thyme - 1 teaspoon salt - 1/2 teaspoon black pepper - Juice of 1 lemon - Fresh parsley for garnish You can easily swap some ingredients if needed. Here are a few ideas: - Use avocado oil instead of olive oil for a different flavor. - Try fresh herbs if you don’t have dried thyme. - Substitute lime juice for lemon juice for a zesty twist. - You can replace black pepper with cayenne pepper for heat. - If you lack garlic powder, fresh minced garlic works well too. Fresh ingredients make a big difference in flavor. They enhance the taste of your chicken breasts. Fresh herbs add brightness, while fresh chicken ensures juiciness. When possible, select organic or locally sourced items. This not only supports local farmers but also ensures quality. The fresher your ingredients, the better your dish will be. Trust me, your taste buds will thank you! To make juicy air fryer chicken breasts, start with simple steps. First, gather all your ingredients. You will need boneless, skinless chicken breasts, olive oil, and spices. These spices include garlic powder, onion powder, paprika, dried thyme, salt, and black pepper. Don't forget the lemon juice! This adds a nice zing. 1. Preheat your air fryer to 375°F (190°C). This helps the chicken cook evenly. 2. In a large bowl, mix the olive oil, garlic powder, onion powder, paprika, thyme, salt, pepper, and lemon juice. This marinade gives the chicken great flavor. 3. Add the chicken breasts to the bowl. Make sure they are coated well with the marinade. Let them sit for 15-30 minutes. This helps the flavors soak in. 4. Once the air fryer is ready, place the chicken breasts in the basket. Keep them spaced apart so they cook well. 5. Cook the chicken for 15-18 minutes. Flip the chicken halfway through. This ensures both sides get golden brown. Check that the chicken reaches 165°F (74°C) inside before removing it. 6. After cooking, take out the chicken and let it rest for 5 minutes. This helps keep the juices inside. 7. Garnish with fresh parsley before you serve. It adds a nice touch! Set your air fryer to 375°F (190°C) for best results. Cook the chicken for 15-18 minutes. Use a meat thermometer to ensure it's cooked through. This way, you avoid undercooking or overcooking. Remember, resting the chicken is key to keeping it juicy. Make sure to check the full recipe for any extra details! To keep chicken juicy, start with a good marinade. A mix of oil, spices, and acid works wonders. The olive oil adds moisture, while the lemon juice tenderizes the meat. Marinate for at least 30 minutes. This gives the flavors time to soak in. When cooking in the air fryer, avoid crowding the basket. Leave space for hot air to flow. This helps the chicken cook evenly. Flip the chicken halfway through for a nice, golden finish. Use fresh herbs and spices in your marinade. Fresh thyme and parsley can add great taste. You can also try different acids like vinegar or yogurt. These options change the flavor and make it exciting. If you want a kick, add some hot sauce or chili powder. Always remember to coat the chicken well. Ensure every part gets that flavorful marinade. One big mistake is not preheating the air fryer. This step helps the chicken cook faster and more evenly. Another error is overcooking the chicken. Use a meat thermometer to check the internal temperature. Aim for 165°F (74°C). Letting the chicken rest for a few minutes before slicing is key. This helps keep all the juices inside. Lastly, don’t skip the garnish. A sprinkle of fresh parsley makes your dish look great. For the full recipe, check out Juicy Air Fryer Chicken Breasts. {{image_2}} You can change the flavors of your air fryer chicken breasts easily. Try different spices or marinades. For a sweet touch, add honey and soy sauce. A spicy kick? Use chili powder or cayenne pepper. You can also try herbs like rosemary or oregano. Just mix these with olive oil and lemon juice for a tasty marinade. Let your chicken soak in it for at least 30 minutes. This will give your dish extra depth and flavor. You can cook more than just chicken breasts in the air fryer. Thighs, wings, and drumsticks work well, too. Chicken thighs stay juicy and are often more forgiving if you cook them a bit longer. Wings are great for game day. They turn crispy and taste amazing with your favorite sauce. Adjust your cooking time based on the cut. Thighs may need 20-22 minutes, while wings can cook in about 25 minutes. Pair your juicy chicken breasts with tasty sides. A fresh salad or roasted veggies make a great match. You can also serve it with rice or quinoa for a filling meal. To make it special, add a squeeze of lemon on top before serving. Garnish with fresh parsley for a burst of color. This not only makes your dish look nice but also adds a fresh taste. Explore different sides to keep your meals exciting! For the full recipe, check out Juicy Air Fryer Chicken Breasts. After you cook your juicy air fryer chicken breasts, you might have leftovers. Store them in an airtight container. This keeps them fresh and safe to eat. Make sure to let the chicken cool down first. Then, place it in the fridge. It will stay good for about three to four days. When you’re ready to eat the leftovers, reheating is key. Use the air fryer again for the best results. Set it to 350°F (175°C). Heat the chicken for about 5-7 minutes. This way, it stays juicy and warm. If you don’t have an air fryer, you can use a microwave. Just cover the chicken with a damp paper towel. This helps keep moisture in. If you want to save chicken for later, freezing is a great choice. Wrap each piece tightly in plastic wrap. Then, place them in a freezer bag. Remove as much air as you can. Label the bag with the date. Frozen chicken breasts can last up to 6 months. When you’re ready to cook them, thaw in the fridge overnight. Then, follow the full recipe to make them juicy again. I recommend marinating chicken breasts for 15 to 30 minutes. This time is enough for the flavors to soak in. For even better taste, you can marinate them overnight in the fridge. Just remember to cover the bowl with plastic wrap or a lid. The longer the chicken marinates, the more flavor it will have. Chicken should reach an internal temperature of 165°F (74°C). You can check this with a meat thermometer. This temperature ensures the chicken is safe to eat. Cooking to this temperature keeps the chicken juicy and tender. Yes, you can use frozen chicken breasts in the air fryer. However, you need to adjust the cooking time. Cook frozen chicken for about 20 to 25 minutes at 375°F (190°C). Make sure to check the internal temperature to ensure it reaches 165°F (74°C). If needed, add extra time to fully cook the chicken. In this blog post, we explored how to cook chicken breasts effectively. We covered key ingredients, detailed cooking steps, and helpful storage tips. You learned about marinades and techniques for juicy chicken. We also discussed common mistakes and variations to keep meals exciting. Remember, using fresh ingredients makes a big difference. With these tips, you can create delicious, flavorful chicken every time. Enjoy your cooking and happy eating!

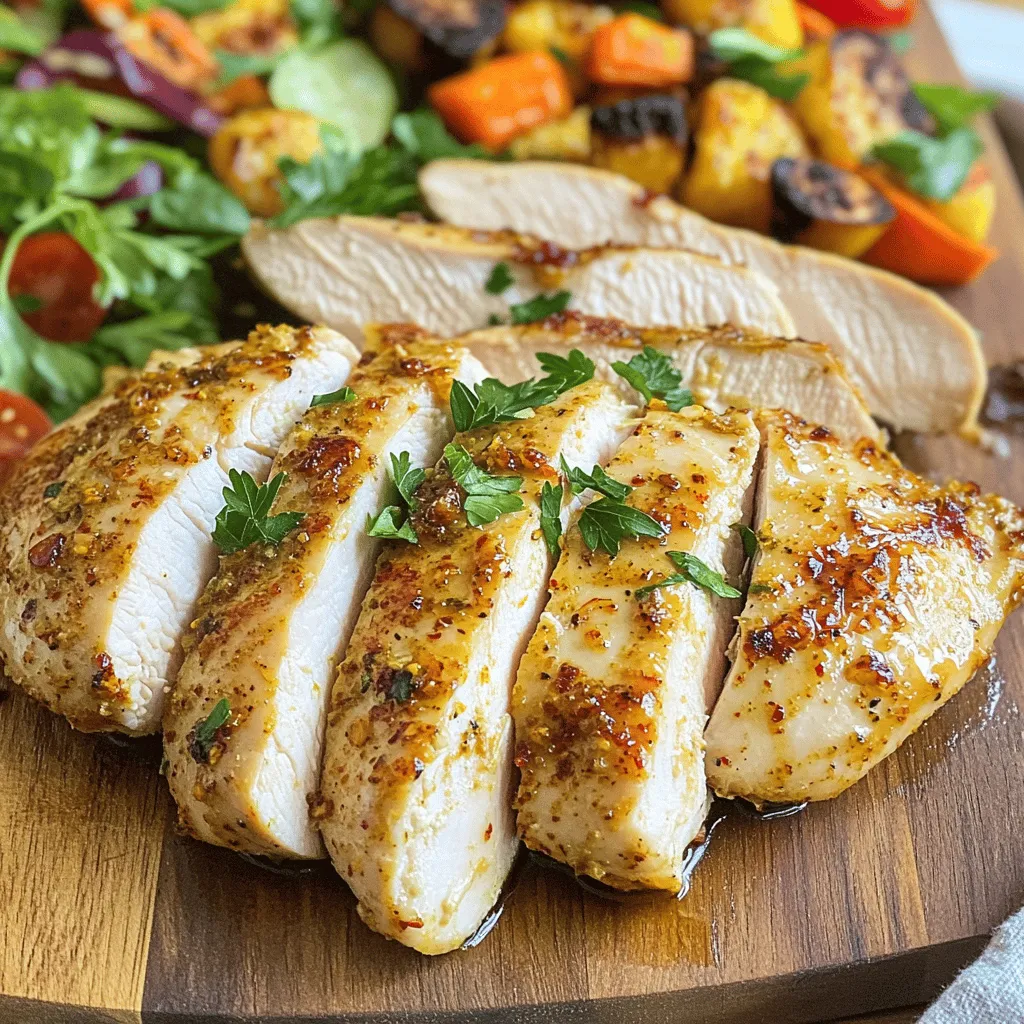
Are you ready to impress your family with a simple, tasty dinner? In this post, I’ll show you how to make juicy air fryer chicken breasts that are sure to …

Read more

Categories Dinner

Mediterranean Chickpea Salad Fresh and Flavorful Meal

May 29, 2025 by Chef Luca
To make a Mediterranean Chickpea Salad, you need these fresh ingredients: - 1 can (15 oz) chickpeas, rinsed and drained - 1 medium cucumber, diced - 1 cup cherry tomatoes, halved - 1/2 red onion, finely chopped - 1 red bell pepper, diced - 1/2 cup Kalamata olives, pitted and halved - 1/4 cup fresh parsley, chopped - 1/4 cup feta cheese, crumbled (optional) - 3 tablespoons extra virgin olive oil - 2 tablespoons lemon juice - 1 teaspoon dried oregano - Salt and pepper to taste I love starting with chickpeas. They are packed with protein and fiber. Cucumber adds crunch, while cherry tomatoes bring sweetness. The red onion gives a lovely bite, and red bell pepper adds color and taste. Kalamata olives offer a rich, briny flavor that elevates the salad. Fresh parsley adds brightness and freshness. If you want a creamy touch, crumbled feta cheese is a nice option. The olive oil and lemon juice make a simple and zesty dressing. Oregano adds that classic Mediterranean flair, while salt and pepper round out the flavors. These ingredients come together to create a refreshing and tasty salad. You can find the full recipe to guide you through the steps. Enjoy the process of making this vibrant Mediterranean dish! First, let's prepare our ingredients. Start with rinsing and draining chickpeas. This step is key to removing excess sodium and ensuring a fresh taste. Drain them well in a colander and set aside. Next, dice your vegetables. Cut your cucumber and red bell pepper into small pieces. Halve the cherry tomatoes for a burst of flavor. Then, finely chop the red onion for a nice crunch. Don't forget to chop the parsley; it adds a fresh note to the salad. If you're using feta cheese, prepare the olives and feta next. Halve the Kalamata olives and crumble the feta cheese into bite-sized pieces. If you prefer not to use feta, you can skip this step. Now it’s time to mix everything. In a large bowl, combine all the ingredients. Add the chickpeas, diced cucumber, halved cherry tomatoes, chopped red onion, diced red bell pepper, Kalamata olives, and chopped parsley. This colorful mix is not just pretty; it’s packed with flavor! For the dressing, take a small bowl and make the dressing. Whisk together the extra virgin olive oil, lemon juice, dried oregano, salt, and pepper. This simple dressing brings out the best in your salad. Next, we’ll bring it all together. Toss the salad gently and drizzle the dressing over the top. Mix it well, so every bite gets coated. If you’re using feta, sprinkle it on top and give it a light toss again. Allow the salad to sit for about 10 minutes at room temperature. This helps the flavors to meld beautifully. For an even better taste, refrigerate for 30 minutes before serving. Enjoy your Mediterranean Chickpea Salad! Check out the Full Recipe for more details. To make the best Mediterranean chickpea salad, start with fresh ingredients. Use ripe tomatoes and crisp cucumbers. They add a great crunch and flavor. Wash everything well before chopping. This keeps the salad clean and vibrant. Next, focus on balancing the flavors in the dressing. Whisk together olive oil, lemon juice, oregano, salt, and pepper. Adjust the amounts to suit your taste. A bit more lemon juice brightens the dish. If you like it richer, add more olive oil. This salad pairs well with grilled meats or fish. Serve it alongside pita bread for a full meal. You can also enjoy it with hummus as a snack. For a beautiful presentation, use a large bowl. Garnish with extra parsley and whole olives. A lemon wedge on the side adds color and flavor. Your guests will love how it looks and tastes! You can easily prepare this salad in advance. Mix the salad early in the day for dinner. Just wait to add the dressing until right before serving. This keeps the veggies crisp. Store the salad in an airtight container in the fridge. It stays fresh for up to three days. If the salad looks dry before serving, add a splash of olive oil. This refreshes the flavors and makes it delicious again! For the full recipe, check out the complete guide. {{image_2}} You can easily make this salad vegan. Instead of feta cheese, use avocado or a tofu-based cheese. This keeps the creamy texture but removes all animal products. You might also try adding cooked quinoa or lentils as extra protein. They boost nutrition and add a nice chew. Feel free to mix in other veggies or grains. Try adding shredded carrots, roasted red peppers, or even cooked farro for extra texture. To enhance flavors, consider adding spices like cumin or smoked paprika. Nuts like almonds or pine nuts can add a crunch that makes the salad even more delightful. You can adapt this salad to match the seasons. In summer, add fresh corn or diced zucchini for a light touch. In winter, use roasted sweet potatoes or brussels sprouts for warmth. Both options create a great twist while keeping the essence of the Mediterranean flavor. To keep your Mediterranean chickpea salad fresh, place it in the fridge right away. Use an airtight container to prevent moisture loss. Glass or plastic containers work well. Make sure the lid seals tightly to keep air out. If you have a large batch, consider dividing it into smaller portions. This helps maintain freshness longer. In the fridge, this salad lasts about three to five days. After that, it may start to spoil. Look for signs like a sour smell or slimy vegetables. If you see any mold, throw it away. Always trust your senses when checking food freshness. You should not reheat this salad. It is best served cold. However, if you want to enhance the flavors after refrigerating, drizzle a bit more olive oil or lemon juice on top. This will brighten up the taste. Toss the salad gently to mix the new dressing in well. Enjoy it cold for a refreshing meal! Mediterranean Chickpea Salad is a bright and tasty dish. It features chickpeas, fresh veggies, and a zesty dressing. Here are the main ingredients: - 1 can (15 oz) chickpeas, rinsed and drained - 1 medium cucumber, diced - 1 cup cherry tomatoes, halved - 1/2 red onion, finely chopped - 1 red bell pepper, diced - 1/2 cup Kalamata olives, pitted and halved - 1/4 cup fresh parsley, chopped - 1/4 cup feta cheese, crumbled (optional) - 3 tablespoons extra virgin olive oil - 2 tablespoons lemon juice - 1 teaspoon dried oregano - Salt and pepper to taste This salad is colorful and full of flavor. The mix of textures makes it fun to eat. To make this salad more filling, you can add grains or proteins. Here are some great options: - Cooked quinoa or couscous - Brown rice or farro - Grilled chicken or shrimp - Tofu or chickpea patties Adding these items gives your salad extra nutrients and fullness. Yes, you can use canned chickpeas! They are convenient and save time. Canned chickpeas are already cooked and ready to eat. You just need to rinse and drain them. This makes your prep quick and easy. Yes, Mediterranean Chickpea Salad is gluten-free. The main ingredients do not contain gluten. Just be sure to check any added ingredients, like dressings or grains, for gluten. If you like heat, there are many ways to spice up your salad: - Add diced jalapeños or red pepper flakes - Mix in some hot sauce or chili oil - Use spiced olives or add harissa These ideas can take your salad to the next level. Enjoy exploring new flavors! This blog post walks you through making a tasty Mediterranean chickpea salad. We covered the key ingredients and the step-by-step process to prepare and mix everything. I shared tips on perfecting the dish and ideas for variations to suit your taste. Storing your salad properly ensures freshness, and I answered common questions for clarity. In summary, this salad is fresh, simple, and customizable! You can easily adapt it to any meal. Enjoy experimenting with flavors and ingredients. Your next dish can be both healthy and delicious!

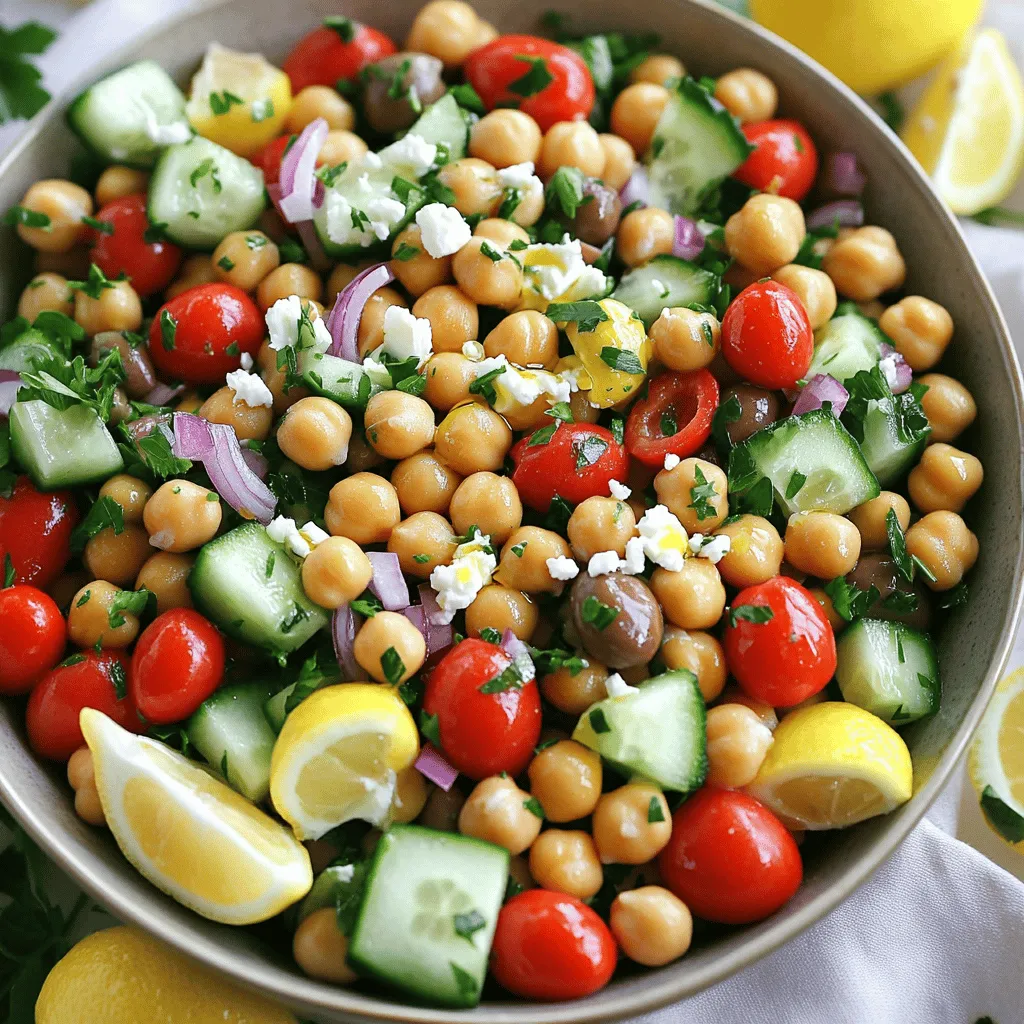
Looking for a fresh and healthy meal? Let me introduce you to the Mediterranean Chickpea Salad! Packed with crunchy veggies, creamy feta, and hearty chickpeas, this dish bursts with flavor. …

Read more

Categories Salads
Older posts
Newer posts
← Previous Page1 … Page111 Page112 Page113 … Page122 Next →

STIRRED RECIPES

Where every dish begins with a stir! 🍲✨

PAGES

Home About Contact Privacy Policy Terms & Conditions Cookie Policy GDPR Policy Copyright Policy Disclaimer

CATEGORIES

Appetizers Desserts Salads Breakfast Dinner

Contact

  • Pinterest
  • Mail
Copyright © 2026 Stirred Recipes. All rights reserved.