Skip to content
Stirred Recipes
  • Home
  • Appetizers
  • Desserts
  • Salads
  • Breakfast
  • Dinner
  • Privacy Policy
  • Contact
  • About

Chef Luca

Snickers Salad Delightful and Easy Dessert Recipe

June 3, 2025 by Chef Luca
Snickers salad is a sweet and creamy treat. It blends candy, fruit, and nuts. This dish is fun to make and great for gatherings. It takes just 15 minutes to prep. You will chill it for 30 minutes before serving. - 6 fun-sized Snickers bars, chopped - 1 cup mini marshmallows - 1 cup diced apples (like Granny Smith for tartness) - 1 cup whipped topping (like Cool Whip) - ½ cup chopped pecans or walnuts (optional) - 1 tablespoon lemon juice - 1 tablespoon chocolate syrup (for drizzling) You can add or swap some ingredients. Here are a few ideas: - Use different types of candy bars, like Milky Way or Reese’s. - Swap apples for pears or bananas for a new taste. - Add shredded coconut for extra texture. - Use sugar-free whipped topping for a lighter option. Feel free to mix and match to find your favorite version of this Snickers salad! First, gather your ingredients. You will need Snickers bars, mini marshmallows, diced apples, and whipped topping. If you like, add nuts for crunch. 1. Chop the Snickers bars: Slice the fun-sized bars into small pieces. Place them in a bowl. 2. Prepare the apples: Dice the apples into small cubes. Toss them with lemon juice. This keeps them fresh and bright. Now, let’s mix everything together. Start with the Snickers in the bowl. 1. Add the diced apples and mini marshmallows. If you like nuts, toss them in too. 2. Fold in the whipped topping: Gently mix until all the pieces are coated. Be careful not to squish everything. Your Snickers salad is ready to shine! 1. Transfer to a serving bowl: Spread the mixture evenly. This gives it a nice look. 2. Drizzle chocolate syrup: Add a sweet touch on top. 3. Chill before serving: Place it in the fridge for at least 30 minutes. This helps the flavors blend beautifully. For the full recipe, check the complete guide! To get the best flavors in your Snickers salad, use fresh apples. I like Granny Smith apples for their tartness. Their crunch adds great texture. Make sure to chop the Snickers bars into small pieces. This helps them mix well with the other ingredients. Toss the apples in lemon juice right away. This stops them from turning brown. Mixing in chocolate syrup at the end gives it a sweet touch. One common mistake is overmixing. Be gentle when folding in the whipped topping. If you mix too hard, you’ll lose that fluffy texture. Another mistake is not chilling the salad long enough. Let it sit in the fridge for at least 30 minutes. This helps all the flavors blend together. Also, don't skip the chocolate drizzle. It adds a nice finish. Store any leftover Snickers salad in an airtight container. This keeps it fresh and tasty. You can keep it in the fridge for up to three days. However, the apples may soften over time. It’s best to eat it fresh for the best taste. For the full recipe, check the recipe section above. {{image_2}} You can switch out Snickers for other candy bars. Try Milky Way for a smooth caramel flavor. Reese's Peanut Butter Cups add a nutty twist. If you prefer something fruity, use M&M's for a colorful crunch. Each option changes the taste and adds fun. Apples are great, but you can use other fruits. Sliced bananas give a creamy texture. Chopped strawberries add a fresh taste. If you want tartness, try adding blueberries. Each fruit creates a unique flavor blend for your Snickers salad. Want a lighter version? Use Greek yogurt instead of whipped topping. This keeps the salad creamy and adds protein. You can also cut down on candy bars. Use three Snickers instead of six. Add more fruit to fill it up. This way, you still enjoy the dessert with fewer calories. For more details, check the Full Recipe. One serving of Snickers salad has about 300 calories. This may vary based on the toppings and nuts you choose. The fun-sized Snickers bars add most of the calories. Each bar packs about 80 calories. The whipped topping and marshmallows also contribute to the total. Snickers salad offers some key nutrients. Each serving includes: - Protein: About 4 grams, mainly from the nuts and whipped topping. - Carbohydrates: Roughly 40 grams, coming from candy, marshmallows, and fruit. - Fats: Around 15 grams, primarily from the Snickers and optional nuts. - Fiber: Approximately 2 grams, mostly from the apples. This dessert is not gluten-free due to the candy bars. However, you can swap Snickers with a gluten-free candy option. It can be nut-free if you skip the nuts. Just ensure the other ingredients are free from nuts if allergies are a concern. If you want a lighter version, use a low-fat whipped topping. You can find the full recipe for Snickers salad above. You can make Snickers Salad a day in advance. Just prepare the salad as usual. Store it in the fridge in an airtight container. This allows the flavors to mix well. The salad stays fresh for up to two days. However, the apples may soften a bit. If you want them crisp, add them just before serving. Yes, you can use homemade whipped topping. Just whip heavy cream until it forms soft peaks. Add a bit of sugar and vanilla for extra flavor. This gives your Snickers Salad a fresh taste. Homemade topping can also make it more creamy and rich. If you want to switch up the candy bars, you have options. Try using Milky Way or Twix bars for a different flavor. You can also use peanut butter cups for a nutty twist. If you prefer a healthier choice, use dried fruit or granola. These swaps can change the taste, but they still keep it fun! In this post, I shared how to make a tasty Snickers Salad. We covered the full recipe, needed ingredients, and how to mix everything. I shared tips for great flavor, common mistakes to avoid, and how to store leftovers. You can even customize with other candy or fruit. Remember to consider the nutrition facts for your dietary needs. With these steps, you can make a delicious treat you'll love to share. Enjoy every bite!

Are you craving a dessert that’s both fun and super easy to make? Look no further than Snickers Salad! This delightful treat mixes crunchy candy, fresh fruit, and creamy goodness. …

Read more

Categories Desserts

Air Fryer Steak Bites Flavorful and Easy Recipe

June 3, 2025 by Chef Luca
To make air fryer steak bites, you will need: - 1 lb sirloin steak, cut into bite-sized cubes - 2 tablespoons olive oil - 1 teaspoon garlic powder - 1 teaspoon onion powder - 1 teaspoon smoked paprika - ½ teaspoon black pepper - ½ teaspoon salt - Fresh parsley, chopped (for garnish) I love using sirloin for steak bites. Sirloin is tender and flavorful. You can also try ribeye for a richer taste. Flank steak works well too. Just remember to cut it against the grain for the best texture. The right seasonings make a big difference. For this recipe, I use garlic powder and onion powder for depth. Smoked paprika adds a nice, warm flavor. You can switch things up too! Try adding chili powder for heat or rosemary for a fresh twist. Marinating the steak for at least 20 minutes helps the flavors soak in. For more ideas, check out the Full Recipe. Start by gathering your ingredients. You will need olive oil, garlic powder, onion powder, smoked paprika, black pepper, and salt. In a large bowl, combine these items. Mix them well to create a flavorful marinade. The olive oil helps the spices stick to the steak, while the spices bring great taste. Now, it's time to add the steak. Cut 1 pound of sirloin steak into bite-sized cubes. Toss the steak cubes into the bowl with the marinade. Use a spoon or your hands to coat each piece evenly. This step is key for great flavor. Let the steak marinate for at least 20 minutes. If you have time, marinate longer for even more flavor. Preheat your air fryer to 400°F (200°C) for about 5 minutes. This helps cook the steak bites evenly. Place the marinated steak bites in the air fryer basket. Make sure they are in a single layer. This allows hot air to circulate around each piece. Cook the steak bites for 8-10 minutes. Remember to shake the basket halfway through. This helps them cook evenly. For medium-rare, 8 minutes is perfect. If you like it medium, go for 10 minutes. After cooking, let the steak bites rest for a few minutes. This helps keep them juicy. Finally, garnish with fresh parsley before serving. Enjoy your tasty air fryer steak bites! For the full recipe, check out the recipe above. To get your steak bites just right, check the cooking time. For medium-rare, cook for about 8 minutes. For medium, go for 10 minutes. Use a meat thermometer to check the internal temperature. Aim for 130°F (54°C) for medium-rare and 140°F (60°C) for medium. Let the steak rest for a few minutes. This helps the juices stay in the meat. One common mistake is overcrowding the air fryer. Make sure to leave space between the steak bites. This helps them cook evenly. Another mistake is not marinating long enough. Letting the steak sit in the marinade for at least 20 minutes really boosts the flavor. Lastly, don’t skip the resting step. It makes a big difference in taste and texture. You can easily boost the flavor of your steak bites. Try adding fresh herbs like rosemary or thyme to the marinade. A splash of Worcestershire sauce can add depth. For a spicy kick, include a pinch of cayenne pepper. You can also experiment with different spices, like cumin or coriander, for a unique twist. For more ideas, check out the Full Recipe to explore different flavor profiles! {{image_2}} You can use many cuts of steak for this recipe. Sirloin is my favorite. It’s tender and flavorful. However, you can also try ribeye or flank steak. Ribeye has great marbling, which adds juiciness. Flank steak is lean and takes on flavors well. Just cut the steak into bite-sized pieces. This makes cooking fast and easy. You can mix up the flavors with different marinades. For a sweet twist, add soy sauce and honey. This gives a nice glaze. If you like heat, try adding chili powder or hot sauce. You can also use fresh herbs, like rosemary or thyme, for more flavor. Let the steak marinate for at least 20 minutes. This helps the meat soak up all the goodness. Serve your steak bites hot. They go well with a side of garlic aioli or spicy sriracha mayo. For a complete meal, pair them with fresh salad or roasted veggies. You can also serve them on skewers for fun finger food at parties. Want a drink? A nice red wine pairs perfectly with steak. Enjoy your meal! For the full recipe, check out Air Fryer Steak Bites. To store leftover steak bites, first let them cool down. Place them in an airtight container. This helps keep them fresh. You can store them in the fridge for up to three days. Make sure to label the container with the date. This way, you can track how long they’ve been stored. When you're ready to eat the leftovers, you can reheat them in the air fryer. Set the air fryer to 350°F (175°C). Place the steak bites in a single layer. Heat them for about 3-5 minutes until they are warm. This keeps them juicy and tasty. You can also use a microwave, but it might make them less crispy. If you want to keep steak bites for longer, freezing is a great option. First, let them cool completely. Then, spread them out on a baking sheet and freeze for one hour. This prevents them from sticking together. Once frozen, transfer them to a freezer bag. Remove as much air as possible before sealing. You can freeze them for up to three months. When you’re ready to eat, thaw them in the fridge overnight before reheating. For the full recipe, check out the delicious steps I shared earlier. Enjoy your cooking! Cook steak bites in the air fryer for 8 to 10 minutes. For medium-rare, aim for 8 minutes. For medium, go for 10 minutes. Check them halfway and shake the basket for even cooking. This keeps the bites juicy and flavorful. Yes, you can use various steak cuts. Options like ribeye, tenderloin, or flank steak work well. Each cut has a unique flavor and texture. Just remember to adjust cooking times based on the thickness of the pieces. Steak bites taste great with many sauces. Garlic aioli adds a rich, creamy touch. Spicy sriracha mayo gives a nice kick. You can also try chimichurri or blue cheese dressing for extra flavor. These dips enhance the taste and make your meal even better. For the full recipe, click here: Full Recipe. In this post, we explored how to make delicious steak bites. We covered the best ingredients, from cuts of steak to marinades. I shared step-by-step instructions for marinating and cooking your steak bites in an air fryer. We also looked at tips for perfect doneness and common mistakes to avoid. Remember, you can experiment with different steak cuts and marinades. With some practice, you can create flavorful steak bites for any meal. Enjoy your cooking and the tasty results!

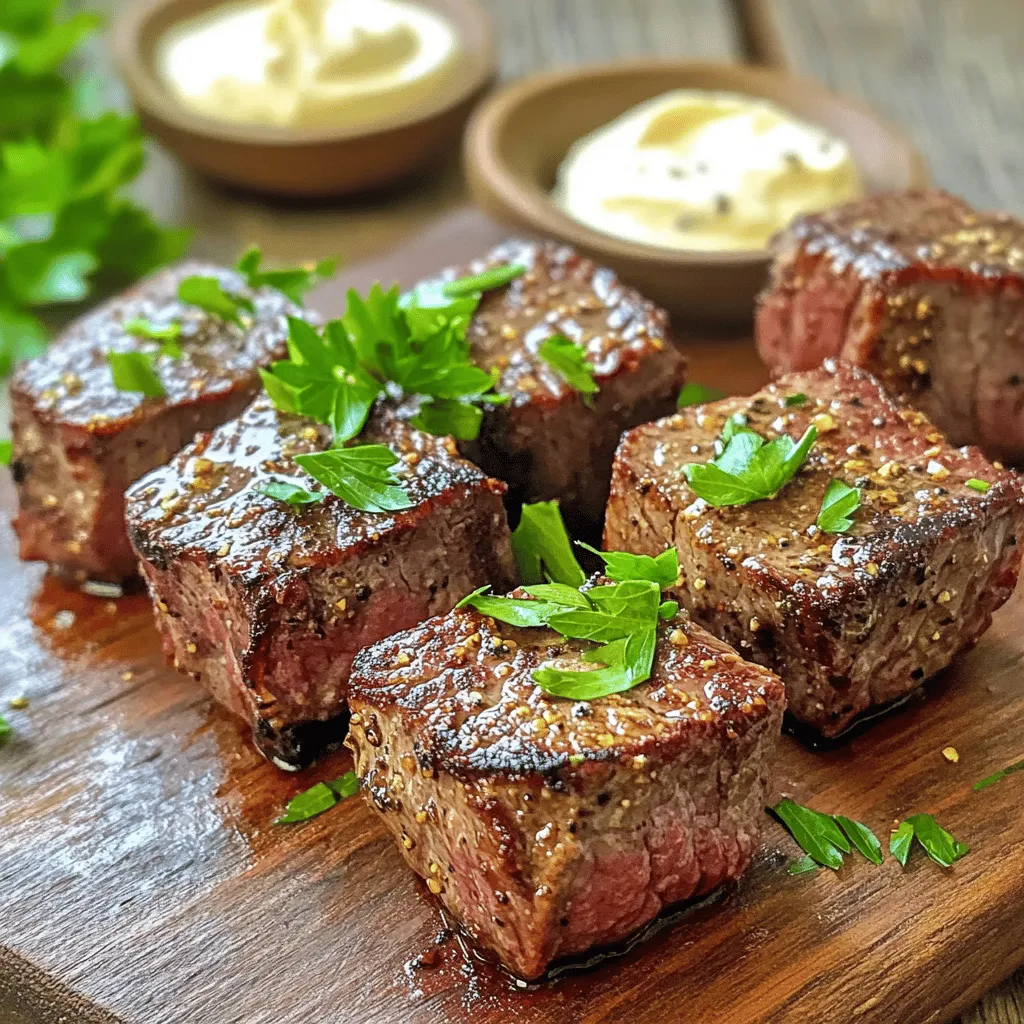
Are you ready to elevate your dinner game? Air fryer steak bites offer a flavorful, quick meal that’s perfect for any night. With simple ingredients and an easy process, you’ll …

Read more

Categories Dinner

Quick Tomato Spinach Gnocchi Skillet Easy Dinner Idea

November 11, 2025May 30, 2025 by Chef Luca
- 1 pound gnocchi (store-bought or homemade) - 2 tablespoons olive oil - 2 cloves garlic, minced - 1 can (14 oz) diced tomatoes, undrained - 3 cups fresh spinach, roughly chopped - 1 teaspoon dried oregano - Salt and pepper to taste - ½ cup grated Parmesan cheese (or a dairy-free alternative) - 1 teaspoon crushed red pepper flakes (for heat) - Fresh basil leaves (for garnish) You can swap gnocchi for pasta if needed. Use canned tomatoes in juice for easy prep. Instead of olive oil, try avocado oil for a different flavor. For a dairy-free option, skip the cheese or use a vegan brand. Fresh spinach can be replaced with frozen spinach; just thaw and drain it well. {{ingredient_image_1}} This dish comes together quickly. You need about 10 minutes to prep and 20 minutes to cook. Gather your ingredients first. This saves time and keeps you organized. 1. Start by heating 2 tablespoons of olive oil in a large skillet over medium heat. 2. Once the oil is hot, add 2 cloves of minced garlic. Sauté it for 30 seconds. You want it fragrant but not burnt. 3. Next, pour in a can of diced tomatoes. Keep the juices for flavor. Stir in 1 teaspoon of dried oregano and crushed red pepper flakes if you like heat. Let this simmer for 5 minutes. 4. While the tomato mix cooks, boil salted water in another pot. Add 1 pound of gnocchi and cook it for 2-3 minutes. The gnocchi is done when it floats. Drain it well and set aside. 5. After 5 minutes, stir in 3 cups of chopped spinach. Let it wilt for about 2 minutes. 6. Now add the cooked gnocchi to the skillet. Mix well with the sauce. Season with salt and pepper to taste. 7. Remove from heat and sprinkle ½ cup of grated Parmesan cheese on top. Stir gently to mix and let the cheese melt slightly. 8. Serve hot! Garnish with fresh basil leaves for a pop of color and flavor. - Prepare the ingredients while the oil heats. This keeps everything flowing. - Start cooking the gnocchi as soon as you add the tomatoes to the skillet. - Timing is key. You want the gnocchi ready when the sauce is done. - If you need extra flavor, add fresh herbs at the end. They brighten up the dish. To cook gnocchi well, use plenty of water. Salt the water well; this adds flavor. Cook the gnocchi until they float. This usually takes 2-3 minutes. Do not overcook them. If you do, they become mushy. Drain them gently and set aside. To boost flavor, add fresh herbs like basil and parsley. They add brightness to the dish. You can also use more garlic for a richer taste. If you like heat, add more crushed red pepper flakes. A splash of balsamic vinegar can deepen the flavor as well. Serve straight from the skillet for a cozy touch. This looks rustic and inviting. For a fancier look, scoop into bowls. Top with extra basil and a drizzle of olive oil. This adds a nice shine and extra flavor. Enjoy your meal with a side of crusty bread to soak up the sauce! Pro Tips Choosing Gnocchi: Opt for fresh gnocchi if possible; it has a lighter texture compared to shelf-stable varieties. Enhancing Flavor: Incorporate fresh herbs like thyme or rosemary to elevate the dish's flavor profile. Serving Suggestions: Pair with a side salad or crusty bread to make a complete meal. Storage Tips: Store leftovers in an airtight container in the fridge for up to 3 days; reheat gently to avoid overcooking the gnocchi. {{image_2}} You can easily boost this dish by adding protein. Chicken is a great choice. Simply cook bite-sized pieces in the skillet before adding garlic. Cook until the chicken is browned. For shrimp, add them just after the tomatoes. They cook quickly and add a nice touch. Both options make this dish more filling and tasty. This recipe is easy to adapt for vegetarians and vegans. To keep it vegetarian, just stick to the original recipe. For a vegan version, swap the Parmesan cheese with a dairy-free alternative. Nutritional yeast can add a cheesy flavor. You can also increase the spinach or add other veggies like bell peppers or mushrooms for more nutrition. If you want a gluten-free meal, choose gluten-free gnocchi. Many brands are available in stores. They taste great and cook similarly to regular gnocchi. Make sure to check the labels for allergens. This way, everyone can enjoy the dish without worry. To keep your Quick Tomato Spinach Gnocchi Skillet fresh, store leftovers in an airtight container. Let the dish cool down at room temperature first. Then, place it in the fridge for up to three days. This keeps the flavors intact. When you're ready to eat the leftovers, reheat gently. You can use the stove or microwave. If using the stove, warm it in a skillet over low heat. Stir occasionally until hot. If using a microwave, heat in short bursts of 30 seconds. Stir in between to avoid hot spots. If you want to save it for later, freezing is a great option. Place the cooled gnocchi skillet in a freezer-safe container. Seal it tightly to prevent freezer burn. This dish can last up to three months in the freezer. To enjoy later, thaw it overnight in the fridge before reheating. You can use store-bought gnocchi or make your own. I often choose store-bought for speed. Look for fresh or frozen gnocchi in the pasta aisle. Fresh gnocchi cooks fast and has a soft texture. Frozen gnocchi works well too; just follow the package instructions. Yes, you can prepare this dish ahead. Cook the gnocchi and sauce, then store them separately. Keep the gnocchi in an airtight container in the fridge. The sauce can also be stored for up to three days. Reheat both before serving. This keeps everything fresh and tasty. Gnocchi cooks fast. Boil them until they float. This usually takes about 2-3 minutes. Once they rise to the surface, they are ready. You can also taste one to check for doneness. If it’s soft, it’s perfect! In this post, we explored the key ingredients for gnocchi, including required and optional items. I shared step-by-step instructions to make it easy. You learned essential tips for perfecting your dish and exciting variations to try. We also discussed how to store leftovers and answered common questions. Remember, making gnocchi can be fun and rewarding. Use these tips to create your own version. Enjoy your cooking and share your delicious gnocchi with friends!

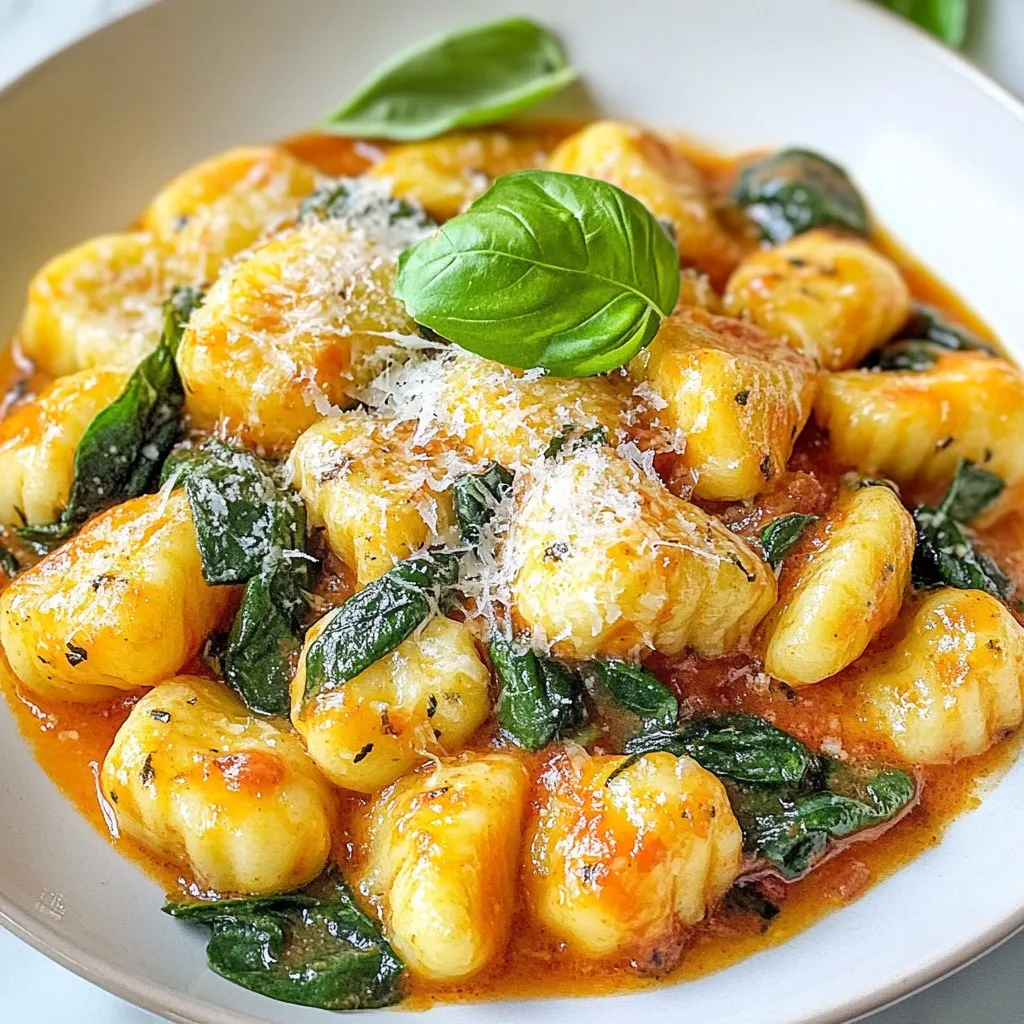
Looking for a quick and tasty dinner? This Quick Tomato Spinach Gnocchi Skillet is your answer! Packed with vibrant flavors and easy steps, this dish transforms simple ingredients into a …

Read more

Categories Dinner

Easy Chicken Lo Mein Quick and Flavorful Recipe

November 13, 2025May 30, 2025 by Chef Luca
- 8 oz egg noodles (or Lo Mein noodles) - 2 tablespoons sesame oil - 1 pound chicken breast, thinly sliced - 2 cups mixed vegetables (bell peppers, carrots, broccoli, snow peas) - 3 cloves garlic, minced - 1 tablespoon ginger, grated - ¼ cup soy sauce - 2 tablespoons oyster sauce (optional for added flavor) - 1 tablespoon sugar - 2 green onions, chopped - 1 teaspoon sesame seeds (for garnish) When making Easy Chicken Lo Mein, each ingredient plays a key role. Here are the measurements you need: - Egg noodles: 8 oz gives a perfect base. - Sesame oil: 2 tablespoons adds rich flavor. - Chicken breast: 1 pound offers protein and heartiness. - Mixed vegetables: 2 cups keep it colorful and healthy. - Garlic: 3 cloves bring aroma and depth. - Ginger: 1 tablespoon adds warmth and spice. - Soy sauce: ¼ cup brings umami and saltiness. - Oyster sauce: 2 tablespoons (if used) enhances flavor complexity. - Sugar: 1 tablespoon balances the salt. - Green onions: 2 chopped for fresh brightness. - Sesame seeds: 1 teaspoon for a lovely finish. If you're missing an ingredient, don’t worry! Here are some swaps you can use: - Noodles: Use rice noodles or even spaghetti if needed. - Sesame oil: Olive oil or vegetable oil works too. - Chicken: Try tofu or shrimp for a different protein. - Mixed vegetables: Any fresh or frozen veggies you like. - Garlic: Garlic powder can work in a pinch. - Ginger: Ground ginger can substitute fresh ginger. - Soy sauce: Tamari or coconut aminos for a gluten-free option. - Oyster sauce: A bit more soy sauce can replace it. - Sugar: Honey or maple syrup can be a sweet substitute. {{ingredient_image_1}} First, fill a big pot with water. Bring it to a boil. Add 8 oz of egg noodles. Cook them as the package says until they are al dente. This means they should be firm but not hard. Once done, drain the noodles and set them aside. Next, heat 1 tablespoon of sesame oil in a large skillet or wok. Set the heat to medium-high. Add 1 pound of thinly sliced chicken breast. Cook the chicken for about 5-7 minutes. You want it to be golden brown and fully cooked. After that, take the chicken out of the skillet and set it aside. In the same skillet, pour in another tablespoon of sesame oil. Toss in 2 cups of mixed vegetables, including bell peppers, carrots, broccoli, and snow peas. Add 3 cloves of minced garlic and 1 tablespoon of grated ginger too. Stir-fry everything for about 3-4 minutes. You want the veggies to be tender but still crisp. Now, bring the cooked chicken back into the skillet. Pour in ¼ cup of soy sauce and 2 tablespoons of oyster sauce if you want more flavor. Add 1 tablespoon of sugar as well. Mix everything well and heat it through. Finally, gently fold in the cooked noodles. Make sure every noodle gets coated with sauce and ingredients. Mix for about 2-3 minutes. After this, take it off the heat. Add 2 chopped green onions and mix lightly. Serve the chicken lo mein hot, and don't forget to sprinkle 1 teaspoon of sesame seeds on top for that perfect finish! To make your chicken lo mein shine, follow these tips: - Use fresh ingredients. Fresh veggies pack more flavor. - Cook noodles just right. Aim for al dente. They should be firm, not mushy. - Preheat your skillet. This step helps to sear the chicken well. - Don’t crowd the pan. Cook in batches if needed. This keeps everything crisp. - Add sauces at the right time. Mix in soy sauce and oyster sauce after veggies. This keeps flavors bright. Avoid these common mistakes: - Using overcooked noodles. They can turn mushy quickly. - Not seasoning enough. A pinch of salt can elevate your dish. - Skipping the garlic and ginger. These add depth and aroma. - Forgetting to garnish. Green onions and sesame seeds add nice crunch. - Not tasting as you go. Adjust flavors to your liking before serving. Here are some techniques to enhance your cooking: - Stir-fry quickly. Use high heat and keep stirring for even cooking. - Use a wok if you have one. It allows for better heat distribution. - Let chicken rest. After cooking, allow it to rest briefly before slicing. This keeps it juicy. - Fold noodles gently. This prevents breakage and keeps them whole. - Finish with a splash of sesame oil. This adds a rich, nutty flavor at the end. By using these tips and tricks, you can create a chicken lo mein that is both quick and bursting with flavor! Pro Tips Choose the Right Noodles: For the best texture, use fresh Lo Mein noodles if available. They offer a chewier bite compared to dried egg noodles. Prep Your Ingredients: Have all your ingredients chopped and ready to go before you start cooking. Stir-frying is a quick process, and you'll want everything within reach. Control the Heat: Keep your skillet or wok at a high temperature while stir-frying. This helps to sear the chicken and vegetables quickly, locking in flavors and maintaining crispness. Customize the Vegetables: Feel free to swap in your favorite vegetables or whatever you have on hand. Just ensure they are cut into uniform sizes for even cooking. {{image_2}} You can easily make a vegetarian lo mein. Swap the chicken for tofu or tempeh. Both options add great texture. Use the same amount you would for chicken. For a veggie boost, add more mixed vegetables like mushrooms or bean sprouts. This change keeps your meal light and tasty. If you want to change up the protein, try shrimp or beef. Shrimp cooks quickly, so add it for the last few minutes of stir-frying. Beef should be thinly sliced and can be added with the chicken. You can even mix proteins for more flavor. Just remember to adjust cooking times to ensure everything is cooked right. You can mix up the sauce to suit your taste. For a spicy kick, add chili paste or sriracha. For a sweeter touch, add more sugar or some honey. You can also try adding rice vinegar for tanginess. Experiment with different sauces like hoisin or teriyaki to find your favorite. To keep your chicken lo mein fresh, store it in an airtight container. Let it cool down first. Place it in the fridge if you plan to eat it within three days. For longer storage, you can freeze it. To reheat your chicken lo mein, use the stove or microwave. On the stove, add a splash of water to a pan. Heat over medium until warm, stirring often. In the microwave, cover the dish with a lid or microwave-safe wrap. Heat in 30-second bursts, stirring in between. To freeze chicken lo mein, pack it in freezer bags or containers. Remove as much air as you can. Label the bags with the date. It can last up to three months in the freezer. When you’re ready to eat, thaw it in the fridge overnight before reheating. To make Chicken Lo Mein gluten-free, swap regular soy sauce for gluten-free soy sauce. You can also use rice noodles or gluten-free egg noodles. Both options taste great. Always check labels for any hidden gluten. Yes, you can use other types of noodles. Soba noodles or rice noodles work well. Just cook them according to the package instructions. They will add a unique flavor and texture to your dish. Chicken Lo Mein can be healthy, especially if you use fresh veggies. The chicken provides protein, while the mixed vegetables add vitamins. You can also control the amount of sauce and oil to keep it lighter. To spice up Chicken Lo Mein, add chili paste or red pepper flakes. You can mix these into the sauce for an extra kick. Fresh sliced chili peppers also add heat and color. Adjust the spice to your liking! This blog post detailed how to make Chicken Lo Mein. We covered the full list of ingredients and their measurements, along with easy substitutions. I shared step-by-step cooking instructions for perfect noodles, chicken, and veggies. Tips helped avoid common mistakes, while variations showed how to customize your dish. Finally, I explained how to store and reheat leftovers effectively. In short, you now have all the tools to enjoy Chicken Lo Mein at home. Enjoy the cooking process, and don't be afraid to experiment!

Are you craving a quick and tasty meal? Look no further! My Easy Chicken Lo Mein recipe is just what you need. It’s packed with flavor, and you can make …

Read more

Categories Dinner

Mediterranean Orzo Pasta Salad Fresh and Healthy Meal

May 30, 2025 by Chef Luca
To make a tasty Mediterranean orzo pasta salad, gather these fresh ingredients: - 1 cup orzo pasta - 1 cup cherry tomatoes, halved - 1 cucumber, diced - 1/2 red onion, finely chopped - 1/2 cup Kalamata olives, pitted and sliced - 1/2 cup feta cheese, crumbled - 1/4 cup fresh parsley, chopped - 1/4 cup olive oil - 2 tablespoons lemon juice - 1 teaspoon dried oregano - Salt and pepper to taste Using fresh ingredients makes a big difference in taste. Look for bright, firm cherry tomatoes. Choose a cucumber that feels crisp. For olives, select rich Kalamata ones for depth. Quality feta cheese should be creamy and tangy. Fresh parsley adds a pop of color and flavor. Always use extra virgin olive oil for the best taste. You can swap some ingredients if needed. If you can't find orzo, try any small pasta like couscous. For a dairy-free option, use a vegan feta or skip it. If you dislike Kalamata olives, green olives work well. Use lemon zest if you want more lemon flavor. You can also add bell peppers or artichokes for a twist. This salad is versatile and lets you play with flavors. For the complete recipe, check out the Full Recipe section. Start by boiling water in a big pot. Add one cup of orzo pasta to the pot. Cook it for about 8 to 10 minutes. Stir it now and then to keep it from sticking. When it’s done, drain the orzo and rinse it with cold water. This cools it down and stops the cooking. While the orzo cooks, chop your veggies. Dice one cucumber and halve one cup of cherry tomatoes. Finely chop half a red onion. Slice half a cup of Kalamata olives and crumble half a cup of feta cheese. Finally, chop a quarter cup of fresh parsley. Having all the veggies ready makes mixing easier. In a small bowl, whisk together the dressing. Start with a quarter cup of olive oil. Add two tablespoons of lemon juice for a zesty kick. Then, mix in one teaspoon of dried oregano. Don't forget to add salt and pepper to taste. This dressing brings all the flavors together. In a large bowl, combine the cooled orzo with all the chopped veggies. Add the crumbled feta cheese and fresh parsley. Pour the dressing over this mix. Toss everything gently to coat well. Let the salad sit for at least 15 minutes. This resting time helps the flavors blend. You can serve it chilled or at room temperature. For extra flair, add more parsley on top if you like. For the complete recipe, refer to the [Full Recipe]. To make your Mediterranean Orzo Pasta Salad taste amazing, use fresh ingredients. Fresh herbs, like parsley, really boost the flavor. You can also add a pinch of red pepper flakes for heat. If you love garlic, try adding minced garlic to the dressing. A touch of honey or agave syrup can balance the acidity of the lemon juice. Serve this salad as a side dish or main meal. It pairs well with grilled chicken or fish. You can also enjoy it on its own as a light lunch. For a colorful plate, add some sliced bell peppers or avocado. Garnish with extra feta or parsley for a pretty look. Store any leftover salad in an airtight container. Keep it in the fridge for up to three days. If you want to keep it fresh longer, separate the dressing from the salad. Mix them just before serving. This keeps the orzo and veggies from getting soggy. {{image_2}} You can change many parts of your Mediterranean Orzo Pasta Salad. Swap orzo pasta with quinoa for a gluten-free option. Substitute cherry tomatoes with diced bell peppers for a sweeter taste. If you want crunch, try adding radishes instead of cucumbers. You can also use goat cheese in place of feta for a tangy flavor. Each swap keeps the salad fresh and fun. Want to make your salad heartier? Add protein to your dish. Chickpeas are an excellent choice for a plant-based boost. Grilled chicken or shrimp also work well and add protein without changing the flavor much. You can even toss in canned tuna for a quick fix. These additions will turn your salad into a complete meal. Herbs bring your Mediterranean Orzo Pasta Salad to life. Fresh basil adds a sweet, aromatic touch. You can also use mint for a refreshing twist. If you like a stronger flavor, try dill or tarragon. Mix in these herbs with the parsley for a bright and bold taste. They enhance the overall flavor and make the salad even more enjoyable. For the full recipe, check out the recipe section. You'll find all the ingredients and steps to create this vibrant dish. To keep your Mediterranean Orzo Pasta Salad fresh, store it in an airtight container. Make sure to let it cool to room temperature first. This helps keep the flavors bright and the texture nice. Leftovers can last in the fridge for about 3 to 5 days. Always check for off smells or changes in texture before eating. I recommend using glass containers with tight lids. They help keep your salad fresh and tasty. You can also use plastic containers, but make sure they are BPA-free. Label the container with the date you made the salad. This way, you won't forget how long it's been in the fridge. You can freeze this pasta salad if you want to save some for later. However, the texture of the vegetables may change. To freeze, place the salad in a freezer-safe container. Make sure to leave some space at the top for expansion. You can freeze it for up to 3 months. When you're ready to eat, just thaw it in the fridge overnight. Enjoy it cold or at room temperature. For the full recipe, check back for easy steps! To make Mediterranean Orzo Pasta Salad, cook 1 cup of orzo pasta. Follow the package instructions. Once cooked, drain and rinse it under cold water. In a large bowl, mix the cooled orzo with halved cherry tomatoes, diced cucumber, finely chopped red onion, sliced Kalamata olives, crumbled feta cheese, and chopped fresh parsley. Next, whisk olive oil, lemon juice, dried oregano, salt, and pepper in a small bowl. Pour this dressing over the salad and toss gently. Let it sit for at least 15 minutes to blend the flavors. Yes, you can make this salad ahead of time. Prepare it a few hours or even a day before serving. Just keep it in the fridge. The flavors will deepen and taste even better after sitting. If you want, wait to add the dressing until you’re ready to serve. This keeps everything fresh and crisp. No, Mediterranean Orzo Pasta Salad is not gluten-free. Orzo is a type of pasta made from wheat. If you need a gluten-free option, you can use gluten-free pasta. Look for brands that offer gluten-free orzo. This way, you can still enjoy a tasty salad without any gluten. You can add many things to this salad! Try adding grilled chicken or shrimp for protein. You could also mix in bell peppers or spinach for more veggies. Artichoke hearts and sun-dried tomatoes add a nice twist too. Experiment with your favorite ingredients to make it your own! Mediterranean Orzo Pasta Salad lasts about 3 to 5 days in the fridge. Store it in an airtight container. If you notice any signs of spoilage, like an off smell or color, it’s best to throw it away. Always trust your senses when it comes to food safety. - 1 cup orzo pasta - 1 cup cherry tomatoes, halved - 1 cucumber, diced - 1/2 red onion, finely chopped - 1/2 cup Kalamata olives, pitted and sliced - 1/2 cup feta cheese, crumbled - 1/4 cup fresh parsley, chopped - 1/4 cup olive oil - 2 tablespoons lemon juice - 1 teaspoon dried oregano - Salt and pepper to taste 1. Cook the orzo pasta according to package instructions. Drain and rinse under cold water to cool. 2. In a large bowl, combine the cooled orzo, cherry tomatoes, cucumber, red onion, Kalamata olives, feta cheese, and fresh parsley. 3. In a small bowl, whisk together the olive oil, lemon juice, dried oregano, salt, and pepper to create the dressing. 4. Pour the dressing over the orzo and vegetable mixture, tossing gently to coat everything evenly. 5. Taste and adjust seasoning if necessary. Let the salad sit for at least 15 minutes to allow the flavors to meld. 6. Serve chilled or at room temperature, garnishing with additional parsley if desired. First, cook the orzo pasta and rinse it. Next, mix in the chopped veggies, olives, and feta. Then, whisk up the dressing. Pour it over the salad and toss. Let it sit for a bit, then serve. It’s simple and fresh! This salad is a healthy choice. It has fiber from the pasta and veggies. The olives and olive oil provide healthy fats. Feta cheese adds protein and calcium. Each serving is about 250 calories. It’s perfect for a light lunch or dinner! We just covered how to make a tasty Mediterranean Orzo Pasta Salad. You learned about key ingredients, their quality, and helpful substitutes. I explained the step-by-step process from cooking the pasta to making the dressing. You got useful tips for enhancing flavor and storing leftovers. Lastly, we discussed easy variations to make the salad your own. Enjoy creating this salad and sharing it with friends. It's a fresh dish that’s fun to customize and perfect for any meal.

Looking for a fresh and healthy meal that’s easy to make? Look no further! This Mediterranean Orzo Pasta Salad is packed with vibrant flavors and nutritious ingredients. I’ll guide you …

Read more

Categories Salads

S’mores Cookies Recipe Irresistible and Fun Treat

May 30, 2025 by Chef Luca
Here’s what you need to make S'mores Cookies. Gather these simple items before you start: - 1 cup unsalted butter, softened - 3/4 cup brown sugar, packed - 1/2 cup granulated sugar - 1 large egg - 1 teaspoon vanilla extract - 2 cups all-purpose flour - 1/2 teaspoon baking soda - 1/4 teaspoon salt - 1 cup chocolate chips (semi-sweet or milk chocolate) - 1 cup mini marshmallows - 1 cup graham cracker crumbs These ingredients blend perfectly to create a cookie that tastes like the classic campfire treat. The butter makes the cookies rich and soft. The sugars provide sweetness, while the egg binds everything together. The flour and baking soda give the cookies shape and lift. The mini marshmallows and chocolate chips deliver that gooey, melty goodness. Finally, graham cracker crumbs add a crunch that completes the S'mores experience. You can find the full recipe for this delightful treat by checking the recipe section. Enjoy the process of mixing these ingredients! - Preheat the oven to 350°F (175°C). - Line baking sheets with parchment paper. Start by getting your oven nice and warm. Set it to 350°F. This will ensure your cookies bake evenly. While your oven heats up, grab some parchment paper. Line your baking sheets with it. This step helps prevent sticking and makes cleanup easy. - Cream the butter and sugars. - Add egg and vanilla. - Combine dry ingredients. - Fold in chocolate chips, marshmallows, and graham cracker crumbs. In a large bowl, mix the softened butter with brown sugar and granulated sugar. Use an electric mixer for about three to four minutes. The mixture should look light and fluffy. Next, drop in the egg and vanilla extract. Mix until everything blends well. Now, in another bowl, whisk together the flour, baking soda, and salt. Slowly add it to the butter mix. Stir until just combined; don't overdo it. Finally, fold in the chocolate chips, mini marshmallows, and graham cracker crumbs. Make sure these tasty bits are evenly mixed in. - Scoop the dough onto the baking sheet. - Bake for 10-12 minutes. - Allow cooling process. Now it’s time to scoop the dough. Use a cookie scoop or a tablespoon to drop rounded balls onto the lined baking sheets. Leave some space between them for spreading. Bake the cookies for 10 to 12 minutes. They should be lightly golden at the edges. The middle might look a bit underbaked, and that’s okay! Once baked, take them out and let them cool on the sheet for about five minutes. This helps the marshmallows firm up. After that, move the cookies to a wire rack to cool completely. You can find the complete details in the Full Recipe. Enjoy making your S'mores Cookies! Baking time is key for soft cookies. Aim for 10 to 12 minutes in the oven. You want the edges to be golden, while the center remains a bit soft. This gives you that chewy feel. When you remove them, they may look underbaked. Don’t worry; this is what you want for perfect S'mores Cookies. They will firm up as they cool. For a fun twist, try different types of chocolate. Dark chocolate adds a rich flavor. You can also use white chocolate for a sweeter taste. If you want a crunchy bite, swap graham crackers for crushed cookies or even pretzels. This change adds a nice salty contrast to the sweet marshmallows and chocolate. Remember, the Full Recipe has all the details you need! {{image_2}} When making S'mores Cookies, you can switch things up for fun and flavor. Here are some exciting variations. - Gluten-free options: You can replace all-purpose flour with a gluten-free blend. Look for one that works well in baking. This way, everyone can enjoy your cookies! - Vegan substitutions: To make these cookies vegan, swap out the butter for coconut oil or vegan butter. For the egg, use a flax egg made from one tablespoon of ground flaxseed and three tablespoons of water. This keeps the texture just right. - Adding peanut butter or caramel: Want a twist? Mix in some peanut butter for a nutty taste. You can also drizzle caramel on top before baking for a sweet surprise. - Using flavored chocolate or chips: Change up your chocolate by using flavored chips. Try mint, dark chocolate, or even butterscotch. These small changes can create a whole new cookie experience. Feel free to explore these variations. Your S'mores Cookies can be unique every time you bake! Check out the Full Recipe for more details. To keep your S'mores Cookies fresh, store them in an airtight container. This helps maintain their soft texture and flavor. You can also add a slice of bread to the container. The bread keeps the cookies moist. If you have a lot of cookies, separate layers with parchment paper. This prevents them from sticking together. You can freeze cookie dough for future baking. To freeze, scoop the dough into balls and place them on a baking sheet. Freeze until solid, then transfer the balls to a freezer-safe bag. Label the bag with the date. When you want cookies, just take out the dough. To thaw baked cookies, simply leave them at room temperature for about 15 minutes. You can also heat them in the microwave for a few seconds. This makes them warm and gooey again. Enjoy your treats anytime! For the complete recipe, check out the Full Recipe. Can I make S'mores Cookies ahead of time? Yes, you can make the dough a day in advance. Just chill it in the fridge. This helps the flavors blend well. You can bake them fresh later. What can I use instead of graham crackers? You can use digestive biscuits or vanilla wafers. Both give a nice crunch. They also add a sweet flavor to your cookies. How do I ensure my cookies are chewy? Use brown sugar in your recipe. It adds moisture. Also, do not overbake the cookies. Take them out when the edges are golden but the centers look soft. Can I add nuts or fruits to the recipe? Yes, you can! Walnuts or pecans work well. Dried fruits like cranberries or cherries can add great flavor too. Just keep the balance of wet and dry ingredients in mind. Why are my cookies spreading too much? Too much butter or not enough flour can cause this. Make sure you measure correctly. Also, chill the dough before baking to firm it up. What to do if my dough is too dry? If your dough feels dry, add a splash of milk. Mix it in gradually. Just enough to bring the dough together without making it sticky. These S'mores cookies combine classic flavors in a fun treat. You learned about the ingredients, steps, and tips for making them perfect. Remember to check for underbaked centers for that chewy goodness. Feel free to explore variations like gluten-free or vegan options. You can also enhance the flavors with peanut butter or different chocolates. Store your cookies carefully to keep them fresh. I hope you enjoy baking these cookies and sharing them with friends and family!

Get ready to whip up a sweet treat that will delight everyone! My S’mores Cookies Recipe combines the classic flavors of s’mores in a fun, easy-to-bake cookie. With melty chocolate, …

Read more

Categories Desserts

Summer Fruit Salad Refreshing and Healthy Recipe

May 30, 2025 by Chef Luca
- Watermelon - Strawberries - Blueberries - Kiwi - Peaches To make a vibrant summer fruit salad, I love using fresh fruits. Watermelon gives a sweet, juicy base that feels refreshing. Strawberries add a bright red color and a tangy taste. Blueberries offer a burst of flavor with every bite. Kiwi brings a unique sweetness and a lovely green hue. Peaches add a soft, fragrant touch that ties everything together. - Honey - Fresh Mint - Lime Juice - Sea Salt For the dressing, I blend honey, fresh mint, lime juice, and sea salt. Honey adds natural sweetness and helps balance the tangy lime. Fresh mint is a game changer, bringing a cool flavor. Lime juice brightens the salad, while sea salt enhances all the tastes. This dressing is simple yet makes a big impact. - Mixing Bowl - Small Bowl - Whisk You will need a mixing bowl for the fruit and a small bowl for the dressing. A whisk helps mix the honey, lime juice, and salt smoothly. Using the right tools makes the process easy and quick. This way, you can enjoy your delicious summer fruit salad sooner. For the complete recipe, check out the Full Recipe. To start, you need to prepare the fruit. First, grab a watermelon. Cut it in half. Use a sharp knife to slice the fruit away from the rind. Then, dice it into small cubes. Make sure each piece is about one inch. Next, take the strawberries. Rinse them under cold water. Then, cut off the green tops. Slice each berry in half. This helps release their sweet juice. Now, let’s move on to the kiwi. Peel the skin carefully. Then, slice it into thin rounds. If you want bite-sized pieces, cut those rounds into halves or quarters. Lastly, chop the peaches. Cut them in half and remove the pit. Dice the flesh into small cubes, like the watermelon. Now, let’s make the dressing. Take a small bowl. Add two tablespoons of honey. Next, squeeze the juice of one lime into the bowl. This will give the salad a zesty kick. Then, add a pinch of sea salt. This helps balance the flavors. Use a whisk to mix these ingredients well. Make sure the honey dissolves completely. It’s time to combine everything. In a large mixing bowl, add the diced watermelon, halved strawberries, blueberries, sliced kiwi, and diced peaches. Once the fruit is in the bowl, drizzle the honey-lime dressing over the top. Use a spatula or your hands to gently toss the salad. Make sure each piece of fruit gets a nice coat of dressing. Finally, fold in the finely chopped mint. This adds a fresh touch to your salad. Cover the bowl and let it chill in the fridge for at least 30 minutes. This step allows all the flavors to mix beautifully. For the full recipe, check the details above! To pick the best fruits, look for signs of ripeness. For watermelon, a ripe one feels heavy and has a dull spot. This spot shows where it rested on the ground. Peaches should have a sweet smell and give a little when you press them. Strawberries should be bright red with no white spots. If they smell sweet and are firm, they are ready to eat. You can boost the taste of your fruit salad with fresh herbs and spices. Try adding basil or cilantro for a twist. A pinch of cinnamon can also add warmth. If you like a kick, a sprinkle of black pepper works great. These flavors mix well with the sweetness of the fruits. Get creative when you serve your salad. Use clear glasses to show off the colors. You can layer the fruits for a pretty look. Add a mint leaf on top for a fresh touch. For a fun twist, serve the salad inside halved fruits like oranges or pineapples. This makes the dish not just tasty, but also fun to eat. {{image_2}} For a fun twist, add tropical fruits to your salad. Mango and pineapple bring bright flavors. They add a sweet, juicy taste that pairs well with other fruits. Cut the mango into cubes and slice the pineapple into rings or chunks. You can mix them right in for a fresh bite of summer. Try adding more berries for a berry medley! Raspberries, blackberries, and strawberries work great together. Each berry brings its own taste and texture. Toss them in for a colorful burst of flavor. You can even layer them in the bowl for a pretty look. If you want a vegan option, swap honey for agave syrup or maple syrup. Both are sweet and plant-based. You can also add chia seeds for extra texture and nutrition. Sprinkle them in to boost fiber and omega-3s. Your salad stays fresh and tasty while being kind to the planet. For the full recipe, check out the Summer Bliss Fruit Salad. Enjoy your healthy and refreshing creation! To keep your summer fruit salad fresh, use an airtight container. Place the salad in the fridge right away. This helps keep the fruit from getting mushy. Make sure the lid fits well. If you have leftover dressing, store it separately. This way, the salad stays crisp and tasty. The fruit salad stays fresh for about three days in the fridge. After that, the fruits start to lose their flavor and texture. If you see any browning or mushiness, it’s best to toss it. Enjoy the salad while it’s at its best! You can freeze fruit salad, but it's not always the best idea. Freezing changes the texture of many fruits. If you want to freeze it, choose fruits that hold up well, like blueberries and peaches. Cut the fruits into small pieces and place them in a freezer bag. Squeeze out the air before sealing. When you’re ready to eat, let the salad thaw in the fridge. Use it in smoothies or as a topping instead of eating it plain. For the full recipe, check out Summer Bliss Fruit Salad. Yes, you can use frozen fruit. Frozen fruit is often picked at peak ripeness. This means it has great taste and nutrients. However, there are some downsides. Frozen fruit can be mushy when thawed. This texture may not work well in a fresh salad. If you want to use it, try to buy a brand without added sugar. Thaw the fruit before using it. Drain excess liquid to keep your salad fresh. To keep your fruit salad bright, use a few simple tricks. First, add a splash of lemon or lime juice. The acid helps slow down browning. Another tip is to mix the fruits quickly after cutting them. This helps reduce air exposure. Store your salad in an airtight container. This will keep it fresh longer. Keep it in the fridge until serving. If you want a filling salad, try adding some protein or grains. Chopped nuts, like almonds or walnuts, add crunch and healthy fats. You can also use seeds, such as chia or sunflower seeds. For a grain boost, add quinoa or cooked farro. These options will make your salad more satisfying. You can even mix in yogurt or cottage cheese for extra creaminess. For the full recipe, check out the Summer Bliss Fruit Salad. This fruit salad is a vibrant mix of freshness, flavor, and fun. We explored juicy fruits like watermelon and strawberries, created a zesty dressing with honey and lime, and shared handy tips for preparing and storing your salad. Remember, ripe fruits make a big difference. Experiment with variations to keep things exciting. Whether you serve it at a picnic or as a snack, this recipe is sure to please. Enjoy your delicious creation and the smile it brings!

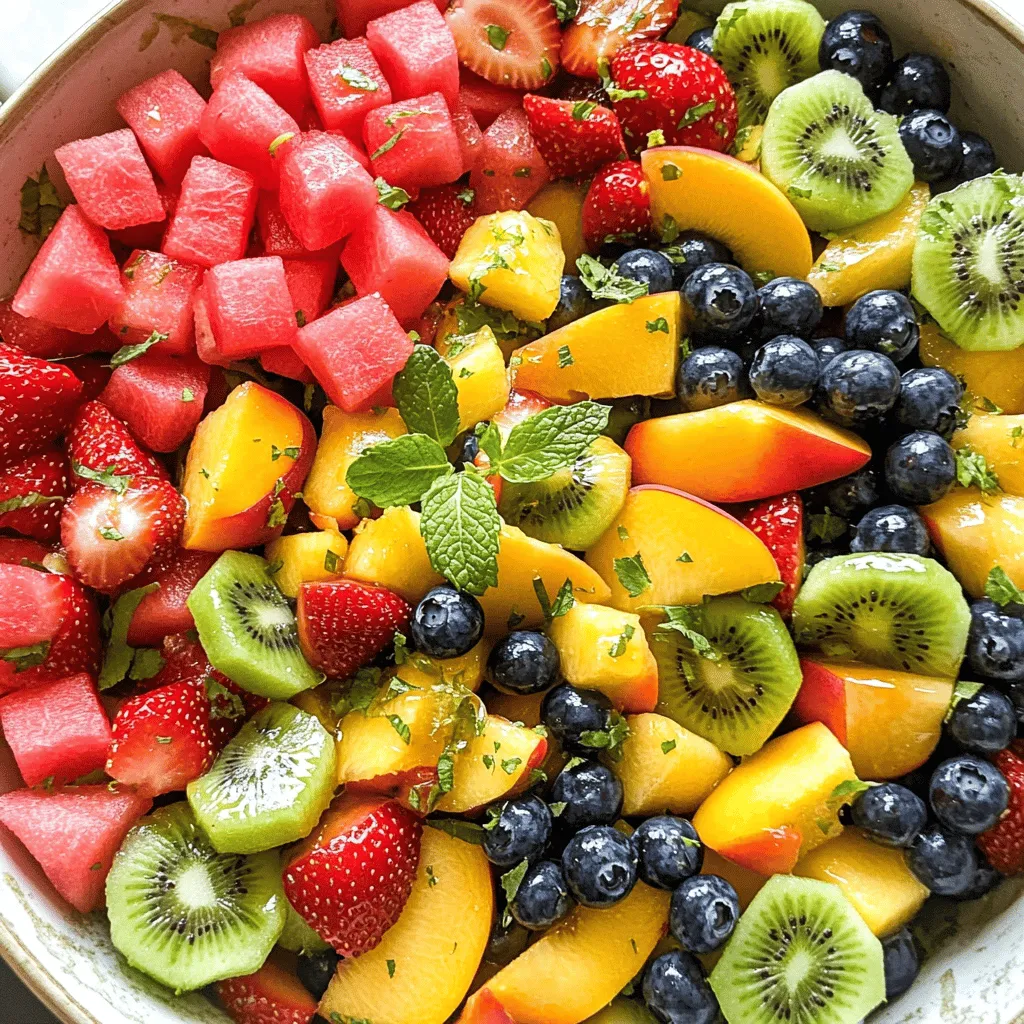
Looking for a way to stay cool and healthy this summer? A fresh summer fruit salad is the perfect solution! Bursting with sweet watermelon, juicy peaches, and colorful blueberries, this …

Read more

Categories Salads

Boat Dip Rotel Ranch Dip Easy and Flavorful Recipe

May 30, 2025 by Chef Luca
To create the perfect Boat Dip, you need these main items: - 1 can (10 oz) diced tomatoes with green chilies (like Rotel) - 1 cup sour cream - 1 packet ranch seasoning mix - 1 cup cream cheese, softened - 1 cup shredded cheddar cheese - 1/2 cup diced green onions - 1/2 cup diced bell pepper (any color) These ingredients bring flavor and creaminess to the dip. The diced tomatoes add a nice kick, while the cream cheese and sour cream give it a rich texture. Feel free to add your own twist with these optional ingredients: - 1/4 cup black olives, sliced (optional) - A splash of hot sauce or diced jalapeños for heat These extras let you make the dip your own. If you love olives, toss them in. Want more spice? A little hot sauce does the trick! Serve your Boat Dip with these tasty items for the best experience: - Tortilla chips - Veggie sticks (like carrots or celery) Tortilla chips are crunchy and perfect for scooping. Veggie sticks offer a fresh, healthy option. Whichever you choose, your guests will love it! For the full recipe, check the previous section. Making Boat Dip is quick and easy. You will need about 15 minutes to prep. Gather all your ingredients first. This will help you move faster. You can find the full recipe above. Start by taking a large bowl. Add the softened cream cheese, sour cream, and ranch seasoning mix. Mix these three together until it is smooth and creamy. This is the base of your dip. Next, drain the can of diced tomatoes with green chilies. Add them to the bowl and stir until well combined. Now it is time to add the fun stuff! Fold in the shredded cheddar cheese, diced green onions, diced bell pepper, and black olives if you want. Mix it gently so you keep the cheese chunks. Taste your dip and adjust the seasoning if needed. If you want more heat, add a splash of hot sauce or diced jalapeños. Once it is all mixed, transfer your dip to a serving bowl. Chill it in the fridge for at least 30 minutes. This helps all the flavors blend together. Serve it cold with tortilla chips or veggie sticks. Enjoy your delicious Boat Dip! To make your Boat Dip even tastier, try adding fun flavors. Here are some ideas: - Hot Sauce: Add a few dashes for spice. - Jalapeños: Fresh or pickled ones give a kick. - Cilantro: Fresh herbs add a bright taste. - Corn: Sweet corn adds crunch and sweetness. Each of these can give your dip a unique twist. Mix and match to find your favorite blend! A great dip deserves a great look. Here are some tips to serve your Boat Dip: - Chill it: Let it cool for at least 30 minutes. This helps the flavors blend well. - Garnish: Sprinkle extra green onions or cheese on top before serving. - Serve in style: Use a fun bowl or even a hollowed-out bell pepper for a colorful touch. - Pair with dips: Offer tortilla chips and veggie sticks for a nice spread. These small steps can make your dip the star of the table! When making Boat Dip, some mistakes can happen. Here’s what to watch out for: - Skipping the chill time: Don’t rush this step. Chilling helps flavors mix. - Not draining tomatoes: Ensure you drain the canned tomatoes well. Too much liquid makes it runny. - Overmixing: Mix just enough to combine. Overmixing can change the texture. - Forget to taste: Always taste your dip before serving. Adjust seasoning as needed. Avoiding these common errors will help you make a perfect dip every time. For the full recipe, check the [Full Recipe]. {{image_2}} If you like heat, you can spice up your boat dip. You can add diced jalapeños or a splash of hot sauce. Both options bring a great kick to the dip. For more heat, try adding diced serrano peppers. You can also use spicy ranch seasoning instead of the regular kind. This will give your dip a bold flavor. Just remember to taste as you go. Adjust to find the heat level you enjoy. You can easily make this dip vegetarian. Swap the ranch seasoning for a plant-based version. Use vegan cream cheese and sour cream for a dairy-free dip. You can also add more veggies. Chopped spinach or artichokes can enhance the dip's texture. Grated carrots or diced cucumbers also work well. These additions make the dip healthy and colorful. Everyone will enjoy it, even if they don’t follow a vegetarian diet. Cheese is key in boat dip, but you have options. If you want a lighter dip, use low-fat cream cheese. You can also swap in mozzarella for a milder taste. If you love blue cheese, crumbled blue cheese can add a strong flavor. For a nutty twist, try using nutritional yeast. This will give your dip a cheesy flavor without dairy. Each option changes the taste, so have fun exploring! For the full recipe, check out the complete guide above! To keep leftover Boat Dip fresh, place it in an airtight container. Make sure to seal it well. Store it in the fridge. It will stay good for about three days. If you notice any change in smell or color, it’s best to toss it out. If you want to freeze Boat Dip, use a freezer-safe container. Leave some space at the top. The dip may expand when frozen. It can last up to two months in the freezer. When you’re ready to eat it, thaw it in the fridge overnight. To reheat Boat Dip, avoid using the microwave. Instead, warm it gently in a saucepan over low heat. Stir often to keep it smooth. If the dip looks thick, add a splash of sour cream. This keeps it creamy and tasty. Enjoy your dip warm with chips or veggies. For the full recipe, check the main article. Boat Dip stands out due to its creamy texture and bold flavors. The main ingredient is cream cheese, which gives it a rich, smooth base. The combination of diced tomatoes with green chilies adds a zesty kick. Ranch seasoning brings in a tangy flavor that pairs well with the cheese. This dip is effortless to make and perfect for gatherings. You can serve it cold or at room temperature, making it versatile for any occasion. Yes, you can make Boat Dip in advance. In fact, making it a day before can enhance the flavors. Just prepare the dip as per the Full Recipe and store it in an airtight container. Keep it in the fridge until you’re ready to serve. When you take it out, give it a quick stir and enjoy the burst of flavors. If you don’t have ranch seasoning, you can make your own mix. Combine equal parts of dried herbs such as dill, parsley, and chives. Add some garlic powder and onion powder for extra flavor. You can also use Italian seasoning or any favorite seasoning blend. Just remember to taste and adjust the flavors to your liking. In this blog post, we explored how to craft a delicious boat dip. We discussed key ingredients, step-by-step instructions, and tips to enhance flavor. We also looked at tasty variations and how to store your dip effectively. Remember, boat dip can be tailored to your taste, so don’t be afraid to experiment! With these tips, your next gathering will have a crowd-pleaser on the table. Enjoy making your perfect dip and share it with friends!

If you love a tasty and easy dip, you’re in for a treat! Boat Dip, also known as Rotel Ranch Dip, is the perfect blend of flavors for any gathering. …

Read more

Categories Appetizers

Easy Mexican Coleslaw Quick and Flavorful Recipe

May 30, 2025 by Chef Luca
To make Easy Mexican Coleslaw, gather these simple ingredients: - Green cabbage (4 cups, finely shredded) - Red cabbage (1 cup, finely shredded) - Carrot (1 cup, grated) - Red onion (1/2 cup, thinly sliced) - Corn kernels (1 cup, fresh or canned) - Cilantro (1/2 cup, chopped) - Jalapeño (1, minced) - Mayonnaise (1/4 cup) - Lime juice (2 tablespoons) - Honey (1 tablespoon) - Ground cumin (1 teaspoon) - Salt and pepper (to taste) Each ingredient adds its own flavor and texture. The green and red cabbage bring crunch and color. Carrots add sweetness, while red onion gives a nice bite. Corn adds a pop of sweetness, and cilantro gives freshness. The jalapeño adds heat; you can remove the seeds for less spice. The dressing combines mayonnaise, lime juice, honey, and cumin. This blend ties all the flavors together. For a full experience, check out the Full Recipe. These ingredients work well together and make a tasty side for any meal! 1. Combine all vegetables in a large mixing bowl. Start by adding 4 cups of finely shredded green cabbage, 1 cup of finely shredded red cabbage, 1 cup of grated carrot, 1/2 cup of thinly sliced red onion, 1 cup of corn kernels, 1/2 cup of chopped cilantro, and 1 minced jalapeño to a large mixing bowl. This colorful mix makes your coleslaw vibrant and fresh. 2. Whisk together dressing ingredients in a small bowl. In a separate bowl, whisk together 1/4 cup of mayonnaise, 2 tablespoons of lime juice, 1 tablespoon of honey, 1 teaspoon of ground cumin, and salt and pepper to taste. This dressing adds zing and creaminess to your coleslaw. 3. Mix dressing with vegetables and adjust seasoning. Pour the dressing over your vegetable mix. Toss everything well so the veggies get fully coated. Taste your coleslaw and adjust the seasoning if needed. You can add more salt, pepper, or lime juice to enhance the flavor. 4. Refrigerate to allow flavors to meld. After mixing, cover your coleslaw and pop it in the fridge for at least 30 minutes. This chilling time helps the flavors blend beautifully. Trust me, the wait is worth it! For more detailed instructions, check out the Full Recipe. Enjoy making this easy and tasty Easy Mexican Coleslaw! Choosing fresh vegetables is key for great coleslaw. Look for bright colors and crisp leaves. Avoid any wilted or brown spots. Fresh veggies make your dish pop with flavor. Adjusting for spice is easy with jalapeños. If you want less heat, remove the seeds. For more heat, keep the seeds in or add more jalapeños. You can also try adding hot sauce for a kick. Chilling time is very important. After mixing, cover your coleslaw and let it chill for at least 30 minutes. This lets the flavors blend well. The longer it sits, the better it tastes. For more details, check the Full Recipe. {{image_2}} You can easily adjust this coleslaw to fit your taste. If you want a vegan option, swap out the mayonnaise for a plant-based version. Many brands offer tasty dairy-free mayo that works just as well. You can also use avocado for creaminess. Adding different vegetables can keep things fresh. Try using bell peppers for a sweet crunch or radishes for a spicy kick. Fruits like pineapple or mango can add sweetness and a tropical twist. Don't forget about the dressing! You can play around with flavors. Try adding a bit of salsa for a zesty kick or swap lime juice for orange juice for a sweeter note. These small changes can make a big difference. For the full recipe, check out the Easy Mexican Coleslaw section. Enjoy making it your own! To keep your Easy Mexican Coleslaw fresh, store it in a sealable container. This helps to lock in the flavors. Glass or BPA-free plastic containers work well. Make sure the lid fits tightly. This prevents air from getting in, which can make the coleslaw soggy. You can store leftover coleslaw in the fridge for up to three days. The flavors will get better as it sits. However, it may lose some crunch over time. If you want to keep it longer, consider freezing it. But note that the texture may change once thawed. For best results, enjoy your coleslaw fresh. You can find the Full Recipe above for more details on preparation. How long does Easy Mexican Coleslaw last in the fridge? Easy Mexican coleslaw stays fresh for about three days in the fridge. After that, it may lose its crunch. If you see any signs of spoilage, throw it away. Can I make this coleslaw ahead of time? Yes, you can make this coleslaw ahead of time. I recommend preparing it a few hours before serving. Chilling helps the flavors blend well. Just give it a stir before serving. What can I serve with Mexican coleslaw? Mexican coleslaw pairs well with tacos, grilled chicken, or fish. You can also serve it as a side for BBQs. It adds a nice crunch to any meal. How to make the coleslaw spicier? To kick up the heat, add more jalapeño or use hot sauce. You can also mix in diced serrano peppers for extra spice. Always taste as you go to find your perfect heat level. Can I use different types of cabbage? Yes! You can use Napa cabbage or savoy cabbage instead of green or red. Each type brings its own flavor and texture. Feel free to mix and match to suit your taste. For the full recipe, check out the [Full Recipe]. In this blog post, we explored how to make Easy Mexican Coleslaw. You learned about key ingredients like green and red cabbage, carrots, and spices. We covered step-by-step prep, tips for the perfect texture, and ways to customize your dish. We also looked at proper storage methods to keep your coleslaw fresh. Coleslaw is versatile and fun to make. Try different veggies and dressings to make it your own. Enjoy your tasty creation!

Get ready to spice up your meals with my Easy Mexican Coleslaw! This quick and flavorful recipe combines crunchy vegetables and zesty dressing for a perfect side dish. Whether you’re …

Read more

Categories Salads

Grinder Pasta Salad Flavorful and Simple Recipe

May 30, 2025 by Chef Luca
To make a great Grinder Pasta Salad, you need key ingredients. Here’s what you need: - 2 cups rotini pasta - 1/2 cup diced salami - 1/2 cup diced provolone cheese - 1/2 cup cherry tomatoes, halved - 1/2 cup black olives, sliced - 1/4 cup red onion, finely chopped - 1/4 cup pepperoncini peppers, sliced - 2 tablespoons fresh parsley, chopped - 1/4 cup olive oil - 2 tablespoons red wine vinegar (or apple cider vinegar) - 1 teaspoon dried Italian herbs - Salt and pepper to taste These ingredients create a colorful and tasty dish. The rotini pasta holds the dressing well. Salami and provolone add rich flavors. The fresh veggies give crunch and brightness. You can customize your Grinder Pasta Salad with extra ingredients. Here are some ideas: - Diced bell peppers for sweetness - Artichoke hearts for tanginess - Capers for a briny kick - Fresh basil or oregano for more herbs - Grated Parmesan for a cheesy touch These add-ins let you play with flavors. Choose what you love to make the salad your own. For the best results, use a good grinder. A food processor works well for chopping veggies. A box grater can shred cheese easily. If you have a manual grinder, it can help mix the salad too. The right tools make cooking fun and easy. Try this recipe to enjoy a refreshing meal. Check out the Full Recipe for detailed steps and tips! Start by boiling water in a large pot. Add salt to the water. This helps flavor the pasta. Next, add 2 cups of rotini pasta. Cook it as the package says, usually about 8-10 minutes. You want it to be al dente, which means firm but not hard. Once done, drain the pasta and rinse it with cool water. This stops the cooking. Now, set the pasta aside to cool completely. In a big mixing bowl, combine the tasty bits. Start with 1/2 cup of diced salami and 1/2 cup of diced provolone cheese. Then add 1/2 cup of halved cherry tomatoes. Next, toss in 1/2 cup of sliced black olives. Don’t forget 1/4 cup of finely chopped red onion and 1/4 cup of sliced pepperoncini peppers. Finally, sprinkle in 2 tablespoons of chopped fresh parsley. This mix brings so much flavor and color to your salad. In a small bowl, whisk together your dressing. Use 1/4 cup of olive oil, 2 tablespoons of red wine vinegar, and 1 teaspoon of dried Italian herbs. Add a pinch of salt and pepper. Now, pour this dressing over the mixing bowl filled with your ingredients. Next, add the cooled pasta. Toss everything gently until it’s well mixed and coated. Taste the salad. If it needs more flavor, add more salt, pepper, or vinegar. Cover the bowl and chill it for at least 30 minutes. This lets the flavors blend beautifully. For the full recipe, check the details above. To make the best pasta, start with a big pot. Fill it with water and add a good amount of salt. Bring it to a boil before adding the rotini. This helps add flavor to the pasta. Cook the pasta until it feels firm but tender, usually around 8-10 minutes. Taste it a minute or two before the time is up. This helps you get it just right. After you drain the pasta, rinse it under cold water. This stops the cooking and cools it down. Toss the pasta with a little olive oil. This keeps the noodles from clumping together. Stir it well, so every piece gets coated. To boost flavors, think about adding fresh herbs. Basil and oregano work well. You can also try different cheeses, like feta or mozzarella. For a kick, add more pepperoncini or a splash of lemon juice. Taste as you go to find your perfect mix. For the full recipe of Grinder Pasta Salad, follow the steps provided above to enjoy this delightful dish. {{image_2}} You can easily make this salad vegetarian. Simply swap the salami and cheese for tasty plant-based options. Use diced cucumbers or bell peppers for crunch. Adding chickpeas can bring in protein and texture. Fresh basil or spinach adds a nice green touch. This keeps the dish light and fresh while still being filling. The dressing can change the whole vibe of the salad. Instead of olive oil and vinegar, try a creamy dressing. A ranch or pesto dressing can add a rich flavor. For a kick, mix in some sriracha or hot sauce. You can also use lemon juice for a zesty twist. Experiment with different herbs like dill or cilantro for unique tastes. Grinder pasta salad can take on local flavors. For a Mediterranean spin, add feta cheese and artichoke hearts. If you want a Southwest vibe, include black beans and corn. A touch of lime juice and cumin can spice things up. Think about what flavors you love and make it your own. The options are endless and fun to explore! To keep leftover pasta salad fresh, use an airtight container. This helps the salad stay tasty and prevents it from drying out. Make sure to cool the salad before sealing it. If you add dressing, mix it in just before serving. This keeps the pasta from getting soggy. When prepping for the week, store each ingredient separately. This way, you can mix and match your flavors. Keep the pasta, veggies, and dressing in different containers. When you are ready to eat, just combine them. This method keeps everything fresh and crunchy. Grinder pasta salad lasts about three to five days in the fridge. If you want to freeze it, do so without dressing. Freeze the pasta and veggies together. They can last up to three months in the freezer. When you are ready to eat, thaw it in the fridge overnight. Then, add fresh dressing before serving. This keeps the taste bright and delicious. For the full recipe, check out the details above. Rotini pasta is the best choice. Its spiral shape holds the dressing well. Other good options are fusilli and penne. These shapes are fun and easy to eat. They also mix well with all the ingredients. When you cook the pasta, make sure it is al dente. This way, it stays firm and tasty in the salad. Yes, you can make this salad ahead of time. It's even better after chilling in the fridge. I suggest making it a few hours before you serve it. This helps the flavors blend nicely. Just cover it well and keep it cold. You can also store it overnight. Just remember to stir it before serving. To serve more people, you can easily scale up the recipe. Just double the amount of pasta and other ingredients. For example, use 4 cups of rotini pasta instead of 2. Keep the same ratios for the other items. If you need to serve a big crowd, make a large batch. This salad is great for parties or potlucks. You can find the full recipe online for more details. Grinder pasta salad is simple and tasty. We discussed key ingredients, including essential and optional add-ins. The step-by-step guide helps you prepare the pasta and mix it with the dressing. Useful tips ensure your pasta cooks just right and stays fresh. Variations let you make it vegetarian or explore different dressings. Always store leftovers properly to keep them tasty. Now, you have all you need to make this dish. Enjoy your pasta salad!

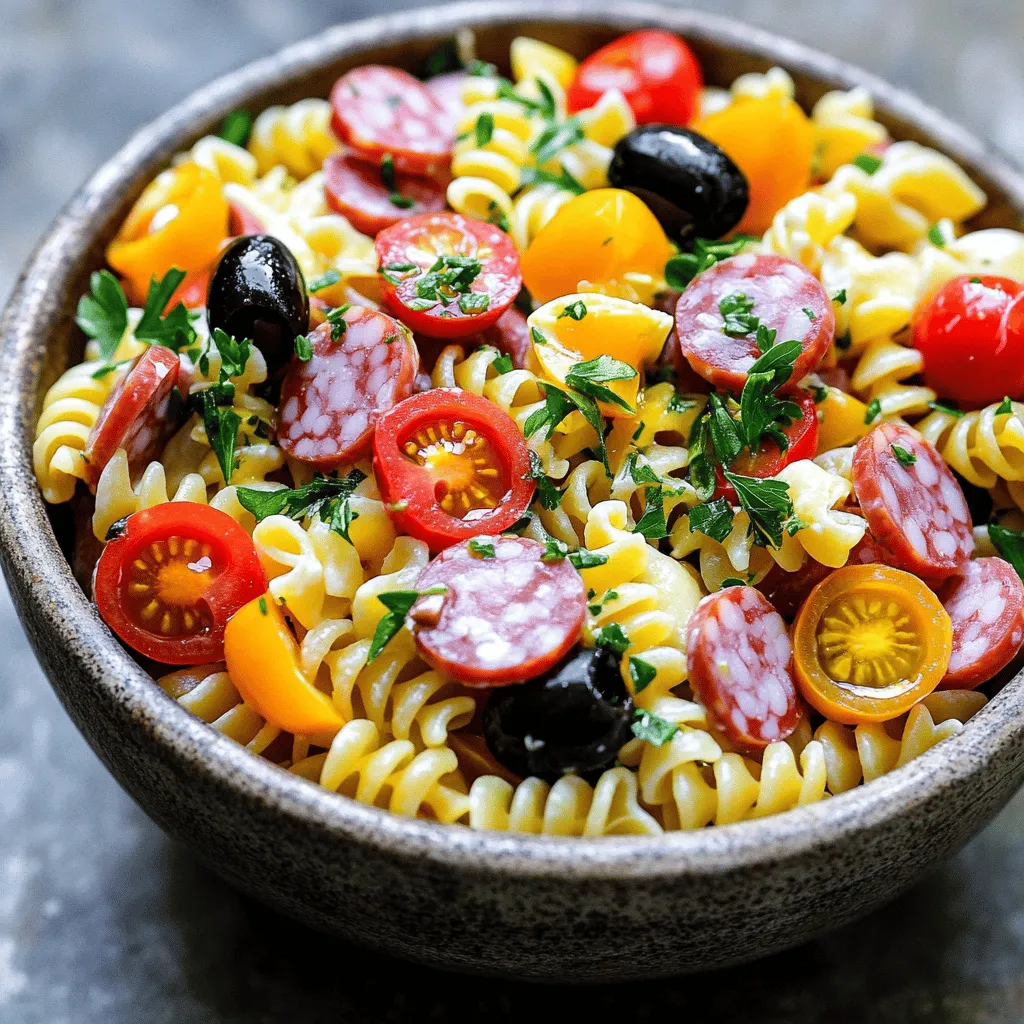
If you love fresh flavors and simple meals, you need to try my Grinder Pasta Salad. This dish combines tasty ingredients that come together effortlessly. I’ll walk you through the …

Read more

Categories Salads
Older posts
Newer posts
← Previous Page1 … Page106 Page107 Page108 … Page122 Next →

STIRRED RECIPES

Where every dish begins with a stir! 🍲✨

PAGES

Home About Contact Privacy Policy Terms & Conditions Cookie Policy GDPR Policy Copyright Policy Disclaimer

CATEGORIES

Appetizers Desserts Salads Breakfast Dinner

Contact

  • Pinterest
  • Mail
Copyright © 2026 Stirred Recipes. All rights reserved.