Skip to content
Stirred Recipes
  • Home
  • Appetizers
  • Desserts
  • Salads
  • Breakfast
  • Dinner
  • Privacy Policy
  • Contact
  • About

Chef Luca

Best Easy No-Bake Peanut Butter Haystacks Delight

June 4, 2025 by Chef Luca
For the best easy no-bake peanut butter haystacks, you need a few key ingredients: - 1 cup creamy peanut butter - 1 cup granulated sugar - 1/2 cup unsweetened cocoa powder - 3 cups crispy rice cereal - 1 teaspoon vanilla extract - 1/4 teaspoon salt These ingredients work together to create a sweet and rich flavor. The creamy peanut butter gives a smooth texture. The cocoa powder adds a nice chocolatey taste. The crispy rice cereal provides a fun crunch in every bite. You can also enhance the flavor with optional toppings. Here are some ideas: - Mini chocolate chips - Chopped nuts - Shredded coconut These toppings not only add flavor but also make your haystacks look appealing. Choose your favorites to create your perfect treat! For the full recipe, check out the detailed cooking instructions provided earlier. Mixing the base ingredients First, grab a large mixing bowl. Add 1 cup of creamy peanut butter, 1 cup of granulated sugar, 1/2 cup of unsweetened cocoa powder, 1 teaspoon of vanilla extract, and 1/4 teaspoon of salt. Use a spoon or spatula to mix everything together. Keep stirring until the mixture is smooth and creamy. Incorporating the crispy rice cereal Now, it’s time to add the crispy rice cereal. Pour in 3 cups of cereal and gently fold it into the peanut butter mixture. Make sure every piece of cereal gets coated. This step is key for the perfect crunch. Forming haystack shapes Next, scoop small amounts of the mixture with a spoon or your hands. Shape them into small mounds or haystacks. Place each one on a parchment-lined baking sheet. If you like, sprinkle some mini chocolate chips or chopped nuts on top for extra flavor and fun. Refrigeration time and temperature After shaping your haystacks, pop the baking sheet into the refrigerator. Let them chill for about 30 minutes. This helps them set and firm up. Once they’re ready, you can enjoy them right away, or store them in an airtight container. They’ll stay fresh for up to a week. For the full recipe, check the section above. To make the best haystacks, avoid common mistakes. One mistake is not mixing well. If you don’t blend the peanut butter and sugar enough, the texture will be off. Mix until everything is smooth and creamy. Another issue is not coating the cereal fully. When you add the cereal, fold it gently. Make sure each piece gets the peanut butter mix. This ensures every bite is rich in flavor. Shaping the haystacks can be tricky. Use a spoon or your hands to scoop out the mix. You can form them into mounds or haystack shapes. Press them gently to hold their shape. Pair these haystacks with a cold glass of milk. The creaminess of the milk blends well with the rich taste. You can also serve them with coffee for a tasty treat. For a party, arrange the haystacks on a nice plate. Add some fresh fruit or a drizzle of chocolate on top. This will make them look fancy and fun. You can even sprinkle some nuts or coconut for extra flair. Check the [Full Recipe] for all details and enjoy making these easy treats! {{image_2}} You can switch up the nut butter in this recipe. Almond butter adds a sweet twist. Cashew butter gives a creamy texture. Sunflower seed butter works well for nut-free options. For gluten-free cereal, use puffed rice or gluten-free crispy rice. Both options keep the crunchy feel and are just as tasty. Feel free to mix in extras for more flavor. Try mini marshmallows for a chewy bite. Add dried fruit like raisins or cranberries for a sweet touch. You can also use spices like cinnamon or nutmeg for warmth. Seasonal variations are fun, too! In fall, add pumpkin spice. In winter, sprinkle some peppermint. Each change makes the haystacks unique and exciting. To keep your haystacks fresh, store them in an airtight container. This will lock in moisture and flavor. Use a plastic or glass container with a tight lid. You can also line the bottom with parchment paper. This helps prevent sticking. Make sure to place a layer of wax paper between layers if you stack them. In the refrigerator, these haystacks last about one week. They stay tasty and firm when chilled properly. If you want to keep them longer, freezing is a great option. Wrap each haystack in plastic wrap, then place them in a freezer bag. This prevents freezer burn and keeps them fresh. You can freeze them for up to three months. When you're ready to eat, just thaw them in the fridge overnight. Enjoy your sweet treat anytime! Can I use natural peanut butter? Yes, you can use natural peanut butter. It adds a rich flavor. Just note, it might be a bit thinner. This can change the texture. You might need to adjust the amount of sugar to balance it. How can I make these vegan? To make vegan haystacks, replace granulated sugar with coconut sugar. Ensure your peanut butter is 100% vegan. It’s easy to find brands that fit. You can also use maple syrup instead of sugar. This adds a nice flavor too. Caloric content and serving size Each haystack has about 100 calories. This can change based on toppings you choose. A serving is 1 haystack, and you can make 12-15 haystacks with this recipe. Allergen information for common ingredients This recipe contains peanuts and may have traces of nuts. It also contains cocoa. If you have a gluten allergy, check if your rice cereal is gluten-free. Always read labels for safety. You learned how to make tasty no-bake peanut butter haystacks. We covered key ingredients and helpful steps for perfect results. I shared tips to avoid mistakes and served ideas to impress guests. You also explored variations and smart storage methods. These simple treats can delight any crowd. With a little creativity, you can make them your own. Enjoy making and sharing your delicious haystacks!

If you’re craving a quick and tasty treat, you’ve come to the right place! My Best Easy No-Bake Peanut Butter Haystacks Delight is simple to make and perfect for all …

Read more

Categories Desserts

Savory Chicken Avocado Ranch Burritos Recipe

June 4, 2025 by Chef Luca
- 2 cups cooked shredded chicken - 1 ripe avocado, diced - 1/2 cup ranch dressing - 1 cup cherry tomatoes, halved - 1 cup shredded lettuce - 1 cup shredded cheddar cheese - 4 large flour tortillas - 1 tablespoon lime juice - 1/2 teaspoon garlic powder - Salt and pepper to taste - Fresh cilantro, for garnish (optional) To make Chicken Avocado Ranch Burritos, gather these fresh and tasty ingredients. The shredded chicken is the heart of this dish. It brings protein and flavor. Use cooked chicken from any meal or a store-bought rotisserie chicken. Next, grab a ripe avocado. A good avocado adds creaminess and richness. Make sure it is soft but not mushy. The ranch dressing adds a tangy kick. It blends well with the chicken and avocado. Cherry tomatoes add a burst of sweetness. Halved, they fit perfectly in the burrito. Shredded lettuce gives a nice crunch. Shredded cheddar cheese adds a savory layer. Flour tortillas hold all the goodness inside. Lime juice brightens the flavors. Garlic powder adds depth. Finally, use salt and pepper to taste. You can also sprinkle fresh cilantro on top for color and flavor. - Mixing bowl - Non-stick skillet - Knife and cutting board You will need a few tools to create these burritos. A mixing bowl is key for combining the ingredients. A non-stick skillet can help with grilling the burritos. A knife and cutting board are important for chopping and preparing your food. These simple tools make cooking easy and fun. Enjoy this process as you bring these flavors together. For the full recipe, check the section above. First, you need to prepare the filling. In a mixing bowl, combine: - 2 cups cooked shredded chicken - 1/2 cup ranch dressing - 1 tablespoon lime juice - 1/2 teaspoon garlic powder - Salt and pepper to taste Mix these ingredients well. Make sure the chicken is well coated with the ranch dressing and spices. This mix adds a nice flavor to the burrito. Next, take your flour tortillas. Lay them flat on a clean surface. Make sure they are easy to fill. Now, it’s time to fill the tortillas. Spoon about 1/4 of the chicken mixture onto the center of each tortilla. Spread it out evenly. Then, add layers on top of the chicken: - 1 ripe avocado, diced - 1 cup cherry tomatoes, halved - 1 cup shredded lettuce - 1 cup shredded cheddar cheese These layers make the burrito colorful and tasty! To fold the burrito, fold the sides of the tortilla toward the center. Then, roll it tightly from the bottom up. This keeps all the yummy fillings inside. Repeat this for the rest of the tortillas and filling. To cook the burritos, heat a non-stick skillet over medium heat. Place the burritos seam side down in the skillet. Grill them for 2-3 minutes on each side. This adds flavor and makes them crispy. For a perfect golden-brown texture, press down gently with a spatula while grilling. Keep an eye on them to avoid burning. Once they are golden brown, remove them from the skillet. Slice each burrito in half. You can garnish with fresh cilantro if you like. Enjoy your Chicken Avocado Ranch Burritos! For the full recipe, see the earlier section. Using fresh ingredients makes a big difference. Fresh chicken, ripe avocado, and crunchy lettuce add flavor. Try to buy local produce for the best taste. For rolling burritos, you can use a few methods. The traditional way is to fold the sides in first, then roll from the bottom. If that feels tricky, you can also try the “envelope” method. Just fold the top and bottom first, then the sides. Pair your burritos with sides like crispy chips or fresh salsa. The crunch adds fun to every bite. You could also serve them with guacamole or a fresh salad. For drinks, try a cold soda or a refreshing iced tea. If you want something fancy, a light beer or margarita works well too. One common mistake is overfilling your burritos. It can make them hard to roll and eat. Stick to a small amount of each filling for the best results. Another mistake is not letting your ingredients chill. Warm ingredients can make your tortilla soggy and fall apart. Chill your chicken and other fillings for a better wrap. {{image_2}} You can easily change the protein in your burritos. If you want beef, use ground beef or steak. For a pork option, shredded pork works well. If you prefer plant-based meals, try black beans or grilled tofu. These choices give you a unique twist while keeping the flavors fresh. Changing some ingredients can make your burritos new and exciting. Instead of ranch, use a spicy chipotle sauce. This adds a kick to your dish. You can also mix in different spices, like cumin or smoked paprika, for more depth. Adding extra veggies, such as bell peppers or corn, boosts nutrition and flavor. If you need gluten-free options, use rice or corn tortillas. These work well and taste great. For those avoiding dairy, try almond or cashew cheese. It melts nicely and complements the other flavors. These swaps help everyone enjoy this tasty meal without missing out. For the full recipe of Chicken Avocado Ranch Burritos, check out the link. To keep your Chicken Avocado Ranch Burritos fresh, store them in the fridge. Wrap each burrito in plastic wrap or foil. Place them in an airtight container. This helps prevent drying out. They will stay good for 3 to 4 days. If you want to save them for later, freezing works great. Wrap each burrito tightly in plastic wrap. Then, place them in a freezer-safe bag. Remove as much air as you can. This keeps them safe from freezer burn. They can last up to 3 months in the freezer. When it's time to enjoy your burritos again, you have options. The oven gives a crispy finish. To do this, preheat your oven to 350°F (175°C). Place the burritos on a baking sheet. Heat for about 15-20 minutes until hot. If you are short on time, the microwave is quick. Place the burrito on a microwave-safe plate. Cover it with a damp paper towel. Heat for 1-2 minutes. But, be careful, as this method can make them soft. To get that nice crispy texture back, you can use a skillet. Heat a non-stick skillet over medium heat. Add the burritos and cook for about 2-3 minutes on each side. This way, you can enjoy that great crunch again. You can prep these burritos ahead of time. First, cook the chicken and prepare the filling. Store the chicken mixture in a sealed container in the fridge. You can also cut the veggies and keep them fresh. When ready to eat, warm the chicken mixture. Fill and roll the tortillas. You can also wrap the burritos tightly in foil or plastic wrap. This keeps them fresh for up to three days. Yes, you can easily make this dish vegetarian. Swap the chicken for black beans or lentils. These options add protein and flavor. You can also use roasted veggies like bell peppers and zucchini for extra texture. Choose a ranch dressing made from plant-based ingredients to keep it vegetarian. Enjoy the same great taste with these simple swaps. Dips can enhance the flavor of your burritos. Here are some tasty options: - Salsa: Adds freshness and spice. - Guacamole: Complements the avocado in the burrito. - Sour cream: Adds creaminess and tang. - Cheese dip: For extra cheesy goodness. These dips add a fun twist to your meal. Try them out at your next gathering! In this blog post, I shared a simple recipe for Chicken Avocado Ranch Burritos. We covered the main ingredients you need, the tools for preparation, and the cooking steps. I also provided tips to enhance flavor and avoid common mistakes. Lastly, I explored variations and how to store leftovers. You can create tasty burritos easily. Don’t hesitate to experiment with different ingredients. Enjoy your cooking and make this meal a family favorite!

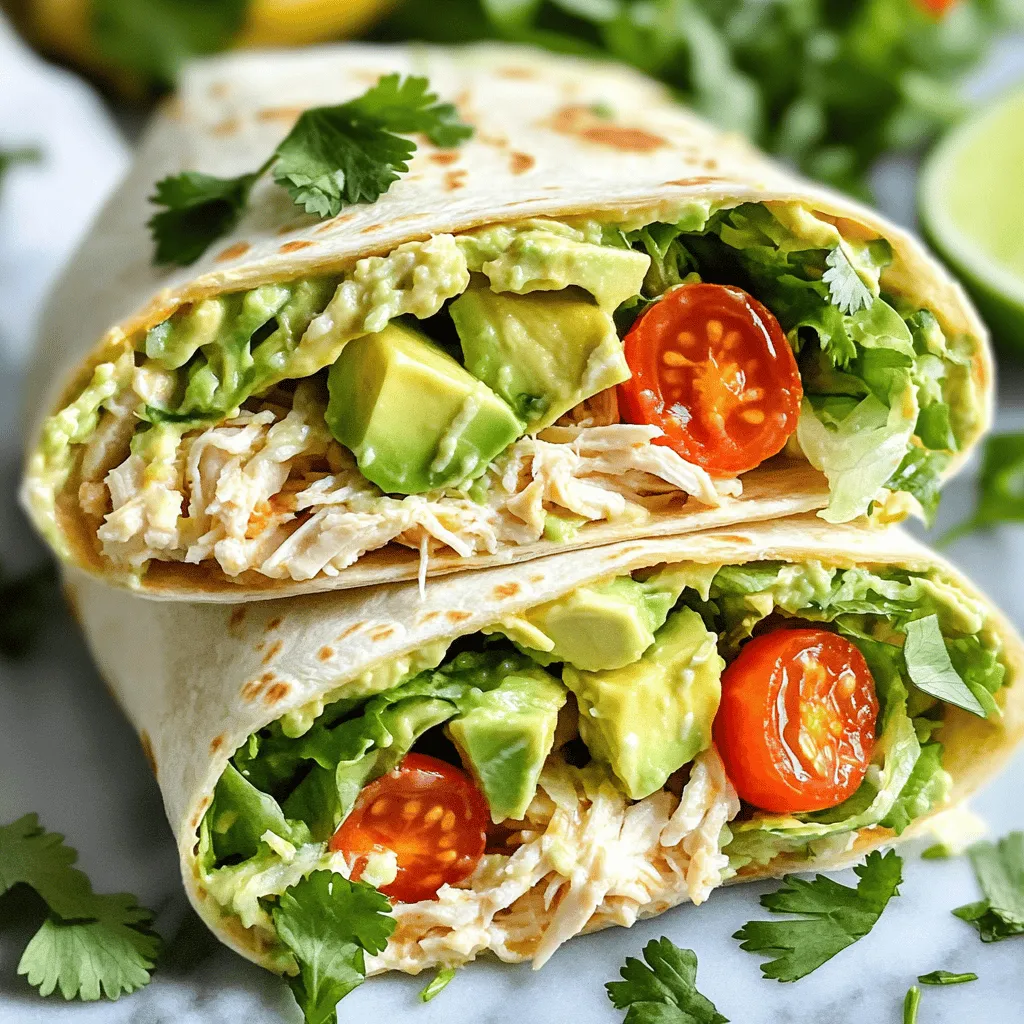
Are you ready to spice up your mealtime with a quick and tasty dish? My Savory Chicken Avocado Ranch Burritos are simple to make and bursting with flavor. With tender …

Read more

Categories Dinner

DoubleTree Hotel Chocolate Chip Cookies Delightful Treat

June 4, 2025 by Chef Luca
To make the famous DoubleTree Hotel chocolate chip cookies, gather these ingredients: - 1 cup unsalted butter, softened - 3/4 cup brown sugar, packed - 3/4 cup granulated sugar - 1 teaspoon vanilla extract - 2 large eggs - 2 1/4 cups all-purpose flour - 1 teaspoon baking soda - 1/2 teaspoon salt - 2 cups semi-sweet chocolate chips - Optional: 1 cup chopped walnuts or pecans, 1/2 teaspoon cinnamon These ingredients work together to create a cookie that is soft, chewy, and full of flavor. The combination of brown and granulated sugar gives the cookies a deep, rich taste. The semi-sweet chocolate chips melt just right, creating gooey pockets of chocolate in every bite. Using unsalted butter allows you to control the saltiness of the cookies. The eggs add moisture and help the cookies rise. Adding vanilla extract enhances the overall flavor, making each bite delightful. If you want to add a twist, try adding walnuts or pecans for some crunch. A hint of cinnamon can also elevate the flavor. Whether you keep it classic or add your personal touch, these cookies will surely impress! First, preheat your oven to 350°F (175°C). This temperature helps the cookies bake evenly. While the oven warms up, line a baking sheet with parchment paper. This step keeps the cookies from sticking and makes clean-up easy. Now, let’s mix the wet ingredients. In a large bowl, cream together 1 cup of softened unsalted butter, 3/4 cup of brown sugar, and 3/4 cup of granulated sugar. Use an electric mixer for about 2-3 minutes. The mixture should feel light and fluffy. Next, add 1 teaspoon of vanilla extract and 2 large eggs, one at a time. Mix well after each addition. This helps blend everything together. In a separate bowl, whisk 2 1/4 cups of all-purpose flour, 1 teaspoon of baking soda, 1/2 teaspoon of salt, and 1/2 teaspoon of cinnamon. Gradually mix the dry ingredients into the wet mixture. Stir until just combined. Then, fold in 2 cups of semi-sweet chocolate chips and 1 cup of chopped walnuts or pecans if you like nuts. Make sure they are evenly mixed throughout the dough. Now, it’s time to bake! Drop heaping tablespoons of dough onto your prepared baking sheet. Space them about 2 inches apart. Bake in your preheated oven for 10-12 minutes. Keep an eye on them! The edges should turn golden brown while the centers stay soft. After baking, let the cookies cool on the sheet for about 5 minutes. Then, transfer them to a wire rack to cool completely. Enjoy your homemade DoubleTree Hotel chocolate chip cookies! For a complete guide, check the Full Recipe. To get the best texture, start with room temperature ingredients. This helps the butter mix well, making your cookies light and fluffy. If the butter is cold, it won't blend properly. Aim for a soft, creamy mix. For fluffy and chewy cookies, don’t overmix your dough. Mix until you see no dry flour. Overmixing can lead to tough cookies. Also, use a mix of brown and white sugar. Brown sugar adds moisture, while white sugar helps the cookies spread. These cookies taste great with a glass of cold milk. Milk cools the warm chocolate and balances the sweetness. You can also enjoy them with coffee for a nice contrast. When serving, stack the cookies high on a fun plate. You can sprinkle a little sea salt on top for a gourmet touch. Warm cookies are perfect for sharing. Get creative with your cookies! You can add dried fruit like cranberries or raisins for a chewy twist. Different nuts, like pecans or almonds, add crunch. Want a hint of spice? Try adding a bit of cinnamon or nutmeg to the dough. Personalizing your cookies makes them extra special. Each batch can be unique! For the complete recipe, check out the [Full Recipe]. {{image_2}} You can make DoubleTree cookies healthier without losing taste. Try using whole wheat flour. This flour adds fiber and nutrients. You can also swap out butter for coconut oil. This change gives a subtle coconut flavor. Reducing the sugars is another great way to lighten the recipe. Use half the brown sugar or granulated sugar. You can adjust the type of chocolate as well. Use dark chocolate, which has less sugar, for a richer taste. To make your cookies more exciting, add flavor twists. Spices like nutmeg or ginger can add warmth. Just a pinch can change the flavor a lot. You can also play with different types of chocolate. Use white chocolate or dark chocolate chips. Mixing these can create a unique taste. You can even try adding chocolate chunks for extra bite. For vegan options, substitute eggs with flaxseed meal mixed with water. This mix acts as a great egg replacement. Use vegan butter or coconut oil for a dairy-free option. If you need gluten-free cookies, swap all-purpose flour for almond flour or gluten-free blends. These options keep the cookies soft and tasty. Remember to check that all other ingredients are gluten-free as well. Explore these variations to find your perfect cookie! For the full recipe, check the detailed instructions above. To keep your DoubleTree cookies fresh, you have two great options: airtight containers or zip-lock bags. Airtight containers are ideal for long-term storage. They prevent air from getting in and keep cookies soft. If you use zip-lock bags, squeeze out as much air as you can. This method works well, but it's best for shorter storage. Both options help maintain that chewy texture we all love. Freezing cookies is a smart way to enjoy them later. You can freeze both the dough and the baked cookies. For dough, scoop it into balls and place them on a tray. Freeze them for about an hour, then transfer the dough balls to a zip-lock bag. When you want fresh cookies, bake them right from the freezer, adding a few extra minutes to the baking time. For baked cookies, let them cool completely. Then, stack them in a layer with parchment paper between each cookie. Place the stack in a zip-lock bag and freeze. Baked cookies can last for up to three months in the freezer. Just thaw them at room temperature before enjoying. At room temperature, DoubleTree cookies stay fresh for about one week. Store them in an airtight container to keep them soft. If you notice they are getting dry, try adding a slice of bread to the container. The bread will help keep the cookies moist. If you want to keep them longer, consider freezing them as mentioned. DoubleTree cookies hold a special place in many hearts. The recipe is a well-kept secret of the DoubleTree Hotels. Each cookie has a rich, buttery taste, with a perfect balance of sweet and salty. The hotel first baked these cookies in 1986. Guests loved them so much that they became a signature treat. The warm cookies are a welcome gift at check-in, making guests feel at home right away. Yes, you can use different types of chocolate in your cookies. Semi-sweet chocolate is the classic choice. Dark chocolate offers a deeper flavor, while milk chocolate adds extra sweetness. You can mix and match these types to suit your taste. Try using half semi-sweet and half milk chocolate for a delicious blend. To prevent your cookies from spreading, chill the dough before baking. This helps keep the shape. Use the right ingredient ratios too. Make sure you measure your flour correctly. Too little flour can lead to flat cookies. Also, don’t forget to space the dough drops well on the baking sheet. You can buy DoubleTree cookies directly from the hotels. Some locations offer them for sale at their front desk. If you want to make them at home, you can find the recipe online. Many food blogs and sites share the classic DoubleTree cookie recipe. You might even find pre-made versions in some stores. Yes, you can make DoubleTree cookies ahead of time! Store baked cookies in an airtight container. They stay fresh for up to a week. If you want to save the dough, wrap it tightly and freeze it. You can bake fresh cookies anytime. Just let the dough thaw in the fridge before you bake. This way, you always have a treat ready to share! In this blog post, we explored the classic cookie recipe with essential ingredients and easy steps. From prepping to baking, I shared how to achieve the perfect cookie texture. You can mix flavors, customize your cookies, and even make healthier choices. Remember to store your cookies right to keep them fresh. Baking should be fun and tasty, so experiment with what you love. Now, grab your ingredients and make some delicious cookies today!

Are you ready to recreate the magic of DoubleTree Hotel’s famous chocolate chip cookies? With just a few simple ingredients and steps, you can whip up a batch that rivals …

Read more

Categories Desserts

Minute Lemon Parmesan Salad Fresh and Flavorful Mix

January 7, 2026June 4, 2025 by Chef Luca
- 4 cups mixed greens (spinach, arugula, and romaine) - 1 cup cherry tomatoes, halved - 1 cucumber, thinly sliced - 1/4 cup red onion, thinly sliced - Fresh basil leaves for garnish I love using mixed greens for this salad. They add a nice crunch and color. Spinach gives a mild flavor. Arugula adds a peppery touch, and romaine provides crispness. Cherry tomatoes bring sweetness. Halving them makes them easy to eat. Cucumbers add a refreshing bite. Slicing them thin helps mix the flavors. Red onion gives a sharp taste, which is balanced by the other ingredients. Fresh basil leaves add a lovely aroma. They make the salad feel special. - 1/2 cup shaved Parmesan cheese - 2 tablespoons olive oil - 2 tablespoons fresh lemon juice - 1 teaspoon honey - Salt and pepper to taste Shaved Parmesan cheese is a star in this salad. It adds a salty flavor that pairs well with greens. Olive oil makes the dressing rich and smooth. Fresh lemon juice brightens the taste. It gives the salad a zesty kick. Honey adds a touch of sweetness to balance the tartness. Salt and pepper are key for seasoning. You can adjust them to your liking. - Caloric value per serving: about 120 calories - Breakdown of macronutrients: 7g carbs, 9g fat, 3g protein - Health benefits of key ingredients: This salad is low in calories but full of nutrients. The mixed greens are high in vitamins A and C. Cherry tomatoes provide antioxidants that are great for your skin. Cucumbers keep you hydrated. Olive oil is heart-healthy, and Parmesan gives you calcium. Lemon juice aids digestion and adds vitamin C. Each bite not only tastes good but is also healthy. Enjoy this salad without guilt! {{ingredient_image_1}} First, wash the mixed greens under cold water. Spin them dry in a salad spinner or pat them with a clean towel. This step keeps your salad crisp. Next, slice the cherry tomatoes in half. Their sweetness adds a nice touch. Now, take the cucumber and slice it thinly. This gives a refreshing crunch. Lastly, slice the red onion into thin pieces. This will add a sharp flavor that balances the salad. For the dressing, you will need: - 2 tablespoons olive oil - 2 tablespoons fresh lemon juice - 1 teaspoon honey - Salt and pepper to taste In a small bowl, combine the olive oil, lemon juice, honey, salt, and pepper. Use a whisk to mix them together. Whisk until the dressing looks smooth and blended. This emulsified dressing will coat the salad evenly. In a large mixing bowl, toss the mixed greens, halved cherry tomatoes, cucumber, and sliced red onion together. Make sure all the veggies mix well. Drizzle the dressing over the salad mix. Toss gently to ensure every piece gets dressed. Now, add the shaved Parmesan cheese on top. Lightly toss again to distribute the cheese. Finally, taste your salad. Adjust the seasoning if needed. Serve it right away, garnished with fresh basil leaves for that extra aroma. To boost the taste of your Minute Lemon Parmesan Salad, add fresh herbs. Consider using parsley, cilantro, or dill for a twist. Each herb brings its own flavor and aroma, enhancing your salad. You can also change the balance of the dressing. If you want more zing, add extra lemon juice. For sweetness, mix in a bit more honey. Taste as you go to find your perfect balance. You can save time by pre-chopping your ingredients. Wash and slice the greens or cut the veggies the night before. Store them in airtight containers in the fridge. This way, you can quickly toss your salad together. For a fast assembly, keep your cheese and dressing ready to go. This will cut down your prep time by several minutes. This salad pairs well with grilled chicken or fish. The fresh flavors complement rich main dishes nicely. To impress your guests, serve it in a clear bowl. This lets the colorful veggies shine. You can also add a sprinkle of nuts or seeds on top for crunch. Pro Tips Fresh Ingredients: Always opt for fresh, high-quality produce to enhance the flavors of your salad. Chill Your Greens: For a refreshing crunch, chill your mixed greens in the refrigerator before assembling the salad. Customize Your Cheese: Feel free to substitute shaved Parmesan with other hard cheeses like Pecorino Romano for a different flavor profile. Make Ahead: Prepare the salad ingredients in advance, but dress the salad just before serving to keep it fresh and vibrant. {{image_2}} You can change the mixed greens in this salad. Try using kale or romaine instead. If you want a nutty taste, add some arugula. You can also switch cherry tomatoes for diced bell peppers or radishes. For a protein boost, grilled chicken works great. If you're looking for a plant-based option, chickpeas are perfect too. They add texture and protein without meat. You can use different dressings to change the flavor. A creamy dressing adds richness. Try a simple yogurt or ranch dressing for a twist. For a lighter taste, stick with a vinaigrette. You can also play with citrus flavors. Lime or orange juice can work well with the lemon. Each option brings its own unique taste to the salad. Adapt this salad to fit the seasons. In summer, add fresh berries or corn for sweetness. Winter salads can include roasted squash or apples for warmth. You can also use seasonal herbs like mint in spring. Each season brings new produce, so keep an eye out for local options. This way, you can always enjoy fresh and tasty salads year-round. To store leftovers, place the salad in an airtight container. This keeps it fresh. You can keep it in the fridge for up to two days. After that, the greens may wilt and lose their crunch. You can prep the ingredients a day ahead. Wash and slice the veggies and keep them in separate containers. Assemble the salad just before you serve it. This way, it stays crisp and bright. You should not freeze this salad. Freezing changes the texture of the greens and tomatoes. If you want to save ingredients, consider freezing the dressing separately. Just remember to use it within three months! Yes, you can make this salad vegan. To do this, you need to swap out the cheese and honey. Use a dairy-free cheese for the Parmesan. You can find these in most stores. For the honey, use maple syrup or agave nectar. This keeps the sweet flavor without using honey. This salad pairs well with many dishes. Here are some great options: - Grilled chicken or tofu for protein. - Quinoa or brown rice for a filling side. - Garlic bread or pita for a nice crunch. - A light soup like tomato or minestrone. These sides add variety and balance to your meal. To make this salad gluten-free, check your dressing and toppings. Most olive oils and lemon juice are gluten-free. Ensure your vinegar is safe too. For the cheese, use a gluten-free brand. Always check the labels for hidden gluten in products. This way, you enjoy the salad without worry. This blog post showed you how to create a fresh and tasty salad. We covered the best ingredients, helpful tips, and simple steps for making it. With the right veggies, dressing, and additions, you can boost the flavor and nutrition of your meals. Don’t forget the storage tips to keep leftovers fresh. With these tools, you can impress friends and family, no matter the season. Enjoy experimenting with your salad variations!

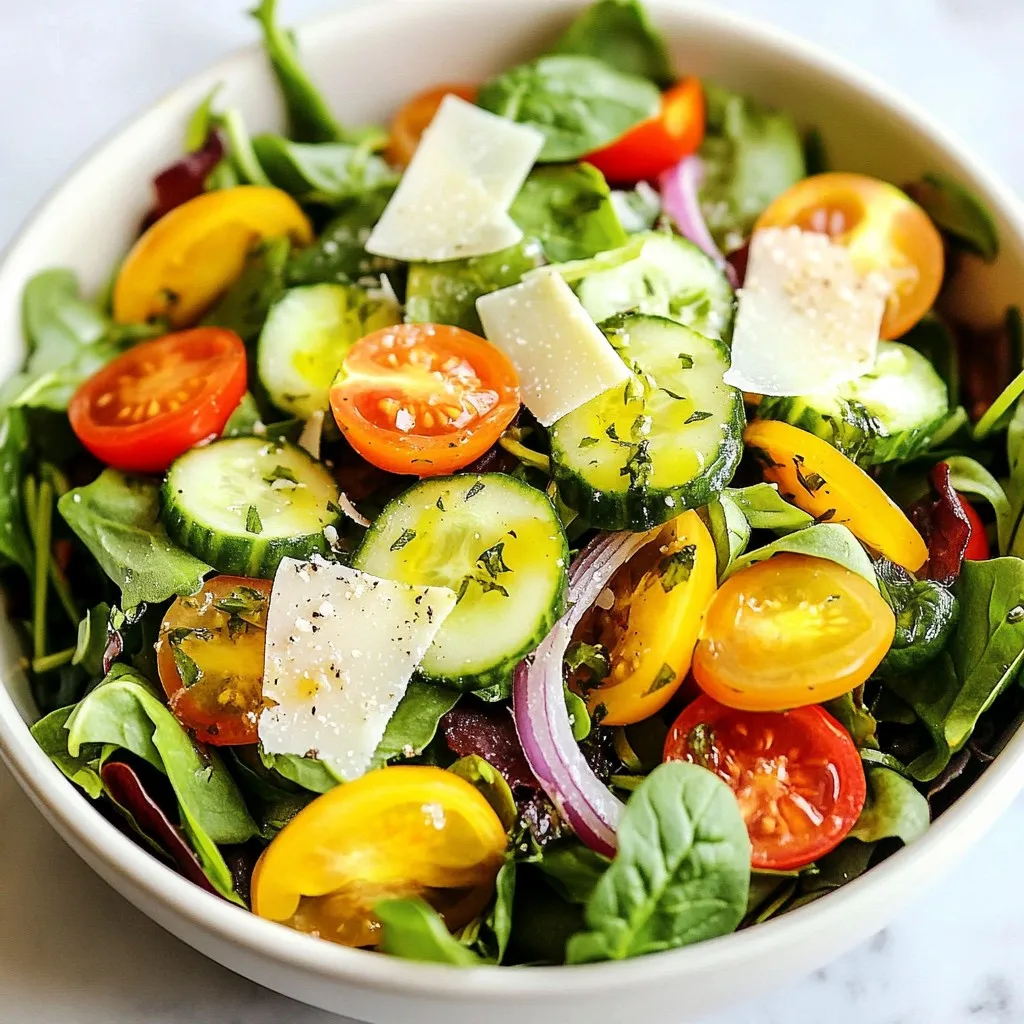
Looking for a quick and tasty salad that packs a punch? The Minute Lemon Parmesan Salad is your answer! With fresh greens, juicy tomatoes, and a zesty lemon dressing, this …

Read more

Categories Salads

Barbecue Meatball Bowls Flavorful and Easy Meal

January 5, 2026June 4, 2025 by Chef Luca
- 1 lb ground beef or turkey - 1/2 cup breadcrumbs - 1/4 cup grated Parmesan cheese - 1 large egg - 2 tablespoons fresh parsley, chopped - 1 tablespoon garlic powder - 1 teaspoon onion powder - 1/2 teaspoon black pepper - 1 cup barbecue sauce (store-bought or homemade) - 2 cups cooked rice (white, brown, or cauliflower rice) - 1 cup cherry tomatoes, halved - 1 avocado, sliced - Fresh cilantro for garnish To make Barbecue Meatball Bowls, you'll need a few key ingredients. Start with ground beef or turkey. Both work great and bring good flavor. The breadcrumbs and Parmesan cheese help bind the meatballs. An egg adds moisture and keeps them tender. For seasoning, fresh parsley makes a nice pop. Garlic and onion powder give depth to the taste. A bit of black pepper adds a mild kick. When it's time to serve, choose your barbecue sauce. You can buy it or make it yourself. Pair the meatballs with cooked rice. You can use white, brown, or even cauliflower rice for a low-carb option. Top your bowls with halved cherry tomatoes and slices of avocado. Fresh cilantro adds color and a burst of flavor. Together, these ingredients create a meal that looks as good as it tastes. {{ingredient_image_1}} Set your oven to 400°F (200°C). This heat will help cook the meatballs evenly. In a large bowl, combine the following ingredients: - 1 lb ground beef or turkey - 1/2 cup breadcrumbs - 1/4 cup grated Parmesan cheese - 1 large egg - 2 tablespoons fresh parsley, chopped - 1 tablespoon garlic powder - 1 teaspoon onion powder - 1/2 teaspoon black pepper Mix these items together. Be careful not to overwork the meat. This keeps the meatballs tender. Shape the mixture into 1-inch meatballs. Place them on a baking sheet lined with parchment paper. This helps with easy cleanup. Bake the meatballs for about 20 minutes. They should turn golden brown and be fully cooked. Take the meatballs out of the oven. Brush them generously with barbecue sauce. This adds flavor and a nice glaze. Put them back in the oven for 5-10 minutes. This step caramelizes the sauce nicely. While the meatballs finish baking, prepare the bowls. Start with a layer of cooked rice at the bottom. Add a generous serving of the barbecue meatballs on top. Add halved cherry tomatoes and sliced avocado on top of the meatballs. These fresh ingredients add color and taste. Finally, garnish each bowl with fresh cilantro. You can also drizzle more barbecue sauce for extra flavor. Enjoy! To make the best meatballs, you should not overwork the meat mixture. Overmixing can make the meatballs tough. Gently combine your ingredients until they just hold together. For even cooking, aim for meatballs that are about 1 inch in size. This size allows them to cook evenly and stay juicy. If you want to mix things up, consider using ground chicken or pork instead of beef or turkey. Both add a new flavor twist. You can also swap your rice type. Try white rice, brown rice, or even cauliflower rice for a low-carb meal. Each option gives your bowl a different texture and taste. For a bolder taste, make your own barbecue sauce. Blend ketchup, brown sugar, vinegar, and spices for a quick sauce. You can also create unique spice blends. Try adding smoked paprika or chili powder to the meatball mixture. These small changes can really elevate your dish and impress your guests. Pro Tips Use Lean Meat: Opt for lean ground beef or turkey to keep your meatballs juicy without excess fat. Add Spice: Feel free to customize your meatball mixture with extra spices like smoked paprika or cayenne for added heat. Cook Rice Ahead: Prepare your rice in advance to save time and ensure it's warm when assembling your bowls. Fresh Toppings Matter: Don't skip the fresh herbs and vegetables; they add brightness and texture to your dish. {{image_2}} You can use different meats for your meatballs. Ground turkey or chicken works well. These options are leaner and still tasty. If you prefer beef, that’s great too. For a plant-based option, try vegetarian or vegan meatballs. You can make them with beans, lentils, or chickpeas. These choices are healthy and packed with flavor. The sauce makes a big difference in taste. You can pick from many barbecue sauces. A spicy sauce adds a kick. If you like sweet flavors, try a honey or maple BBQ sauce. A smoky sauce can give a rich depth. Mix and match to find your favorite flavor. Don't be afraid to experiment! You can serve your meatball bowls with tasty sides. A fresh salad adds crunch and color. Grilled veggies bring out smoky flavors. Coleslaw offers a nice contrast with its creaminess. These sides balance the meal and make it more fun. Choose what you love and enjoy! To keep your meatballs fresh, store them in an airtight container. Place them in your fridge for up to three days. Make sure they cool down before sealing. This helps to avoid moisture build-up. You can also pair them with rice or other sides in the same container. For longer storage, freeze the meatballs and rice separately. Place the cooled meatballs in a single layer on a baking sheet. After they freeze, transfer them to a freezer bag. This prevents them from sticking together. For rice, use a freezer-safe container. It will last up to three months in the freezer. When it’s time to enjoy your meal, reheat without losing moisture. Use a microwave-safe dish and cover it with a damp paper towel. Heat in short intervals, stirring in between. This keeps the meatballs juicy. You can also reheat them in a skillet over low heat. Add a splash of water to keep everything tender. Yes, you can make these meatballs ahead of time. I often prepare a big batch. Just mix the meat, breadcrumbs, cheese, egg, and spices. Form the meatballs and bake them. Once they cool, store them in an airtight container. They last in the fridge for up to three days. You can also freeze them for up to three months. Just thaw them in the fridge before reheating. If you want a rice substitute, you have many options. Quinoa works well. It’s healthy and has a nice texture. Cauliflower rice is a great low-carb choice. You can also try farro or barley for a different flavor. Each option offers its own unique taste and texture. Making your own barbecue sauce is simple. Start with these ingredients: - 1 cup ketchup - 1/4 cup brown sugar - 2 tablespoons apple cider vinegar - 1 tablespoon Worcestershire sauce - 1 teaspoon garlic powder - 1 teaspoon onion powder Mix these together in a bowl. Adjust the sweetness or tanginess to your taste. This sauce adds a personal touch to your meatballs. Yes, you can cook these meatballs on the stovetop. Just heat some oil in a large pan over medium heat. Add the meatballs, cooking them until they are browned on all sides. This usually takes about 10-12 minutes. Ensure they reach an internal temperature of 165°F (74°C). Adjust the cooking time as needed based on the meat size. In this post, we covered how to make delicious barbecue meatball bowls. We talked about key ingredients like ground meat, breadcrumbs, and barbecue sauce. I also shared steps to ensure perfect meatballs and tasty bowl assembly. You can try various ingredients or sauces for fun twists. Don't forget about storage tips for leftovers. Enjoy your cooking adventure, and amaze your friends and family with these easy, flavorful bowls. You will impress everyone with your skills!

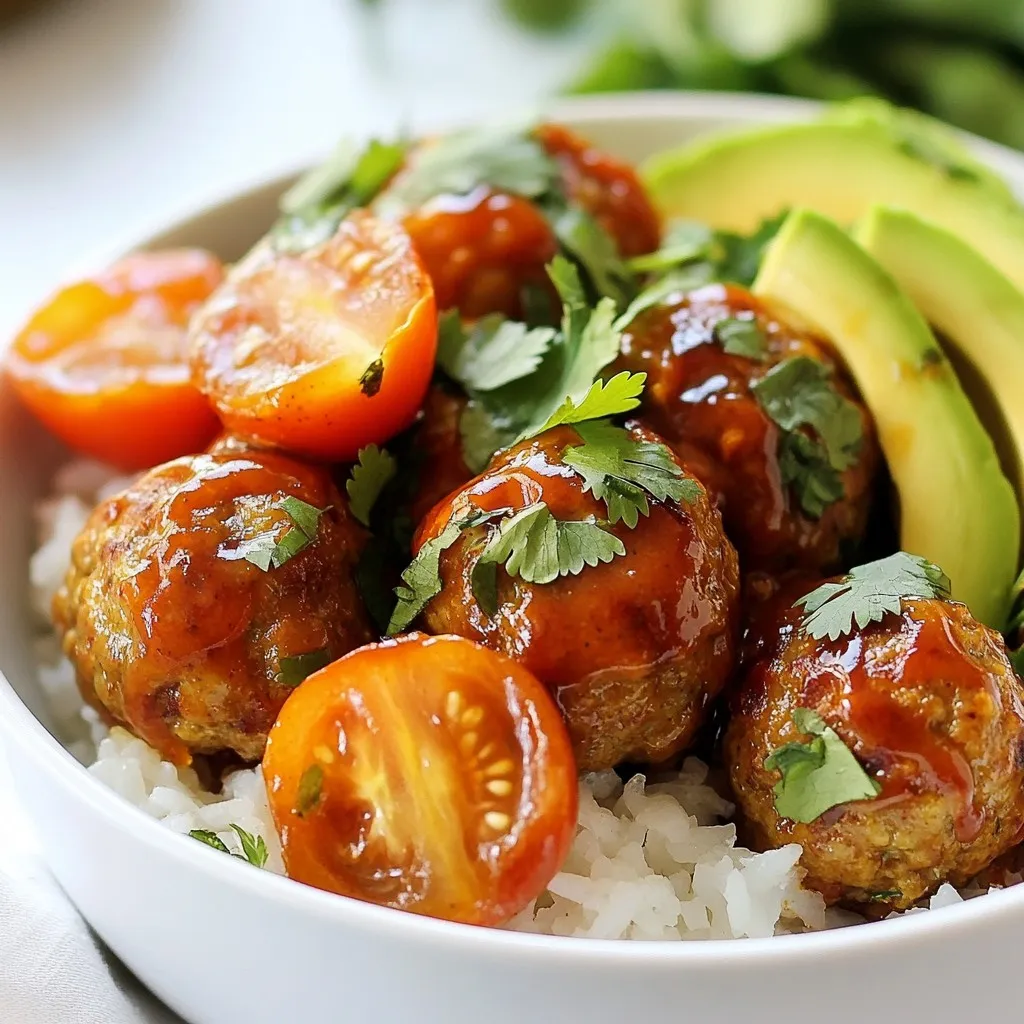
Craving a quick, tasty meal that impresses? Look no further! Barbecue Meatball Bowls combine juicy meatballs, flavorful barbecue sauce, and fresh toppings. Perfect for busy weeknights or laid-back weekends, this …

Read more

Categories Dinner

Apple Crisp Coffee Cake Divine and Cozy Treat

June 3, 2025 by Chef Luca
To start your Apple Crisp Coffee Cake, you need some key ingredients. Here’s what you’ll need: - 2 cups all-purpose flour - 1 ½ cups granulated sugar - ½ cup unsalted butter, softened - 1 cup buttermilk - 2 large eggs These ingredients form the base of your cake. The flour gives it structure, while the sugar adds sweetness. The butter keeps it moist, and buttermilk gives it a lovely tang. Eggs help bind everything together. Now, let’s add some flavor. Here are the extras that make this cake special: - 1 teaspoon vanilla extract - 1 tablespoon ground cinnamon - 2 cups peeled and diced apples (such as Granny Smith or Honeycrisp) - ½ cup rolled oats Vanilla adds warmth, and cinnamon brings a cozy spice. Diced apples provide juicy bites, and oats add a crunch. This mix creates a delightful flavor profile. Finally, you need some baking essentials. These are the ingredients that help your cake rise and taste just right: - 1 teaspoon baking powder - ½ teaspoon baking soda - ½ teaspoon salt Baking powder and baking soda are your leavening agents. They help the cake rise. Salt enhances all the flavors, making them pop. When you combine all these ingredients, you create a wonderful and tasty Apple Crisp Coffee Cake. Check out the Full Recipe for all the steps to make this cozy treat! 1. Preheat your oven to 350°F (175°C). Grease a 9x13 inch baking dish. This helps the cake not stick. 2. In a large bowl, cream together ½ cup softened butter and 1 cup of sugar. Mix until it is light and fluffy. This adds air and makes the cake soft. 3. Add 2 large eggs, one at a time. Mix well after each egg. Stir in 1 teaspoon of vanilla extract for flavor. 1. In another bowl, combine 2 cups of all-purpose flour, 1 tablespoon baking powder, ½ teaspoon baking soda, and ½ teaspoon salt. Whisk them together well. 2. Gradually add the dry mix to the wet mix. Alternate with 1 cup of buttermilk. Start and end with the flour. Mix until just combined to avoid tough cake. 1. Gently fold in 2 cups of peeled and diced apples. These add sweetness and moisture. 2. In a small bowl, mix ½ cup of sugar, 1 teaspoon of ground cinnamon, and ½ cup of rolled oats. This will be your topping. 1. Pour the batter into the prepared dish. Spread it out evenly. 2. Sprinkle the topping over the batter. Bake for 40-45 minutes. Check for doneness by inserting a toothpick in the center. It should come out clean. Make sure to check out the Full Recipe for more details! Choosing the Right Apples Use firm apples for this cake. Granny Smith and Honeycrisp are my favorites. They add a nice tartness that balances the sweetness. Slice and dice them evenly to ensure they cook well in the cake. This way, you get bites of juicy apple in every slice. Avoiding Overmixing the Batter Mix the batter just until the flour disappears. Overmixing can make the cake tough. Gently fold in the apples, ensuring they are spread evenly. This keeps the texture light and fluffy, which is what you want in a coffee cake. Adding Nuts or Spices For extra crunch, add walnuts or pecans. They pair well with the apples. You can also sprinkle in some nutmeg or ginger for warmth. These spices elevate the flavor and make each bite special. Serving Suggestions Serve the cake warm with a scoop of vanilla ice cream. A drizzle of caramel sauce adds richness. If you prefer, top it with whipped cream or a dusting of powdered sugar. Each option makes the cake even more delightful. How to Test for Doneness Insert a toothpick into the center of the cake. If it comes out clean, the cake is ready. If there is batter on the toothpick, bake for a few more minutes. This simple test ensures you have a perfectly baked cake. How to Cool the Cake Properly Let the cake cool in the pan for about 15 minutes. This helps it set and makes it easier to slice. After that, transfer it to a wire rack to cool completely. Proper cooling keeps the cake from becoming soggy. For the complete recipe, check out the Full Recipe. {{image_2}} You can add fun twists to your Apple Crisp Coffee Cake. One tasty option is the cinnamon swirl. To make this, mix cinnamon and sugar into the batter before you pour it into the dish. Swirl it gently with a knife. This adds a lovely flavor and look. Another option is to add caramel or cream cheese. Drizzle caramel over the top before serving. For cream cheese, mix it with sugar and spread it on top after baking. Both choices give your cake a rich taste. If you need gluten-free options, swap the all-purpose flour with a gluten-free blend. Make sure to check the blend for good binding. You can also use almond flour or coconut flour for a unique touch. For vegan adaptations, replace eggs with flaxseed meal or applesauce. Use almond milk in place of buttermilk. Use vegan butter or coconut oil to keep the texture nice. You can serve your cake warm or cold. Warm cake offers a cozy feeling, especially in winter. Cold cake is great for summer picnics. Both ways taste amazing! Pair your Apple Crisp Coffee Cake with ice cream or coffee. A scoop of vanilla ice cream adds creaminess. A hot cup of coffee or tea brings out the flavors. You can find the full recipe [here](#). To keep your Apple Crisp Coffee Cake fresh, store it in an airtight container. This prevents dry air from hardening the cake. If you do not have a container, wrap the cake tightly in plastic wrap. This helps keep the moisture in and keeps flavors strong. Make sure to store it at room temperature for the best taste. If you want to save some for later, freezing is a great option. You can freeze the coffee cake once it cools down completely. Wrap slices in plastic wrap and then place them in a freezer-safe bag. This helps avoid freezer burn. To thaw, simply take a slice out and let it sit at room temperature for about an hour. For a warm treat, you can heat it in the microwave for a few seconds. When stored well, your Apple Crisp Coffee Cake lasts about 3 to 4 days in the fridge. After this time, it might start to lose its flavor and texture. Signs that your cake has spoiled include a dry or hard texture, or an off smell. If you notice any mold, discard it immediately. Enjoy your cake while it’s fresh for the best taste! For the full recipe, check out the [Full Recipe]. What type of apples work best for Apple Crisp Coffee Cake? I recommend using Granny Smith or Honeycrisp apples. These apples hold their shape well and add a nice tartness. You can mix different types for more flavor. Can I use a different type of milk instead of buttermilk? Yes, you can use regular milk or a non-dairy milk. If you use regular milk, add a splash of vinegar or lemon juice. This helps mimic the tangy taste of buttermilk. How do I know when the cake is done baking? Check with a toothpick. Insert it into the center of the cake. If it comes out clean, your cake is ready. The top should be golden brown, too. Can I make this ahead of time? Absolutely! You can prepare the batter a day before. Just store it in the fridge. Bake it fresh when you’re ready to serve. What can I use instead of eggs in this recipe? You can use unsweetened applesauce or mashed banana. About ¼ cup of either works well as a substitute for one egg. How to make homemade buttermilk? To make homemade buttermilk, mix 1 cup of milk with 1 tablespoon of vinegar or lemon juice. Let it sit for about 5 minutes. This quick mix works great in any recipe! You’ve learned how to make a delicious Apple Crisp Coffee Cake. We covered the key ingredients, preparation steps, and clever tips to enhance flavor and texture. Variations can suit many diets and tastes. Proper storage keeps your cake fresh longer. With these insights, you can create an amazing treat for yourself or friends. Enjoy your baking journey and share your results!

If you’re looking for a cozy treat that warms the heart, try my Apple Crisp Coffee Cake. This cake combines soft, spiced apples with a crunchy topping, perfect for any …

Read more

Categories Desserts

Slow Cooker Birria Tacos Flavorful and Easy Meal

June 3, 2025 by Chef Luca
To make Slow Cooker Birria Tacos, you need a few key ingredients. Let's break them down into three groups: beef and vegetables, spices and seasonings, and tortillas and garnishes. - Beef and Vegetables - 3 lbs beef chuck roast, cut into chunks - 1 large onion, quartered - 4 cloves garlic, minced - Spices and Seasonings - 2 dried guajillo chiles, stems and seeds removed - 2 dried ancho chiles, stems and seeds removed - 2 cups beef broth - 1 tablespoon apple cider vinegar - 1 teaspoon cumin - 1 teaspoon oregano - 2 bay leaves - Salt and pepper to taste - Tortillas and Garnishes - Corn tortillas - Fresh cilantro, chopped - Onion, chopped for garnish - Lime wedges for serving These ingredients create a rich and flavorful taco experience. The beef chuck roast gives depth, while the chiles add a nice kick. The broth and spices meld together, making a delicious sauce to dip your tacos in. When you garnish with cilantro, onion, and lime, you add freshness and brightness. For the complete recipe, check out the Full Recipe and get ready to impress your friends and family! Toasting and Soaking First, I toast the dried guajillo and ancho chiles. I heat a dry skillet over medium heat. I add the chiles and toast them for about 2-3 minutes. I want them to smell great but not burn. Once they are fragrant, I remove them from the heat. Next, I soak the chiles in hot water for about 15 minutes. This softens them and makes blending easier. Blending the Sauce After soaking, I blend the chiles with onion, garlic, and beef broth. I also add apple cider vinegar, cumin, oregano, and a pinch of salt. I blend until the sauce is smooth. This sauce is packed with flavor and will coat the meat perfectly. Properly Coating the Beef In a large bowl, I season the beef chunks with salt and pepper. It’s important to coat them well. The seasoning enhances the meat's flavor. I make sure each piece is covered. This step is key to making the final dish taste amazing. Cooking Times and Methods I transfer the seasoned beef into my slow cooker. I pour the blended sauce over the beef. I also add bay leaves for extra flavor. I mix everything to coat the meat well. I then cover the pot and set it to cook on low for 8 hours. If I'm short on time, I can also cook it on high for 4 hours. Shredding the Meat Once the cooking time is up, I check the meat. It should be tender and easy to shred. I remove the beef from the slow cooker and use two forks to shred it. After shredding, I return the meat to the pot. I stir it back into the rich sauce. This final step ensures that every bite is full of flavor. For the full recipe, check out the details above. To get the best flavor in your birria tacos, spice adjustments matter. I often add more cumin for warmth. If you like heat, try adding a few more dried chiles. This small tweak makes a big difference. Cooking time is critical for flavor too. Slow cooking for eight hours gives the meat time to soak up all those spices. The longer you cook, the more tender the beef becomes. Don't rush this step. It’s worth the wait! When serving birria tacos, traditional pairings shine. A side of rice and beans works well. You can also serve pickled onions for a touch of tang. For garnishes, fresh cilantro and diced onion add great flavor. Squeeze a lime wedge over the tacos for brightness. You can even dip your tacos into the rich consomé left in the slow cooker. This adds extra flavor and richness to your meal. For the complete cooking process, check out the Full Recipe. {{image_2}} You can switch up your birria tacos in fun ways. Want to try different proteins? You can use chicken, pork, or even jackfruit for a plant-based option. Each protein gives the tacos a new twist. For those who want to add veggies, consider using mushrooms or zucchini. These options add great texture and flavor to your meal. Next, let’s talk tortillas. Corn tortillas are classic, but you can try flour tortillas for a softer bite. You can also use whole wheat tortillas for a healthier choice. Each type changes the taste and feel of your tacos. Birria has many styles based on where you are. In Jalisco, they often add spices like cinnamon and cloves. This gives a warm, rich flavor. Meanwhile, in Tijuana, they serve it with a side of broth, perfect for dipping. Taco serving traditions also vary. Some like to top their tacos with radishes and avocado. Others may add a splash of hot sauce for extra heat. Try different combinations to find your favorites. To explore the full recipe, check the Slow Cooker Birria Tacos section above. To keep your Slow Cooker Birria Tacos fresh, store leftovers right after eating. Place the meat and sauce in an airtight container. This helps them stay juicy and tasty. You can refrigerate them for up to three days. If you want to save them longer, freeze them. Just ensure you use a freezer-safe container. They will keep well for about three months in the freezer. When you're ready to enjoy your leftovers, reheating is key for the best taste. The best method is to use a stovetop. Pour the meat and sauce into a pan over low heat. Stir often until it's hot. This keeps the meat tender and flavorful. You can also use a microwave, but it may dry out the meat. If using a microwave, heat it in short bursts and stir in between. Enjoy your delicious Birria Tacos just like the first time! Birria comes from Jalisco, Mexico. This dish has deep roots in Mexican culture. It began as a stew made with goat meat. Over time, people started using beef, pork, and lamb. The dish is often served at special events and celebrations. The rich flavors come from a mix of spices and dried chiles. Today, Birria is popular in many places, especially in taco form. Yes, you can use different cuts of meat for Birria. Some good options are brisket, short ribs, or lamb. Each cut offers a unique flavor and texture. Just make sure the meat is tender and can shred easily after cooking. If you want a leaner option, try using chicken thighs. Adjust the cooking time based on the meat you choose. To enjoy Birria tacos, serve them with a side of consomé. Consomé is the broth from the slow cooker. It is rich and full of flavor. Dip the tacos in the consomé for a delicious taste. For garnish, add chopped cilantro and onion on top of the meat. Squeeze fresh lime juice over the tacos to enhance the flavor. This creates a perfect balance of taste and texture. For the full experience, pair the tacos with lime wedges and fresh veggies. In this post, we covered the key ingredients, cooking steps, and tips for perfect Birria Tacos. You learned how to prepare the chiles, season the meat, and slow-cook for rich flavor. Plus, I shared ways to customize your tacos and store leftovers. Birria Tacos are a fun and tasty dish. They bring a taste of tradition to your table. Enjoy making your own unique Birria Tacos!

Want to impress your friends and family with a mouthwatering dish? Slow Cooker Birria Tacos are the answer! Packed with rich flavor and easy to make, these tacos will be …

Read more

Categories Dinner

Balsamic Grilled Flank Steak Caprese Delightful Meal

June 3, 2025 by Chef Luca
- 1 ½ lbs flank steak - 1 cup balsamic vinegar - 3 tablespoons honey - 1 teaspoon garlic powder - 1 teaspoon black pepper - 1 teaspoon salt - 1 cup cherry tomatoes, halved - 8 oz fresh mozzarella balls, halved - 1 cup fresh basil leaves - 2 tablespoons olive oil - Balsamic reduction - Additional basil leaves When you gather these ingredients, you set the stage for a fantastic meal. The flank steak shines with its blend of flavors from the balsamic vinegar, honey, and spices. You’ll taste the sweetness of the honey and the tang of the vinegar. The garlic powder adds a lovely depth, while salt and pepper enhance all the flavors. The Caprese salad brings freshness to this dish. The cherry tomatoes burst with juice, while the mozzarella is creamy and mild. Fresh basil leaves add a fragrant touch. Drizzling olive oil over the salad brings everything together, making it colorful and inviting. Feel free to add optional garnishes too. A balsamic reduction gives a sweet-tart kick. Extra basil leaves can add more color and flavor. Using these ingredients makes your Balsamic Grilled Flank Steak Caprese a delightful treat. For the full recipe, check out the detailed steps to create this dish. - In a small bowl, mix: - 1 cup balsamic vinegar - 3 tablespoons honey - 1 teaspoon garlic powder - 1 teaspoon black pepper - 1 teaspoon salt - Place the flank steak in a resealable bag. Pour the marinade over the steak. Seal the bag tightly. Refrigerate for at least 1 hour, or up to 4 hours. This step adds great flavor. - Preheat your grill to medium-high heat. This ensures even cooking. - Remove the flank steak from the marinade. Let any excess marinade drip off. Discard the marinade. This helps avoid flare-ups on the grill. - Place the flank steak on the grill. Cook for about 5-7 minutes per side. Aim for medium-rare for the best taste. - Once done, remove the steak from the grill. Let it rest for 5-10 minutes. This helps keep the juices in the meat. - In a medium bowl, combine: - 1 cup cherry tomatoes, halved - 8 oz fresh mozzarella balls, halved - 1 cup fresh basil leaves - Drizzle with 2 tablespoons olive oil. Toss gently to combine. Set aside. This salad adds freshness to the meal. - Thinly slice the rested flank steak against the grain. This makes the meat tender to eat. - Arrange the steak slices with the Caprese salad on a large platter. - If desired, drizzle some balsamic vinegar over the top for extra flavor. You can find the full recipe in the article for more details. Cooking flank steak just right is key for a great meal. For medium-rare, grill for 5-7 minutes on each side. If you like medium, go for 7-10 minutes. Using a meat thermometer helps too. Aim for 130°F for medium-rare and 140°F for medium. This way, you avoid overcooking. For the best flavor, marinate your flank steak for at least 1 hour. If you have more time, let it soak for up to 4 hours. This lets the vinegar and honey infuse deeply into the meat. Adjust the vinegar and honey to fit your taste. If you want it sweeter, add more honey. For a tangy kick, increase the vinegar. Pair your Balsamic Grilled Flank Steak with a light side. Fresh veggies or garlic bread work well. A chilled glass of red wine complements the dish nicely. For presentation, serve the steak slices on a big platter with the Caprese salad. Garnish with extra basil leaves for a pop of color. A drizzle of balsamic reduction adds a fancy touch. For the full recipe, check out the details above. {{image_2}} You can switch up the taste of your flank steak with different marinades. A soy sauce-based marinade adds a savory kick. Mixing soy sauce with ginger gives it an Asian twist. You can also try herb-infused marinades. Fresh herbs like thyme or rosemary can bring bright flavors. If you love spice, add a blend of cumin, paprika, and chili powder to your marinade. This mix will give the steak a smoky and earthy taste. The Caprese salad is a great way to add new flavors. You can swap mozzarella for feta or burrata for a creamier texture. Feta gives a tangy taste, while burrata adds a rich creaminess. Adding fruits like peaches or strawberries can enhance the salad. The sweetness of the fruit contrasts well with the savory cheese and fresh basil. This twist makes the salad refreshing and fun. If you don't have a grill, don't worry! You can use a grill pan or an oven broiler. A grill pan gives nice grill marks and flavor without leaving home. If you prefer, the oven broiler can cook the steak evenly. Just make sure to keep an eye on it to avoid overcooking. You can also choose between charcoal and gas grills. Charcoal provides a smoky flavor, while gas grills offer convenience. Both options can create a delicious steak. To store grilled flank steak, wrap it tightly in plastic wrap or foil. Place it in an airtight container. This keeps the steak juicy and fresh. Try to eat it within three days for the best taste. For the Caprese salad, store it in a separate container. Avoid mixing it with the steak. This helps keep the tomatoes firm and the cheese fresh. Use it within two days for peak flavor. Yes, you can freeze marinated flank steak. Place the steak in a freezer bag. Make sure to remove as much air as possible. It can last for up to three months in the freezer. For Caprese ingredients, freezing is not recommended. The tomatoes and cheese lose their texture. Instead, prepare these fresh when you are ready to eat. To reheat steak, use a skillet over low heat. Add a bit of broth or water and cover it. This keeps the steak tender and moist. You can also use the microwave, but be careful. Heat it in short bursts to avoid overcooking. For the Caprese salad, rebuild freshness by adding fresh basil and a drizzle of olive oil. Mix gently to combine. Enjoy this delightful meal with a burst of flavor! For the Full Recipe, check the earlier sections. Flank steak is great for grilling. If you can’t find flank steak, try these options: - Skirt steak - Hanger steak - Sirloin steak - Flat iron steak These cuts are tender and flavorful. They also absorb marinades well. To check doneness, use these tips: - Use a meat thermometer. Aim for 130°F for medium-rare. - Press the steak with your finger. It should feel firm but springy. - Look for a nice brown crust on the outside. Avoid cutting into the meat. This lets the juices escape. Yes, you can prep the Caprese salad beforehand. Here’s how: - Slice the tomatoes and mozzarella ahead of time. - Store them in the fridge in an airtight container. - Add basil and olive oil just before serving. This keeps the salad fresh and tasty. Balsamic vinegar is a top pick for marinating. It adds a sweet, rich flavor. If you want to try something else, consider these: - Red wine vinegar for a tangy taste. - Apple cider vinegar for a fruity twist. - Flavored vinegars, like garlic or herb, can also work well. Experiment with what you like best! This article provided a simple guide for making Balsamic Grilled Flank Steak and Caprese salad. By following the steps and tips, you can achieve a delicious meal that impresses. Remember to use high-quality ingredients and adjust flavors to your taste. Get creative with variations and garnishes to suit your style. Enjoy the balanced flavors and beautiful presentation. With practice, you can make this dish a favorite in your kitchen. Happy grilling!

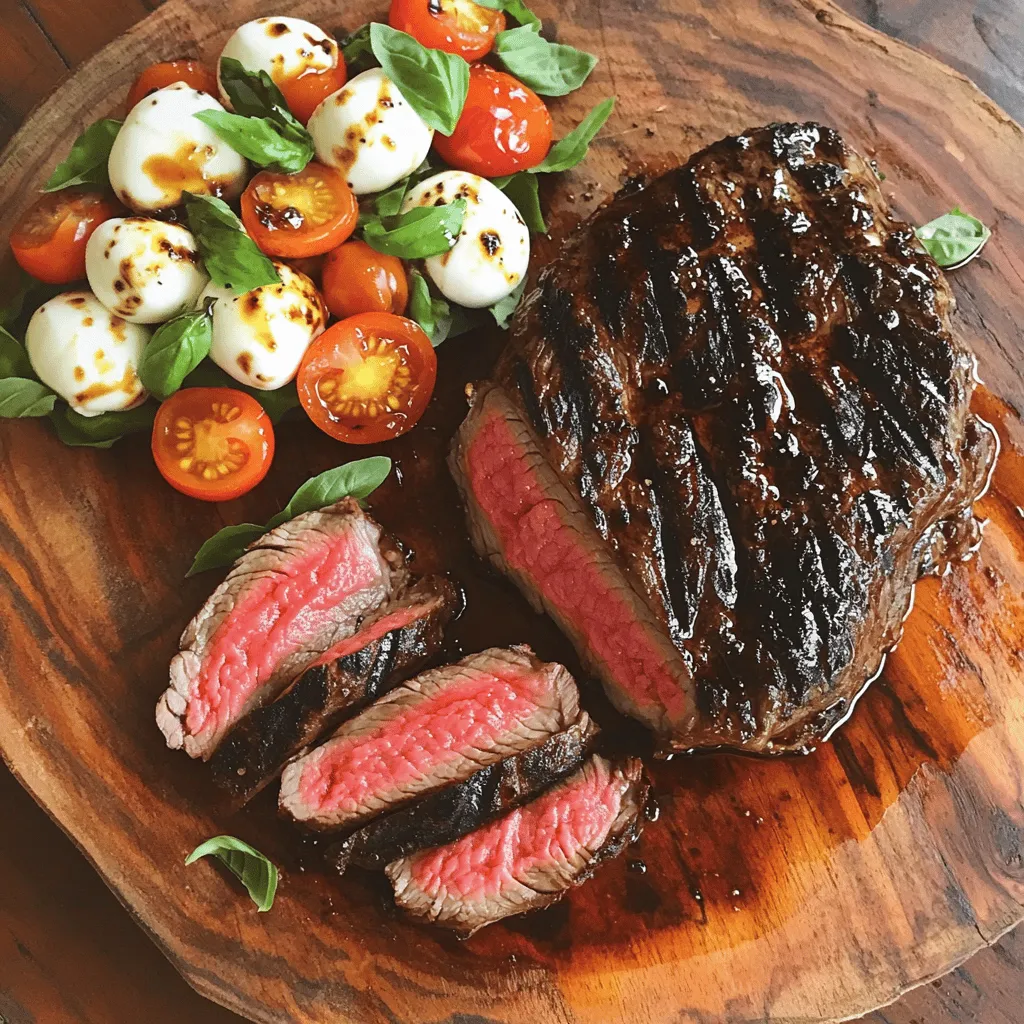
Are you ready to take your grilling game to the next level? My Balsamic Grilled Flank Steak Caprese is a mouthwatering delight that combines juicy flank steak with a fresh …

Read more

Categories Dinner

Broccoli and Cheddar Twice-Baked Potatoes Delight

June 3, 2025 by Chef Luca
- 4 large russet potatoes - 1 cup fresh broccoli florets, steamed and chopped - 1 ½ cups sharp cheddar cheese, shredded - ½ cup Greek yogurt or sour cream - 2 tablespoons unsalted butter, softened - 2 green onions, chopped - 1 teaspoon garlic powder - Salt and pepper to taste - Optional: a pinch of cayenne pepper for heat When making Broccoli and Cheddar Twice-Baked Potatoes, fresh ingredients shine. Russet potatoes give a fluffy base, while sharp cheddar adds rich flavor. Broccoli brings color and nutrients, making this dish healthy and fun. I love using Greek yogurt for creaminess. It adds tang and cuts fat, too. Don't skip the green onions; they add a nice crunch. - Baking sheet - Mixing bowl - Potato masher - Steamer basket Using the right tools makes cooking easier. A baking sheet helps the potatoes cook evenly. A mixing bowl is essential for combining the filling. A potato masher helps you get a creamy texture. A steamer basket allows the broccoli to cook perfectly without losing nutrients. These tools help you create a delightful dish. You can find the full recipe in the article to guide you through the cooking process. - Preheat your oven to 400°F (200°C). - Scrub the russet potatoes clean. Pierce each potato several times with a fork. - Place the potatoes on a baking sheet. Bake for 45-60 minutes until tender. - While the potatoes bake, steam the broccoli florets for about 4-5 minutes. - Once bright green and tender, chop the broccoli finely and set it aside. - When the potatoes are done, remove them from the oven. Let them cool slightly. - Cut each potato in half lengthwise. Scoop out the flesh into a mixing bowl, leaving a thin shell. - In your mixing bowl, combine the potato flesh, chopped broccoli, and 1 cup of cheddar cheese. - Add Greek yogurt, softened butter, green onions, garlic powder, salt, and pepper. - If you like a kick, add a pinch of cayenne pepper. - Mash everything together until creamy and well combined. Taste the mixture and adjust seasoning if needed. - Refill the potato skins with the mixture, heaping it slightly for a rustic look. - Sprinkle the remaining cheddar cheese over the tops of the stuffed potatoes. - Return the filled potatoes to the oven. Bake for 15-20 minutes until the tops are golden and cheese is bubbly. - Once done, remove from the oven and let cool for a few minutes before serving. For the full recipe, check out the section above. Enjoy these delightful bites! - Ensuring potatoes are fully cooked: Always bake your potatoes until they are soft. A fork should easily pierce through them. This step is key for a smooth filling. Use large russet potatoes for the best results. They have a great flavor and texture. - How to achieve a creamy filling: To get a creamy texture, mash the potato flesh well. Add Greek yogurt or sour cream to make it rich. Mix in cheddar cheese and butter for extra creaminess. Taste your filling and adjust with salt and pepper. - Best ways to store leftovers: After your twice-baked potatoes cool, wrap them in plastic wrap or foil. Place them in an airtight container. They can stay fresh in the fridge for up to three days. - Reheating tips for optimal taste: To reheat, place potatoes in the oven at 350°F (175°C). Bake for about 15-20 minutes until warm. This keeps the skin crispy and the filling soft. You can also microwave them, but the oven gives better results. - Garnishing ideas for serving: For a lovely touch, sprinkle chopped green onions on top. A dash of paprika adds color and flavor. You can also drizzle a bit of olive oil for shine. - Serving suggestions with sides: Pair these potatoes with a fresh salad or steamed veggies. They also go well with grilled chicken or fish. This makes for a hearty meal that everyone will enjoy. {{image_2}} You can change the cheese in this recipe. Try mozzarella for a milder taste. You can also use pepper jack for some heat. If you want to switch the Greek yogurt, sour cream works well, too. Plain yogurt can be a lighter option. Spices can bring your potatoes to life. A pinch of smoked paprika adds a nice touch. You can also try chili powder for extra warmth. If you like meat, bacon bits can give a savory crunch. Cook the bacon first, then stir it into the filling. Making these potatoes vegetarian is easy. Just skip the bacon bits and stick with the cheese. For gluten-free options, ensure the potato skins are the only base. All the ingredients, including cheese and yogurt, are naturally gluten-free. You can enjoy this dish worry-free! Each serving of broccoli and cheddar twice-baked potatoes contains about 400 calories. - Carbohydrates: 50g - Protein: 15g - Fat: 18g These potatoes are rich in vitamins. They provide a good dose of Vitamin C from broccoli. You also get calcium from cheddar cheese. You can lighten the recipe by making some small swaps. - Use low-fat cheese instead of sharp cheddar. - Replace Greek yogurt with a lower-fat option. - Consider using olive oil instead of butter. These changes can cut calories while keeping flavor. Try to use fresh herbs for taste instead of extra salt. Broccoli and cheddar twice-baked potatoes fit well into meal prep. - You can make a batch at the start of the week. - Store them in the fridge for quick meals. Pair these potatoes with a simple salad or roasted veggies. This adds balance and makes a full meal. If you freeze the leftovers, reheat them in the oven for the best taste. For more ideas, check out the Full Recipe. Can I make this recipe ahead of time? Yes, you can prepare these potatoes a day in advance. Bake the potatoes, scoop them, and mix the filling. Store the filled skins in the fridge. When you are ready to eat, bake them until hot. How can I make this recipe vegetarian? This recipe is already vegetarian! It uses no meat, just veggies and cheese. You can add more vegetables if you like. What can I use instead of cheddar cheese? You can use any cheese you enjoy. Try mozzarella for a milder taste or pepper jack for some spice. Can leftovers be frozen? Yes, you can freeze the leftover potatoes. Wrap each potato well in plastic wrap, then place it in a freezer bag. They keep well for up to three months. What toppings can be added? You can add toppings like crispy bacon bits, sour cream, or extra cheese. Chopped herbs like parsley or chives also work great. How do I know when potatoes are done? Potatoes are done when you can easily pierce them with a fork. They should feel soft inside. Can I use different types of potatoes? You can use other potatoes, like Yukon Gold or red potatoes. Just ensure they are large enough to hold the filling. This recipe shows how to make tasty stuffed potatoes with broccoli and cheese. We discussed ingredients, tools, and step-by-step instructions. You learned tips for perfecting your dish and ideas for variations. This meal is easy, healthy, and great for any occasion. I encourage you to customize it to your taste. Enjoy creating and sharing this satisfying dish!

If you love comforting meals that are easy to make, you’re in for a treat! Broccoli and Cheddar Twice-Baked Potatoes Delight is a fun twist on a classic. With creamy …

Read more

Categories Dinner

Easy Fruit Salad Recipe Quick and Simple Delight

June 3, 2025 by Chef Luca
- Strawberries - Pineapple - Kiwi - Blueberries - Grapes - Orange I love using vibrant fruits in my salads. They add color and flavor. For this fruit salad, I pick fresh strawberries, juicy pineapple, and tangy kiwi. Blueberries bring sweetness, while grapes add crunch. Don't forget the orange for a zesty twist! - Honey - Fresh mint - Lime juice To enhance the salad, I add some sweetness and freshness. Honey drizzles on top, giving a nice glaze. Fresh mint leaves add a refreshing touch. A splash of lime juice brightens everything up. - Caloric content per serving - Vitamins and minerals provided This salad is not just tasty; it's healthy too! Each serving has about 100 calories. It packs vitamins C and A, plus antioxidants. These nutrients help keep you strong and healthy. You get fiber from the fruits, which is great for digestion. So, this fruity fiesta salad is both a treat and a boost for your body! Check the [Full Recipe] for more details. Mixing the fruits First, grab a large mixing bowl. Add 1 cup of strawberries, hulled and quartered. Next, toss in 1 cup of diced pineapple. Then, slice 1 cup of kiwi and add it to the bowl. Don’t forget 1 cup of blueberries and 1 cup of halved grapes. Finally, include 1 orange, segmented. Mix all these fruits gently with a spatula. This ensures even distribution of flavors. Making the honey-lime dressing In a small bowl, whisk together 2 tablespoons of honey and the juice of 1 lime. Add in 1 tablespoon of fresh mint, finely chopped. Mix until everything is well combined. This dressing adds a sweet and tangy flavor to your fruit salad. Combining everything together Drizzle the honey-lime dressing over your mixed fruits. Gently toss the fruit salad again using a spatula. Make sure every fruit is coated with the dressing. Let the salad sit for about 10 minutes. This allows the flavors to meld together, making it even tastier. Presentation tips Serve the fruit salad in individual bowls. You can also use clear cups for a fun look. Garnish with some extra mint leaves for color. This makes the salad look fresh and inviting. Recommended serving temperature Enjoy the fruit salad chilled or at room temperature. Both ways bring out the best flavors. If you want a refreshing treat, chill it in the fridge for a bit before serving. Prep time breakdown Preparation takes about 15 minutes. You can chop and mix the fruits quickly. Making the dressing is also easy and fast. Total time summary In total, you will need about 25 minutes. This includes prep time and letting the salad sit. You can whip this up in no time for a delicious side dish or snack. To make a great fruit salad, start with the best fruits. Here’s how to choose ripe ones: - Strawberries: Look for bright red color with no white spots. They should feel firm but not hard. - Kiwi: Choose kiwis that give slightly when you press them. Avoid ones that feel very soft. - Pineapples: Pick a pineapple with a sweet smell at the base. The leaves should be green and fresh. - Orange segments: Select firm oranges with a smooth skin. They should feel heavy for their size. To make your salad pop, try these additions: - Spices: A pinch of cinnamon or nutmeg can add warmth. - Zest: Grate some lime or orange peel for a fresh twist. - Dressings: Instead of honey-lime, mix in yogurt or a splash of coconut milk for creaminess. Having the right tools makes prep easier. Here are my top picks: - Cutting board: A sturdy one helps you chop fruits safely. - Sharp knife: A good knife makes slicing easy and quick. - Mixing bowl: Use a large bowl to toss all your fruits together. - Spatula: A silicone spatula is perfect for gently mixing without bruising the fruit. These tips can help you create the best fruity fiesta salad. For the complete recipe, check out the [Full Recipe]. Enjoy your fruit salad! {{image_2}} You can change your fruit salad with the seasons. In spring, add fresh strawberries and peaches. Summer is perfect for juicy watermelon and ripe cherries. In fall, think about apples and pears. Winter offers sweet citrus like oranges and grapefruits. Mixing tropical options like pineapple and mango with berries creates a fun flavor twist. This makes each bite exciting! If you want a vegan option, skip the honey and use agave syrup instead. You can also use a low-sugar sweetener. If you need a low-carb option, try berries like strawberries and blueberries. Feel free to swap fruits you don’t like. Don't enjoy kiwi? Replace it with banana. This salad can fit any diet. How you serve your fruit salad can make it special. Instead of a bowl, use clear cups for a nice touch. This lets guests see the colors. You can also use skewers to make fun fruit kabobs. Arrange the fruit on a platter for a beautiful display. These ideas make your fruit salad look great and more inviting! For the Full Recipe, be sure to check the details in the earlier section. To keep your fruit salad fresh, put it in an airtight container. This helps keep air out. Place the container in the fridge right away. To avoid browning, use fruits like apples or bananas only when serving. If you mix these fruits, add lemon juice to slow down browning. Store your salad for later, but eat it within a few days for the best taste. Your fruit salad can stay fresh in the fridge for about 3 to 5 days. After that, the fruits may start to lose their crunch and flavor. Signs that the salad has gone bad include a sour smell, slimy texture, or excessive liquid. If you see any of these signs, it is best to throw it away. Can you freeze fruit salad? It’s not the best idea. Freezing can change the texture of the fruits. If you do want to freeze fruits, do it separately. Freeze berries, grapes, and pineapples on a tray first. Once frozen, put them in a bag. This way, you can use them later in smoothies or desserts. You can use many fruits for a fruit salad. I love mixing sweet and tart fruits. Some popular options are: - Strawberries - Pineapple - Kiwi - Blueberries - Grapes - Orange These fruits add great color and flavor. They also bring different textures, making the salad fun to eat. You can mix your favorites or try new ones. Seasonal fruits can add a nice twist too. Yes, you can use canned fruit, but there are pros and cons. Canned fruit is easy to find and save time. It has a longer shelf life too. However, fresh fruit usually tastes better and has a better texture. Canned fruit can be mushy and syrupy. If you choose canned fruit, look for ones without added sugar. Rinse them well to reduce syrup. To keep your fruit salad fresh, start with the right fruits. Use firm fruits like grapes and apples. Avoid overripe fruits, as they can make the salad mushy. Here are some tips: - Drain any extra liquid from canned fruit. - Mix the dressing just before serving. - Serve it in a chilled bowl to keep it cool. Following these steps can help keep your salad crisp and tasty. For a delightful blend, check out the Full Recipe for a Fruity Fiesta Salad. In this article, we covered how to make a delicious fruit salad using fresh ingredients. We shared tips on selecting ripe fruits, creating a honey-lime dressing, and suggested variations for dietary needs. Remember, fresh fruit offers great flavor and nutrition. Store leftovers properly to maintain quality. Using this guide, you can create a vibrant fruit salad that is both tasty and healthy. Enjoy the process and get creative with your ingredients!

Looking for a quick and simple treat? My Easy Fruit Salad Recipe is your answer! With fresh fruits like strawberries, kiwi, and grapes, this dish bursts with flavor. Plus, a …

Read more

Categories Salads
Older posts
Newer posts
← Previous Page1 … Page104 Page105 Page106 … Page122 Next →

STIRRED RECIPES

Where every dish begins with a stir! 🍲✨

PAGES

Home About Contact Privacy Policy Terms & Conditions Cookie Policy GDPR Policy Copyright Policy Disclaimer

CATEGORIES

Appetizers Desserts Salads Breakfast Dinner

Contact

  • Pinterest
  • Mail
Copyright © 2026 Stirred Recipes. All rights reserved.