Skip to content
Stirred Recipes
  • Home
  • Appetizers
  • Desserts
  • Salads
  • Breakfast
  • Dinner
  • Privacy Policy
  • Contact
  • About

Chef Luca

Spicy Shrimp and Avocado Rice Bowl Flavorful Delight

June 8, 2025 by Chef Luca
- 1 pound large raw shrimp, peeled and deveined - 2 ripe avocados, diced - 1 red bell pepper, thinly sliced - 1 small cucumber, diced - Fresh cilantro, for garnish - Lime wedges, for serving - 1 cup jasmine rice - 2 tablespoons soy sauce - 1 tablespoon sriracha (adjust to taste) - 1 tablespoon lime juice - 2 tablespoons olive oil - 2 cloves garlic, minced - 1 tablespoon fresh ginger, grated - Salt and pepper to taste Each ingredient in this bowl brings its own magic. The shrimp gives a lovely sea flavor, while avocado adds creaminess. Fresh bell pepper and cucumber add crunch, making each bite exciting. I love using jasmine rice because it cooks soft and fluffy. This rice serves as a nice base for the bold flavors on top. For the pantry staples, soy sauce and sriracha create a spicy, savory mix. Lime juice adds brightness, cutting through the richness of the avocado. Garlic and ginger offer warmth and depth. Salt and pepper pull everything together, ensuring the dish is well-seasoned. If you want to see how to combine these amazing ingredients, check out the Full Recipe. You'll love how easy it is to prepare your Spicy Shrimp and Avocado Rice Bowl. To start, rinse the jasmine rice under cold water. This removes extra starch and helps keep the rice fluffy. Next, bring 2 cups of water to a boil in a pot. Once boiling, add the rice. Lower the heat, cover the pot, and let it simmer for about 15 minutes. The rice will become soft and fluffy. Fluff it with a fork once it's done, and set it aside. Now it's time to prepare the shrimp. In a small bowl, mix soy sauce, sriracha, lime juice, minced garlic, and grated ginger. This mix will be your marinade. Heat olive oil in a large skillet over medium-high heat. Add the shrimp and cook them for about 2-3 minutes until they turn pink. Pour the marinade over the shrimp and toss them well. Cook for another 1-2 minutes until the shrimp are fully cooked. Remove the skillet from the heat. To build your rice bowl, start by adding a scoop of jasmine rice at the bottom of each bowl. Next, layer in sliced red bell pepper, diced cucumber, and the diced avocados. Finally, top it all with a generous portion of the spicy shrimp. For a finishing touch, garnish with fresh cilantro. Serve with lime wedges on the side for that extra zing. For a complete recipe, check the Full Recipe section. To get the best shrimp texture, start with fresh, high-quality shrimp. Look for large, raw shrimp that are peeled and deveined. This will help them cook evenly. Cooking them for too long makes them tough. I suggest cooking shrimp until they turn pink and curl slightly. This usually takes about 2-3 minutes per side. The best cooking method is pan-searing. It gives the shrimp a nice sear and helps lock in moisture. To boost the flavor, try adding spices like paprika or cayenne pepper. You can also mix in herbs like cilantro or green onions. For a tasty sauce, consider making a quick avocado crema. Just blend ripe avocado, lime juice, and a little salt. This adds creaminess and pairs well with the shrimp. You can also use store-bought sauces like spicy mayo for added zing. When serving your spicy shrimp and avocado rice bowl, add a side of fresh fruit. Watermelon or mango complements the spicy shrimp nicely. For drinks, try a chilled lemonade or iced tea. They balance the heat well. For garnishing, sprinkle fresh cilantro on top. You can also add lime wedges for extra zest. A slice of radish or jalapeño can add a nice touch, too. Check out the Full Recipe for more ideas! {{image_2}} You can easily swap shrimp for chicken, tofu, or beef. For chicken, use about 1 pound of diced breast. Cook it for 5-7 minutes until it’s no longer pink. If you prefer tofu, use firm tofu, cut into cubes. Sauté it for 4-5 minutes until golden. For beef, thinly slice flank steak and cook for 4-6 minutes. Adjust these times based on the thickness of your protein. To make this dish gluten-free, choose tamari instead of soy sauce. You can also use coconut aminos for a sweet, soy-free option. For a vegan twist, skip the shrimp and add additional veggies or chickpeas. This keeps the dish filling and tasty without losing flavor. Add tropical fruits like mango or pineapple for a sweet touch. You can also include different veggies like corn or snap peas for more crunch. Experiment with marinades too. Try a honey-lime glaze or a spicy chili sauce to change up the taste. Each variation creates a new experience in flavor and texture. For the full recipe, check out the detailed steps above. When you have leftovers, store them in an airtight container. This keeps them fresh. Make sure to let the dish cool before sealing. I recommend using glass containers. They do not stain and are easy to clean. To reheat, use the microwave or stovetop. If using the microwave, heat in short bursts. Stir often to keep it warm. For stovetop, add a splash of water. This helps keep the rice moist. Yes, you can freeze this dish. First, cool it completely. Then, store in freezer-safe bags or containers. Squeeze out air to prevent freezer burn. For best results, freeze the shrimp and rice separately. This way, they keep their flavor and texture. To make fluffy jasmine rice, rinse it first. Rinsing removes excess starch. Use cold water until it runs clear. Next, boil two cups of water. Add one cup of rice, then reduce heat to low. Cover and simmer for about 15 minutes. When done, fluff the rice gently with a fork. This method gives you light and airy rice. Yes, you can use frozen shrimp! Just remember to thaw them first. Place shrimp in cold water for about 10 minutes. Once thawed, pat them dry with a paper towel. This will help them cook evenly. When you sauté the shrimp, they will turn pink and be tender. You can serve many sides with this rice bowl. Try a fresh salad with greens and a light dressing. Grilled vegetables also pair well. You can add some crispy tortilla chips on the side. If you want a drink, iced tea or a light beer works nicely. Adjusting spice is easy! If you like it mild, use less sriracha. You can start with one teaspoon. For more heat, add a bit more sriracha to taste. You can also mix in some chili flakes. Just remember to taste as you go! This dish is healthy and balanced! Shrimp is low in calories and high in protein. Avocados provide healthy fats and fiber. Jasmine rice offers energy, while the veggies add vitamins. Overall, it’s a nourishing meal that fuels your body well. You can find the full recipe for this tasty dish above. This blog post covers a tasty shrimp and avocado rice bowl. I shared fresh and pantry ingredients, step-by-step cooking, and tips to enhance the dish. You learned about variations and storage tips, too. Now, you can make a yummy meal your friends and family will love. Enjoy playing with flavors and ingredients. Always remember, the best part of cooking is sharing great food with those you care about. Happy cooking!

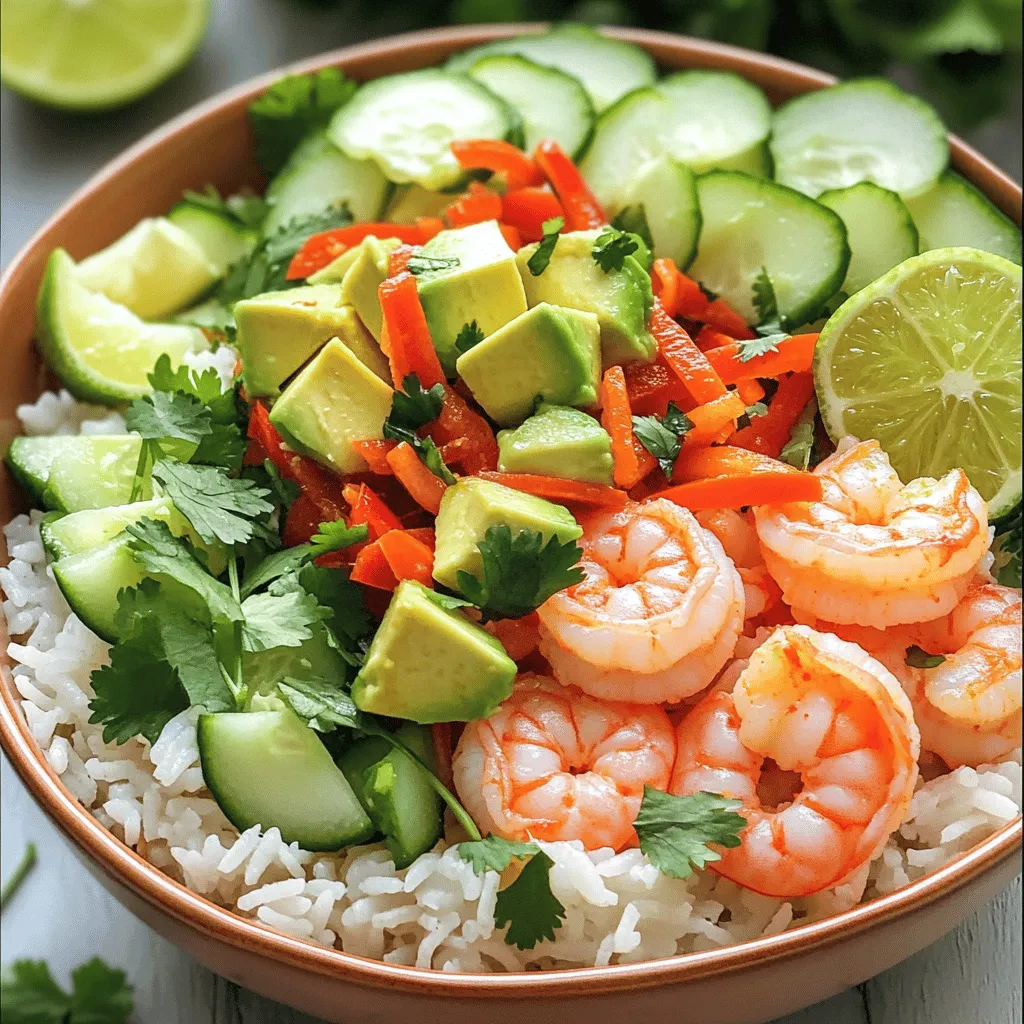
If you’re ready to spice up your dinner routine, you’ve come to the right place! This Spicy Shrimp and Avocado Rice Bowl packs a flavor punch you’ll love. With fresh …

Read more

Categories Dinner

Garlic Butter Honey BBQ Chicken Tacos Simple Feast

June 7, 2025 by Chef Luca
- 1 lb boneless, skinless chicken thighs - 2 tablespoons unsalted butter - 4 cloves garlic, minced - 1/4 cup honey - 1/4 cup BBQ sauce (your favorite brand) - 1 teaspoon smoked paprika - 1/2 teaspoon cayenne pepper (optional for heat) - Salt and pepper to taste For these tacos, I love using chicken thighs. They stay juicy and tender. The garlic and butter create a rich flavor base. Honey adds sweetness, while BBQ sauce gives that smoky kick. - 8 small corn tortillas - 1 cup shredded lettuce - 1 cup diced tomatoes - 1/2 cup crumbled queso fresco or feta cheese - Fresh cilantro for garnish - Lime wedges for serving Toppings transform these tacos. Crisp lettuce and juicy tomatoes add freshness. Cheese brings creaminess, while cilantro adds a bright finish. A squeeze of lime adds zest and balances flavors. Enjoy this full recipe for a delicious meal! Start by mixing your marinade. In a bowl, combine honey, BBQ sauce, smoked paprika, cayenne (if you want heat), salt, and pepper. This mix adds depth to the chicken's flavor. Next, take your chicken thighs and coat them well in this marinade. Make sure every piece gets covered. Let the chicken sit for at least 20 minutes. If you can, put it in the fridge to marinate longer. This step makes the chicken tender and flavorful. Now, let’s cook the chicken. In a large skillet, melt the butter over medium heat. Once the butter is melted, add minced garlic. Sauté it for about 1-2 minutes. Watch it closely so it doesn’t burn. Now, take your marinated chicken and place it in the skillet. Cook each side for about 6-7 minutes. You want the chicken to be fully cooked and reach an internal temp of 165°F (75°C). Once done, remove the chicken and let it rest for a few minutes. This helps keep it juicy. Slice the chicken into bite-sized pieces. While the chicken rests, it's time for the tortillas. Heat a dry skillet over medium heat. Place the corn tortillas in the skillet for about 30 seconds on each side. You want them warm and flexible. Now comes the fun part! Assemble your tacos. On each tortilla, add some sliced chicken. Top with shredded lettuce, diced tomatoes, and crumbled queso fresco. Don’t forget the fresh cilantro on top! Serve your tacos with lime wedges on the side. Squeeze some lime juice over the tacos for an extra burst of flavor. Enjoy your Garlic Butter Honey BBQ Chicken Tacos! For the complete recipe, check out the Full Recipe. To make your tacos shine, choose a good BBQ sauce. I love using sweet and tangy sauces. Some great brands include Sweet Baby Ray's or Stubb's. These sauces add depth and richness. If you like heat, adjust the spice. I add cayenne pepper for a kick. Start with a little, then taste. You can always add more if you want it spicier. Cook your chicken until it is safe to eat. Chicken should reach an internal temperature of 165°F. To ensure this, use a meat thermometer. Insert it into the thickest part of the chicken. This tool helps you avoid undercooking. If you don't have a thermometer, check the juices. They should run clear, not pink. Make your tacos look great! Use a colorful plate. Stack your tacos in a line or a circle. This adds fun to your meal. For garnishes, use fresh cilantro and lime wedges. They add bright colors and fresh flavors. You can also sprinkle extra cheese on top. This makes your tacos even more inviting. {{image_2}} You can swap chicken with beef or shrimp for a different taste. Both options cook well in the garlic butter mix. For beef, try flank steak, as it is tender and flavorful. If you choose shrimp, cook them until pink and firm, about 2-3 minutes per side. If you prefer a vegetarian option, use beans. Black beans or pinto beans work great. You can season them with spices like cumin or chili powder. This adds depth and warmth to your dish without meat. The BBQ sauce is key to a great taco. You can play with different BBQ sauces. Try a spicy sauce for heat or a sweet sauce for a twist. You can even mix sauces, like honey BBQ with a touch of chipotle. For extra crunch, add toppings like crispy onions or jalapeños. You can also include slaw for a fresh bite. This adds texture and makes each taco more exciting. You can serve these tacos in many ways. Taco-style is classic, with small tortillas filled with meat and toppings. If you want a heartier meal, try burrito-style. Use larger tortillas and wrap everything inside. You can also experiment with different tortilla types. Corn tortillas are traditional, but flour tortillas are soft and chewy. You could even use lettuce wraps for a low-carb option. Each style brings a new experience to your meal. Store leftover Garlic Butter Honey BBQ Chicken in an airtight container. Keep it in the fridge for up to three days. For best taste, eat it within this time. If you want to save the chicken for longer, freeze it. Place the chicken in freezer bags. Remove as much air as possible before sealing. It will last for up to three months in the freezer. When ready to use, thaw it in the fridge overnight. To reheat chicken and keep it moist, use a skillet. Heat it over low heat and add a splash of water or broth. Cover the skillet to trap steam and keep the chicken juicy. Stir occasionally until the chicken is hot. For tortillas, heat them in a dry skillet for about 15 seconds per side. This warms them without drying them out. You can also wrap them in a damp paper towel and microwave for about 20 seconds. For safety, eat leftovers within three days of cooking. If frozen, the chicken is safe to eat for three months. Check for signs of spoilage before eating. Look for off smells, discoloration, or a slimy texture. If you notice any of these, it's best to throw it away. Enjoy your tacos fresh to savor all those tasty flavors! For the full recipe, check out the section above. Yes, you can use other meats. Chicken is great, but you can try pork or beef. Ground turkey is another tasty option. Each meat will give a different flavor. - Pork: Use pork tenderloin or chops. Cook them the same way as chicken. - Beef: Ground beef works well too. Just season it like the chicken. - Turkey: Ground turkey is leaner. Just be sure to cook it fully. You can easily make this recipe gluten-free. The main change is to use gluten-free tortillas. Many brands offer great options. Look for corn or rice-based tortillas. - Corn Tortillas: Most corn tortillas are gluten-free, just check the label. - Rice Tortillas: These are another option if you want a different texture. To round out your meal, choose some tasty sides. Here are a few ideas that work well: - Mexican Rice: This is a classic side. It adds flavor and texture. - Black Beans: These are healthy and filling. They pair nicely with tacos. - Corn Salad: A fresh corn salad adds crunch and sweetness. - Guacamole: Creamy guacamole is always a hit. It brings a nice creaminess to the meal. These sides will make your meal even more enjoyable! For the complete cooking process, check out the Full Recipe. In this article, we explored how to make delicious garlic butter honey BBQ chicken tacos. You learned about main ingredients and tasty toppings. I shared step-by-step cooking instructions and helpful tips for flavor and presentation. We also covered variations and storage info to keep your tacos fresh. Try these techniques and enjoy a fun taco night. With these easy details, you can impress friends and family. Cooking can be simple and enjoyable with the right recipe. Enjoy every bite!

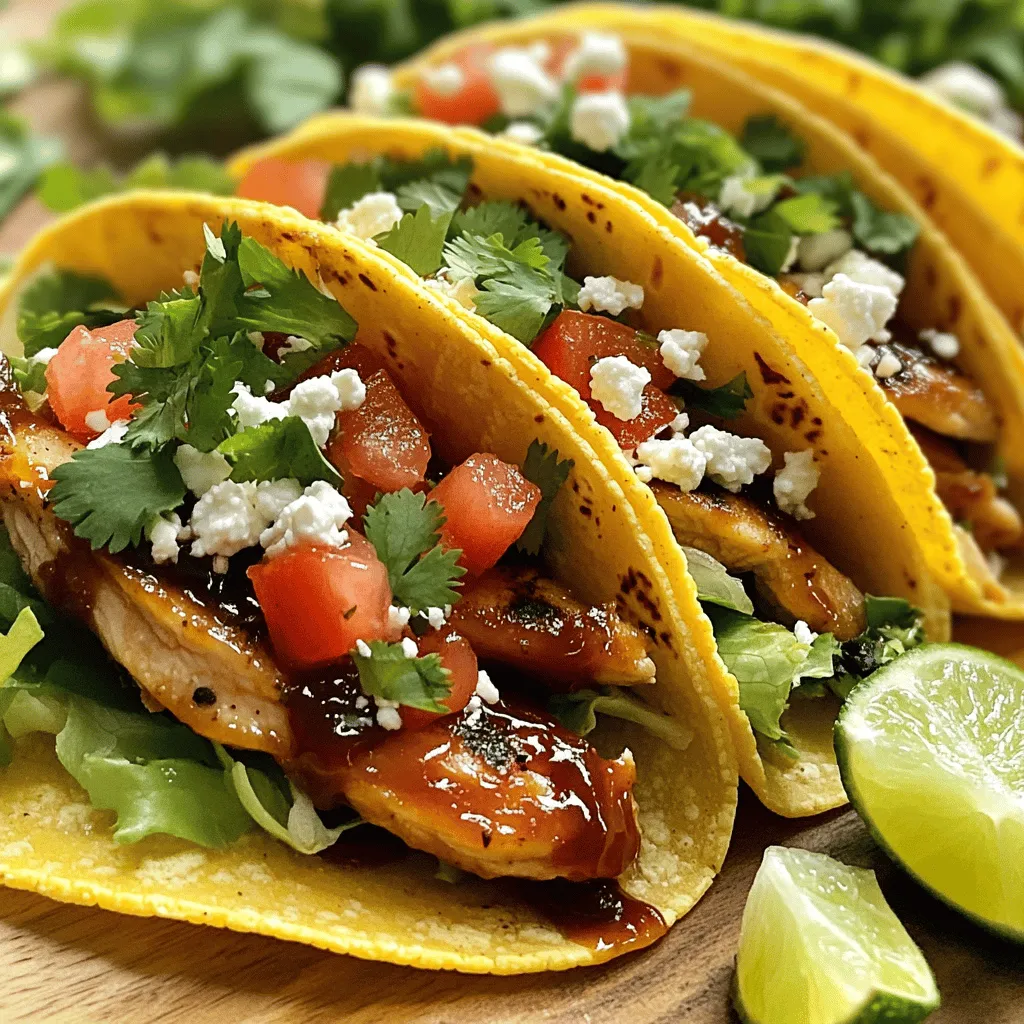
Ready to take taco night to a whole new level? These Garlic Butter Honey BBQ Chicken Tacos bring a sweet and savory twist to your table. Packed with juicy chicken …

Read more

Categories Dinner

Big Mac Wraps Flavorful Twist on a Classic Meal

June 7, 2025 by Chef Luca
- 1 lb ground beef - 1 tablespoon seasoning mix (e.g., garlic powder, onion powder, paprika) - 4 large flour tortillas - ½ cup shredded lettuce - ½ cup diced tomatoes - ½ cup pickles, sliced - ½ cup shredded cheddar cheese - ¼ cup mayonnaise - ¼ cup ketchup - 2 tablespoons mustard - 1 tablespoon apple cider vinegar - Salt and pepper to taste For the Big Mac Wraps, I start with ground beef. It gives the wraps that hearty flavor. I mix in a simple seasoning blend. Garlic powder, onion powder, and paprika work wonders. This blend adds depth to the beef. Next, I grab large flour tortillas. They need to be big enough to hold all the tasty fillings. Fresh veggies come next. I use shredded lettuce and diced tomatoes for crunch. Sliced pickles add a zesty kick. Cheese is essential too. I use shredded cheddar for a rich taste. Now, let's talk sauce. For that classic Big Mac flair, I whip up a special sauce. It's a mix of mayonnaise, ketchup, mustard, and apple cider vinegar. This sauce ties all the flavors together. Make sure to season everything well with salt and pepper. This ensures each bite is full of flavor. These ingredients combine to create a fun twist on a classic meal. For the full recipe with instructions, check the section above. To brown ground beef, use a large skillet over medium heat. Break the beef into small pieces with a spatula while it cooks. This helps it cook evenly. Cook until the beef is brown with no pink spots. Drain off any extra fat to keep it lean. Next, sprinkle your seasoning mix over the beef. I like to use garlic powder, onion powder, and paprika. This mix gives the beef a nice flavor. Add salt and pepper to taste. Stir well to combine everything. Cook for about 2-3 more minutes to let the flavors blend. Remove the skillet from heat and set it aside. For the special sauce, you'll need a few simple ingredients. Gather mayonnaise, ketchup, mustard, and apple cider vinegar. In a small bowl, mix them together. Start with ¼ cup of mayonnaise, ¼ cup of ketchup, and 2 tablespoons of mustard. Add 1 tablespoon of apple cider vinegar for a tangy kick. Stir well until everything is smooth. Taste the sauce and adjust the flavors if needed. You might want more ketchup for sweetness or more mustard for a kick. This sauce is what makes the wraps taste like a classic Big Mac. Now it’s time to assemble your wraps. Lay out the flour tortillas on a clean surface. This step is important for even wrapping. Spread a generous tablespoon of the special sauce on each tortilla. Make sure to cover it well for maximum flavor. Next, evenly distribute the seasoned ground beef down the center of each tortilla. Then, layer on shredded lettuce, diced tomatoes, pickles, and shredded cheddar cheese. This adds crunch and freshness to your wraps. For wrapping, fold in the sides of the tortilla over the filling. Then roll it from the bottom up, keeping everything tightly wrapped. If you want extra crispiness, place the wraps seam-side down in a skillet over medium heat. Toast for 1-2 minutes on each side until golden brown. Enjoy your Big Mac Wraps! For the full recipe, click here. To enhance the taste of your Big Mac Wraps, consider adding extra spices and herbs. I love using: - 1 teaspoon of dried oregano - 1 teaspoon of chili powder - 1 teaspoon of cumin These spices add depth and warmth to the dish. For tender beef, cook it over medium heat. This allows the fat to render slowly. Don't rush the cooking process. It will keep the beef juicy and flavorful. Keeping your wraps intact is key. After you fill the tortilla, fold the sides in first. Then, roll from the bottom up tightly. This method helps seal in all the goodness. To add a nice crunch, toast your wraps. Heat a skillet over medium heat. Place the wraps seam-side down and toast for 1-2 minutes on each side. This step gives a delightful texture. Big Mac Wraps pair well with simple sides. I recommend serving them with: - Sweet potato fries - Fresh fruit salad - Crispy onion rings For gatherings, arrange the wraps on a platter. Cut them in half for easy serving. You can also add a small bowl of extra special sauce for dipping. It makes the meal even more fun! {{image_2}} You can switch up the protein in your Big Mac Wraps. Ground turkey or chicken works great. For a twist, try using shrimp or tofu. If you're vegan or vegetarian, you can use black beans or lentils. Both options add protein and flavor. Adding sauces can change the game. Try sriracha for a spicy kick or barbecue sauce for a smoky vibe. You might also consider ranch dressing for creaminess. For toppings, think outside the box. Sliced jalapeños add heat, while avocado gives a smooth texture. You can also try crunchy onions for an extra bite. If you're watching carbs, low-carb tortillas are a smart choice. These wraps still taste great but have fewer carbs. To cut calories, use less cheese or opt for Greek yogurt instead of mayonnaise. You can also load up on veggies. They add volume without many calories. This way, you can enjoy a Big Mac Wrap that's tasty and lighter. For the complete guide on making these wraps, check the Full Recipe. To keep your Big Mac Wraps fresh, store them in the fridge. Wrap each one tightly in plastic wrap or foil. Place them in an airtight container to avoid moisture. This method helps keep the wraps from drying out. Your leftovers will last about three days in the fridge. When you’re ready to enjoy them again, choose the right method to reheat. The best way is to use a skillet. Heat it over medium-low heat. Place the wrap seam-side down for a few minutes until warm. This helps keep the wrap crispy. You can also use a microwave, but this might make the wrap soggy. Can you freeze Big Mac Wraps? Yes! You can freeze them for later. Just make sure they are tightly wrapped. They can last up to three months in the freezer. When you want to eat one, thaw it in the fridge overnight before reheating. Meal prepping makes life easier. You can prepare these wraps in advance for quick meals. Cook the beef and assemble the wraps, but do not add fresh veggies yet. Instead, store the cooked wraps in the fridge for a few days. To freeze for meal prep, follow the same steps as before. Wrap them tightly and store in a freezer-safe bag. When you are ready to eat, thaw and add fresh veggies for the best taste. Enjoy your quick and delicious meals! Check out the Full Recipe for more details on making these tasty wraps. A Big Mac Wrap features tasty ingredients that bring joy to your meal. Here’s what you need: - 1 lb ground beef - 1 tablespoon seasoning mix (garlic powder, onion powder, paprika) - 4 large flour tortillas - ½ cup shredded lettuce - ½ cup diced tomatoes - ½ cup sliced pickles - ½ cup shredded cheddar cheese - ¼ cup mayonnaise - ¼ cup ketchup - 2 tablespoons mustard - 1 tablespoon apple cider vinegar - Salt and pepper to taste These ingredients blend well to create a fun twist on the classic Big Mac. The Big Mac Wrap offers a unique taste and texture compared to the burger. You enjoy the same classic flavors but in a new form. The wrap is soft and chewy, while the burger has a firm bun. In a Big Mac Wrap, you get warm, seasoned beef with fresh veggies in every bite. The special sauce spreads evenly, adding creaminess. This makes each mouthful burst with flavor, unlike the layered structure of a burger. Currently, Big Mac Wraps are not on the regular McDonald's menu. They sometimes offer special promotions or limited-time items, so keep an eye out for changes. You might find similar wraps or menu items at some locations. Yes! You can make a gluten-free Big Mac Wrap easily. Here are some swaps you can use: - Replace flour tortillas with gluten-free wraps made from rice or corn. - Check the labels on sauces to ensure they are gluten-free. Brands like Sir Kensington’s offer gluten-free mayonnaise. These simple changes let you enjoy the flavors without the gluten! Big Mac Wraps are fun to make and tasty to eat. You learned how to create the wraps using ground beef, fresh veggies, and a special sauce. Following step-by-step directions helps you cook the beef, mix the sauce, and assemble the wraps just right. With tips for flavor, wrapping, and serving, you can impress anyone at your table. Feel free to customize the wraps to suit your taste or health goals. Enjoy your delicious Big Mac Wraps, and don’t forget to share this recipe with friends!

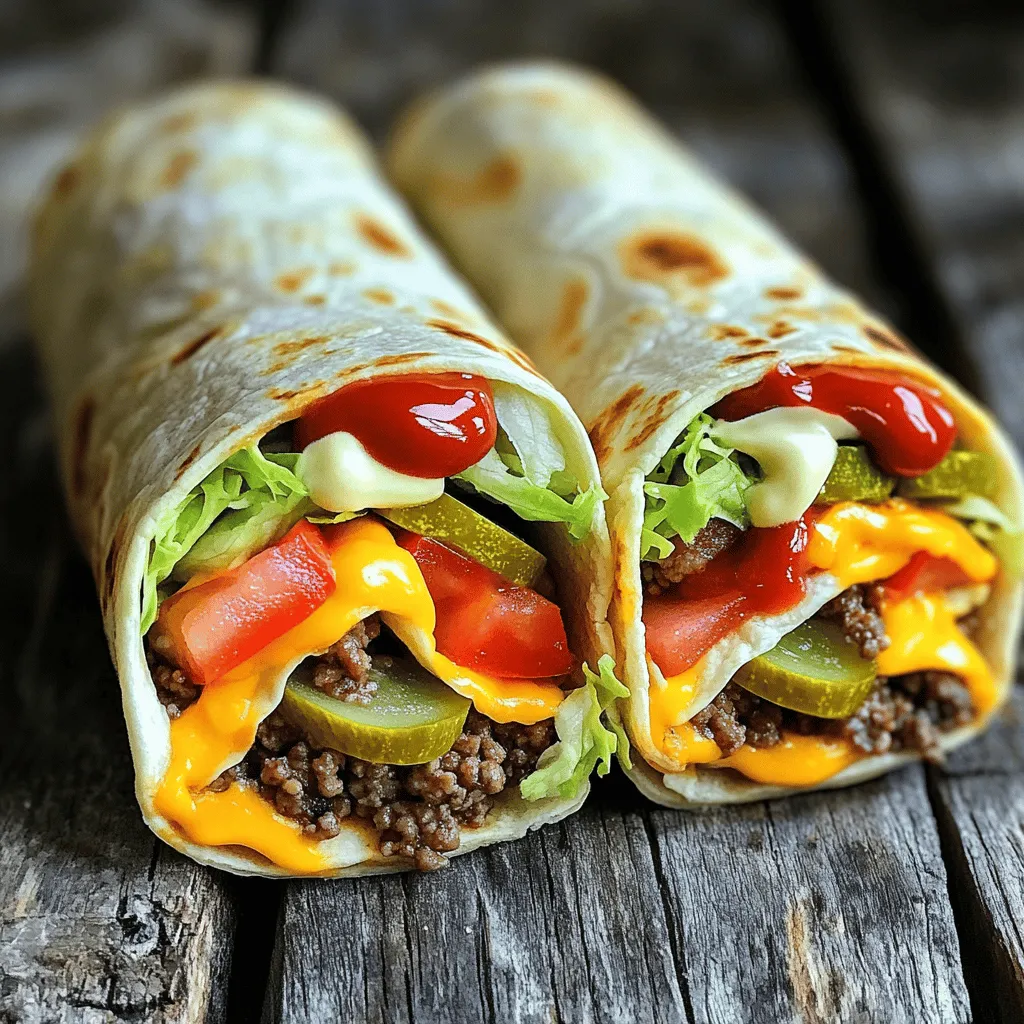
Craving a tasty twist on the classic Big Mac? Let’s dive into making Big Mac Wraps! This simple recipe combines ground beef, fresh veggies, and a special sauce. You’ll enjoy …

Read more

Categories Dinner

Delicious Mississippi Mud Potatoes Easy and Fun Recipe

June 7, 2025 by Chef Luca
- 4 large russet potatoes - 1 cup sour cream - ½ cup cream cheese, softened - 1 cup shredded cheddar cheese - 1/2 cup cooked bacon bits (optional) - 1/4 cup green onions, chopped - 1 cup mini marshmallows - 1/2 cup chocolate chips - 1/4 cup unsweetened cocoa powder - 1/4 cup brown sugar - 1/4 teaspoon vanilla extract - Salt and pepper to taste - Olive oil for drizzling To make delicious Mississippi Mud Potatoes, gather these simple ingredients. Start with russet potatoes, as they have a great texture. Sour cream and cream cheese add creaminess. The cheddar cheese gives a nice flavor boost. If you like, you can add bacon bits for extra taste. Green onions give a fresh crunch. Next, we have mini marshmallows and chocolate chips, which create a sweet topping. Unsweetened cocoa powder and brown sugar bring out the chocolatey flavor. Vanilla extract adds warmth. Don’t forget salt and pepper for seasoning and olive oil for a nice drizzle. Each serving has about 350 calories. You get a good mix of fat and protein from the cheese and sour cream. The potatoes provide carbs. If you have allergies, watch out for dairy in the sour cream, cream cheese, and cheese. For a lighter dish, you can swap sour cream with Greek yogurt. If you want a dairy-free option, use vegan cream cheese and cheese. For the marshmallows, look for vegan types at your store. These swaps keep the fun while catering to your needs. You can find the full recipe for more details on how to prepare these delicious Mississippi Mud Potatoes. 1. Preheat the oven and prepare potatoes: Start by preheating your oven to 400°F (200°C). Take four large russet potatoes and scrub them clean. Use a fork to pierce each potato a few times. This helps steam escape while baking. Rub each potato with olive oil and sprinkle salt over them. Place the potatoes directly on the oven rack or on a baking sheet. 2. Mixing the cheese and seasoning mixture: While the potatoes bake, grab a mixing bowl. Combine 1 cup of sour cream, ½ cup of softened cream cheese, 1 cup of shredded cheddar cheese, and ¼ cup of chopped green onions. If you like, add ½ cup of cooked bacon bits for extra flavor. Mix everything well. Don’t forget to season with salt and pepper to taste. 1. Baking the potatoes and cooling them: Bake the potatoes for about 45-55 minutes, or until they are tender. Once done, take them out of the oven and let them cool for a few minutes. This makes them easier to handle. 2. Scooping and mixing the potato flesh: Carefully cut each potato down the center lengthwise. Use a spoon to scoop out the insides, leaving a thin layer of flesh in the skin. Place the scooped potato flesh into the mixing bowl with the cheese mixture. Blend it all together until smooth. 3. Stuffing the potato skins: Now, refill each potato skin with the cheesy potato mixture. Mound the filling high, making them look nice and inviting. 1. Combining marshmallow-chocolate mix: In a separate small bowl, mix together 1 cup of mini marshmallows, ½ cup of chocolate chips, ¼ cup of unsweetened cocoa powder, ¼ cup of brown sugar, and ¼ teaspoon of vanilla extract. Stir until combined. 2. Broiling the stuffed potatoes: Spread the marshmallow-chocolate mixture evenly over the stuffed potatoes. Return them to the oven and broil on high for about 2-3 minutes. Keep a close eye on them until the tops are bubbly and slightly toasted. Make sure to check the [Full Recipe] for all the details! To bake your potatoes perfectly, start by washing and piercing them. Use a fork for this. It helps steam escape while they bake. Rub them with olive oil and sprinkle salt on top for flavor. Bake at 400°F (200°C) for about 45-55 minutes. Check if they are soft by poking them with a fork. To avoid overcooking or burning, keep an eye on the time. Every oven is different. If you notice the skin getting too crispy, cover them with foil. This helps keep the inside soft while the outside cooks. Make your dish look fun and bright. Serve the potatoes on a rustic wooden board. You can also use a colorful platter for extra flair. Garnish with green onions for a fresh look. A drizzle of chocolate syrup adds a whimsical touch that kids love. For extra flavor, consider adding a dollop of sour cream on top. You could also sprinkle more cheddar cheese for a cheesy bite. Pair these tasty potatoes with a fresh salad. A simple green salad with vinaigrette works well. You could also serve them with grilled vegetables for a healthy side. For drinks, iced tea or lemonade complements the potatoes nicely. If you want something warm, hot cocoa makes a fun pairing, especially for kids. Enjoy the blend of flavors! {{image_2}} You can change the cheese to fit your taste. Try pepper jack for a spicy kick. Alternatively, use mozzarella for a gooey, stretchy texture. You can also mix in some crumbled feta for a tangy twist. To spice up the recipe, add jalapeños or diced bell peppers. These ingredients add both flavor and color. You might also consider adding some garlic powder or smoked paprika for depth. Experiment with these options to find your favorite combo! If you need gluten-free options, simply check the cheese and bacon brands. Most are gluten-free, so you can enjoy this dish without worry. Use gluten-free sour cream and cream cheese if needed. For low-carb or keto variations, swap regular potatoes for cauliflower. This change cuts carbs while still giving a creamy filling. You can also skip the marshmallows and chocolate for a savory dish. For holidays, consider adding festive toppings. Try crispy fried onions for a crunch at Thanksgiving. You can also sprinkle some holiday herbs like rosemary or thyme for a seasonal flair. Using seasonal ingredients can enhance the dish. In summer, add fresh corn or tomatoes. In fall, mix in roasted pumpkin or butternut squash. These ingredients will make your Mississippi Mud Potatoes even more delightful. For the full recipe, check the ingredients and instructions above. To keep your Mississippi Mud Potatoes tasty, store leftovers right. Start by letting them cool down. Use airtight containers for best results. This keeps moisture in and prevents drying out. If you have multiple potatoes, separate them to avoid sogginess. You can place parchment paper in between to help. When reheating, aim for a cozy warmth without drying them out. Preheat your oven to 350°F (175°C). Place the potatoes on a baking sheet. Cover them with foil to keep moisture in. Heat for about 15-20 minutes or until warm. If you want a crispy top, remove the foil for the last 5 minutes. Broil them for 2-3 minutes to regain that crunch. Just watch closely to avoid burning. Freezing Mississippi Mud Potatoes is a great choice for meal prep. Start by wrapping each potato tightly in plastic wrap. Then, place them in a freezer bag. They can last up to three months. When you’re ready to enjoy them, take them out of the freezer. Let them thaw in the fridge overnight. To reheat, follow the regular reheating steps. This way, you still get that delicious flavor and texture from the Full Recipe. What are the origins of Mississippi Mud Potatoes? Mississippi Mud Potatoes come from the Southern United States. The dish blends rich flavors and textures. It combines savory cheese with sweet toppings. This fun recipe reflects Southern hospitality and creativity. Can I make this dish ahead of time? Yes, you can prepare Mississippi Mud Potatoes ahead of time. Bake the potatoes and stuff them earlier. Store them in the fridge for up to one day. Just broil them right before serving for that perfect finish. How do I ensure my potatoes are perfectly baked? To bake perfect potatoes, scrub them well. Pierce them with a fork to let steam escape. Rub olive oil and sprinkle with salt. Bake them at 400°F for 45-55 minutes or until soft. Can I use other toppings besides marshmallows and chocolate? Absolutely! You can try different toppings like crushed cookies or candy bars. Sweet fruits or nuts can add a fun twist too. Be creative and make it your own! How long should I cook potatoes in the oven? Bake your potatoes for 45-55 minutes at 400°F. Check for tenderness by pricking them with a fork. If it goes in easily, they are done! What is the best way to store baked potatoes? Store baked potatoes in an airtight container in the fridge. They stay fresh for about 3-5 days. When ready to eat, reheat them in the oven or microwave. In this post, we explored making delicious Mississippi Mud Potatoes. We covered key ingredients, detailed steps, and helpful storage tips. I shared variations for different tastes and dietary needs too. These stuffed potatoes offer a fun twist for any meal. Try them at your next gathering. You'll impress everyone with this unique dish. Enjoy your cooking adventure!

Are you ready to take your potato game to the next level? Let’s dive into the world of Delicious Mississippi Mud Potatoes! This fun and easy recipe combines cheesy goodness …

Read more

Categories Desserts

Taco Rice Recipe Flavorful and Easy Meal Idea

June 7, 2025 by Chef Luca
For a great taco rice, you need: - 1 cup white rice - 2 cups vegetable broth - 1 tablespoon olive oil - 1 small onion, diced - 1 bell pepper (any color), diced - 2 cloves garlic, minced - 1 can (15 oz) black beans, drained and rinsed - 1 cup corn (fresh or frozen) - 1 tablespoon taco seasoning - 1 teaspoon cumin - Salt and pepper to taste - 1 cup diced tomatoes (fresh or canned) - 1 avocado, diced - 1 cup shredded cheese (cheddar or Mexican blend) - Fresh cilantro, chopped (for garnish) - Lime wedges (for serving) You can swap ingredients to fit your taste. For rice, use brown rice or quinoa. If you prefer a different bean, try pinto or kidney beans. For a lighter option, use low-fat cheese or skip it entirely. Use fresh produce for the best taste. Choose firm avocados and bright bell peppers. Fresh garlic adds great flavor. Select canned items with no added sugars or preservatives. Quality ingredients make a big difference in your taco rice! To start, you need to cook the rice. First, grab a medium saucepan and pour in 2 cups of vegetable broth. Heat it on high until it boils. This step is key for adding flavor to the rice. Once the broth is bubbling, add 1 cup of white rice. Cover the pot and reduce the heat to low. Let it simmer for about 15 to 20 minutes. The rice will soak up all the broth and become tender. After the time is up, take it off the heat but keep it covered for an extra 5 minutes. This helps the rice to fluff up nicely. Use a fork to fluff it before mixing it with other ingredients. While the rice cooks, it’s time to sauté the vegetables. Take a large skillet and heat 1 tablespoon of olive oil over medium heat. Once the oil is warm, add 1 small diced onion and 1 diced bell pepper. Sauté these for about 5 minutes until they soften. Stir them well to avoid burning. You want them tender but still colorful. This will add great texture to your taco rice. Now, let’s bring the flavors together. Add 2 minced garlic cloves to the skillet with the onions and bell peppers. Stir in 1 tablespoon of taco seasoning and 1 teaspoon of cumin. Cook these for another minute. This will fill your kitchen with an amazing smell! Next, it's time to mix in the other ingredients. Add 1 can of drained black beans, 1 cup of corn, and 1 cup of diced tomatoes. Stir everything well and let it heat through for about 3 to 5 minutes. Season with salt and pepper to taste. Finally, gently fold in the cooked rice, letting it combine with the veggies and spices. Cook for an extra 2 to 3 minutes on low heat. Now you have a colorful and tasty taco rice mixture ready to serve! For the full recipe, check out the full recipe section. To make your taco rice even tastier, think about adding spices. Consider cumin, paprika, or chili powder. Fresh herbs like cilantro or parsley can add brightness. A squeeze of lime juice before serving gives it a zesty kick. You can also add a dash of hot sauce for heat. When sautéing your veggies, make sure to keep the heat medium. This helps the onions and peppers soften without burning. Stir them often for even cooking. Mix the spices in when the vegetables are soft to release their full flavors. Fold the rice into the veggie mix gently to keep it fluffy. For a beautiful plate, layer your taco rice in bowls. Top with diced avocado and a sprinkle of cheese. Add fresh cilantro for color and flavor. Serve lime wedges on the side for extra zest. You can also add sour cream or guacamole for creaminess. These small touches make a big difference! {{image_2}} You can make taco rice even better by adding different proteins. Chicken, beef, or plant-based proteins work well. - Chicken: Cook diced chicken in the skillet before adding the veggies. Season it with taco spices for extra flavor. - Beef: Use ground beef as another option. Brown it in the skillet first, then mix in spices and other ingredients. - Plant-based: For a vegan choice, try lentils or tofu. Cook the tofu until golden brown for a nice texture. These proteins add more depth and flavor to your dish. Feel free to mix and match based on your taste! Adapting this recipe for vegetarians or vegans is easy. Simply remove any meat and add more veggies or legumes. - Beans: Black beans are great, but you can also use pinto or kidney beans. - Veggies: Add more colorful vegetables like zucchini or mushrooms for a hearty meal. - Cheese: For a vegan version, skip the cheese or use a dairy-free alternative. These adjustments keep the meal filling and tasty while meeting different diet needs. If you love heat, you can spice up your taco rice. Adding jalapeños or hot sauce can give it a kick. - Jalapeños: Chop fresh jalapeños and sauté them with the onions and bell peppers. This adds a nice crunch and heat. - Hot Sauce: Drizzle your favorite hot sauce on top when serving. This lets each person choose their spice level. Playing with spice makes the dish exciting and bold! Store leftover taco rice in an airtight container. Make sure to let it cool first. Place it in the fridge for up to 3 days. This keeps it fresh and tasty. When you want to eat it again, check if it smells good. If it smells off, it’s best to toss it. To reheat taco rice, use a microwave or stovetop. If using a microwave, add a splash of water. This helps keep it moist. Heat for about 1-2 minutes, stirring halfway. On the stovetop, warm it in a pan over low heat. Stir often to avoid sticking. Both methods keep the rice soft and fluffy. You can freeze taco rice for longer storage. First, let it cool completely. Then, scoop it into freezer bags. Press out as much air as you can. Label the bags with the date. Taco rice can stay good for up to 3 months. To thaw, move the bag to the fridge overnight. Reheat it as described above. This way, you’ll enjoy your taco rice all over again! Yes, you can prep taco rice ahead of time. To do this, cook the rice and the veggie mix separately. Cool them down before storing in the fridge. Put them in airtight containers. You can keep them for up to three days. When ready to eat, reheat both parts in a skillet. Add a splash of water to keep it moist. Heat until it’s warm all the way through. Taco rice pairs well with many sides. Here are some ideas: - Guacamole: This adds creaminess and flavor. - Salsa: A fresh salsa gives a nice kick. - Chips: Serve with tortilla chips for crunch. - Salad: A light salad can balance the meal. - Corn on the Cob: Sweet corn complements the dish. To spice up taco rice, you have several options: - Jalapeños: Add fresh or pickled jalapeños to the mix. - Hot Sauce: Drizzle your favorite hot sauce on top. - Spicy Seasoning: Use spicy taco seasoning or add cayenne pepper. - Chili Powder: Mix in chili powder for a deeper heat. Experiment with these options to find your perfect spice level. Taco rice is a simple and tasty dish made with rice, beans, and fresh veggies. We covered all the essentials, from ingredient options to cooking methods, and even storage tips. Remember to use fresh produce for the best flavor. Feel free to experiment with proteins and spices to make it your own. Enjoy making this meal, as it’s both fun and rewarding. With these tips, you’re ready to create a delicious taco rice that everyone will love. Happy cooking!

If you’re craving a meal that’s both tasty and easy to make, you’re in for a treat! My Taco Rice recipe combines rice, veggies, and bold flavors into one fun …

Read more

Categories Dinner

Big Mac Smash Burger Taco Delicious Family Meal Idea

June 7, 2025 by Chef Luca
- 1 lb ground beef (80/20) - 8 small flour tortillas - 1 cup shredded lettuce - 1 cup diced tomatoes - 1 cup shredded cheddar cheese - 1/2 cup pickles, sliced - 1/2 cup mayonnaise - 2 tablespoons mustard - 2 tablespoons ketchup - 1 tablespoon white vinegar - 1 teaspoon garlic powder - 1 teaspoon onion powder - Salt and pepper to taste - Cooking oil for frying To make the Big Mac Smash Burger Taco, you need a mix of fresh and tasty items. The ground beef is the star. I recommend using 80/20 for that juicy flavor. Small flour tortillas hold everything together nicely. Fresh veggies like lettuce and tomatoes add crunch. Shredded cheddar gives it that cheesy goodness we crave. Pickles bring a tangy bite that makes every taco pop. The sauce is key to this recipe. It combines mayonnaise, mustard, ketchup, and vinegar. Garlic and onion powder add extra flavor. Don't forget to season your beef with salt and pepper; it makes a big difference. - Additional toppings for customization: jalapeños, avocado, or crispy bacon - Suggested side dishes: French fries, coleslaw, or a garden salad You can get creative with your tacos! Try adding jalapeños for heat or avocado for creaminess. Crispy bacon is another fun option. For sides, French fries pair well with the tacos. You can also serve coleslaw for a fresh crunch. A garden salad rounds out the meal nicely, making it a full family feast. You can find the full recipe linked above to guide you through this fun meal! To make the Big Mac sauce, you need to mix a few simple ingredients. In a small bowl, combine: - 1/2 cup mayonnaise - 2 tablespoons mustard - 2 tablespoons ketchup - 1 tablespoon white vinegar - 1 teaspoon garlic powder - 1 teaspoon onion powder - A pinch of salt and pepper Mix all the ingredients well until smooth. The flavor improves when you let the sauce rest for at least 10 minutes. This gives the flavors time to blend. Now, let’s get to the beef. Start by dividing the ground beef into 8 equal portions. Each piece should weigh around 2 ounces. Shape them into loose balls. Don’t pack them too tightly. This helps keep them juicy. Next, preheat your skillet or griddle over medium-high heat. Drizzle some cooking oil on the surface. When the oil is hot, place the beef balls into the skillet. Use a spatula to smash them flat, about 1/4 inch thick. This step is key for a great crust. Season the patties with salt and pepper. Cook for 2-3 minutes until you see a nice crust. Flip them and cook for another 1-2 minutes. It’s time to build your taco! Warm the flour tortillas on another skillet for about 30 seconds on each side. This makes them soft and easy to fold. On each tortilla, place a smash burger patty. Then, layer on the shredded lettuce, diced tomatoes, cheddar cheese, and pickles. Drizzle a generous amount of the Big Mac sauce on top. To fold your taco, gently lift the sides of the tortilla over the filling. Fold it like a burrito to keep everything inside. Enjoy your Big Mac Smash Burger Taco! For the full recipe, check out the earlier sections. To get a crispy crust, use high heat. Preheat your skillet to medium-high. Make sure it is hot before adding the beef. This helps the meat sear well. Use a spatula to smash the beef down. Smash it flat for a great crust. Cook for 2-3 minutes on one side. Flip it and cook for another 1-2 minutes. For tasty burgers, use simple seasonings. Salt and pepper work well, but feel free to mix things up. Try adding garlic powder or smoked paprika for a twist. For cheese, I suggest cheddar or American. They melt beautifully and add rich flavor. A slice of cheese on each patty at the end is key. Want to feed a crowd? This recipe scales easily. Just double or triple the ingredients. You can make the patties ahead of time and freeze them too. For sides, consider crispy fries or onion rings. A fun drink like soda or milkshakes pairs nicely. Try serving the tacos with some fresh fruit, too! For the full recipe, refer to the Full Recipe section. {{image_2}} You can change the meat in your Big Mac Smash Burger Taco. Ground turkey is a lean option. It keeps the taco healthy. For plant-based lovers, try using meat alternatives like soy or pea protein. They add great flavor too. When you switch meats, adjust the seasoning. Turkey can taste bland. Add extra spices like paprika or cayenne. This will boost the flavor. For plant-based options, season well with garlic and onion powder to enhance taste. Want to spice things up? Add jalapeños to your tacos. They bring heat and crunch. Slice them thin, and sprinkle them on top of your patties. If you like a kick, this is a must-try. You can also mix different sauces. Swap regular ketchup for spicy ketchup. Try barbecue sauce for a smoky twist. A dash of sriracha can also add a fun twist. Let your taste buds guide you! If you need gluten-free options, use corn tortillas. They work well and keep the taste intact. You can find them in most stores. They also hold up well with the fillings. For those watching carbs, use lettuce wraps instead of tortillas. They are fresh and light. Just take a large leaf, fill it like a taco, and enjoy without the carbs. This keeps your meal tasty and guilt-free. To keep your Big Mac Smash Burger Tacos fresh, store leftovers in the fridge. Place the tacos in an airtight container. They will stay good for up to three days. If you have extra components, store them separately. This helps keep the tortillas soft. Freezing is also an option. Wrap the tacos tightly in plastic wrap, then place them in a freezer bag. They can last for up to two months. When you're ready to eat, thaw in the fridge overnight. When reheating your tacos, aim for a method that keeps them fresh. The oven works well. Preheat it to 350°F (175°C). Place the tacos on a baking sheet for about 10-15 minutes. This warms them up without making them soggy. You can also use a skillet. Heat it over medium heat and warm the tacos for a few minutes on each side. To avoid soggy tortillas, skip the microwave. It tends to make tortillas chewy and wet. A Big Mac Smash Burger Taco is a fun twist on two classics. It combines a smash burger and a taco in one dish. You get juicy beef patties, fresh veggies, and a creamy sauce all wrapped in a soft tortilla. It’s a perfect meal for any time, mixing flavors and styles that everyone loves. Yes, you can make parts of this recipe ahead. You can prepare the Big Mac sauce the day before. Store it in the fridge to let the flavors blend. You can also form the beef patties and keep them in the fridge until you're ready to cook. This way, you save time on busy days and still enjoy a tasty meal. You can get creative with toppings! Try adding diced onions for crunch. Jalapeños can add some heat if you like spice. You can swap out cheddar cheese for pepper jack for a kick. Want more veggies? Add avocado slices or bell peppers. The choice is yours, so mix it up and find your favorite combo. Check the Full Recipe for ideas and fun options! This blog post covered how to make a Big Mac Smash Burger Taco. We explored essential ingredients, from ground beef to fresh veggies. I shared step-by-step instructions for making the sauce, cooking patties, and assembling the taco. Tips for perfecting your burger and creative variations add flair to your meal. With these ideas, you can create a delicious dish for any occasion. Enjoy experimenting with flavors and sharing it with family and friends!

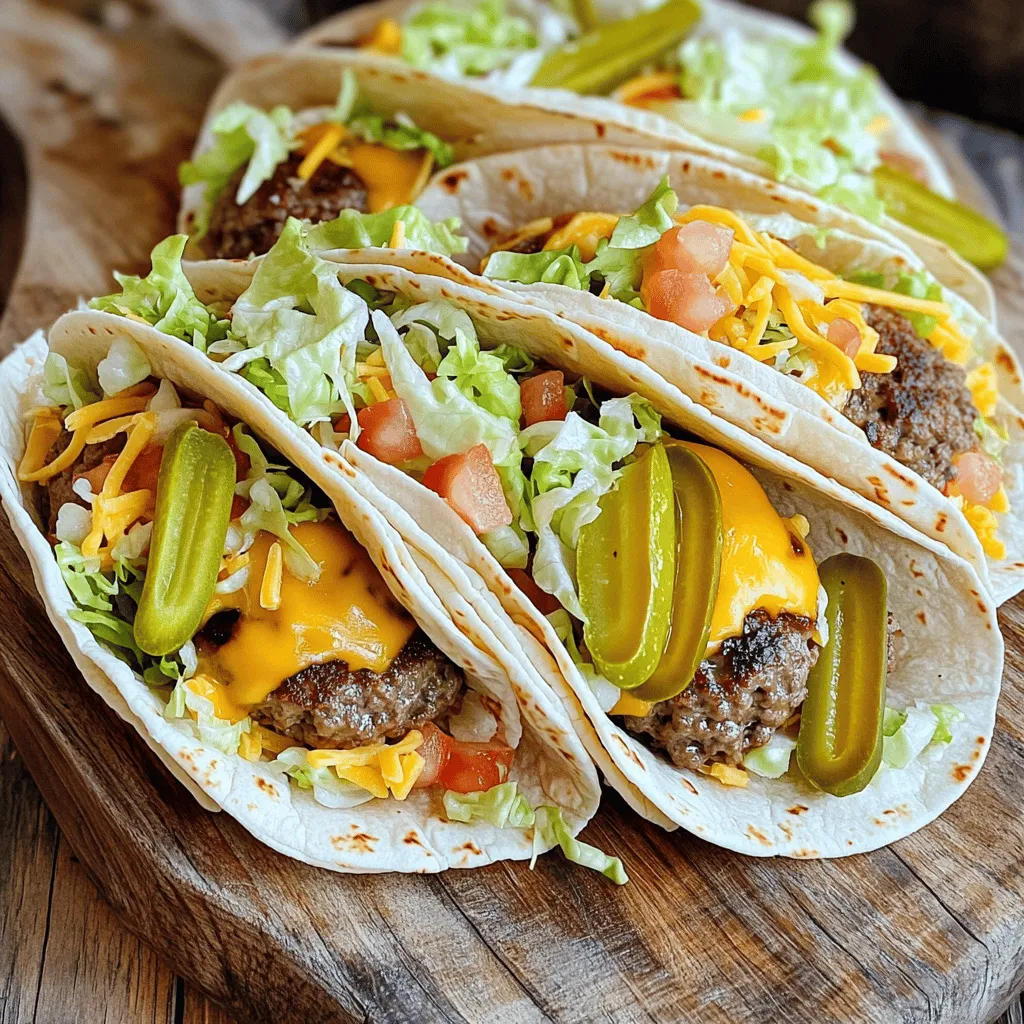
Are you ready to elevate family meals to a whole new level? The Big Mac Smash Burger Taco combines all the juicy goodness of a classic burger with the fun …

Read more

Categories Dinner

Leftover Mashed Potato Cheese Puffs Irresistible Snack

June 7, 2025 by Chef Luca
To make these tasty leftover mashed potato cheese puffs, gather the following ingredients: - 2 cups leftover mashed potatoes - 1 cup shredded sharp cheddar cheese - 1/2 cup grated Parmesan cheese - 1/4 cup chopped green onions - 1 large egg - 1/2 cup all-purpose flour - 1 teaspoon garlic powder - 1 teaspoon onion powder - Salt and pepper to taste - Vegetable oil for frying These ingredients work together to create a crunchy outside and a creamy inside. The sharp cheddar adds a rich flavor, while the Parmesan brings a nice depth. Green onions give a fresh touch, making every bite special. Feel free to adjust the spices based on what you like. This recipe uses common items that many have at home. You can check the Full Recipe for more details on how to prepare them. Start by mixing the ingredients together. In a large bowl, combine the leftover mashed potatoes, sharp cheddar cheese, Parmesan cheese, and chopped green onions. Use a sturdy spoon to mix until everything is even. Next, beat the egg in a separate bowl. Add the egg to the potato mix and stir well to combine. Now, sprinkle in the flour, garlic powder, onion powder, salt, and pepper. Mix until you have a thick, sticky dough. This dough is what will make your cheese puffs delicious! Shaping the cheese puffs comes next. With clean hands, scoop out tablespoon-sized portions of the potato mixture. Roll them gently into small balls. Make sure they are uniform in size for even cooking. For the frying process, heat about 2 inches of vegetable oil in a deep skillet or pot over medium heat. Use a thermometer to check the temperature; it should reach 350°F (175°C). Safety is key, so be careful when handling hot oil. Once the oil is hot, drop the potato balls into it. Fry them in batches to avoid overcrowding the pot. Fry each side for about 3-4 minutes until they turn golden brown and crispy. Remove the cheese puffs with a slotted spoon and place them on paper towels to drain excess oil. Let them cool slightly before serving. To determine if your oil is ready for frying, drop a small piece of dough into the oil. If it sizzles and rises to the top, the oil is good to go. When frying, always cook in batches. This helps to keep the oil temperature steady. If you add too many puffs at once, they will not cook evenly. You want each cheese puff to be crispy and golden all around. For the full recipe, check out the detailed instructions provided above. To make your cheese puffs pop with flavor, add spices or herbs. You can try mixing in: - 1 teaspoon smoked paprika for a smoky kick. - Fresh herbs like parsley or chives for a fresh taste. Choosing the right type of cheese is also key. Sharp cheddar gives a bold flavor, while Parmesan adds a nutty twist. Feel free to mix different cheeses for more depth. One common mistake is overmixing the dough. This can make your puffs tough instead of light. Mix just until combined, and don’t worry if some lumps remain. Another mistake is not heating the oil to the right temperature. If the oil is too cold, your puffs will soak up oil and become greasy. If it’s too hot, they will burn on the outside while staying raw inside. Aim for 350°F (175°C) for perfect frying. For more details and step-by-step guidance, check the Full Recipe. {{image_2}} You can change the flavor of your cheese puffs by using different leftovers. Try mixing in leftover vegetables, like broccoli or spinach. These veggies add color and nutrition. You can also use sweet potatoes for a twist. For cheese, swap sharp cheddar with mozzarella or gouda. Each cheese gives a unique taste. Parmesan adds a nice salty bite, but you can skip it if you want a milder flavor. Mixing different cheeses can make your puffs even better. If you prefer a healthier option, baking works great. Preheat your oven to 400°F (200°C). Line a baking sheet with parchment paper. Shape your mashed potato mixture into balls, just like before. Place the balls on the sheet, leaving space between them. Lightly spray or brush them with oil for a crunchy texture. Bake for about 20-25 minutes. Keep an eye on them. They should turn golden brown and firm. This method cuts down the oil but keeps the puffs tasty. For both methods, you can find the full recipe in the main article. Enjoy experimenting! After frying your cheese puffs, let them cool down. This step is key to keeping them tasty. Place them on a wire rack to avoid steam. Steam can make them soggy. Once cooled, wrap the cheese puffs in plastic wrap or aluminum foil. This keeps them fresh. You can also use a food storage bag. Be sure to squeeze out as much air as possible. This helps prevent freezer burn. For best results, store the leftover cheese puffs in an airtight container. A glass or hard plastic container works great. Keep them in the fridge if you plan to eat them within a few days. If you want to save them for longer, freeze them. They can stay fresh for up to three months in the freezer. To enjoy your cheese puffs again, reheat them properly. You have two great options: the oven or the microwave. Oven Method: Preheat your oven to 350°F (175°C). Place the cheese puffs on a baking sheet. Heat them for about 10-15 minutes. This method keeps them crispy and warm. Microwave Method: If you’re in a hurry, use the microwave. Place your cheese puffs on a microwave-safe plate. Heat them for about 30 seconds to 1 minute. However, this method may make them soft. To avoid this, try placing a paper towel under the puffs. This helps absorb extra moisture. Remember, the goal is to keep them crispy. Always check if they are heated through before serving. Enjoy your tasty leftovers! Yes, you can! For a gluten-free option, use almond flour or rice flour instead of all-purpose flour. These alternatives work well to bind the ingredients. They also add a unique flavor that enhances the cheese puffs. You can store leftover cheese puffs in an airtight container for up to three days in the fridge. Make sure they cool completely before sealing to keep them fresh. If you want to keep them longer, consider freezing them. Absolutely! To freeze leftover mashed potatoes, place them in a freezer-safe bag or container. Remove excess air to prevent freezer burn. They can last up to three months in the freezer. When ready to use, thaw them in the fridge overnight. Then, reheat them on the stove or in the microwave. In this blog post, you learned to make delicious cheese puffs using leftover mashed potatoes. We covered all the key ingredients and detailed steps for mixing, shaping, and frying. I shared tips to boost flavor and avoid common mistakes. You also discovered fun variations, storage tips, and answers to FAQs. Now you can create tasty snacks and reduce waste in your kitchen. Enjoy experimenting with flavors and impressing your friends and family!

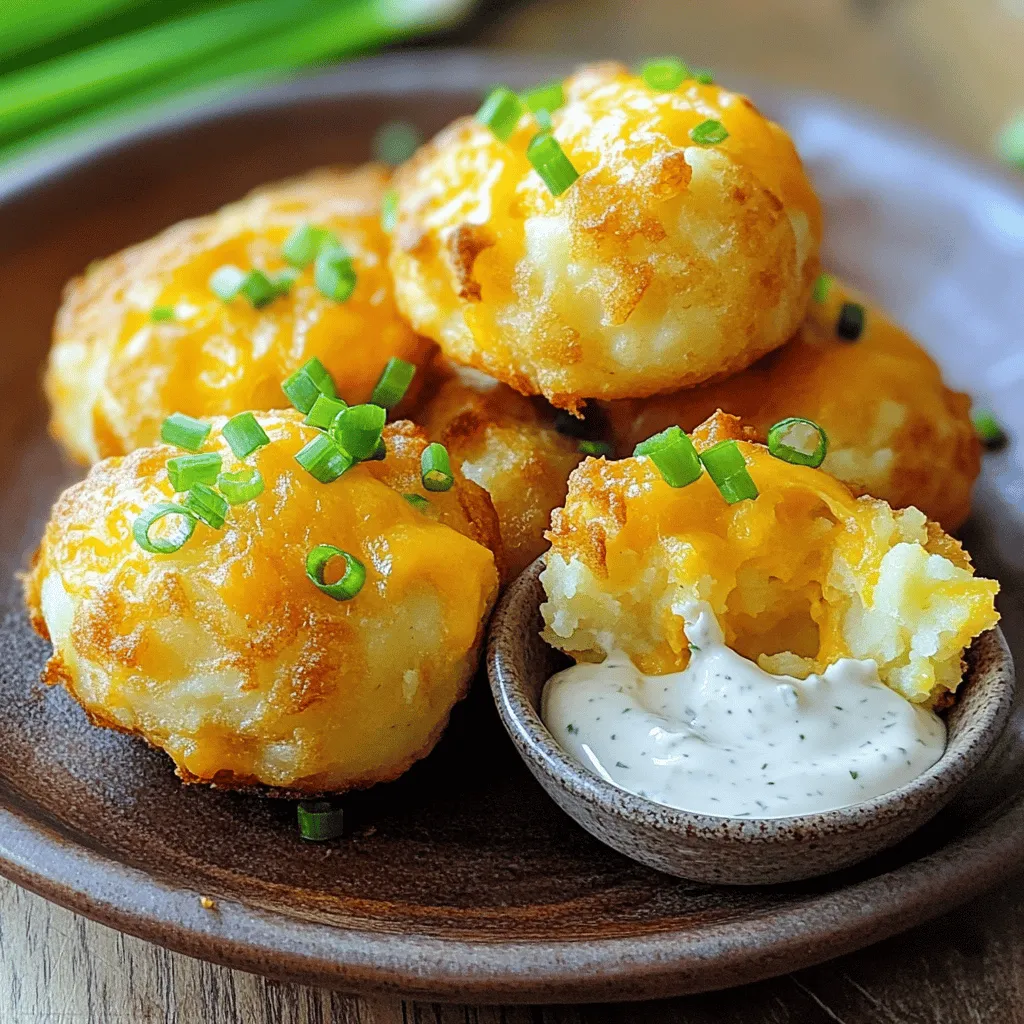
Do you have leftover mashed potatoes? Turn them into a tasty snack with my Leftover Mashed Potato Cheese Puffs! These cheesy bites are easy to make and use simple ingredients …

Read more

Categories Appetizers

The Tasty Bang Bang Chicken Bowl Easy Recipe Guide

June 7, 2025 by Chef Luca
To make the best Bang Bang Chicken Bowl, you need some key ingredients. Here’s what you will need: - 2 chicken breasts, cut into bite-sized pieces - 1 cup cornstarch - 1 teaspoon garlic powder - 1 teaspoon onion powder - 1 teaspoon paprika - Salt and pepper to taste - Oil for frying - 1 cup shredded lettuce - 1 cup cooked jasmine rice - ½ cup cherry tomatoes, halved - ¼ cup green onions, sliced - ¼ cup cilantro, chopped - Sesame seeds for garnish Choosing fresh and high-quality ingredients is important. Fresh chicken and crisp vegetables make the dish taste better. When you use good ingredients, you get great flavors. Always check for the best quality at your local market. The sauce is what makes this dish really special. Here’s what goes into the Bang Bang sauce: - ½ cup mayonnaise - 2 tablespoons sweet chili sauce - 1 tablespoon sriracha (adjust to taste) - 1 teaspoon lime juice - Salt to taste The sauce adds a creamy and spicy kick to the chicken bowl. If you want to change things up, you can swap out the mayonnaise for Greek yogurt. This will give you a lighter sauce with a tangy flavor. You can also adjust the sriracha to make it hotter or milder. To make the Bang Bang sauce, start with a medium bowl. Add half a cup of mayonnaise. Then, mix in two tablespoons of sweet chili sauce. Next, add one tablespoon of sriracha. You can adjust the sriracha to change the heat level. If you prefer less spice, use less sriracha. Lastly, add one teaspoon of lime juice and a pinch of salt. Whisk all the ingredients together until smooth. Set the sauce aside for later. For the chicken, take two chicken breasts and cut them into bite-sized pieces. In a separate bowl, mix one cup of cornstarch with one teaspoon of garlic powder, one teaspoon of onion powder, one teaspoon of paprika, and salt and pepper to taste. Toss the chicken pieces in this mixture until they are fully coated. Next, heat oil in a large skillet over medium-high heat. Ensure the oil is hot before adding the chicken. Fry the chicken in batches, so you do not overcrowd the pan. Cook for about five to seven minutes until golden brown and cooked through. Remove the chicken and let it drain on paper towels to remove excess oil. Now, it's time to assemble your Bang Bang Chicken Bowl. Start with a base of cooked jasmine rice at the bottom of a large bowl. Layer on one cup of shredded lettuce next. Add the crispy fried chicken on top of the lettuce. Then, scatter half a cup of halved cherry tomatoes, a quarter cup of sliced green onions, and a quarter cup of chopped cilantro. Finally, drizzle the Bang Bang sauce generously over the top. For an extra touch, sprinkle sesame seeds on the bowl. Arrange the ingredients nicely for a beautiful presentation. Enjoy your delicious creation! To get crispy chicken, coat the pieces well. Use cornstarch mixed with spices. This gives a crunchy crust. Heat oil in your skillet until it shimmers. This means it’s hot enough. Fry in small batches. This helps each piece cook evenly. Common mistakes often happen during frying. Don’t overcrowd the pan. This makes the chicken steam instead of fry. Also, watch your heat. If it’s too low, the chicken gets soggy. If it’s too high, it burns. Keep an eye on it! Serving your Bang Bang Chicken Bowl is fun! Use bright bowls to make it pop. Start with rice at the bottom. Then, add lettuce, chicken, and tomatoes. Layering looks nice and tastes great. For garnish, sprinkle sesame seeds on top. Add lime wedges for a fresh touch. Green onions and cilantro make it colorful. This makes your dish not just tasty, but pretty too! {{image_2}} You can easily swap out ingredients in the Bang Bang Chicken Bowl. If you want to change the protein, try shrimp or tofu. Both options work well with the sauce and add unique flavors. You can also use tempeh or seitan for a hearty vegetarian choice. For the veggies, think about using spinach or kale instead of lettuce. Bell peppers or cucumbers can add a nice crunch. You can even mix in some avocados for creaminess. These swaps keep the dish fresh and fun. The Bang Bang sauce is the star of the show, but you can change it up! For a sweeter twist, use more sweet chili sauce. If you like heat, add extra sriracha. You could even mix in some peanut butter for a nutty flavor. Try adding spices like ginger or a dash of sesame oil for depth. You can create a spicy mayo by mixing in hot sauce with the mayo. Experiment with different sauces like teriyaki or hoisin for a new take on this dish. Each variation brings a unique taste that keeps it exciting. Store any leftovers in an airtight container. This keeps the chicken and rice fresh. You can keep the Bang Bang Chicken Bowl in the fridge for up to three days. After that, the flavors may change, and it may not taste as good. When you reheat the bowl, use a microwave for quick warmth. Place the bowl on a microwave-safe plate and cover it with a damp paper towel. This helps retain moisture. Heat in short bursts of 30 seconds, stirring in between. To avoid soggy chicken, do not refrigerate the sauce with the chicken. Store the sauce separately. Reheat the chicken in the oven at 350°F for about 10 minutes. This keeps it crispy and delicious. Enjoy the tasty Bang Bang Chicken Bowl even after a day or two! A Bang Bang Chicken Bowl is a tasty dish that combines crispy chicken, fresh veggies, and a creamy sauce. It has gained popularity because it is both fun to eat and easy to make. The dish features chicken coated in cornstarch, fried until golden, and served over jasmine rice. It’s topped with lettuce, tomatoes, and a rich Bang Bang sauce that gives it a unique flavor. This bowl is not only delicious but also visually appealing, making it a hit for any meal. Yes, you can definitely make this dish spicy! To add more heat, increase the amount of sriracha in the Bang Bang sauce. You can also sprinkle some red pepper flakes on top for an extra kick. If you want a deeper spice, add diced jalapeños or even a spicy chili oil. Adjust the heat level to fit your taste. Remember, you can always start with a little and add more if needed. Absolutely, you can make a Bang Bang Chicken Bowl vegan or vegetarian! Instead of chicken, use crispy tofu or tempeh, which will absorb the flavors well. For the sauce, use vegan mayonnaise to keep it plant-based. You can also add more colorful veggies, like bell peppers or avocado, for added nutrition and taste. This way, you can enjoy the same great flavors while sticking to your dietary needs. The Bang Bang Chicken Bowl is a delicious and fun dish. We covered the key ingredients, focusing on freshness and quality. I shared step-by-step instructions for making the sauce, coating, and frying the chicken. Tips helped ensure perfect cooking and presentation. In summary, don’t hesitate to try variations and make it your own. Whether you stick to the classic recipe or experiment with flavors, enjoy the process and the tasty results. Happy cooking!

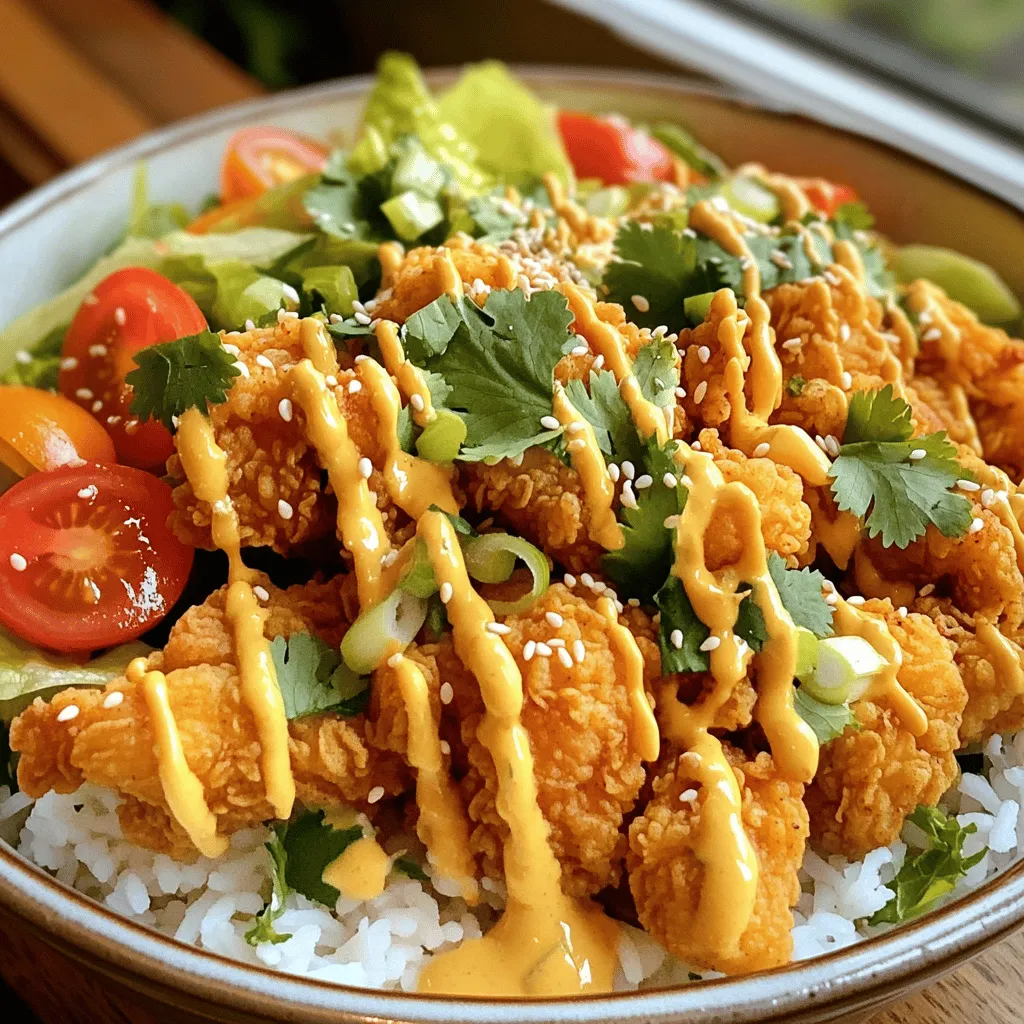
Are you ready to make a Bang Bang Chicken Bowl that packs a flavor punch? In this easy recipe guide, I’ll walk you through every step, from selecting fresh ingredients …

Read more

Categories Dinner

Crack Burgers Juicy and Flavorful Homemade Delight

June 7, 2025 by Chef Luca
To make the perfect Crack Burgers, you need fresh and quality ingredients. Here’s what you’ll need: - 1 pound ground beef (80/20) - 4 slices cheddar cheese - 4 hamburger buns - 1 cup shredded lettuce - 1 large tomato, sliced - 1/2 cup pickles The right seasonings bring out the flavor. For your Crack Burgers, include: - 1 teaspoon garlic powder - 1 teaspoon onion powder - 1 teaspoon smoked paprika - 1 teaspoon black pepper - 1 teaspoon salt - 1 tablespoon Worcestershire sauce These seasonings mix well with the beef and make each bite burst with flavor. Feel free to customize your burgers. Here are some great options: - 1/4 cup mayonnaise - 2 tablespoons ketchup - Optional: hot sauce for extra kick Adding these toppings can really enhance your meal. You can also get creative with other toppings like avocado or sautéed mushrooms. Check out the Full Recipe for more details on how to assemble these delicious burgers! To start, gather your ingredients. You need 1 pound of ground beef, garlic powder, onion powder, smoked paprika, black pepper, salt, and Worcestershire sauce. In a large bowl, add all these to the beef. Use your hands to mix gently. Be careful not to overwork the meat, as this can lead to tough patties. Once mixed, divide the meat into four equal portions. Use your thumb to make a small indent in each patty. This helps them cook evenly. Next, heat your grill or skillet over medium-high heat. Wait until it's hot. Place the patties on the grill. Cook them for about 3-4 minutes without pressing down. This keeps the juices inside. After that, flip each patty. Add a slice of cheddar cheese on top of each one. Cook for another 3-4 minutes until the cheese melts and the internal temperature reaches 160°F (71°C). While the burgers cook, toast the hamburger buns. You can do this on the grill or in a toaster until they turn golden brown. Once everything is ready, it’s time to assemble. Spread mayonnaise on the bottom half of each bun. Place a cheesy patty on top. Add shredded lettuce, tomato slices, and pickles. Drizzle some ketchup over it all. If you like spice, add a few drops of hot sauce. Finally, top with the other half of the bun. Serve the burgers right away for the best taste! For more details, refer to the Full Recipe. To create the best burger patty, start with good meat. I recommend using 80/20 ground beef. This mix has enough fat to keep the patty juicy. When mixing, use your hands but don’t overwork the meat. This keeps the patty tender. Shape the patties gently and make a small dent in the center. This helps the burger cook evenly. Add flavor with seasonings. Garlic powder, onion powder, and smoked paprika work wonders. Each brings a unique taste to your burger. Worcestershire sauce adds a nice depth. If you like heat, try adding hot sauce to the mix. It gives a nice kick. You can also experiment with cheese types. Blue cheese or pepper jack can change the whole taste. When serving your Crack Burgers, presentation matters. Use a large platter for a colorful display. Add extra pickles and lettuce on the side. It makes the meal look fresh and inviting. You can also place small paper flags on top of each burger. This fun touch adds a festive feel. Serve with crispy fries or a fresh salad for a complete meal. Check out the Full Recipe for more tips and ideas to impress your guests! {{image_2}} If you want a lighter burger, try using ground turkey. It has less fat and still tastes great. Just season it like you do with beef. You can also use plant-based meat for a veggie option. Brands like Beyond Meat or Impossible Burger work well. They give you that juicy taste without the meat. Crack Burgers can fit any flavor you like. Want some heat? Add jalapeños or hot sauce to your mix. You can also make a BBQ version. Just mix in some BBQ sauce and top it with coleslaw. This twist adds a sweet and tangy taste that’s hard to resist. What you serve with your Crack Burgers changes the game. For a classic touch, try crispy fries or onion rings. If you want something fresh, a side salad works well. You can also serve them with baked beans for a hearty meal. Don’t forget to add some pickles on the side for that extra crunch. For the full recipe, check out the ingredients and instructions to make these tasty burgers. After enjoying your Crack Burgers, store any leftovers in an airtight container. This keeps them fresh and tasty. Let the burgers cool to room temperature first. If you put hot burgers in the fridge, they can create moisture. This makes the buns soggy. To reheat your Crack Burgers, use the oven for the best taste. Preheat the oven to 350°F (175°C). Place the burgers on a baking sheet and cover them with foil. Heat for about 10-15 minutes. This helps keep the patties juicy and the buns soft. You can also use a microwave, but it may not keep the same texture. Heat them on a microwave-safe plate for about 30-60 seconds. If you want to save your Crack Burgers for later, freezing is a great option. Wrap each burger tightly in plastic wrap or foil. Place them in a freezer bag for extra protection. They can last up to three months in the freezer. When you're ready to eat, thaw in the fridge overnight, then reheat. This way, you can enjoy your gourmet meal anytime! For the full recipe, check the earlier section. Crack burgers are juicy, flavorful beef patties that pack a punch. They get their name from the perfect blend of spices and toppings. Each bite leaves you craving more. The mix of garlic powder, onion powder, and smoked paprika creates a unique taste. When you add cheddar cheese and fresh veggies, it becomes a complete meal. You can easily make these burgers at home. They are great for cookouts or family dinners. To enhance your crack burgers, try adding different toppings. You can use crispy bacon for extra crunch. Avocado slices add creaminess. You can also swap the cheddar for pepper jack cheese for some heat. Another tip is to use homemade sauces. Mixing mayonnaise with sriracha gives a spicy twist. A squeeze of lime juice adds brightness. Don’t forget to try different buns. Pretzel buns or brioche buns can elevate your burger game. Yes, you can prepare crack burgers in advance. You can form the patties and store them in the fridge. Just remember to wrap them well to keep them fresh. You can also freeze the patties. Just place parchment paper between them to avoid sticking. When you’re ready, cook them straight from the freezer. This way, you can enjoy fresh crack burgers anytime. For the full recipe, check out the details shared earlier. This blog post covers everything you need for great Crack Burgers. You learned about the main ingredients, important seasonings, and tasty toppings. I guided you through step-by-step cooking and sharing tips. You also saw variations for healthier options and regional flavors. I included storage info and answered common questions. In conclusion, making Crack Burgers can be fun and simple. You can customize them however you like. Enjoy experimenting with different tastes and share them with friends!

Are you ready to elevate your burger night? In this post, I’ll share my secret recipe for Crack Burgers—juicy, flavorful, and oh-so-addictive! With simple ingredients and easy steps, you can …

Read more

Categories Dinner

Mini Shrimp Tostadas Tasty and Simple Recipe Guide

June 7, 2025 by Chef Luca
- 1 pound small shrimp, peeled and deveined - 12 mini corn tortillas - 1 cup shredded red cabbage - 1 ripe avocado, diced - 1/4 cup fresh cilantro, chopped - 1/2 cup diced tomatoes - 1 tablespoon lime juice - 1 teaspoon ground cumin - 2 tablespoons olive oil - Salt and pepper to taste - Optional: Jalapeño slices for garnish When making mini shrimp tostadas, choose fresh ingredients. Fresh shrimp gives the best flavor. You can find small shrimp at your local market. If you prefer, frozen shrimp works too. Just make sure to thaw them first. The mini corn tortillas are key. They create a nice bite-sized base. Look for the smaller size to keep each tostada light. The shredded red cabbage adds crunch and color. It also gives a fresh taste that pairs well with shrimp. Avocado adds creaminess. Use a ripe avocado for the best texture. The lime juice brightens up the dish. You can adjust the amount to your taste. Ground cumin adds a warm flavor. It's a small amount, but it makes a big difference. Use good olive oil for cooking the shrimp. It helps seal in the flavor. Don’t forget salt and pepper! They enhance all the fresh ingredients. If you like heat, add jalapeño slices as a garnish. They bring a nice kick to each bite. The nutritional information for this dish varies. Each serving has about 200 calories. It mainly consists of protein from shrimp and healthy fats from avocado. It's a great choice for a light meal or appetizer. For the full recipe, visit the [Full Recipe] link. This will guide you through each step while using these ingredients. - Start by cleaning the shrimp. Rinse them under cold water. Pat them dry with a paper towel. This helps remove any grit. - In a medium bowl, mix the shrimp with olive oil, ground cumin, salt, and pepper. Toss well to coat each shrimp evenly. This will add great flavor. - Heat a skillet over medium heat. This is the perfect level for cooking shrimp. - Add the shrimp to the hot skillet. Cook for about 2-3 minutes on each side. Watch for them to turn pink and opaque. This shows they are done. Remove from heat and set aside. - Lightly toast the mini corn tortillas for 1-2 minutes on each side. This makes them warm and slightly crisp. - For each tostada, layer a spoonful of the cabbage and tomato mix on the tortilla first. This adds a fresh crunch. - Then, place a few shrimp on top. Make sure to spread them out for even flavor. - Finish with a dollop of the creamy avocado mix and a sprinkle of cilantro. If you like spice, add jalapeño slices on top for an extra kick. Follow these steps for a delightful mini shrimp tostada experience! For the full recipe, check out the details above. To make great shrimp, avoid overcooking. Cook shrimp for 2-3 minutes per side. They turn pink and opaque when done. If they curl tightly, you cooked them too long. For flavor, season the shrimp well. Use olive oil, ground cumin, salt, and pepper. You can also add garlic or chili powder for extra taste. Marinate for about 15 minutes before cooking. This helps the flavors blend. Pair your mini shrimp tostadas with fresh sides. A cool salad or rice works well. Consider serving with a zesty lime wedge. This adds a fresh kick to your dish. These tostadas suit many occasions. Serve them at parties, game nights, or family dinners. They are quick to make and fun to eat. Plating is key for a stunning dish. Use a colorful plate to make your tostadas pop. Stack the ingredients neatly for a beautiful look. Garnish with fresh herbs like cilantro. This adds color and freshness. You can also sprinkle some lime zest on top. It enhances the visual appeal and flavor. For the full recipe, check out [Full Recipe]. {{image_2}} You can switch up the shrimp in many ways. Try chicken or fish for a different taste. For a vegan option, use jackfruit or tofu. Both give nice texture and flavor. For toppings, if you don't like avocado, use hummus or a bright salsa. You can swap red cabbage for green lettuce or even spicy arugula. Each choice adds a unique twist to your tostadas. Want some heat? Add jalapeños, serranos, or even a dash of hot sauce. These will kick up the spice level. You could also use smoked paprika for a smoky flavor. If you prefer sweet, a mango salsa pairs well. Just mix diced mango, lime juice, and cilantro. This adds a refreshing touch that balances the shrimp. You can serve mini shrimp tostadas as a fun appetizer or make them a main meal. For an appetizer, aim for small portions. For a main dish, add more toppings and sides. Consider how you present them. A single plate makes it easy for small gatherings. A large platter looks great for parties. Each way shows off your tasty creation! For the full recipe, check out the [Full Recipe]. To keep mini shrimp tostadas fresh, store them in an airtight container. This keeps the flavors intact and prevents sogginess. You can place the cooked shrimp and toppings separately. This way, the tortillas stay crisp. In the fridge, they will last for about 2 days. After that, the quality might drop. Yes, you can freeze tostadas! However, freeze the shrimp and toppings separately. The tortillas can get soggy when frozen. Wrap the shrimp tightly in plastic wrap and place it in a freezer bag. For best results, eat them within 1 month. When you are ready to eat, thaw the shrimp in the fridge overnight. Reheat the shrimp in a skillet until warm. Toast the tortillas for a few minutes to refresh their crispness. You can definitely make parts of this dish ahead of time. Cook the shrimp in advance and store it in the fridge. You can also prepare the toppings, like the avocado mixture and cabbage mix, a day before. Just keep everything in airtight containers. For parties, plan to assemble the tostadas right before serving. This ensures they taste fresh and crunchy! Yes, you can use frozen shrimp. Frozen shrimp is easy to find and often cheaper. It’s great when fresh shrimp is not available. Just remember to thaw it before cooking. You can place the shrimp in cold water for about 15 minutes. This method keeps the shrimp from losing flavor. However, frozen shrimp may not taste as fresh as raw shrimp. If you don't have corn tortillas, you can use flour tortillas. They are soft and work well. You can also try rice cakes for a crunchy base. Lettuce wraps are another fun option, giving a fresh taste. Each option brings its own flavor and texture. To add heat, try using cayenne pepper or chili powder. You can mix these into the shrimp before cooking. Another option is to add hot sauce to the avocado topping. Sliced jalapeños also add a spicy kick. Each choice gives your tostadas a different level of heat. Mini shrimp tostadas are simple and tasty. We covered all the key parts: ingredients, cooking steps, tips, and storage. Use fresh shrimp for the best flavor, and don't forget the avocado and cilantro. You can make them spicy, or even swap the shrimp for other proteins. These tostadas are perfect for gatherings or a cozy dinner. Remember to store leftovers properly for the best taste. With this guide, you can create a dish everyone will love! Enjoy making your tostadas just the way you like them.

Are you ready to make a tasty snack that’s both simple and impressive? Mini shrimp tostadas are the perfect dish for any occasion, whether it’s a casual gathering or a …

Read more

Categories Appetizers
Older posts
Newer posts
← Previous Page1 … Page101 Page102 Page103 … Page122 Next →

STIRRED RECIPES

Where every dish begins with a stir! 🍲✨

PAGES

Home About Contact Privacy Policy Terms & Conditions Cookie Policy GDPR Policy Copyright Policy Disclaimer

CATEGORIES

Appetizers Desserts Salads Breakfast Dinner

Contact

  • Pinterest
  • Mail
Copyright © 2026 Stirred Recipes. All rights reserved.