Creamy Roasted Garlic Mashed Potatoes Delightful Dish
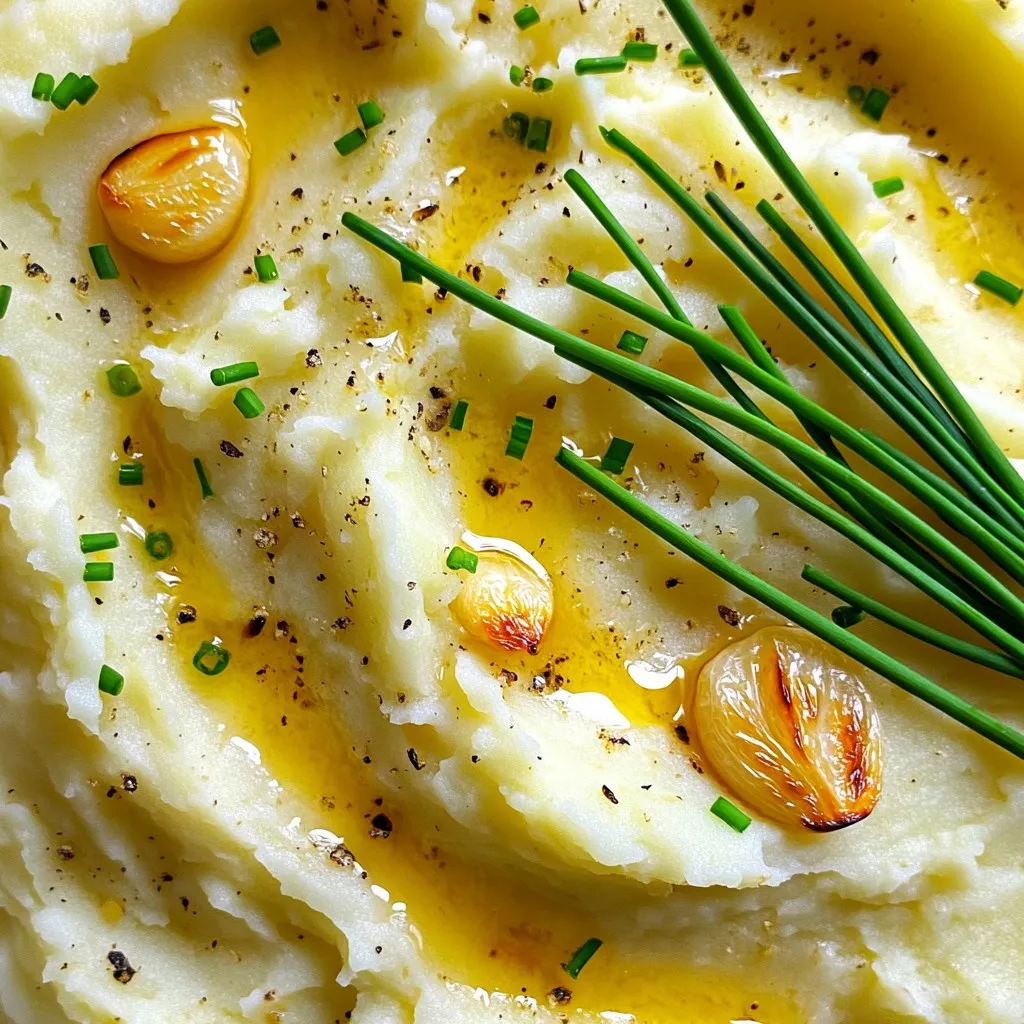
Are you ready to elevate your mashed potato game? In this blog post, I’ll share my secret to making creamy roasted garlic mashed potatoes that are rich, savory, and utterly …
Are you ready to elevate your mashed potato game? In this blog post, I’ll share my secret to making creamy roasted garlic mashed potatoes that are rich, savory, and utterly …

Looking for a fun and tasty snack? Dive into these Air Fryer Cinnamon Sugar Apple Rings! You’ll whip up a crunchy treat that’s both sweet and satisfying. In just a …
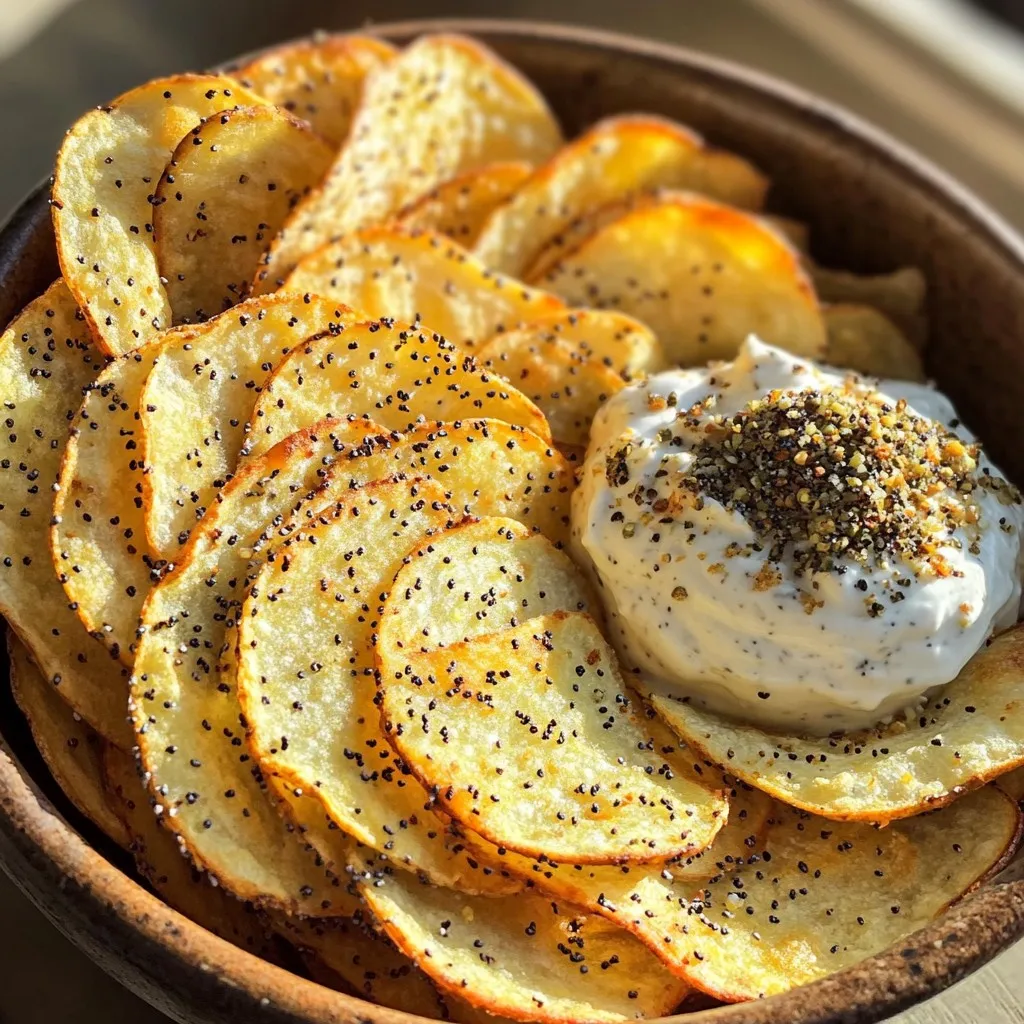
Do you love crunchy snacks that offer big flavor? I’ve got a winner for you! Air Fryer Everything Bagel Chips are easy to make and perfect for any occasion. You …
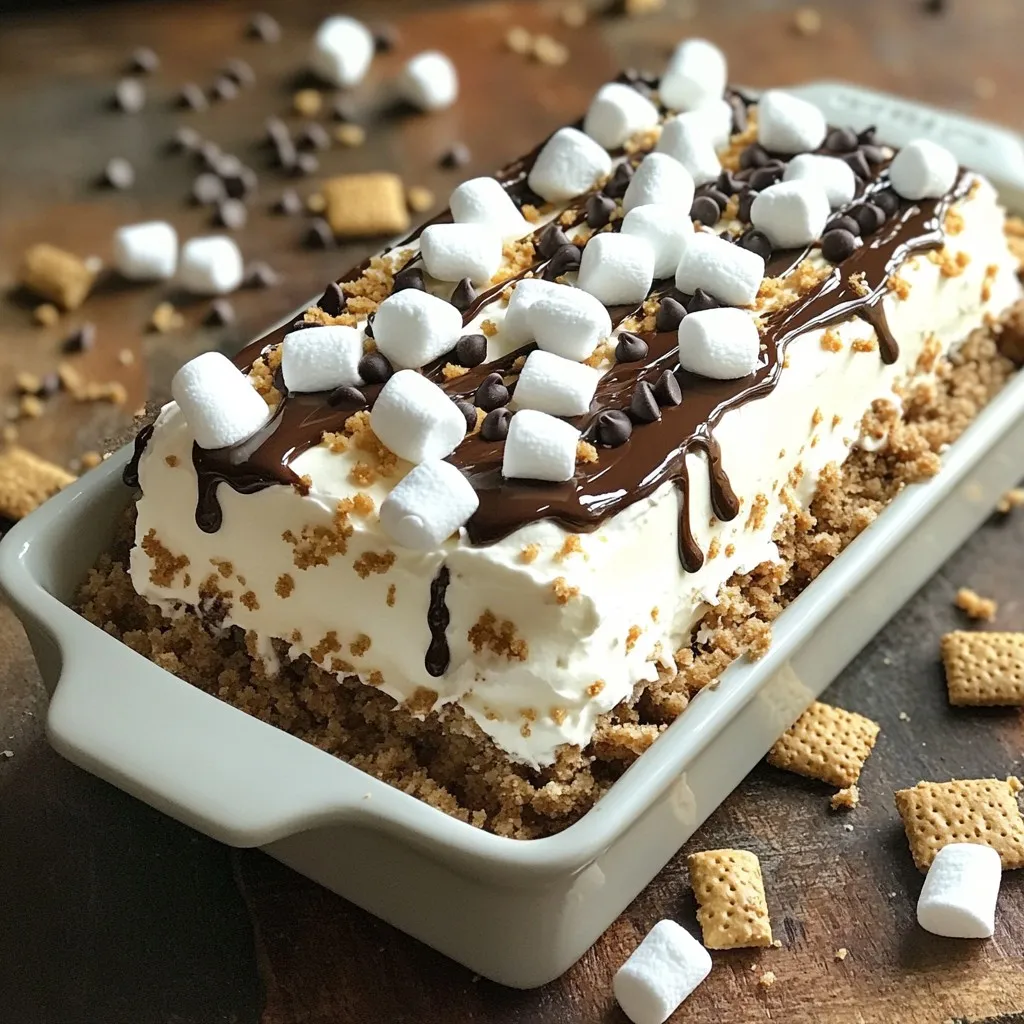
Ready to indulge in a sweet treat? This No-Bake S’mores Icebox Cake is the perfect answer. With layers of creamy goodness, crunchy graham crackers, and rich chocolate, it’s simple and …
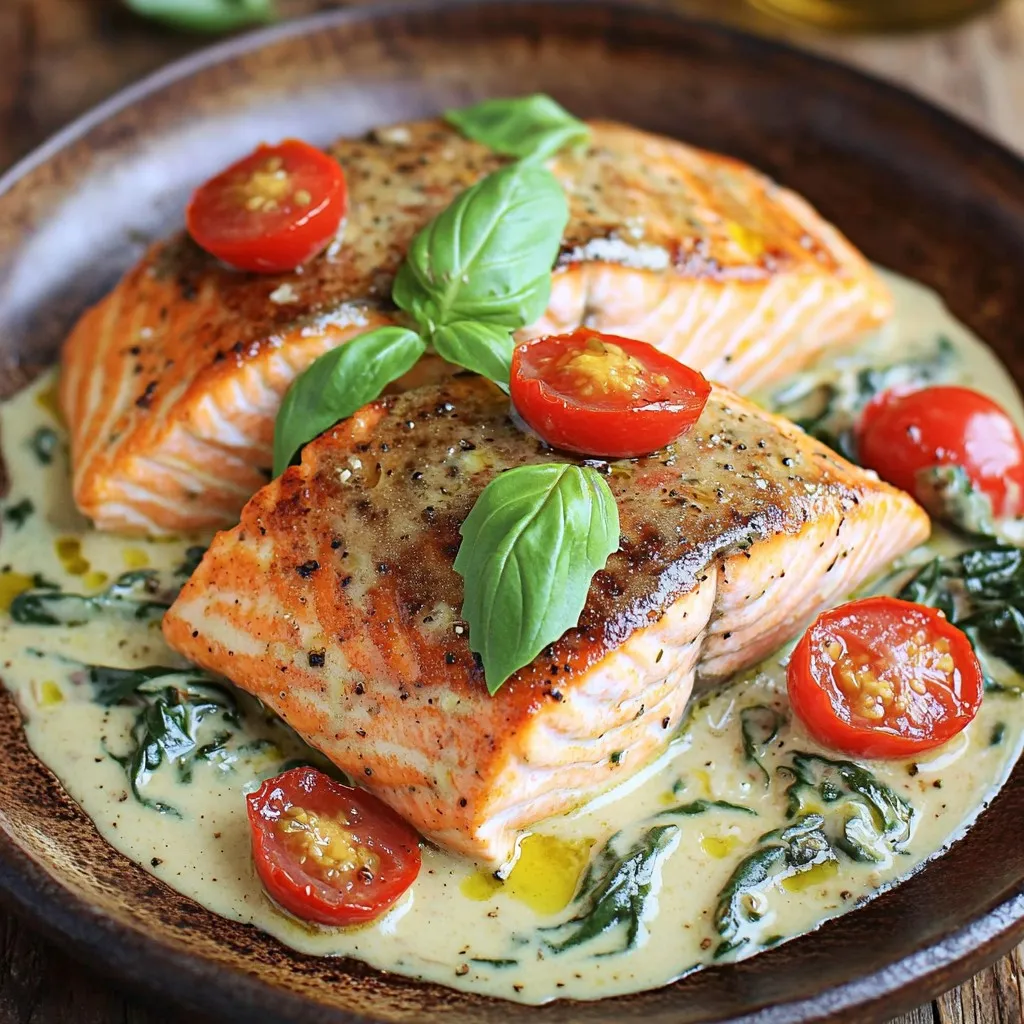
If you’re looking for a quick and tasty dinner, my Minute Creamy Tuscan Salmon is perfect for you! In just a few steps, you can savor tender salmon in a …
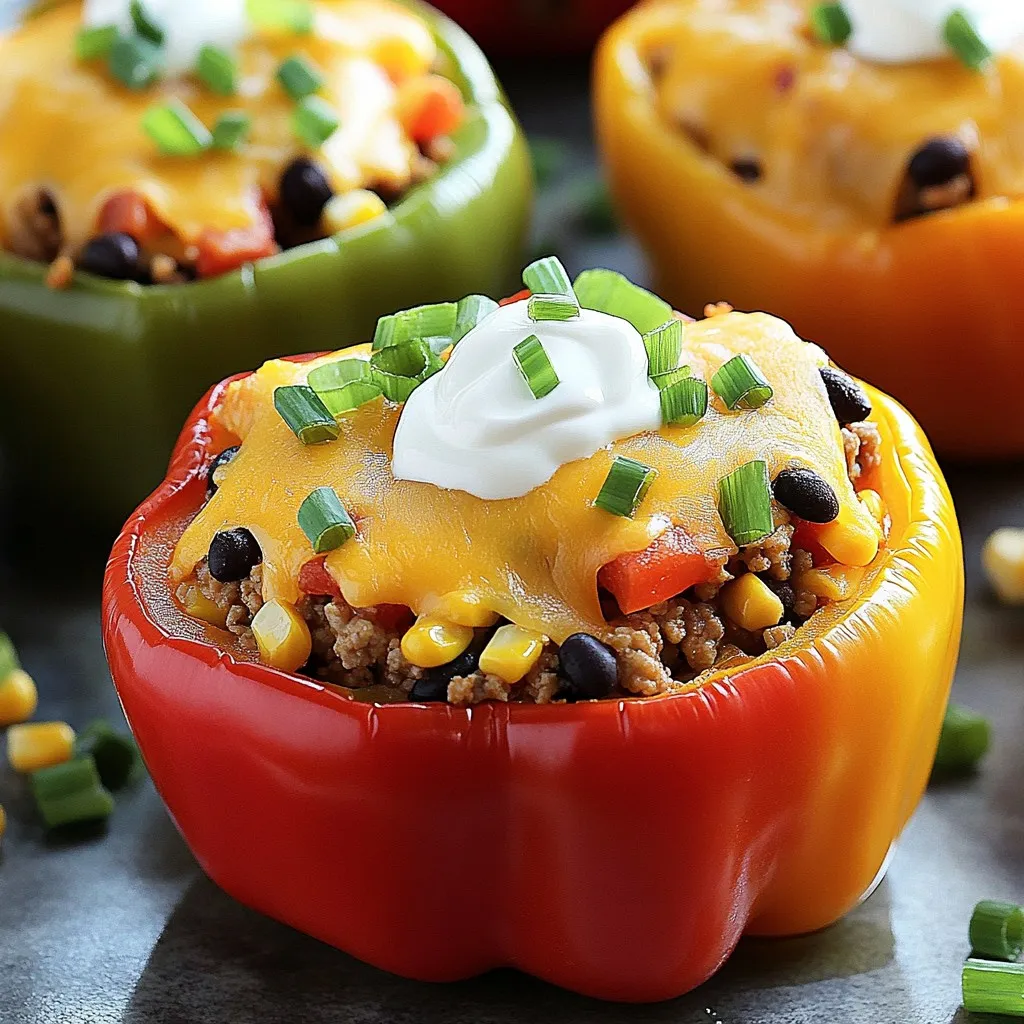
Looking for a simple and tasty dinner that your whole family will love? Cheesy Taco Stuffed Peppers are the perfect answer! These colorful bell peppers are filled with ground meat, …
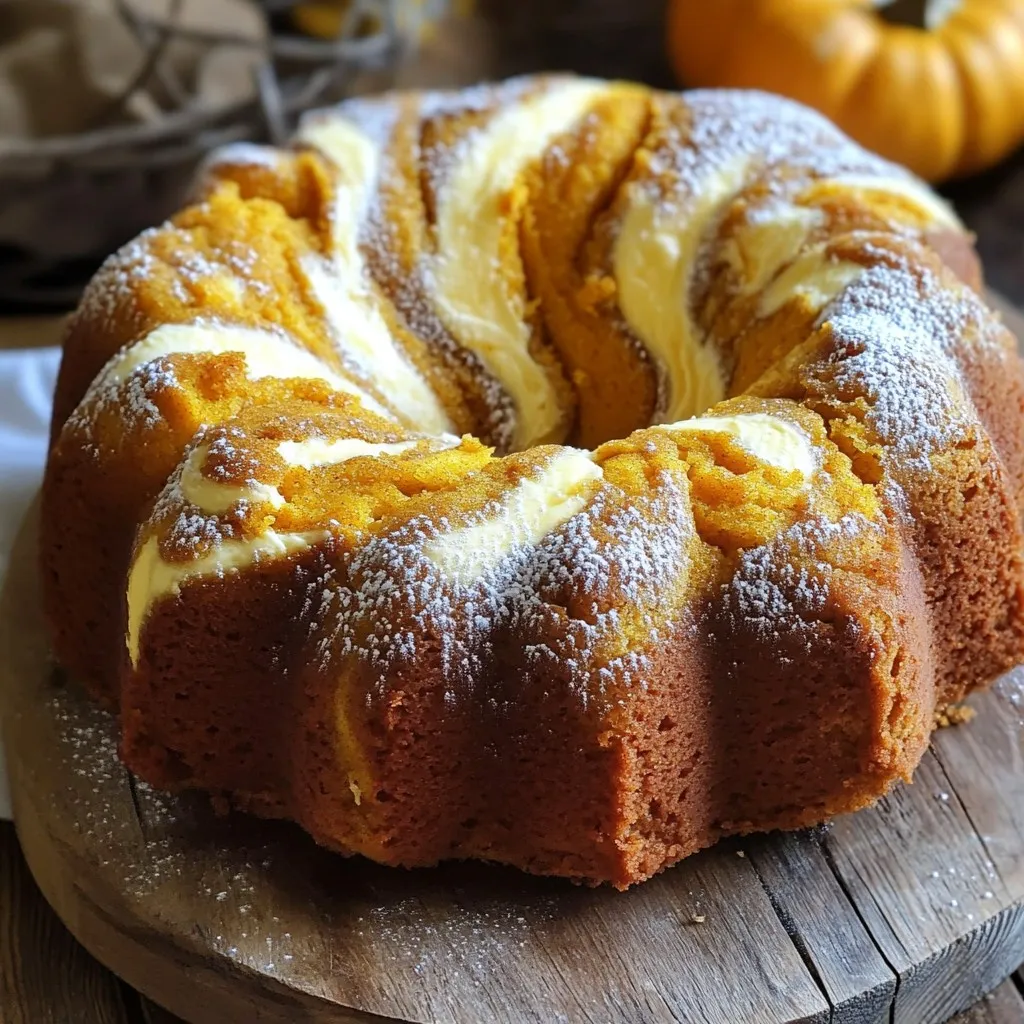
Welcome to the delightful world of pumpkin treats! Today, we’re diving into a simple yet flavorful Pumpkin Cream Cheese Pound Cake. This moist cake, filled with warm spices and creamy …
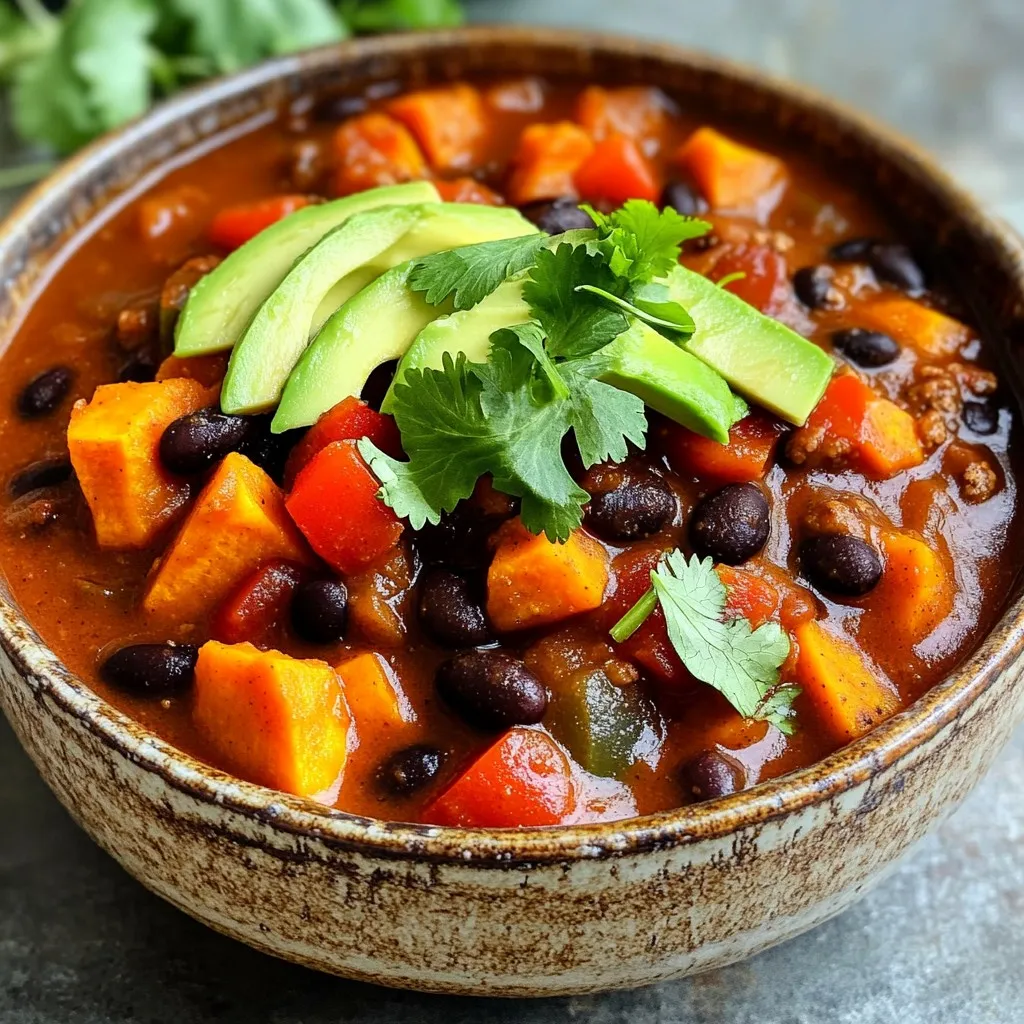
Welcome to my kitchen! Today, I’m sharing a savory Slow Cooker Sweet Potato Black Bean Chili recipe that’s easy, hearty, and full of flavor. Perfect for busy days, this dish …
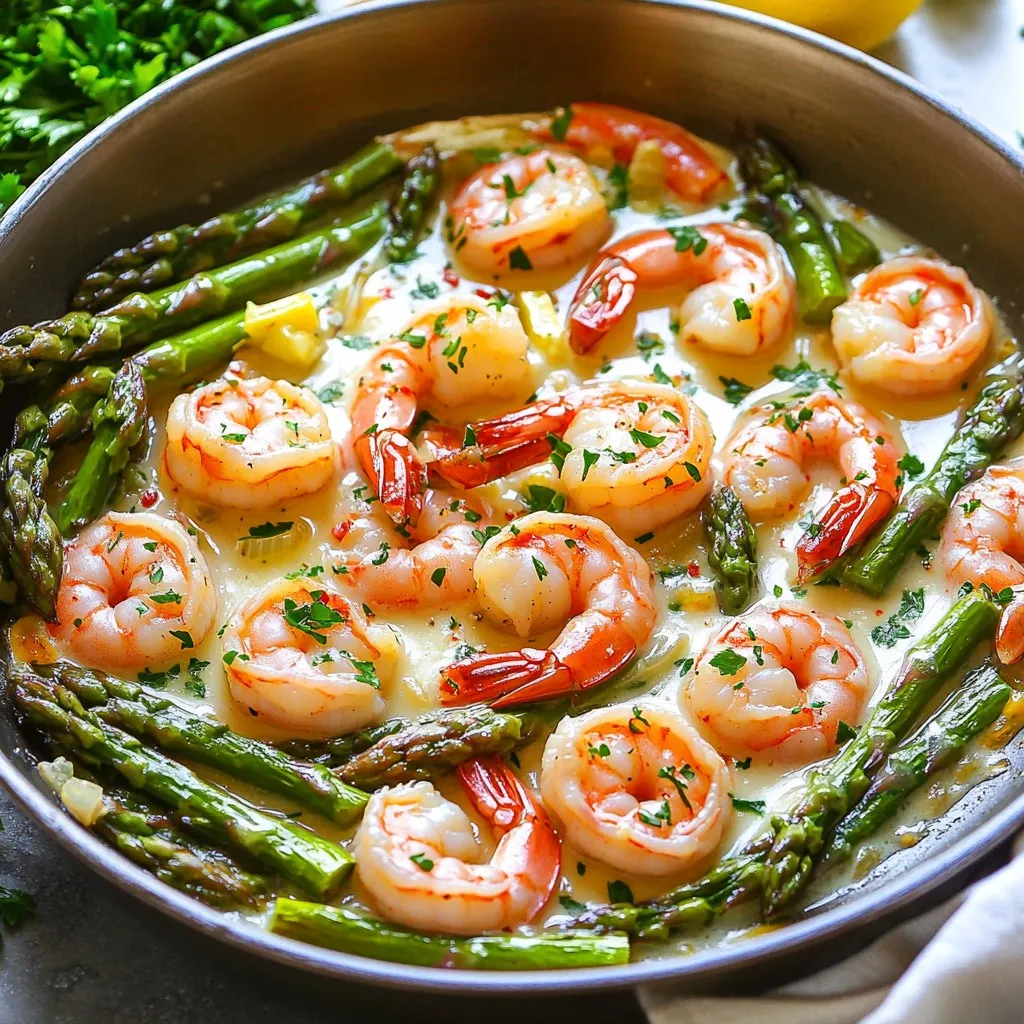
If you crave a quick, flavorful meal that shines in taste and ease, then this Garlic Butter Shrimp & Asparagus Skillet recipe is for you! Imagine juicy shrimp, bright asparagus, …
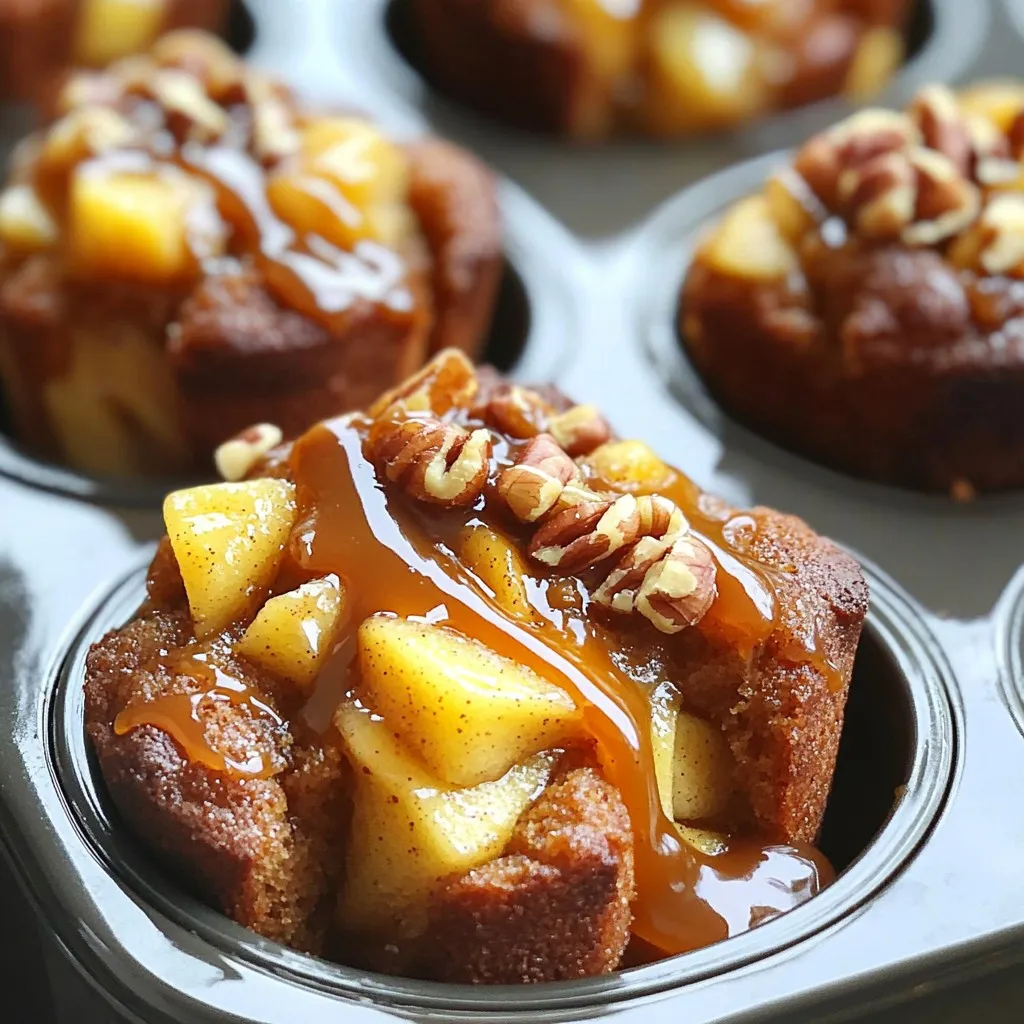
Get ready to enjoy a sweet treat with my Caramel Apple Monkey Bread Muffins! These muffins combine warm, gooey caramel with fresh apples, making them perfect for any time of …