Maple Glazed Pumpkin Scones Easy and Tasty Delight

WANT TO SAVE THIS RECIPE?

If you’re craving a warm, sweet treat, you’ve come to the right place! These Maple Glazed Pumpkin Scones are not only easy to make, but they also promise a burst of fall flavor in every bite. In this guide, I’ll walk you through the simple steps and tips to create these delightful scones. Get ready to impress friends and family with your baking skills! Let’s dive in and make something delicious together.

Ingredients

List of Ingredients

– 2 cups all-purpose flour

– 1/2 cup brown sugar, packed

– 1 tablespoon baking powder

– 1/2 teaspoon baking soda

– 1/2 teaspoon salt

– 1 teaspoon pumpkin pie spice

– 1/2 cup unsalted butter, cold and cubed

– 1/2 cup pure pumpkin puree

– 1/4 cup heavy cream

– 1 large egg

– 1 teaspoon vanilla extract

– 1/2 cup powdered sugar (for glaze)

– 2 tablespoons maple syrup (for glaze)

Measurements & Substitutions

Using precise measurements is key in baking. I recommend using a scale for the flour. If you want a sweeter scone, you can add more brown sugar. You can swap heavy cream with whole milk for a lighter version. For a dairy-free option, try coconut cream.

Importance of Ingredient Quality

The quality of your ingredients can change your scones. Fresh flour and pure pumpkin puree make a big difference. Use real maple syrup for the glaze. It adds depth and flavor. Fresh spices, like pumpkin pie spice, bring warmth. High-quality butter ensures a rich taste and flaky texture. Always aim for the best ingredients; they elevate your dish.

Step-by-Step Instructions

Prepping the Oven and Baking Sheet

Set your oven to 400°F (200°C). This temperature gives you perfect scones. Line a baking sheet with parchment paper. This helps keep the scones from sticking.

Mixing Dry Ingredients

In a large bowl, combine the dry ingredients. You need 2 cups of all-purpose flour, 1/2 cup of packed brown sugar, 1 tablespoon of baking powder, 1/2 teaspoon of baking soda, 1/2 teaspoon of salt, and 1 teaspoon of pumpkin pie spice. Whisk them together well. This mix gives your scones flavor and lift.

Combining Wet Ingredients

In a different bowl, mix the wet ingredients. Start with 1/2 cup of pure pumpkin puree. Add 1/4 cup of heavy cream, 1 large egg, and 1 teaspoon of vanilla extract. Whisk until smooth. This mixture adds moisture and richness to the dough.

Forming the Dough

Pour the wet mix into the dry ingredients. Stir gently until just combined. Be careful not to over-mix; this keeps the scones light. Turn the dough out onto a floured surface. Knead it a few times until it forms a ball. Pat the dough into a circle about 1-inch thick.

Baking the Scones

Cut the dough into 8 wedges. Place them on the baking sheet with space between each. Bake for 15-20 minutes. They should be lightly golden. Use a toothpick to check; it should come out clean. While they bake, make the glaze by mixing 1/2 cup of powdered sugar and 2 tablespoons of maple syrup. Drizzle this over the scones once they cool slightly. Enjoy your tasty treat!

Tips & Tricks

Achieving the Perfect Texture

To get a soft and flaky scone, use cold butter. Cold butter helps create layers. Cut the butter into small cubes before adding it to the flour mix. Mix until it looks like coarse crumbs. This way, your scones will not end up dense.

How to Avoid Over-Mixing

Mix the wet and dry ingredients just until combined. If you mix too much, the dough can become tough. You want to see some flour bits in the dough. Gently knead it on a floured surface to bring it together. This keeps your scones light and airy.

Tips for a Beautiful Glaze

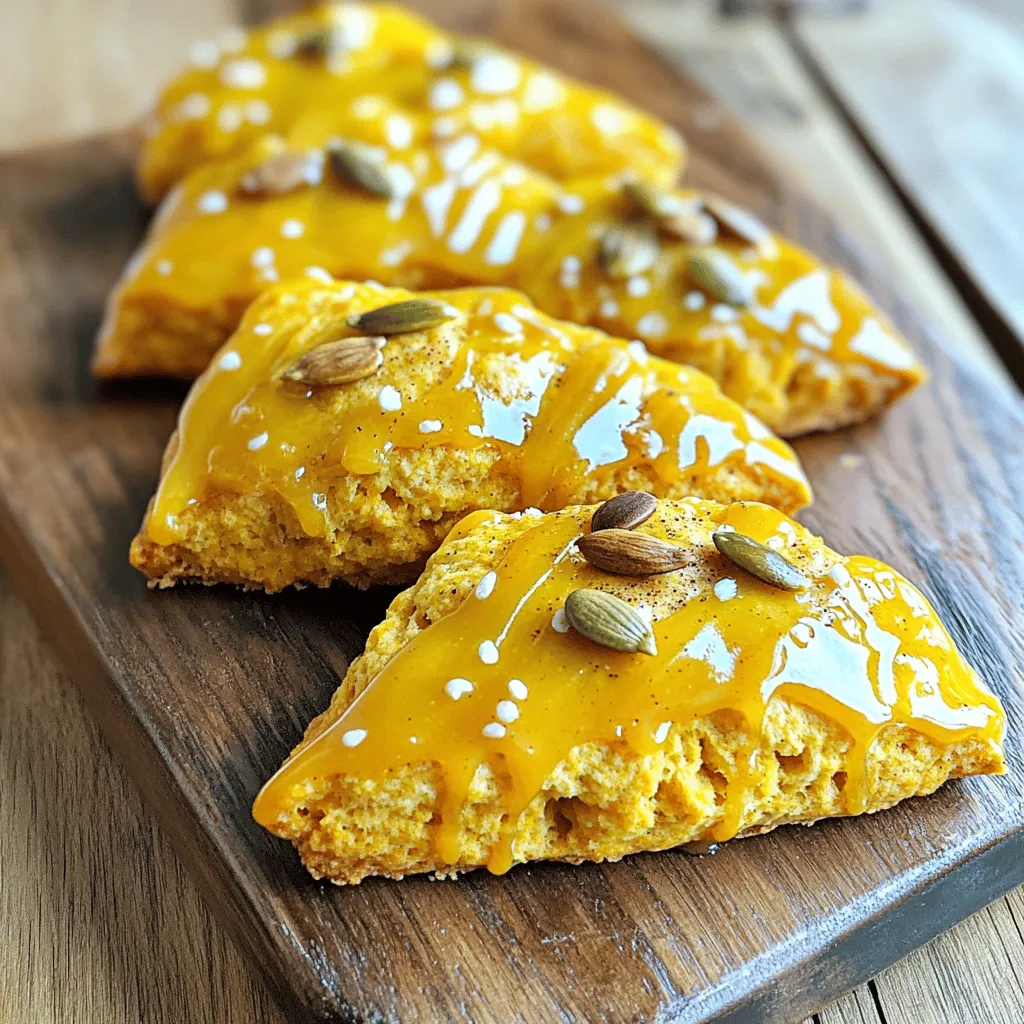
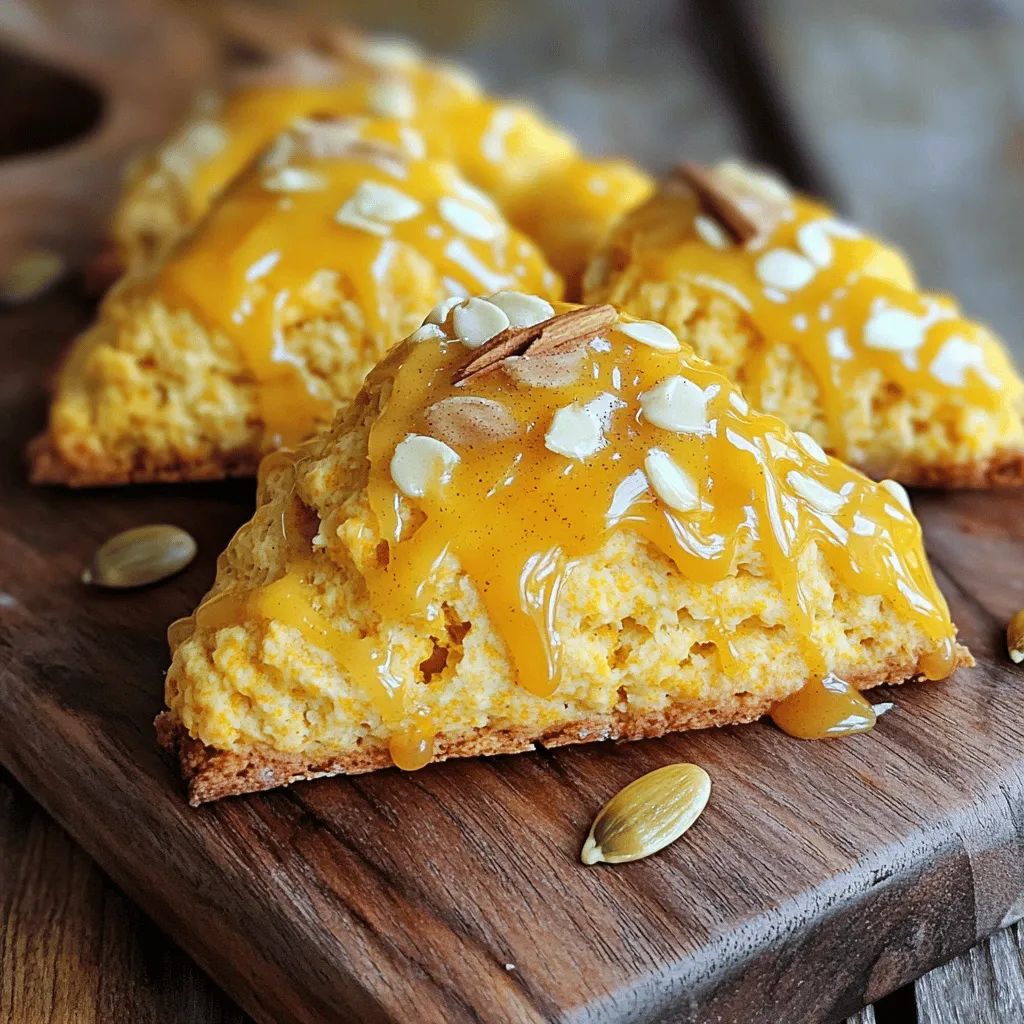
When making the glaze, whisk the maple syrup and powdered sugar together well. Make sure there are no lumps. Drizzle the glaze over the scones while they are still warm. This helps the glaze stick better and gives a nice shine. For a pretty touch, add a sprinkle of cinnamon or some roasted pumpkin seeds on top.
Variations

Adding Nuts or Chocolate Chips

You can add nuts or chocolate chips to your scones for extra flavor. Chopped walnuts or pecans add a nice crunch. Use about 1/2 cup of nuts to keep the balance. If you love chocolate, try dark or milk chocolate chips. They melt and create a sweet surprise in each bite. Just fold them into the dough before you cut it into wedges.

Alternative Spices and Flavorings

Switching up the spices can change the whole vibe of your scones. Instead of pumpkin pie spice, try cinnamon or nutmeg for a different taste. If you want to get fancy, add a pinch of cardamom or ginger for warmth. You can also mix in some orange zest for a fresh twist. These small changes can make your pumpkin scones feel new each time.

Gluten-Free Options

If you need a gluten-free option, don’t worry! You can use a gluten-free all-purpose flour blend. Just make sure it has xanthan gum for the best texture. The rest of the recipe stays the same. Your scones will still be delicious and soft. Enjoy the same great taste without the gluten!

Storage Info

Best Methods for Storing Leftovers

To keep your maple glazed pumpkin scones fresh, store them properly. Place the scones in an airtight container. This helps keep them moist and soft. Add a layer of parchment paper between layers if needed. You can store them at room temperature for up to two days. If you want to keep them longer, use the fridge. They stay fresh for about a week when refrigerated.

Reheating Tips

Reheating your scones is easy and quick. Preheat your oven to 350°F (175°C). Place the scones on a baking sheet. Heat them for about 5 to 10 minutes. This will bring back their warmth and softness. You can also use the microwave. Heat them for about 15 to 20 seconds. Just be careful not to overheat them, or they may dry out.

Freezing Scones for Later Use

Freezing scones is a great way to save some for later. First, let the scones cool completely. Then, wrap each scone in plastic wrap. Place the wrapped scones in a freezer bag. They can last up to three months in the freezer. When you’re ready to eat, thaw them overnight in the fridge. Reheat them in the oven or microwave before serving. Enjoy your tasty treat anytime!

FAQs

Can I make these scones ahead of time?

Yes, you can make these scones ahead of time. Prepare the dough and cut it into wedges. Place the cut scones on a baking sheet and freeze them. Once they are frozen, transfer them to a bag. When you are ready to bake, no need to thaw. Just bake them for a few extra minutes.

What can I substitute for heavy cream?

If you need a substitute for heavy cream, use milk mixed with butter. Combine 1/4 cup of milk with 2 tablespoons of melted butter. This mix will mimic the fat content of heavy cream. You can also use half-and-half or a non-dairy milk if you prefer.

How do I know when the scones are done baking?

Check the scones after 15 minutes of baking. They should be lightly golden on top. Insert a toothpick into the center. If it comes out clean, your scones are done. If it has wet dough on it, bake a few more minutes.

What can I serve with maple glazed pumpkin scones?

These scones pair well with many things. Serve them with butter or cream cheese for added richness. A cup of warm tea or coffee makes a great drink choice. For a fun twist, try them with apple butter or a dollop of whipped cream.

You learned about the key ingredients and methods to make scones that taste great. Remember, using high-quality ingredients matters. Follow the steps given to mix the wet and dry parts well. Use the tips for texture and glaze to make your scones shine. Explore variations like nuts or gluten-free options for fun twists. Finally, store leftovers properly to keep them fresh. Enjoy your baking journey and the delicious scones that come with it!

- 2 cups all-purpose flour - 1/2 cup brown sugar, packed - 1 tablespoon baking powder - 1/2 teaspoon baking soda - 1/2 teaspoon salt - 1 teaspoon pumpkin pie spice - 1/2 cup unsalted butter, cold and cubed - 1/2 cup pure pumpkin puree - 1/4 cup heavy cream - 1 large egg - 1 teaspoon vanilla extract - 1/2 cup powdered sugar (for glaze) - 2 tablespoons maple syrup (for glaze) Using precise measurements is key in baking. I recommend using a scale for the flour. If you want a sweeter scone, you can add more brown sugar. You can swap heavy cream with whole milk for a lighter version. For a dairy-free option, try coconut cream. The quality of your ingredients can change your scones. Fresh flour and pure pumpkin puree make a big difference. Use real maple syrup for the glaze. It adds depth and flavor. Fresh spices, like pumpkin pie spice, bring warmth. High-quality butter ensures a rich taste and flaky texture. Always aim for the best ingredients; they elevate your dish. Set your oven to 400°F (200°C). This temperature gives you perfect scones. Line a baking sheet with parchment paper. This helps keep the scones from sticking. In a large bowl, combine the dry ingredients. You need 2 cups of all-purpose flour, 1/2 cup of packed brown sugar, 1 tablespoon of baking powder, 1/2 teaspoon of baking soda, 1/2 teaspoon of salt, and 1 teaspoon of pumpkin pie spice. Whisk them together well. This mix gives your scones flavor and lift. In a different bowl, mix the wet ingredients. Start with 1/2 cup of pure pumpkin puree. Add 1/4 cup of heavy cream, 1 large egg, and 1 teaspoon of vanilla extract. Whisk until smooth. This mixture adds moisture and richness to the dough. Pour the wet mix into the dry ingredients. Stir gently until just combined. Be careful not to over-mix; this keeps the scones light. Turn the dough out onto a floured surface. Knead it a few times until it forms a ball. Pat the dough into a circle about 1-inch thick. Cut the dough into 8 wedges. Place them on the baking sheet with space between each. Bake for 15-20 minutes. They should be lightly golden. Use a toothpick to check; it should come out clean. While they bake, make the glaze by mixing 1/2 cup of powdered sugar and 2 tablespoons of maple syrup. Drizzle this over the scones once they cool slightly. Enjoy your tasty treat! To get a soft and flaky scone, use cold butter. Cold butter helps create layers. Cut the butter into small cubes before adding it to the flour mix. Mix until it looks like coarse crumbs. This way, your scones will not end up dense. Mix the wet and dry ingredients just until combined. If you mix too much, the dough can become tough. You want to see some flour bits in the dough. Gently knead it on a floured surface to bring it together. This keeps your scones light and airy. When making the glaze, whisk the maple syrup and powdered sugar together well. Make sure there are no lumps. Drizzle the glaze over the scones while they are still warm. This helps the glaze stick better and gives a nice shine. For a pretty touch, add a sprinkle of cinnamon or some roasted pumpkin seeds on top. {{image_2}} You can add nuts or chocolate chips to your scones for extra flavor. Chopped walnuts or pecans add a nice crunch. Use about 1/2 cup of nuts to keep the balance. If you love chocolate, try dark or milk chocolate chips. They melt and create a sweet surprise in each bite. Just fold them into the dough before you cut it into wedges. Switching up the spices can change the whole vibe of your scones. Instead of pumpkin pie spice, try cinnamon or nutmeg for a different taste. If you want to get fancy, add a pinch of cardamom or ginger for warmth. You can also mix in some orange zest for a fresh twist. These small changes can make your pumpkin scones feel new each time. If you need a gluten-free option, don’t worry! You can use a gluten-free all-purpose flour blend. Just make sure it has xanthan gum for the best texture. The rest of the recipe stays the same. Your scones will still be delicious and soft. Enjoy the same great taste without the gluten! To keep your maple glazed pumpkin scones fresh, store them properly. Place the scones in an airtight container. This helps keep them moist and soft. Add a layer of parchment paper between layers if needed. You can store them at room temperature for up to two days. If you want to keep them longer, use the fridge. They stay fresh for about a week when refrigerated. Reheating your scones is easy and quick. Preheat your oven to 350°F (175°C). Place the scones on a baking sheet. Heat them for about 5 to 10 minutes. This will bring back their warmth and softness. You can also use the microwave. Heat them for about 15 to 20 seconds. Just be careful not to overheat them, or they may dry out. Freezing scones is a great way to save some for later. First, let the scones cool completely. Then, wrap each scone in plastic wrap. Place the wrapped scones in a freezer bag. They can last up to three months in the freezer. When you’re ready to eat, thaw them overnight in the fridge. Reheat them in the oven or microwave before serving. Enjoy your tasty treat anytime! Yes, you can make these scones ahead of time. Prepare the dough and cut it into wedges. Place the cut scones on a baking sheet and freeze them. Once they are frozen, transfer them to a bag. When you are ready to bake, no need to thaw. Just bake them for a few extra minutes. If you need a substitute for heavy cream, use milk mixed with butter. Combine 1/4 cup of milk with 2 tablespoons of melted butter. This mix will mimic the fat content of heavy cream. You can also use half-and-half or a non-dairy milk if you prefer. Check the scones after 15 minutes of baking. They should be lightly golden on top. Insert a toothpick into the center. If it comes out clean, your scones are done. If it has wet dough on it, bake a few more minutes. These scones pair well with many things. Serve them with butter or cream cheese for added richness. A cup of warm tea or coffee makes a great drink choice. For a fun twist, try them with apple butter or a dollop of whipped cream. You learned about the key ingredients and methods to make scones that taste great. Remember, using high-quality ingredients matters. Follow the steps given to mix the wet and dry parts well. Use the tips for texture and glaze to make your scones shine. Explore variations like nuts or gluten-free options for fun twists. Finally, store leftovers properly to keep them fresh. Enjoy your baking journey and the delicious scones that come with it!

Maple Glazed Pumpkin Scones

Indulge in the delightful flavors of fall with these Maple Glazed Pumpkin Scones! This easy and delicious recipe combines warm spices and rich pumpkin for a perfect treat that pairs beautifully with your morning coffee or afternoon tea. In just 35 minutes, you can bake these tender scones and drizzle them with a sweet maple glaze. Click through to explore the full recipe and make your kitchen smell amazing this autumn!

Ingredients
  

2 cups all-purpose flour

1/2 cup brown sugar, packed

1 tablespoon baking powder

1/2 teaspoon baking soda

1/2 teaspoon salt

1 teaspoon pumpkin pie spice

1/2 cup unsalted butter, cold and cubed

1/2 cup pure pumpkin puree

1/4 cup heavy cream

1 large egg

1 teaspoon vanilla extract

1/2 cup powdered sugar (for glaze)

2 tablespoons maple syrup (for glaze)

Instructions
 

Preheat your oven to 400°F (200°C) and line a baking sheet with parchment paper.

    In a large bowl, whisk together the flour, brown sugar, baking powder, baking soda, salt, and pumpkin pie spice.

      Add the cubed cold butter to the flour mixture, using a pastry cutter or your fingers to mix until the mixture resembles coarse crumbs.

        In a separate bowl, whisk together the pumpkin puree, heavy cream, egg, and vanilla extract.

          Pour the wet ingredients into the dry mixture and stir until just combined. Avoid over-mixing.

            Turn the dough out onto a floured surface and knead it gently a few times until it comes together. Pat the dough into a circle about 1-inch thick.

              Cut the dough into 8 wedges and place them on the prepared baking sheet, spacing them about 2 inches apart.

                Bake for 15-20 minutes or until the scones are lightly golden and a toothpick inserted comes out clean.

                  While the scones are baking, prepare the glaze by whisking together the powdered sugar and maple syrup until smooth.

                    Once the scones are baked, let them cool for a few minutes before drizzling the maple glaze over the top.

                      Prep Time: 15 minutes | Total Time: 35 minutes | Servings: 8

                        - Presentation Tips: Serve the scones on a rustic wooden board, drizzled with extra maple glaze and garnished with a sprinkle of cinnamon or a few roasted pumpkin seeds for added texture and color.

                          WANT TO SAVE THIS RECIPE?