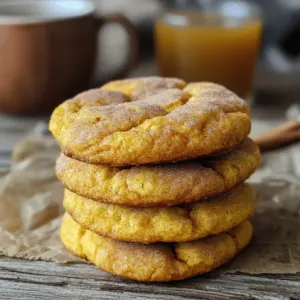
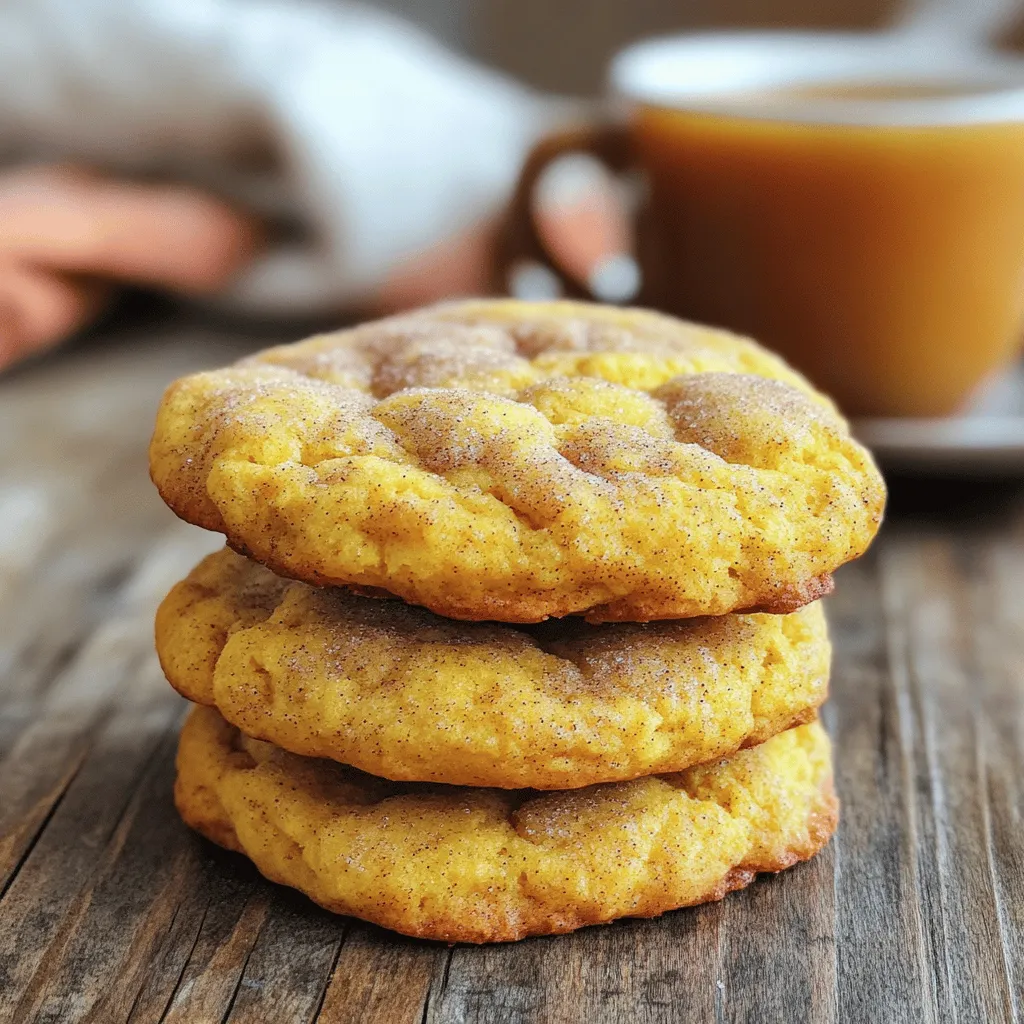
If you love the warm flavors of fall, you’ll adore these Brown Butter Pumpkin Snickerdoodles! This treat blends nutty browned butter with spiced pumpkin, resulting in cookies that are crisp on the outside and soft inside. You’ll learn how to make these delightful cookies from scratch, with tips on perfect texture and storage. Get ready to impress your friends and family with these irresistible sweet bites!
Ingredients
For these Brown Butter Pumpkin Snickerdoodles, you will need:
– 1 cup unsalted butter
– 1 cup granulated sugar
– 1/2 cup packed light brown sugar
– 1 large egg
– 1 cup pumpkin puree (fresh or canned)
– 1 teaspoon vanilla extract
– 3 cups all-purpose flour
– 2 teaspoons cream of tartar
– 1 teaspoon baking soda
– 1/2 teaspoon salt
– 2 teaspoons ground cinnamon
– 1/2 teaspoon ground nutmeg
– 1/4 teaspoon ground ginger
– 1/4 cup sugar (for rolling)
– 1 tablespoon ground cinnamon (for rolling)
These ingredients blend together to create a rich, warm flavor. The brown butter adds depth. The pumpkin gives moisture and a hint of sweetness. The spices add warmth, making these cookies perfect for fall. You can find these items at your local store. If you want a unique flavor, try using fresh pumpkin. It adds a fresh taste to the cookies. Enjoy gathering these ingredients, as each one plays a key role in making your cookies irresistible.
Step-by-Step Instructions
Preparing the Browned Butter
To brown butter, start by melting it in a medium saucepan over medium heat. Stir it often. Watch closely as it turns golden brown. This process takes about 5 to 7 minutes. The butter will develop a nutty aroma, which is a good sign. Once browned, remove it from heat and let it cool slightly. Cooling the butter is key. If it’s too hot, it can cook the eggs and pumpkin in the next step.
Mixing the Wet Ingredients
In a large mixing bowl, combine the cooled browned butter, granulated sugar, and brown sugar. Mix until it becomes creamy. Next, add the pumpkin puree and the egg. Don’t forget the vanilla extract! Mix it all well until combined. This mixture should be smooth and shiny.
Combining Dry Ingredients and Dough Formation
In another bowl, whisk together the flour, cream of tartar, baking soda, salt, ground cinnamon, nutmeg, and ginger. This step is important. It ensures that the spices and leavening agents are evenly mixed. Gradually add this dry mixture to the wet ingredients. Mix just until it comes together. The dough will be soft and slightly sticky at this point.
Chilling and Baking the Cookies
Cover the dough and place it in the fridge for at least 30 minutes. Chilling makes the dough easier to handle. While the dough chills, preheat your oven to 350°F (175°C). Line a baking sheet with parchment paper. In a small bowl, mix together the sugar and ground cinnamon for rolling. Once the dough is chilled, scoop out about 2 tablespoons of dough. Roll each scoop into a ball and then coat it in the cinnamon-sugar mixture. Place the cookie balls on the baking sheet, spaced about 2 inches apart. Bake for 10 to 12 minutes. The edges should be lightly golden, while the centers may look a bit underbaked. They will firm up as they cool.
Tips & Tricks
Ideal Baking Time and Temperature
Baking cookies at the right time and temperature is key. Set your oven to 350°F (175°C). This heat gives a nice golden edge while keeping the center soft. Bake for 10 to 12 minutes. Check the cookies when the edges turn light brown. They may look underbaked in the middle, but they will firm up as they cool. This method keeps your cookies chewy and delicious.
How to Achieve the Perfect Softness
Softness in cookies comes from careful baking. I suggest underbaking them just a bit. When you take them out, the centers will still look soft. This slight underbaking helps keep that melt-in-your-mouth texture. Remember, cookies will continue cooking after you pull them from the oven. Trust the process, and you’ll have a treat that is perfectly soft.
Presentation Suggestions
How you present your cookies makes them even more special. Stack your Brown Butter Pumpkin Snickerdoodles on a nice plate. Dust them with cinnamon sugar for a festive look. You can also serve them with warm apple cider or coffee. This pairing enhances the cozy fall flavors. A simple, beautiful presentation adds joy to your treat.
Variations
Alternative Flours
You can swap the all-purpose flour if needed. For gluten-free options, try almond flour or oat flour. Both add a nice texture. A mix of gluten-free flour blends works well too. Just ensure the blend has xanthan gum for better structure.
Flavor Enhancements
Want to make your cookies even better? Add chocolate chips or nuts! Dark chocolate chips add richness. Chopped pecans or walnuts give a crunchy bite. Mix these in when you combine the dry and wet ingredients. Your taste buds will thank you!
Seasonal Spices
Feel free to play with spices for unique flavors. Add a pinch of cloves for warmth. Try allspice or cardamom for a fun twist. Experimenting can lead to new favorite flavors. Trust your taste and have fun with it!
Storage Info
Best Storage Practices
To keep your Brown Butter Pumpkin Snickerdoodles fresh, store them in an airtight container. This helps retain moisture and flavor. Place a piece of bread in the container to keep them soft. The bread absorbs excess air, keeping the cookies chewy.
Freezing Instructions
You can freeze cookie dough or baked cookies. To freeze dough, scoop it into balls and place them on a baking sheet. Freeze for about an hour until solid. Once frozen, transfer them to a zip-top bag. Label the bag with the date and type. To freeze baked cookies, let them cool completely. Then, layer them in an airtight container with parchment paper between each layer.
Shelf Life
In an airtight container, these cookies last about one week at room temperature. If you store them in the fridge, they can last up to two weeks. For frozen dough, use it within three months for the best taste. Baked cookies can last up to three months in the freezer as well. Enjoy them fresh for the best flavor!
FAQs
Can I use pumpkin pie filling instead of pumpkin puree?
You can use pumpkin pie filling, but it has spices and sugar. This can change the taste of your cookies. If you want a classic flavor, stick with pumpkin puree. It gives a clean pumpkin taste. Use the puree for the best results in this recipe.
Can I make these cookies ahead of time?
Yes, you can make the dough ahead. Just chill it for at least 30 minutes. After chilling, you can roll the dough into balls. Store them in the fridge for up to two days. You can also freeze the cookie balls. Just thaw and bake when ready.
What can I do if my dough is too sticky?
If your dough feels too sticky, add more flour. Start with a tablespoon at a time. You can also chill the dough longer. Chilling helps firm up the dough, making it easier to handle. Just keep an eye on the dough so it doesn’t get too dry.
This blog post covered all you need to make delicious pumpkin cookies. We explored the key ingredients, from the browned butter to the spices. I shared step-by-step instructions to simplify the process. Tips and tricks helped perfect cookie texture and presentation. You can even try variations for unique flavors.
In the end, have fun experimenting and sharing these cookies. They will delight friends and family alike. Enjoy your baking journey!