Mini Pumpkin Bread with Cinnamon Swirl Delight

WANT TO SAVE THIS RECIPE?

Get ready to spice up your baking with my Mini Pumpkin Bread with Cinnamon Swirl Delight! This recipe is simple, fun, and perfect for any season. You’ll learn how to mix rich pumpkin flavor with a sweet cinnamon swirl. Plus, I’ll share tips to make your bread moist and tasty. If you want to impress family and friends, keep reading for easy steps to create this delightful treat!

Ingredients

Essential Ingredients for Mini Pumpkin Bread

To make mini pumpkin bread, you need some key ingredients. These give the bread its moistness and flavor. Here’s what you need:

– 1 cup canned pumpkin puree

– 1/2 cup granulated sugar

– 1/2 cup brown sugar, packed

– 1/3 cup vegetable oil

– 1/3 cup unsweetened applesauce

– 2 large eggs

– 1 teaspoon vanilla extract

– 1 1/2 cups all-purpose flour

– 1 teaspoon baking soda

– 1/2 teaspoon baking powder

– 1 teaspoon ground cinnamon

– 1/2 teaspoon ground nutmeg

– 1/4 teaspoon ground ginger

– 1/4 teaspoon salt

These ingredients work together to create a soft and tasty bread. The pumpkin gives it a lovely color and moistness. The spices add warmth and flavor.

Optional Ingredients

You can add some extras to your mini pumpkin bread. These are not needed, but they add great crunch and taste:

– 1/2 cup chopped walnuts or pecans

Nuts give a nice texture and flavor. You can choose either walnuts or pecans based on your taste.

Measurements and Substitutions

If you don’t have some ingredients, you can replace them. Here are a few ideas:

– For vegetable oil, you can use melted coconut oil or melted butter.

– You can swap applesauce with more pumpkin puree if you want.

– For the flour, you can use a gluten-free blend if needed.

These swaps keep the flavor and texture of the bread intact. Just ensure you measure correctly for the best results.

Step-by-Step Instructions

Preparing the Oven and Pans

First, set your oven to 350°F (175°C). This is the perfect temperature for baking. Next, get your mini loaf pans ready. You can grease them with butter or oil. Then, sprinkle some flour inside. This helps the bread come out easily. If you prefer, you can use silicone molds, which are easy to work with.

Mixing Wet Ingredients

In a large bowl, combine these wet ingredients:

– 1 cup canned pumpkin puree

– 1/2 cup granulated sugar

– 1/2 cup brown sugar, packed

– 1/3 cup vegetable oil

– 1/3 cup unsweetened applesauce

– 2 large eggs

– 1 teaspoon vanilla extract

Mix them until they are smooth and well blended. This step creates the base for your bread.

Combining Dry Ingredients

Now, grab another bowl and whisk together the dry ingredients:

– 1 1/2 cups all-purpose flour

– 1 teaspoon baking soda

– 1/2 teaspoon baking powder

– 1 teaspoon ground cinnamon

– 1/2 teaspoon ground nutmeg

– 1/4 teaspoon ground ginger

– 1/4 teaspoon salt

Make sure everything is mixed well. This helps the bread rise and ensures great flavor.

Creating the Cinnamon Swirl

In a small bowl, mix together:

– 2 tablespoons brown sugar

– 1 teaspoon ground cinnamon

This mixture will give your bread a lovely sweet swirl. Set it aside for later.

Pouring and Swirling the Batter

Now, pour half of the pumpkin batter into each mini loaf pan. Take half of your cinnamon swirl mixture and sprinkle it over the batter. Use a knife or a skewer to swirl it gently. This creates beautiful patterns in the bread. Then, top with the remaining pumpkin batter. Sprinkle the rest of the cinnamon mixture on top and swirl again.

Baking and Cooling Process

Place the pans in the oven. Bake for 25-30 minutes. To check if they are done, poke a toothpick into the center. If it comes out clean, the bread is ready. Once baked, let the mini loaves cool in the pans for about 10 minutes. Then, transfer them to a wire rack to cool completely. Enjoy the warm, sweet aroma filling your kitchen!

Tips & Tricks

Baking Tips for Moist Mini Pumpkin Bread

To ensure your mini pumpkin bread stays moist, use canned pumpkin puree. It has more moisture than fresh pumpkin. Mix the wet ingredients well before adding dry ones. This helps keep the bread soft. Don’t over-mix the batter. Just stir until it is combined. Over-mixing can make the bread tough. Adding a bit of applesauce also helps keep it moist.

Common Mistakes to Avoid

One common mistake is skipping the greasing of the pans. Always grease and flour your mini loaf pans or use silicone molds. This prevents sticking. Another mistake is not checking the oven temperature. Ovens can be off by a few degrees. Use an oven thermometer to be sure. Avoid opening the oven door too often. This lets heat escape and can affect baking time.

Best Practices for Swirling

For a beautiful cinnamon swirl, sprinkle the mixture evenly over the batter. Use a knife or skewer to create gentle swirls. Don’t mix it all in. You want to see the swirl in the finished bread. If you want a stronger flavor, add more cinnamon to the swirl mix. Aim for a balance of pumpkin and cinnamon flavors in every bite.

Variations

Add-ins and Flavor Enhancements

You can make your mini pumpkin bread even more tasty! Here are some fun ideas:

Nuts: Add 1/2 cup of chopped walnuts or pecans for a crunchy bite.

Chocolate Chips: Try 1/2 cup of chocolate chips for a sweet surprise.

Dried Fruits: Add raisins or cranberries for a fruity twist.

Spices: Mix in a pinch of cloves or allspice for extra warmth.

These additions can make each loaf unique and fun to share!

Gluten-Free Options

Want to make this recipe gluten-free? It’s easy! Just swap all-purpose flour with a gluten-free blend. Look for a blend that includes xanthan gum for best results. Use the same amount, and mix it well with your dry ingredients. You will still get a soft and tasty loaf that everyone can enjoy!

Different Sizes and Baking Times

You don’t have to stick to mini loaves! You can use different pan sizes:

Standard Loaf Pan: Bake for 50-60 minutes.

Muffin Pan: Fill the cups halfway and bake for 15-20 minutes.

Keep an eye on them! Use a toothpick to check if they are done. Adjust the baking time as needed for perfect results.

Storage Info

How to Store Mini Pumpkin Bread

To keep your mini pumpkin bread fresh, store it in an airtight container. Place the cooled loaves in the container and seal it tight. You can also wrap each loaf in plastic wrap before placing it in the container. This helps to keep moisture in and prevents the bread from drying out.

Freezing Instructions

If you want to save some for later, freezing is a great option. First, let the mini loaves cool completely. Then, wrap each loaf tightly in plastic wrap. After wrapping, place them in a freezer-safe bag or container. This helps to keep them fresh for a longer time. When you want to enjoy a loaf, simply thaw it in the fridge overnight.

Duration for Best Quality

For the best taste and texture, try to eat the mini pumpkin bread within a week if stored at room temperature. If frozen, the bread can last for up to three months. However, for optimal flavor, I recommend consuming it within one month.

FAQs

Can I use fresh pumpkin instead of canned?

Yes, you can use fresh pumpkin. First, cook and puree the pumpkin. Bake it until soft. Then, let it cool before using it in the recipe. Fresh pumpkin gives a nice flavor and texture.

How do I know when the bread is done?

Check the bread with a toothpick. Insert it into the center of the loaf. If it comes out clean, the bread is done. If it has batter on it, bake a few more minutes.

Can I make this recipe ahead of time?

Yes, you can make it ahead. Bake the mini pumpkin bread and let it cool. Then, wrap it in plastic wrap. Store it in the fridge for up to three days.

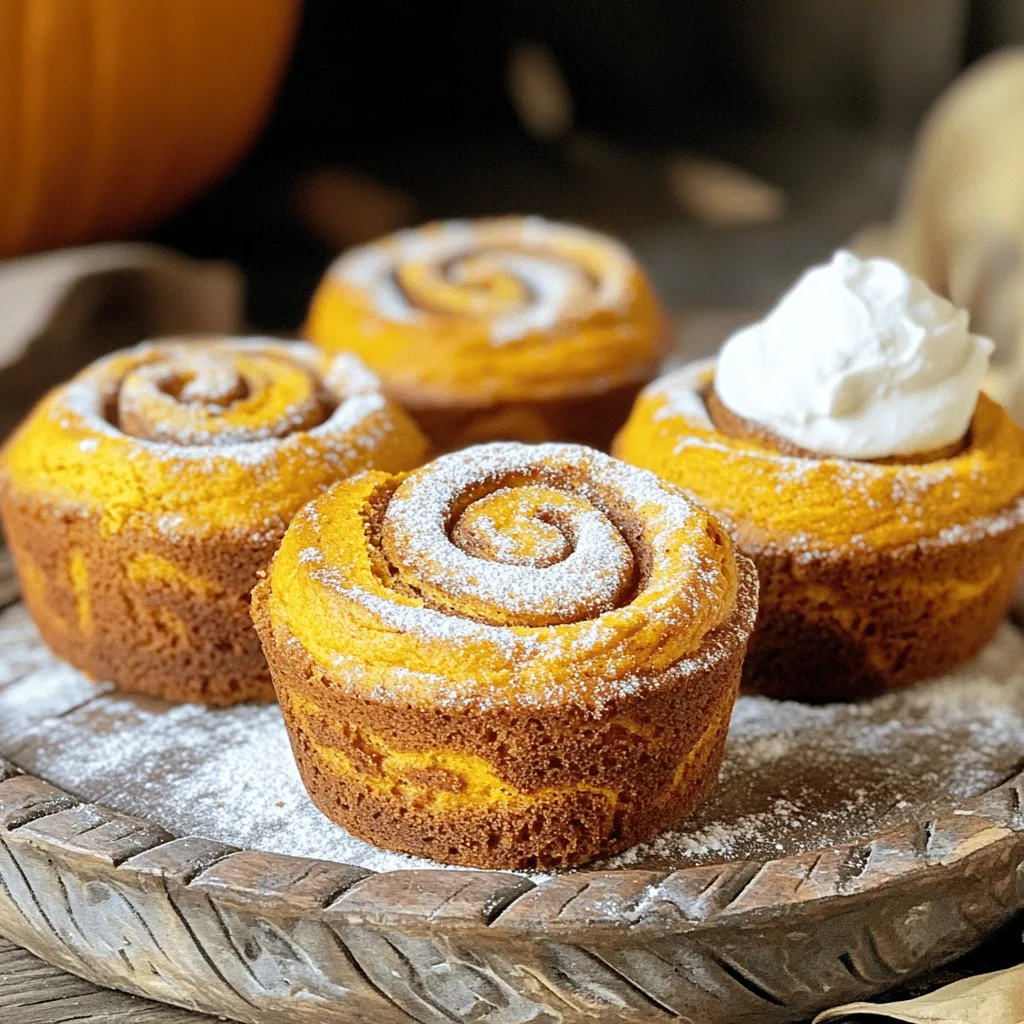
What can I serve with mini pumpkin bread?

Mini pumpkin bread tastes great with many things. Try serving it with whipped cream or vanilla ice cream. A light dusting of powdered sugar works well too. You can also pair it with coffee or tea for a cozy treat.

This guide covers all you need for mini pumpkin bread. You learned about essential and optional ingredients, plus measurements. I walked you through the steps for mixing, baking, and swirling. Remember the tips for moist bread and avoid common mistakes. Explore variations for taste and size. Proper storage keeps your bread fresh. You can even answer questions like using fresh pumpkin. With this knowledge, you can bake delicious mini pumpkin bread every time. Enjoy your baking journey!

To make mini pumpkin bread, you need some key ingredients. These give the bread its moistness and flavor. Here’s what you need: - 1 cup canned pumpkin puree - 1/2 cup granulated sugar - 1/2 cup brown sugar, packed - 1/3 cup vegetable oil - 1/3 cup unsweetened applesauce - 2 large eggs - 1 teaspoon vanilla extract - 1 1/2 cups all-purpose flour - 1 teaspoon baking soda - 1/2 teaspoon baking powder - 1 teaspoon ground cinnamon - 1/2 teaspoon ground nutmeg - 1/4 teaspoon ground ginger - 1/4 teaspoon salt These ingredients work together to create a soft and tasty bread. The pumpkin gives it a lovely color and moistness. The spices add warmth and flavor. You can add some extras to your mini pumpkin bread. These are not needed, but they add great crunch and taste: - 1/2 cup chopped walnuts or pecans Nuts give a nice texture and flavor. You can choose either walnuts or pecans based on your taste. If you don’t have some ingredients, you can replace them. Here are a few ideas: - For vegetable oil, you can use melted coconut oil or melted butter. - You can swap applesauce with more pumpkin puree if you want. - For the flour, you can use a gluten-free blend if needed. These swaps keep the flavor and texture of the bread intact. Just ensure you measure correctly for the best results. First, set your oven to 350°F (175°C). This is the perfect temperature for baking. Next, get your mini loaf pans ready. You can grease them with butter or oil. Then, sprinkle some flour inside. This helps the bread come out easily. If you prefer, you can use silicone molds, which are easy to work with. In a large bowl, combine these wet ingredients: - 1 cup canned pumpkin puree - 1/2 cup granulated sugar - 1/2 cup brown sugar, packed - 1/3 cup vegetable oil - 1/3 cup unsweetened applesauce - 2 large eggs - 1 teaspoon vanilla extract Mix them until they are smooth and well blended. This step creates the base for your bread. Now, grab another bowl and whisk together the dry ingredients: - 1 1/2 cups all-purpose flour - 1 teaspoon baking soda - 1/2 teaspoon baking powder - 1 teaspoon ground cinnamon - 1/2 teaspoon ground nutmeg - 1/4 teaspoon ground ginger - 1/4 teaspoon salt Make sure everything is mixed well. This helps the bread rise and ensures great flavor. In a small bowl, mix together: - 2 tablespoons brown sugar - 1 teaspoon ground cinnamon This mixture will give your bread a lovely sweet swirl. Set it aside for later. Now, pour half of the pumpkin batter into each mini loaf pan. Take half of your cinnamon swirl mixture and sprinkle it over the batter. Use a knife or a skewer to swirl it gently. This creates beautiful patterns in the bread. Then, top with the remaining pumpkin batter. Sprinkle the rest of the cinnamon mixture on top and swirl again. Place the pans in the oven. Bake for 25-30 minutes. To check if they are done, poke a toothpick into the center. If it comes out clean, the bread is ready. Once baked, let the mini loaves cool in the pans for about 10 minutes. Then, transfer them to a wire rack to cool completely. Enjoy the warm, sweet aroma filling your kitchen! To ensure your mini pumpkin bread stays moist, use canned pumpkin puree. It has more moisture than fresh pumpkin. Mix the wet ingredients well before adding dry ones. This helps keep the bread soft. Don’t over-mix the batter. Just stir until it is combined. Over-mixing can make the bread tough. Adding a bit of applesauce also helps keep it moist. One common mistake is skipping the greasing of the pans. Always grease and flour your mini loaf pans or use silicone molds. This prevents sticking. Another mistake is not checking the oven temperature. Ovens can be off by a few degrees. Use an oven thermometer to be sure. Avoid opening the oven door too often. This lets heat escape and can affect baking time. For a beautiful cinnamon swirl, sprinkle the mixture evenly over the batter. Use a knife or skewer to create gentle swirls. Don’t mix it all in. You want to see the swirl in the finished bread. If you want a stronger flavor, add more cinnamon to the swirl mix. Aim for a balance of pumpkin and cinnamon flavors in every bite. {{image_2}} You can make your mini pumpkin bread even more tasty! Here are some fun ideas: - Nuts: Add 1/2 cup of chopped walnuts or pecans for a crunchy bite. - Chocolate Chips: Try 1/2 cup of chocolate chips for a sweet surprise. - Dried Fruits: Add raisins or cranberries for a fruity twist. - Spices: Mix in a pinch of cloves or allspice for extra warmth. These additions can make each loaf unique and fun to share! Want to make this recipe gluten-free? It’s easy! Just swap all-purpose flour with a gluten-free blend. Look for a blend that includes xanthan gum for best results. Use the same amount, and mix it well with your dry ingredients. You will still get a soft and tasty loaf that everyone can enjoy! You don’t have to stick to mini loaves! You can use different pan sizes: - Standard Loaf Pan: Bake for 50-60 minutes. - Muffin Pan: Fill the cups halfway and bake for 15-20 minutes. Keep an eye on them! Use a toothpick to check if they are done. Adjust the baking time as needed for perfect results. To keep your mini pumpkin bread fresh, store it in an airtight container. Place the cooled loaves in the container and seal it tight. You can also wrap each loaf in plastic wrap before placing it in the container. This helps to keep moisture in and prevents the bread from drying out. If you want to save some for later, freezing is a great option. First, let the mini loaves cool completely. Then, wrap each loaf tightly in plastic wrap. After wrapping, place them in a freezer-safe bag or container. This helps to keep them fresh for a longer time. When you want to enjoy a loaf, simply thaw it in the fridge overnight. For the best taste and texture, try to eat the mini pumpkin bread within a week if stored at room temperature. If frozen, the bread can last for up to three months. However, for optimal flavor, I recommend consuming it within one month. Yes, you can use fresh pumpkin. First, cook and puree the pumpkin. Bake it until soft. Then, let it cool before using it in the recipe. Fresh pumpkin gives a nice flavor and texture. Check the bread with a toothpick. Insert it into the center of the loaf. If it comes out clean, the bread is done. If it has batter on it, bake a few more minutes. Yes, you can make it ahead. Bake the mini pumpkin bread and let it cool. Then, wrap it in plastic wrap. Store it in the fridge for up to three days. Mini pumpkin bread tastes great with many things. Try serving it with whipped cream or vanilla ice cream. A light dusting of powdered sugar works well too. You can also pair it with coffee or tea for a cozy treat. This guide covers all you need for mini pumpkin bread. You learned about essential and optional ingredients, plus measurements. I walked you through the steps for mixing, baking, and swirling. Remember the tips for moist bread and avoid common mistakes. Explore variations for taste and size. Proper storage keeps your bread fresh. You can even answer questions like using fresh pumpkin. With this knowledge, you can bake delicious mini pumpkin bread every time. Enjoy your baking journey!

Mini Pumpkin Bread with Cinnamon Swirl

Indulge in the flavors of fall with this delicious mini pumpkin bread with cinnamon swirl! Perfect for cozy gatherings or a sweet treat at home, this recipe combines the warmth of pumpkin and spices into adorable mini loaves. With simple ingredients and easy steps, you’ll create a delightful dessert that impresses everyone. Click through to explore the full recipe and bring some seasonal charm to your baking!

Ingredients
  

1 cup canned pumpkin puree

1/2 cup granulated sugar

1/2 cup brown sugar, packed

1/3 cup vegetable oil

1/3 cup unsweetened applesauce

2 large eggs

1 teaspoon vanilla extract

1 1/2 cups all-purpose flour

1 teaspoon baking soda

1/2 teaspoon baking powder

1 teaspoon ground cinnamon

1/2 teaspoon ground nutmeg

1/4 teaspoon ground ginger

1/4 teaspoon salt

1/2 cup chopped walnuts or pecans (optional)

2 tablespoons brown sugar (for cinnamon swirl)

1 teaspoon ground cinnamon (for cinnamon swirl)

Instructions
 

Preheat your oven to 350°F (175°C). Grease and flour mini loaf pans (you can also use silicone mini loaf molds).

    In a large mixing bowl, combine the pumpkin puree, granulated sugar, brown sugar, vegetable oil, applesauce, eggs, and vanilla extract. Mix until smooth and well combined.

      In a separate bowl, whisk together the all-purpose flour, baking soda, baking powder, ground cinnamon, nutmeg, ginger, and salt.

        Gradually add the dry ingredients to the wet ingredients, stirring until just combined. Avoid over-mixing. If desired, fold in the chopped nuts.

          In a small bowl, mix together the 2 tablespoons of brown sugar and 1 teaspoon of ground cinnamon. This will be your cinnamon swirl mixture.

            Pour half of the pumpkin batter into each mini loaf pan. Sprinkle half of the cinnamon swirl mixture over the batter in each pan, then use a knife or skewer to swirl the mixture gently into the batter.

              Top with the remaining pumpkin batter, followed by sprinkling the remaining cinnamon swirl mixture on top. Use the knife again to create a swirled pattern.

                Bake in the preheated oven for 25-30 minutes, or until a toothpick inserted into the center comes out clean.

                  Allow the mini loaves to cool in the pans for about 10 minutes before transferring them to a wire rack to cool completely.

                    Prep Time: 15 minutes | Total Time: 45 minutes | Servings: 6 mini loaves

                      - Presentation Tips: Slice the mini pumpkin breads and serve them on a decorative platter with a light dusting of powdered sugar on top. Consider adding a dollop of whipped cream or a scoop of vanilla ice cream on the side for a delightful treat!

                        WANT TO SAVE THIS RECIPE?