![- 2 cups all-purpose flour - 1/2 cup unsalted butter, chilled and cubed - 1/4 cup granulated sugar - 3 medium-sized apples (such as Granny Smith), peeled, cored, and diced - 1 teaspoon lemon juice - 1 teaspoon ground cinnamon - 1/4 teaspoon ground nutmeg - 1/4 cup brown sugar - 1 tablespoon cornstarch - Egg wash (1 egg beaten with 1 tablespoon water) - Green candy leaves or fresh mint for garnish When making pumpkin shaped mini apple pies, the right ingredients matter. The base of the pie is a simple yet rich dough. You need all-purpose flour, unsalted butter, and a bit of sugar for sweetness. This mix gives the crust a flaky texture. Next, we have our apples. I love using Granny Smith apples for their tartness. Their flavor balances out the sugar and spices perfectly. Don't forget the lemon juice! It brightens the apple filling, making it fresh and zesty. Spices add warmth and depth. Ground cinnamon and nutmeg are must-haves. They fill your kitchen with a cozy aroma while baking. Brown sugar adds a hint of caramel sweetness to the filling. For the assembly, a simple egg wash gives a golden finish. Top with green candy leaves or mint for a fun touch. These small details make your mini pies pop! Check out the full recipe for more details on each step. - Combine 2 cups of flour, 1/4 cup sugar, and 1/4 teaspoon salt in a bowl. - Add 1/2 cup of chilled, cubed butter. Mix until it looks like coarse crumbs. - Gradually pour in 1/4 cup of ice water, mixing until the dough comes together. - Toss 3 diced apples with 1 teaspoon lemon juice, 1 teaspoon cinnamon, and 1/4 teaspoon nutmeg. - Add 1/4 cup brown sugar and 1 tablespoon cornstarch to the apples. - Let this mixture sit for about 10 minutes to create a rich flavor. - Roll out the dough to 1/8 inch thick on a floured surface. - Use a pumpkin-shaped cookie cutter to cut out shapes. You need two pieces per pie. - Place half of the cutouts on a parchment-lined baking sheet. - Spoon a small amount of apple filling onto each cutout. - Brush the edges with an egg wash made from 1 beaten egg and 1 tablespoon water. - Cover with the second cutout and gently press to seal. Crimp edges with a fork. - Preheat your oven to 375°F (190°C). - Place the assembled pies on a baking sheet. - Bake for 20-25 minutes, until the pies turn golden brown. For the full recipe, click here. To get the best dough, keep your butter cold. Cold butter makes the crust flaky. When you mix it with the flour, it creates small pockets. These pockets help the dough rise as it bakes. Chilling the dough before rolling is key too. Wrap it in plastic and rest it in the fridge for at least 30 minutes. This step keeps the shape when you cut it. Use different apple types to boost flavor. Each apple brings a unique sweetness. I love using Granny Smith for their tartness. You can also mix in Honeycrisp for a sweeter touch. After mixing the apples with spices and sugars, let it sit. Resting helps the flavors blend together. This step enhances the taste and makes your filling pop. Get creative with decoration! Use extra dough scraps to make fun shapes. You can form little leaves or stars to add to your pies. For extra sweetness, drizzle icing on top after baking. A simple glaze made with powdered sugar and milk works great. It adds a nice shine and taste to your pumpkin-shaped mini apple pies. For the final touch, add green candy leaves or fresh mint. This brings your dessert to life! For the full recipe, check out the [Full Recipe]. {{image_2}} You can make your mini apple pies even more tasty. Try adding caramel or raisins to the apple filling for a sweet twist. Both add a rich flavor that blends well with apples. You can also experiment with spices like ginger or clove. These spices give your pies a warm and cozy taste. Just a little goes a long way. Want a healthier pie? You can use whole wheat flour instead of all-purpose flour. This switch gives your crust more fiber and nutrients. If you want to cut calories, try a sugar substitute. There are many options available that still taste great in the filling. While pumpkin shapes are fun, you can create mini pies in other seasonal shapes too. Think leaves or acorns for fall! If you want more to share, try making larger pies. You can use the same filling and crust techniques, just adjust the baking time. Larger pies can be great for gatherings or family dinners. After baking, allow your mini apple pies to cool. Place them in an airtight container. This keeps them fresh and tasty. For the best flavor, eat them within 2-3 days. After this, they may lose some of their charm. To freeze the mini pies, let them cool completely. Wrap each pie in plastic wrap. Then, place them in a freezer bag or container. This method helps avoid freezer burn. They can stay frozen for up to three months. When ready to enjoy, take them out and let them defrost overnight in the fridge. This keeps the texture nice. To reheat your mini pies, place them in a preheated oven at 350°F (175°C). Bake for about 10-15 minutes. This warms them through and keeps the crust crispy. Avoid the microwave if you want the crust to stay flaky. The oven is the best option for that perfect bite. Yes, you can make the dough ahead of time. Just follow these steps: - Mix the dry ingredients and butter as usual. - Add ice water to form the dough. - Wrap it tightly in plastic wrap. - Store it in the fridge for up to two days. This makes it easy to assemble your mini pies later! If you don’t have a pumpkin cookie cutter, don’t worry! Here are some fun options: - Use a regular round cutter and add a stem with dough scraps. - Cut out apple shapes or even leaves for a fall theme. - Use a knife to create pumpkin shapes by hand. Let your creativity shine! To check if the mini pies are done, look for these signs: - The crust should be golden brown. - You may see the filling bubbling up through the vents. - If the edges are crispy and firm, they are ready to enjoy. Trust your eyes and your nose for the best results! Pumpkin-shaped mini apple pies are fun and tasty. This blog post showed you how to make them step by step. You learned about the key ingredients, from flour to apples, and important tips for perfecting the dough. You also saw cool variations and storage ideas. Try these mini pies to impress friends and family. Simple changes can make them your own. Enjoy baking these delicious treats and sharing them with others!](https://stirredrecipes.com/wp-content/uploads/2025/08/19b485dd-4242-4254-82af-3b7a396bab5a.webp)
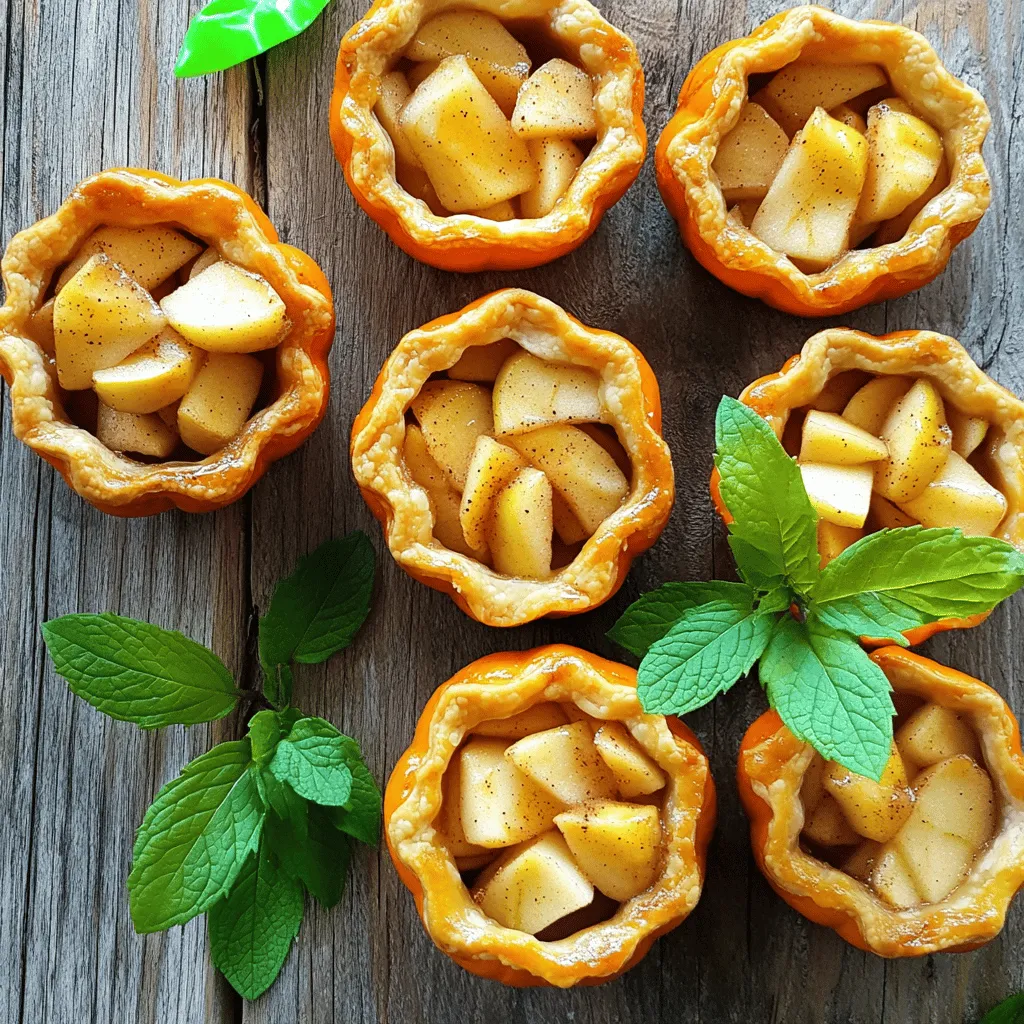
Get ready to savor fall with my delightful pumpkin-shaped mini apple pies! These tasty treats combine the warmth of spiced apples with a flaky crust, making them perfect for any gathering. With easy-to-follow steps and fun tips, I’ll guide you through creating these charming desserts. You’ll impress friends and family while enjoying a delicious bite of autumn goodness. Let’s dive into this fun baking adventure!
Ingredients
Main Ingredients for Pumpkin Shaped Mini Apple Pies
– 2 cups all-purpose flour
– 1/2 cup unsalted butter, chilled and cubed
– 1/4 cup granulated sugar
– 3 medium-sized apples (such as Granny Smith), peeled, cored, and diced
Additional Ingredients
– 1 teaspoon lemon juice
– 1 teaspoon ground cinnamon
– 1/4 teaspoon ground nutmeg
– 1/4 cup brown sugar
– 1 tablespoon cornstarch
For Assembly and Garnish
– Egg wash (1 egg beaten with 1 tablespoon water)
– Green candy leaves or fresh mint for garnish
When making pumpkin shaped mini apple pies, the right ingredients matter. The base of the pie is a simple yet rich dough. You need all-purpose flour, unsalted butter, and a bit of sugar for sweetness. This mix gives the crust a flaky texture.
Next, we have our apples. I love using Granny Smith apples for their tartness. Their flavor balances out the sugar and spices perfectly. Don’t forget the lemon juice! It brightens the apple filling, making it fresh and zesty.
Spices add warmth and depth. Ground cinnamon and nutmeg are must-haves. They fill your kitchen with a cozy aroma while baking. Brown sugar adds a hint of caramel sweetness to the filling.
For the assembly, a simple egg wash gives a golden finish. Top with green candy leaves or mint for a fun touch. These small details make your mini pies pop!
Check out the full recipe for more details on each step.
Step-by-Step Instructions
Preparing the Pie Crust
– Combine 2 cups of flour, 1/4 cup sugar, and 1/4 teaspoon salt in a bowl.
– Add 1/2 cup of chilled, cubed butter. Mix until it looks like coarse crumbs.
– Gradually pour in 1/4 cup of ice water, mixing until the dough comes together.
Making the Apple Filling
– Toss 3 diced apples with 1 teaspoon lemon juice, 1 teaspoon cinnamon, and 1/4 teaspoon nutmeg.
– Add 1/4 cup brown sugar and 1 tablespoon cornstarch to the apples.
– Let this mixture sit for about 10 minutes to create a rich flavor.
Assembling the Mini Pies
– Roll out the dough to 1/8 inch thick on a floured surface.
– Use a pumpkin-shaped cookie cutter to cut out shapes. You need two pieces per pie.
– Place half of the cutouts on a parchment-lined baking sheet.
– Spoon a small amount of apple filling onto each cutout.
– Brush the edges with an egg wash made from 1 beaten egg and 1 tablespoon water.
– Cover with the second cutout and gently press to seal. Crimp edges with a fork.
Baking Instructions
– Preheat your oven to 375°F (190°C).
– Place the assembled pies on a baking sheet.
– Bake for 20-25 minutes, until the pies turn golden brown.
For the full recipe, click here.
Tips & Tricks
Perfecting the Dough
To get the best dough, keep your butter cold. Cold butter makes the crust flaky. When you mix it with the flour, it creates small pockets. These pockets help the dough rise as it bakes. Chilling the dough before rolling is key too. Wrap it in plastic and rest it in the fridge for at least 30 minutes. This step keeps the shape when you cut it.
Making the Filling Stand Out
Use different apple types to boost flavor. Each apple brings a unique sweetness. I love using Granny Smith for their tartness. You can also mix in Honeycrisp for a sweeter touch. After mixing the apples with spices and sugars, let it sit. Resting helps the flavors blend together. This step enhances the taste and makes your filling pop.
Decoration Ideas
Get creative with decoration! Use extra dough scraps to make fun shapes. You can form little leaves or stars to add to your pies. For extra sweetness, drizzle icing on top after baking. A simple glaze made with powdered sugar and milk works great. It adds a nice shine and taste to your pumpkin-shaped mini apple pies. For the final touch, add green candy leaves or fresh mint. This brings your dessert to life!
For the full recipe, check out the [Full Recipe].
Variations
Flavor Variations
You can make your mini apple pies even more tasty. Try adding caramel or raisins to the apple filling for a sweet twist. Both add a rich flavor that blends well with apples. You can also experiment with spices like ginger or clove. These spices give your pies a warm and cozy taste. Just a little goes a long way.
Healthier Alternatives
Want a healthier pie? You can use whole wheat flour instead of all-purpose flour. This switch gives your crust more fiber and nutrients. If you want to cut calories, try a sugar substitute. There are many options available that still taste great in the filling.
Different Shapes and Sizes
While pumpkin shapes are fun, you can create mini pies in other seasonal shapes too. Think leaves or acorns for fall! If you want more to share, try making larger pies. You can use the same filling and crust techniques, just adjust the baking time. Larger pies can be great for gatherings or family dinners.
Storage Info
Short-term Storage
After baking, allow your mini apple pies to cool. Place them in an airtight container. This keeps them fresh and tasty. For the best flavor, eat them within 2-3 days. After this, they may lose some of their charm.
Freezing Instructions
To freeze the mini pies, let them cool completely. Wrap each pie in plastic wrap. Then, place them in a freezer bag or container. This method helps avoid freezer burn. They can stay frozen for up to three months. When ready to enjoy, take them out and let them defrost overnight in the fridge. This keeps the texture nice.
Reheating Tips
To reheat your mini pies, place them in a preheated oven at 350°F (175°C). Bake for about 10-15 minutes. This warms them through and keeps the crust crispy. Avoid the microwave if you want the crust to stay flaky. The oven is the best option for that perfect bite.
FAQs
Can I make the dough ahead of time?
Yes, you can make the dough ahead of time. Just follow these steps:
– Mix the dry ingredients and butter as usual.
– Add ice water to form the dough.
– Wrap it tightly in plastic wrap.
– Store it in the fridge for up to two days.
This makes it easy to assemble your mini pies later!
What can I use if I don’t have a pumpkin cookie cutter?
If you don’t have a pumpkin cookie cutter, don’t worry! Here are some fun options:
– Use a regular round cutter and add a stem with dough scraps.
– Cut out apple shapes or even leaves for a fall theme.
– Use a knife to create pumpkin shapes by hand.
Let your creativity shine!
How can I tell when the mini pies are done?
To check if the mini pies are done, look for these signs:
– The crust should be golden brown.
– You may see the filling bubbling up through the vents.
– If the edges are crispy and firm, they are ready to enjoy.
Trust your eyes and your nose for the best results!
Pumpkin-shaped mini apple pies are fun and tasty. This blog post showed you how to make them step by step. You learned about the key ingredients, from flour to apples, and important tips for perfecting the dough. You also saw cool variations and storage ideas.
Try these mini pies to impress friends and family. Simple changes can make them your own. Enjoy baking these delicious treats and sharing them with others!
![- 2 cups all-purpose flour - 1/2 cup unsalted butter, chilled and cubed - 1/4 cup granulated sugar - 3 medium-sized apples (such as Granny Smith), peeled, cored, and diced - 1 teaspoon lemon juice - 1 teaspoon ground cinnamon - 1/4 teaspoon ground nutmeg - 1/4 cup brown sugar - 1 tablespoon cornstarch - Egg wash (1 egg beaten with 1 tablespoon water) - Green candy leaves or fresh mint for garnish When making pumpkin shaped mini apple pies, the right ingredients matter. The base of the pie is a simple yet rich dough. You need all-purpose flour, unsalted butter, and a bit of sugar for sweetness. This mix gives the crust a flaky texture. Next, we have our apples. I love using Granny Smith apples for their tartness. Their flavor balances out the sugar and spices perfectly. Don't forget the lemon juice! It brightens the apple filling, making it fresh and zesty. Spices add warmth and depth. Ground cinnamon and nutmeg are must-haves. They fill your kitchen with a cozy aroma while baking. Brown sugar adds a hint of caramel sweetness to the filling. For the assembly, a simple egg wash gives a golden finish. Top with green candy leaves or mint for a fun touch. These small details make your mini pies pop! Check out the full recipe for more details on each step. - Combine 2 cups of flour, 1/4 cup sugar, and 1/4 teaspoon salt in a bowl. - Add 1/2 cup of chilled, cubed butter. Mix until it looks like coarse crumbs. - Gradually pour in 1/4 cup of ice water, mixing until the dough comes together. - Toss 3 diced apples with 1 teaspoon lemon juice, 1 teaspoon cinnamon, and 1/4 teaspoon nutmeg. - Add 1/4 cup brown sugar and 1 tablespoon cornstarch to the apples. - Let this mixture sit for about 10 minutes to create a rich flavor. - Roll out the dough to 1/8 inch thick on a floured surface. - Use a pumpkin-shaped cookie cutter to cut out shapes. You need two pieces per pie. - Place half of the cutouts on a parchment-lined baking sheet. - Spoon a small amount of apple filling onto each cutout. - Brush the edges with an egg wash made from 1 beaten egg and 1 tablespoon water. - Cover with the second cutout and gently press to seal. Crimp edges with a fork. - Preheat your oven to 375°F (190°C). - Place the assembled pies on a baking sheet. - Bake for 20-25 minutes, until the pies turn golden brown. For the full recipe, click here. To get the best dough, keep your butter cold. Cold butter makes the crust flaky. When you mix it with the flour, it creates small pockets. These pockets help the dough rise as it bakes. Chilling the dough before rolling is key too. Wrap it in plastic and rest it in the fridge for at least 30 minutes. This step keeps the shape when you cut it. Use different apple types to boost flavor. Each apple brings a unique sweetness. I love using Granny Smith for their tartness. You can also mix in Honeycrisp for a sweeter touch. After mixing the apples with spices and sugars, let it sit. Resting helps the flavors blend together. This step enhances the taste and makes your filling pop. Get creative with decoration! Use extra dough scraps to make fun shapes. You can form little leaves or stars to add to your pies. For extra sweetness, drizzle icing on top after baking. A simple glaze made with powdered sugar and milk works great. It adds a nice shine and taste to your pumpkin-shaped mini apple pies. For the final touch, add green candy leaves or fresh mint. This brings your dessert to life! For the full recipe, check out the [Full Recipe]. {{image_2}} You can make your mini apple pies even more tasty. Try adding caramel or raisins to the apple filling for a sweet twist. Both add a rich flavor that blends well with apples. You can also experiment with spices like ginger or clove. These spices give your pies a warm and cozy taste. Just a little goes a long way. Want a healthier pie? You can use whole wheat flour instead of all-purpose flour. This switch gives your crust more fiber and nutrients. If you want to cut calories, try a sugar substitute. There are many options available that still taste great in the filling. While pumpkin shapes are fun, you can create mini pies in other seasonal shapes too. Think leaves or acorns for fall! If you want more to share, try making larger pies. You can use the same filling and crust techniques, just adjust the baking time. Larger pies can be great for gatherings or family dinners. After baking, allow your mini apple pies to cool. Place them in an airtight container. This keeps them fresh and tasty. For the best flavor, eat them within 2-3 days. After this, they may lose some of their charm. To freeze the mini pies, let them cool completely. Wrap each pie in plastic wrap. Then, place them in a freezer bag or container. This method helps avoid freezer burn. They can stay frozen for up to three months. When ready to enjoy, take them out and let them defrost overnight in the fridge. This keeps the texture nice. To reheat your mini pies, place them in a preheated oven at 350°F (175°C). Bake for about 10-15 minutes. This warms them through and keeps the crust crispy. Avoid the microwave if you want the crust to stay flaky. The oven is the best option for that perfect bite. Yes, you can make the dough ahead of time. Just follow these steps: - Mix the dry ingredients and butter as usual. - Add ice water to form the dough. - Wrap it tightly in plastic wrap. - Store it in the fridge for up to two days. This makes it easy to assemble your mini pies later! If you don’t have a pumpkin cookie cutter, don’t worry! Here are some fun options: - Use a regular round cutter and add a stem with dough scraps. - Cut out apple shapes or even leaves for a fall theme. - Use a knife to create pumpkin shapes by hand. Let your creativity shine! To check if the mini pies are done, look for these signs: - The crust should be golden brown. - You may see the filling bubbling up through the vents. - If the edges are crispy and firm, they are ready to enjoy. Trust your eyes and your nose for the best results! Pumpkin-shaped mini apple pies are fun and tasty. This blog post showed you how to make them step by step. You learned about the key ingredients, from flour to apples, and important tips for perfecting the dough. You also saw cool variations and storage ideas. Try these mini pies to impress friends and family. Simple changes can make them your own. Enjoy baking these delicious treats and sharing them with others!](https://stirredrecipes.com/wp-content/uploads/2025/08/19b485dd-4242-4254-82af-3b7a396bab5a-300x300.webp)