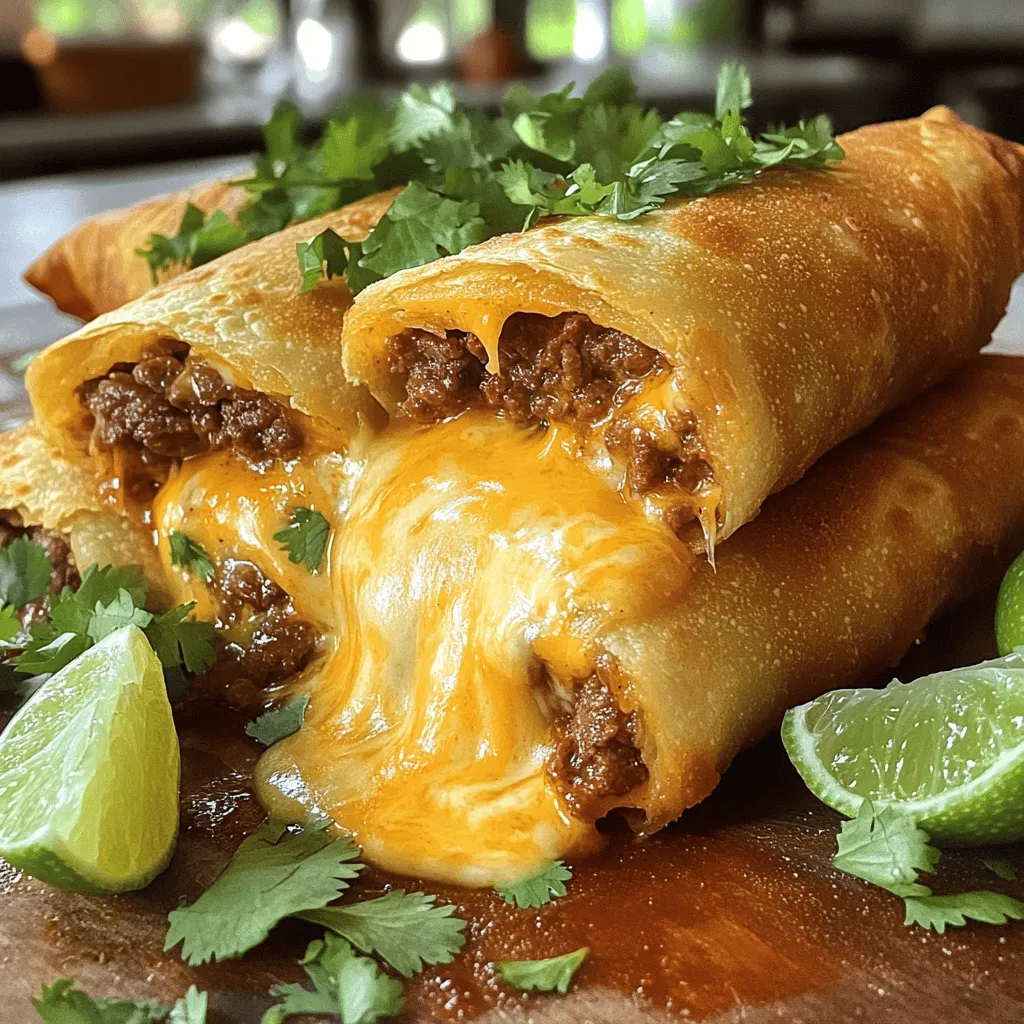
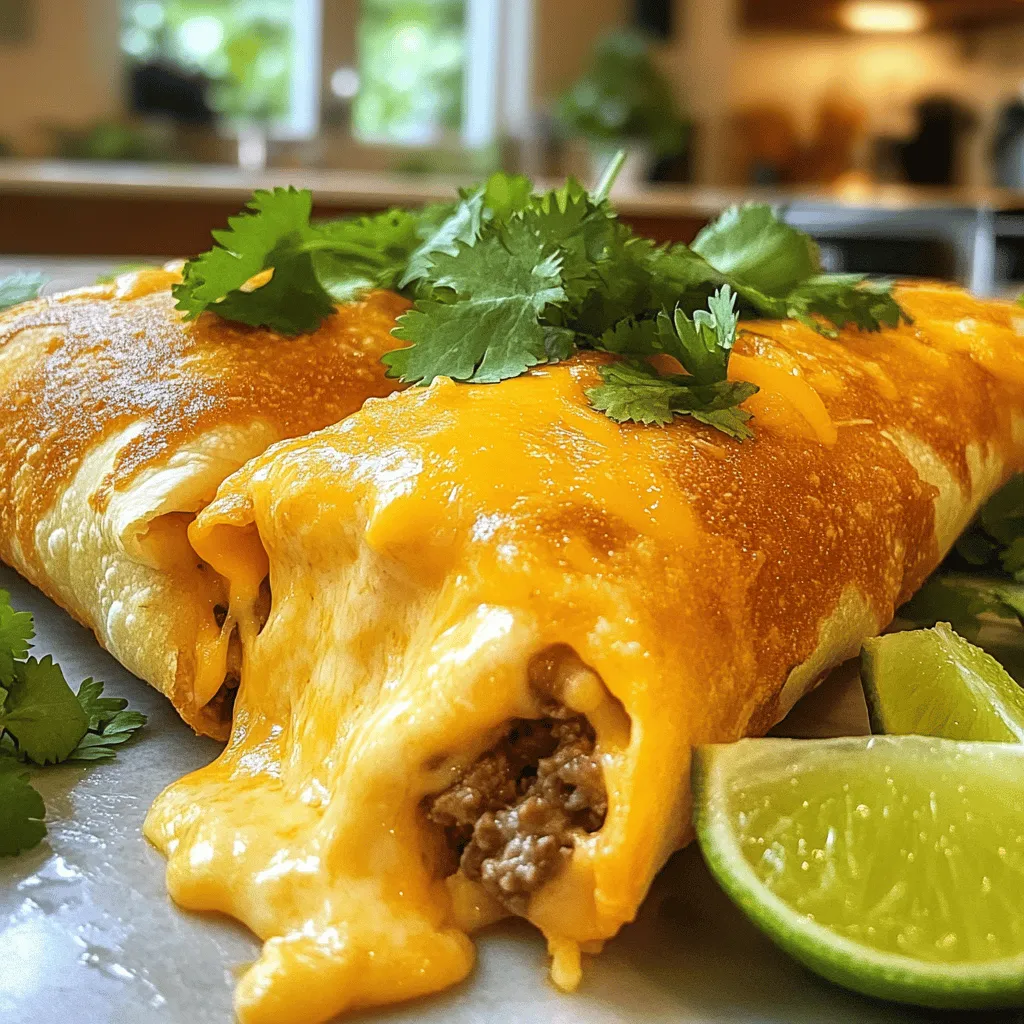
Crispy Beef and Cheese Chimichangas are a true treat you can’t miss. They are crispy on the outside and packed with cheesy, savory goodness inside. Today, I’ll guide you through making these delicious bites from scratch. You’ll learn about the best ingredients, easy prep steps, and secret tips to achieve that perfect crunch. Dive in and let’s create a dish that will impress everyone at your table!
Ingredients
List of Required Ingredients
– 1 pound ground beef
– 1 small onion, finely chopped
– 2 cloves garlic, minced
– 1 teaspoon cumin
– 1 teaspoon chili powder
– 1 teaspoon salt
– ½ teaspoon black pepper
– 1 cup shredded cheddar cheese
– ½ cup shredded Monterey Jack cheese
– 8 large flour tortillas
– 2 cups vegetable oil for frying
To make crispy beef and cheese chimichangas, you need key ingredients. First, ground beef gives the dish its hearty base. Onions and garlic add depth of flavor. Spices like cumin and chili powder bring heat and warmth. Salt and black pepper enhance all the flavors. The cheeses—cheddar and Monterey Jack—melt beautifully, making each bite rich and creamy. Flour tortillas wrap all these tasty ingredients, holding them snugly. Finally, vegetable oil is essential for frying, ensuring a perfect crisp.
Optional Ingredients for Serving
– Fresh cilantro
– Lime wedges
Adding fresh cilantro and lime wedges makes your chimichangas pop. Cilantro adds a fresh taste, while lime offers a bright zing. These ingredients elevate the dish, making each bite even better. You can also use them as a garnish for a beautiful presentation.
Step-by-Step Instructions
Preparation Steps
1. Sautéing onions and garlic
Start by heating a tablespoon of oil in a large skillet over medium heat. Add the finely chopped onion. Cook it until it turns soft and clear, about 3 to 4 minutes. Next, toss in the minced garlic. Sauté for just 1 minute. Stir often to avoid burning.
2. Cooking and seasoning ground beef
Now, add the ground beef to the skillet. Break it apart with a spatula. Cook until it turns brown, which takes about 5 to 7 minutes. Stir in the cumin, chili powder, salt, and black pepper. Mix well and let it cook for 2 more minutes. Take the skillet off the heat. Let the mixture cool for a bit.
Assembling Chimichangas
1. Filling tortillas with beef-cheese mixture
In a bowl, combine the cooled beef mixture with the shredded cheeses. Stir until they mix well. Lay a tortilla on a flat surface. Place about ¼ cup of the beef-cheese mixture right in the center of the tortilla.
2. Securing and rolling the tortillas
Fold the sides of the tortilla over the filling. Then, roll from the bottom to the top. Make sure to secure the filling inside. Repeat this with the rest of the tortillas and filling.
Frying Instructions
1. Heating oil to the correct temperature
In a large pot or deep skillet, pour in the vegetable oil. Heat it over medium-high heat. Wait until the oil shimmers, which means it’s about 350°F or 175°C.
2. Frying until golden brown
Carefully place 2 or 3 chimichangas in the hot oil. Fry them for 3 to 4 minutes on each side. Look for a golden brown color and a crispy texture. Once done, remove them from the oil. Put them on a plate lined with paper towels to drain extra oil.
For detailed cooking times and serving sizes, check the Full Recipe. Enjoy your crispy beef and cheese chimichangas!
Tips & Tricks
Best Practices for Cooking
To make crispy chimichangas, you need to follow a few steps. Start with the right oil. I recommend vegetable oil, as it has a high smoke point. Heat the oil until it shimmers but avoid smoking.
– Use a thermometer to check the oil temperature. It should be around 350°F.
– Fry only a few chimichangas at a time. Overcrowding lowers the oil’s temperature.
To avoid sogginess, drain the chimichangas well. Once they come out of the oil, place them on paper towels. This will help absorb excess oil. You can also let them sit for a minute before serving to keep them crisp.
Flavor Enhancements
Want to add some heat to your chimichangas? You can mix in spices like cayenne pepper or jalapeño. This gives a nice kick without overpowering the beef and cheese.
For cheese lovers, try different cheese blends. Instead of just cheddar and Monterey Jack, you can mix in pepper jack or even queso fresco. This adds depth and variety to each bite.
For the full recipe, check the details above.
Variations
Alternative Fillings
You can switch things up with different proteins. Chicken or turkey work great in chimichangas. Just cook them the same way as the beef. Shred or dice the meat finely for easy wrapping.
For a vegetarian option, fill your chimichangas with beans, cheese, and veggies. Black beans or pinto beans add fiber and taste. You can also add corn, bell peppers, or zucchini for more flavor and color.
Healthier Cooking Methods
If you want a lighter dish, try baking your chimichangas instead of frying. Preheat your oven to 375°F. Place the filled chimichangas on a baking sheet. Brush them with a little oil for crispiness. Bake for about 20 to 25 minutes, or until golden brown.
Another healthy tip is using whole wheat tortillas. They add fiber and nutrients. Whole wheat tortillas also give a nice, nutty flavor. This small change makes your meal a bit more wholesome without losing taste.
For more detailed instructions, check the Full Recipe.
Storage Info
Refrigeration Guidelines
To store leftover chimichangas, let them cool first. Place them in an airtight container. This keeps them fresh and tasty. You can store them in the fridge for up to three days.
When you’re ready to eat, reheat the chimichangas. The best way is in the oven. Preheat it to 350°F (175°C). Place the chimichangas on a baking sheet. Heat them for about 15-20 minutes until crispy and warm. You can also use an air fryer for a quick reheat. Set it to 350°F (175°C) and cook for 5-7 minutes.
Freezing Instructions
To freeze uncooked chimichangas, wrap each one in plastic wrap. Then put them in a freezer-safe bag. They will last for up to three months. When you’re ready to cook them, do not thaw. Just fry them straight from the freezer. This keeps them crispy.
For cooked chimichangas, let them cool. Then wrap each one in foil or plastic wrap. Place them in a freezer bag. They also last up to three months. To reheat, bake at 350°F (175°C) for about 20-25 minutes. This helps them regain their crispiness.
Follow this storage info for the best results from your crispy beef and cheese chimichangas! For the full recipe, check the earlier sections.
FAQs
Common Questions
How to make Crispy Beef and Cheese Chimichangas in advance?
You can prepare these chimichangas ahead of time. After you fill and roll each chimichanga, place them on a baking sheet. Cover them tightly with plastic wrap. You can store them in the fridge for up to 24 hours. When ready to fry, simply heat the oil and cook them as directed. This saves time on busy nights.
Can I make the filling a day ahead?
Yes, making the filling in advance is a great idea. Cook the beef mixture as usual, then let it cool. Store it in an airtight container in the fridge. This way, you can assemble the chimichangas quickly when you’re ready to cook.
Troubleshooting Tips
What to do if chimichangas burst while frying?
If your chimichangas burst, don’t worry. It can happen if they are overfilled or not sealed tightly. Next time, ensure you fold the edges securely. If they do burst, you can still enjoy the filling. Just serve it as a delicious beef and cheese dip with chips!
How to know when the oil is ready for frying?
To check if the oil is hot enough, drop a small piece of tortilla in it. If it sizzles and bubbles right away, the oil is ready. You can also use a thermometer. Aim for about 350°F (175°C). This temperature ensures your chimichangas fry evenly and become golden brown and crispy.
In this blog post, we covered how to make delicious chimichangas. We explored the key ingredients, from ground beef to spices and cheese. I shared step-by-step instructions for preparing, assembling, and frying them to perfection. You also learned tips for making them crispy and how to try different fillings. Finally, I discussed storage options to keep your chimichangas fresh. With these ideas, you can impress anyone at your table. Enjoy making these tasty treats!
