STIRRED RECIPES
Where every dish begins with a stir! 🍲✨
BEST CATEGORIES
TRENDING
NEW RECIPES
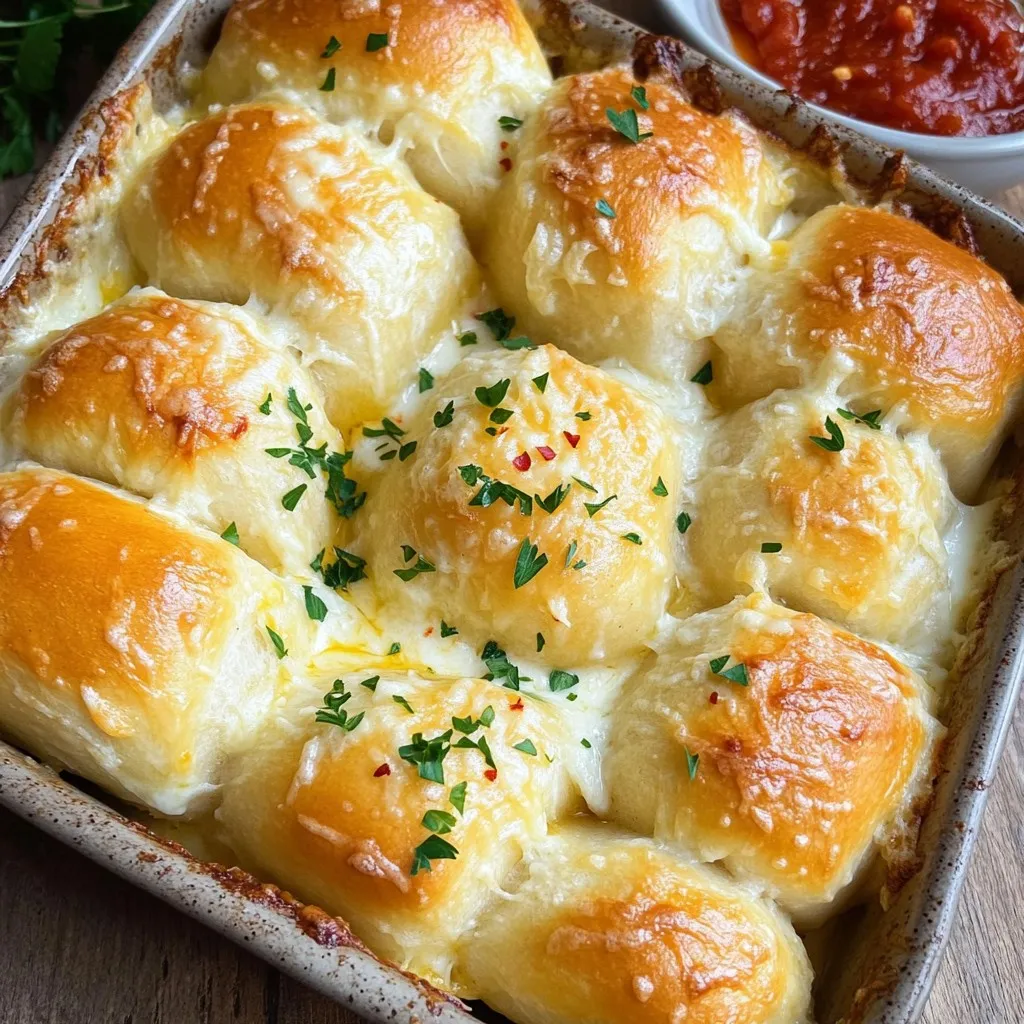
Cheesy Garlic Rolls Delightfully Easy to Make
Are you craving warm, gooey cheesy garlic rolls? You’re in the right place! In this post, I’ll show you how to make these delicious rolls

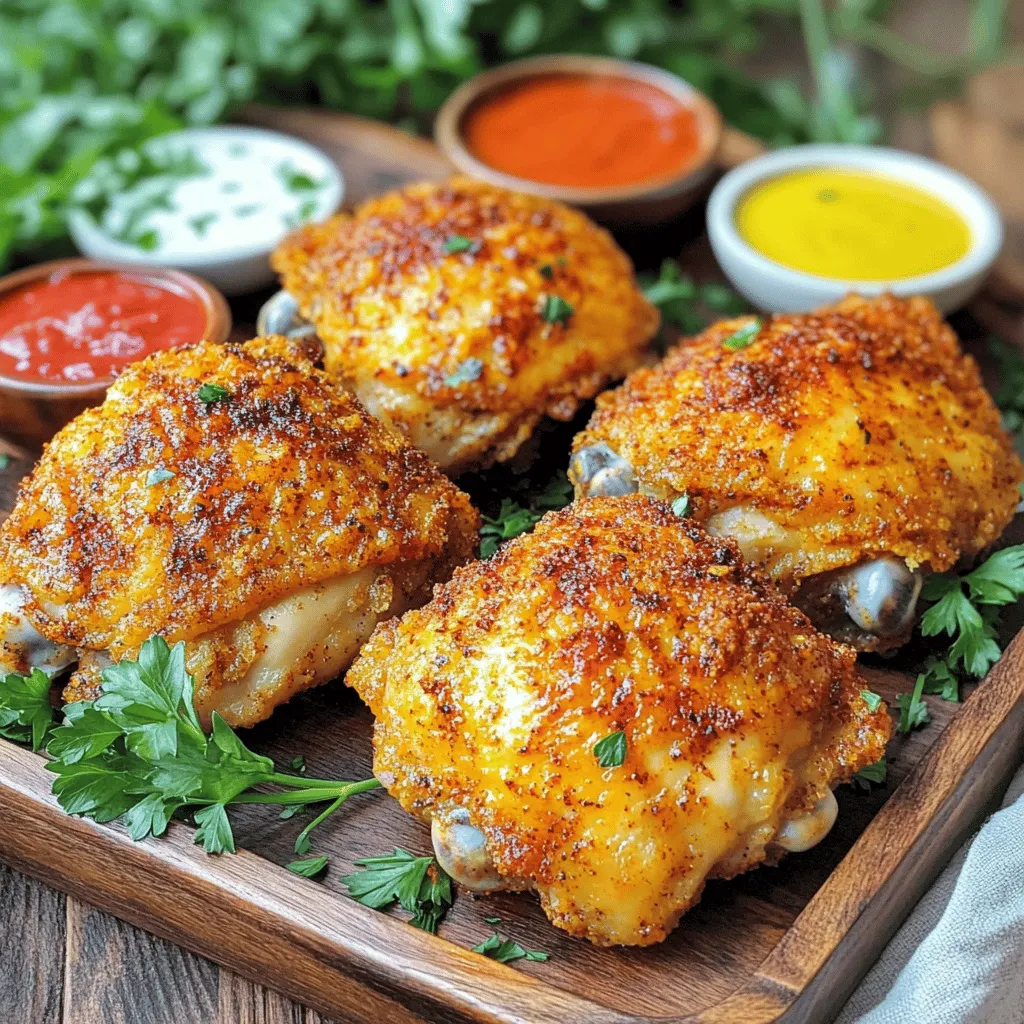
Chicken Pillows with Parmesan Cream Tasty and Simple
Do you want a delicious meal that’s easy to make? Chicken Pillows with Parmesan Cream are the answer! You’ll love how simple it is to
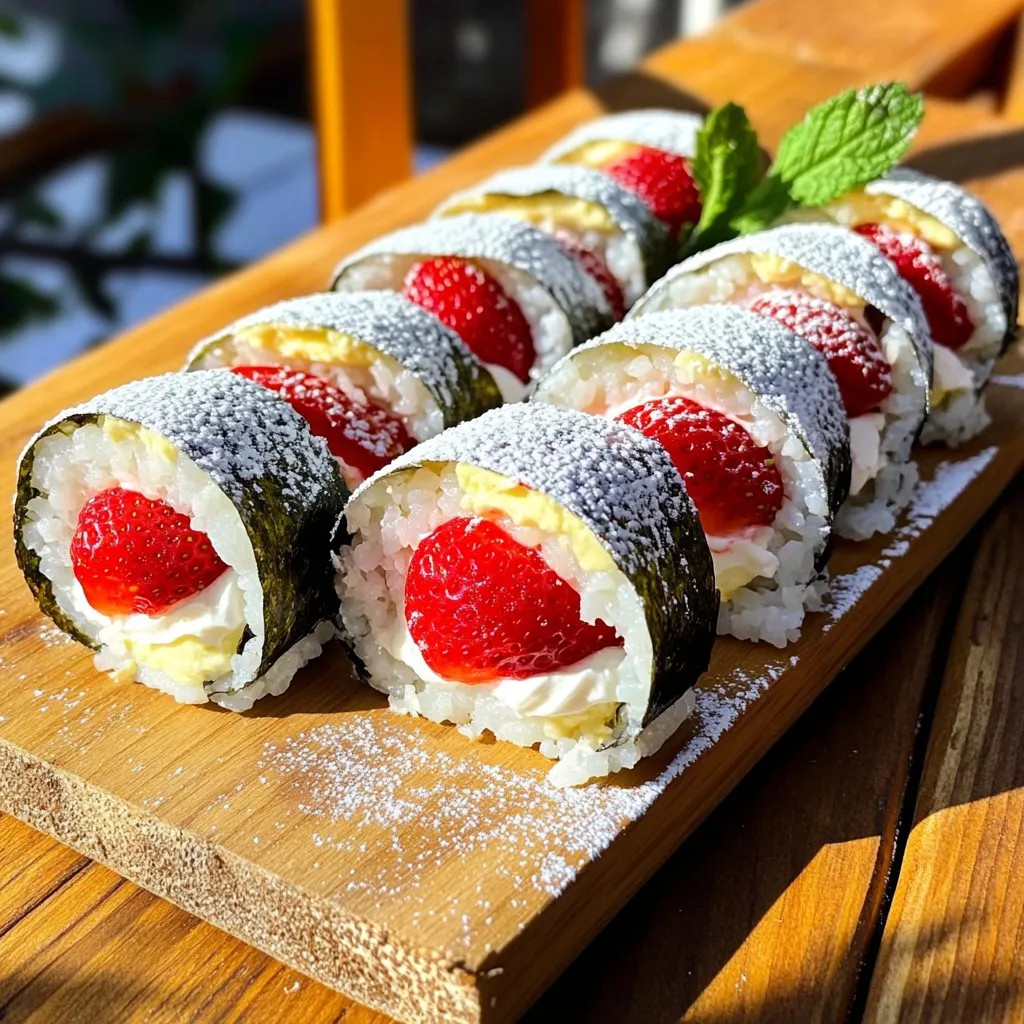
Strawberry Shortcake Sushi Rolls Tasty and Fun Treat
Looking for a fun and tasty treat? Strawberry shortcake sushi rolls blend fresh strawberries, whipped cream, and sushi rice into a delightful dessert. It’s great

French Dip Tortilla Roll Ups Tasty and Simple Snack
Looking for a quick and tasty snack? French Dip Tortilla Roll Ups are your answer! These easy-to-make bites combine savory roast beef and creamy cheese,

Chicken Street Tacos Flavorful and Easy Recipe
Get ready to dive into the tasty world of Chicken Street Tacos! This easy recipe will guide you step-by-step, making it perfect for busy weeknights
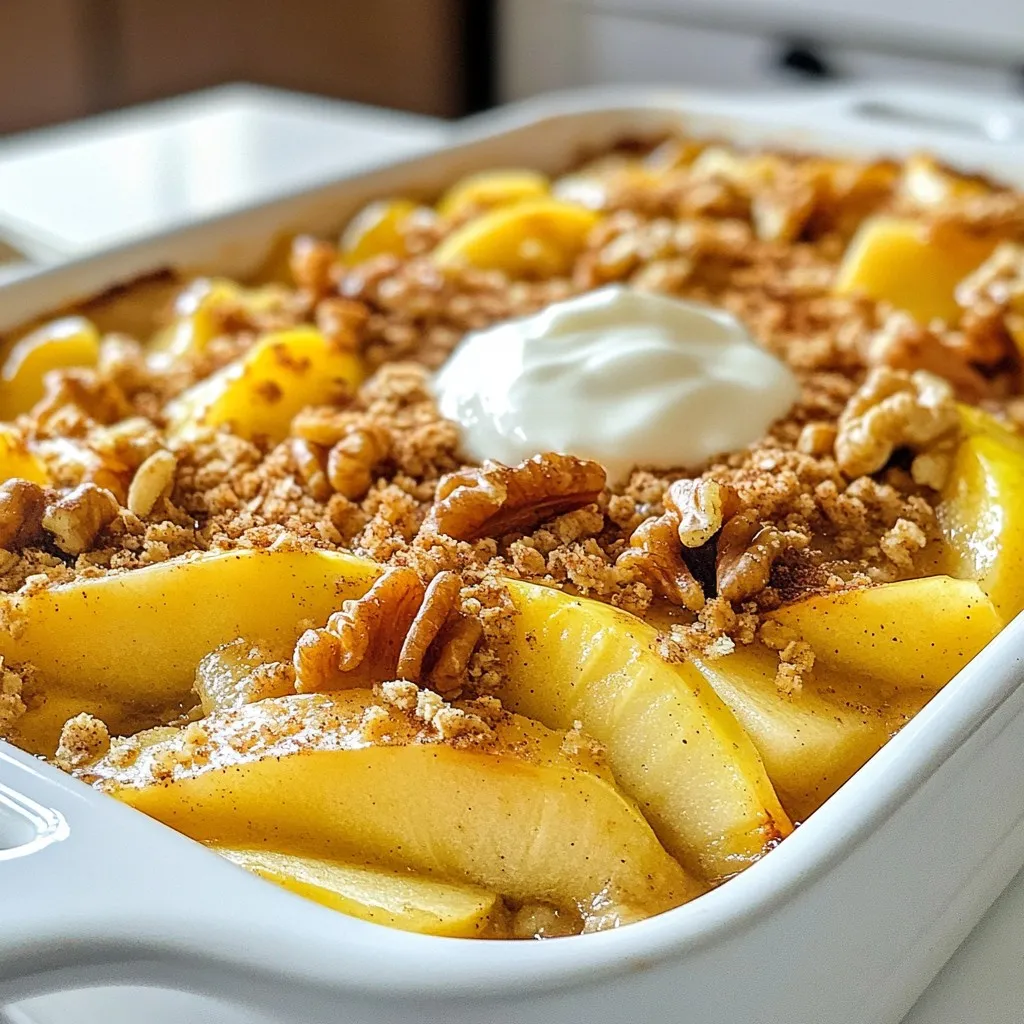
Easy Apple Casserole Quick and Tasty Comfort Food
Are you craving a warm, comforting treat? Look no further! This Easy Apple Casserole is quick to make and bursting with flavor. You’ll find all
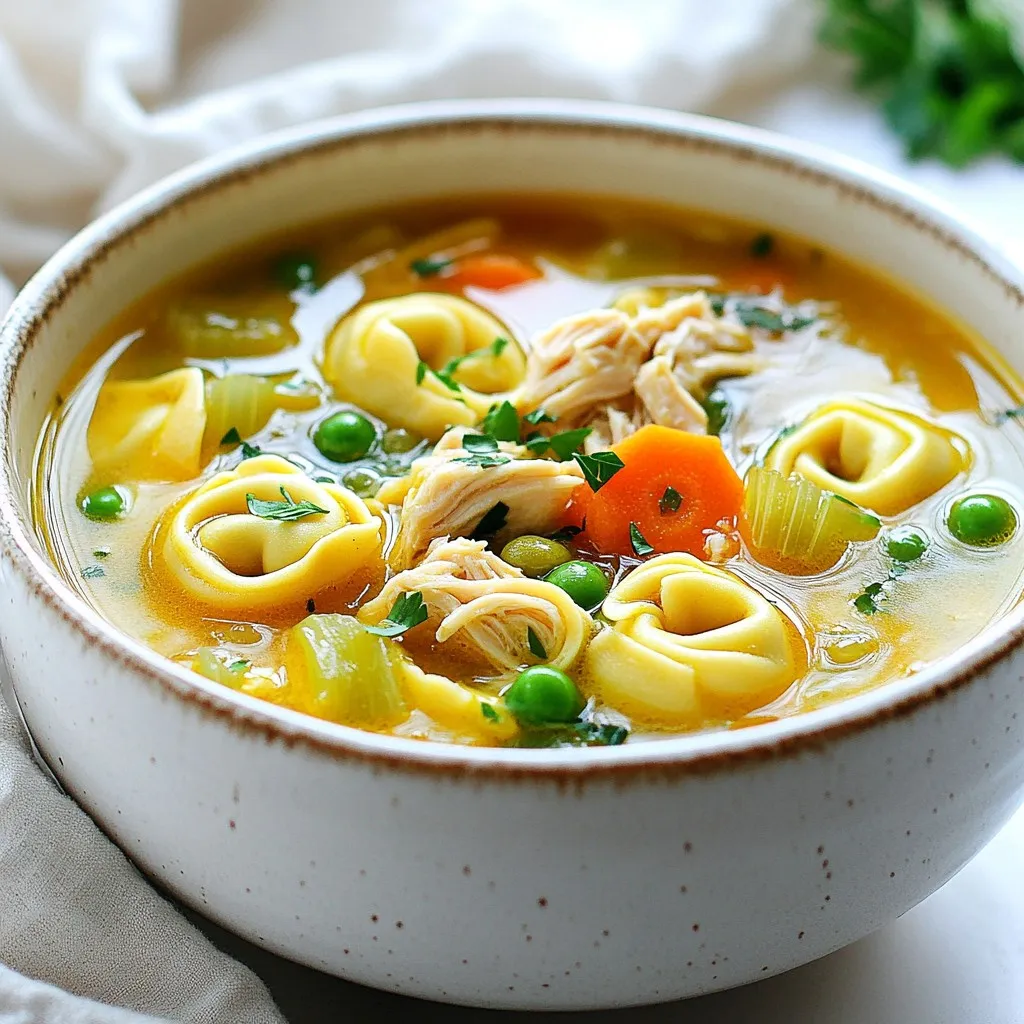
Chicken Tortellini Soup Savory Comfort Dish
If you’re searching for a warm, cozy meal to brighten your day, look no further than Chicken Tortellini Soup. This dish blends juicy chicken, tender
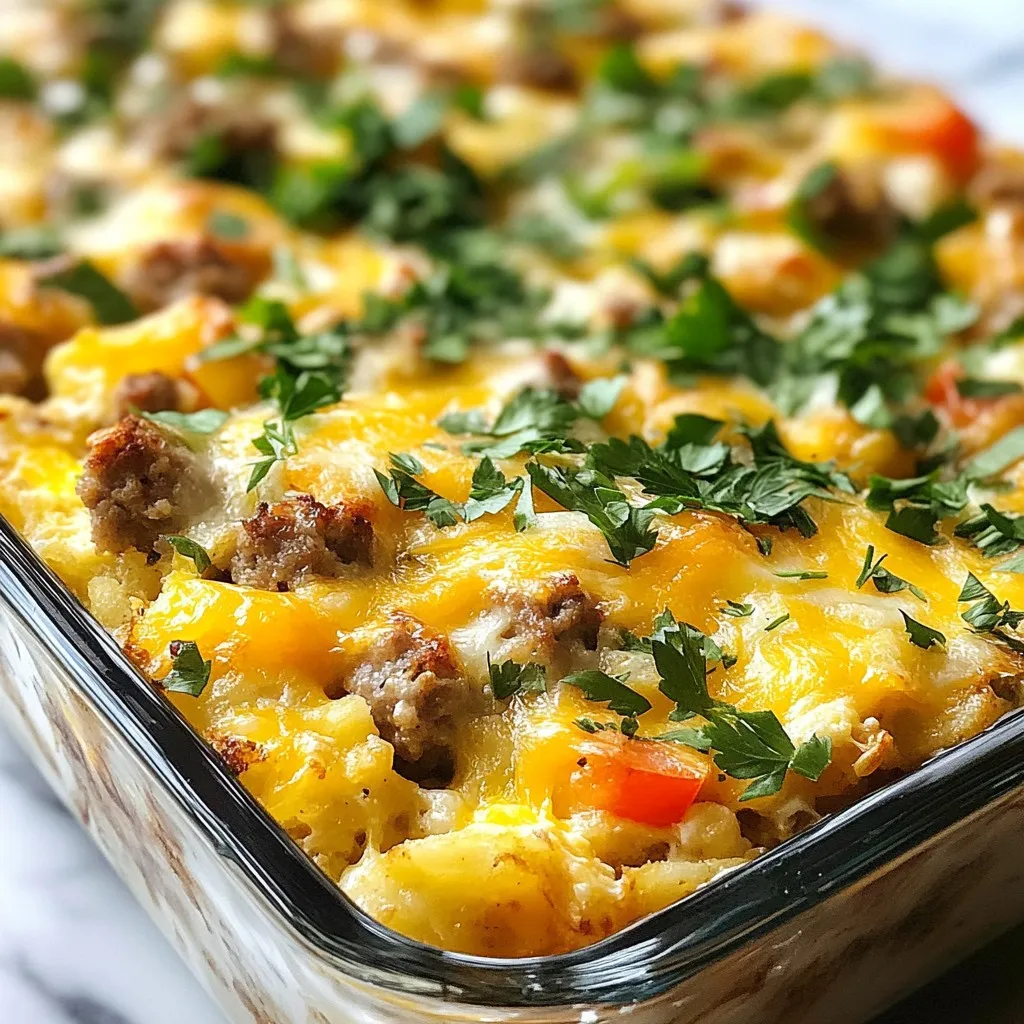
Crack Breakfast Casserole Tasty and Easy Recipe
Looking for a delicious and simple breakfast option? Let me introduce you to my Crack Breakfast Casserole. This dish is packed with eggs, sausage, and